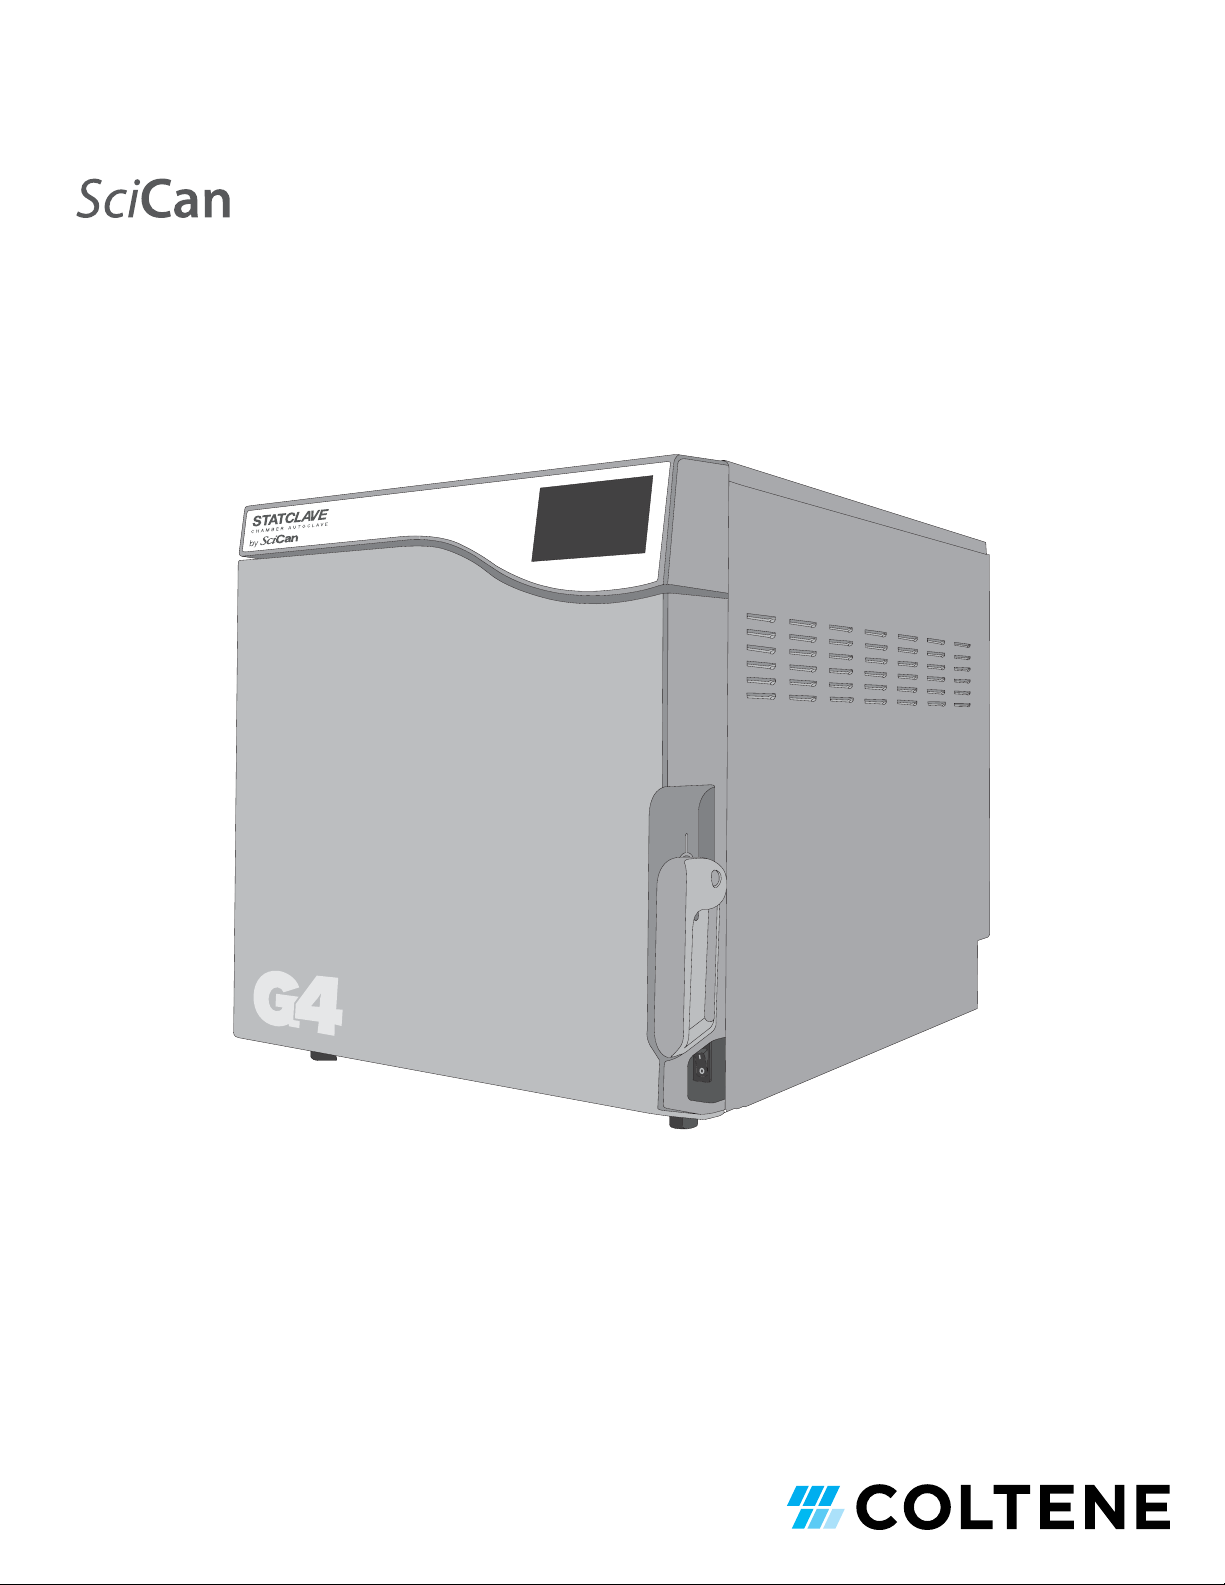
Coltene SciCan STATCLAVE G4 User manual

95-115012 US EN R1. STATCLAVE G4 Operator’s Manual, Copyright 2019 SciCan Ltd. All rights reserved.
STATCLAVE ™G4 - Chamber Autoclave
OPERATOR’S MANUAL

Quick Start Guide
1. Switch the
autoclave ON.
3. Ensure BOTH
drainage tubes
are connected
at the back.
More information
IN SECTION 2.3
8. Press the
START icon.
7. Select a cycle.
More information
IN SECTION 7.
5. Insert the load.
More information
IN SECTION 5.
4. Pull up on the
door latch to
open the door.
2. Ensure BOTH
reservoirs are
filled with high
quality distilled
water.
More information
IN SECTION 4.
6. Close and latch
the door.
You will hear the
vacuum system
activate. This is a
normal operating
sound.
CAUTION: Hot Chamber
IMPORTANT! Never Use Tap Water.
More information
IN SECTION 1.7

1. Your STATCLAVE 3
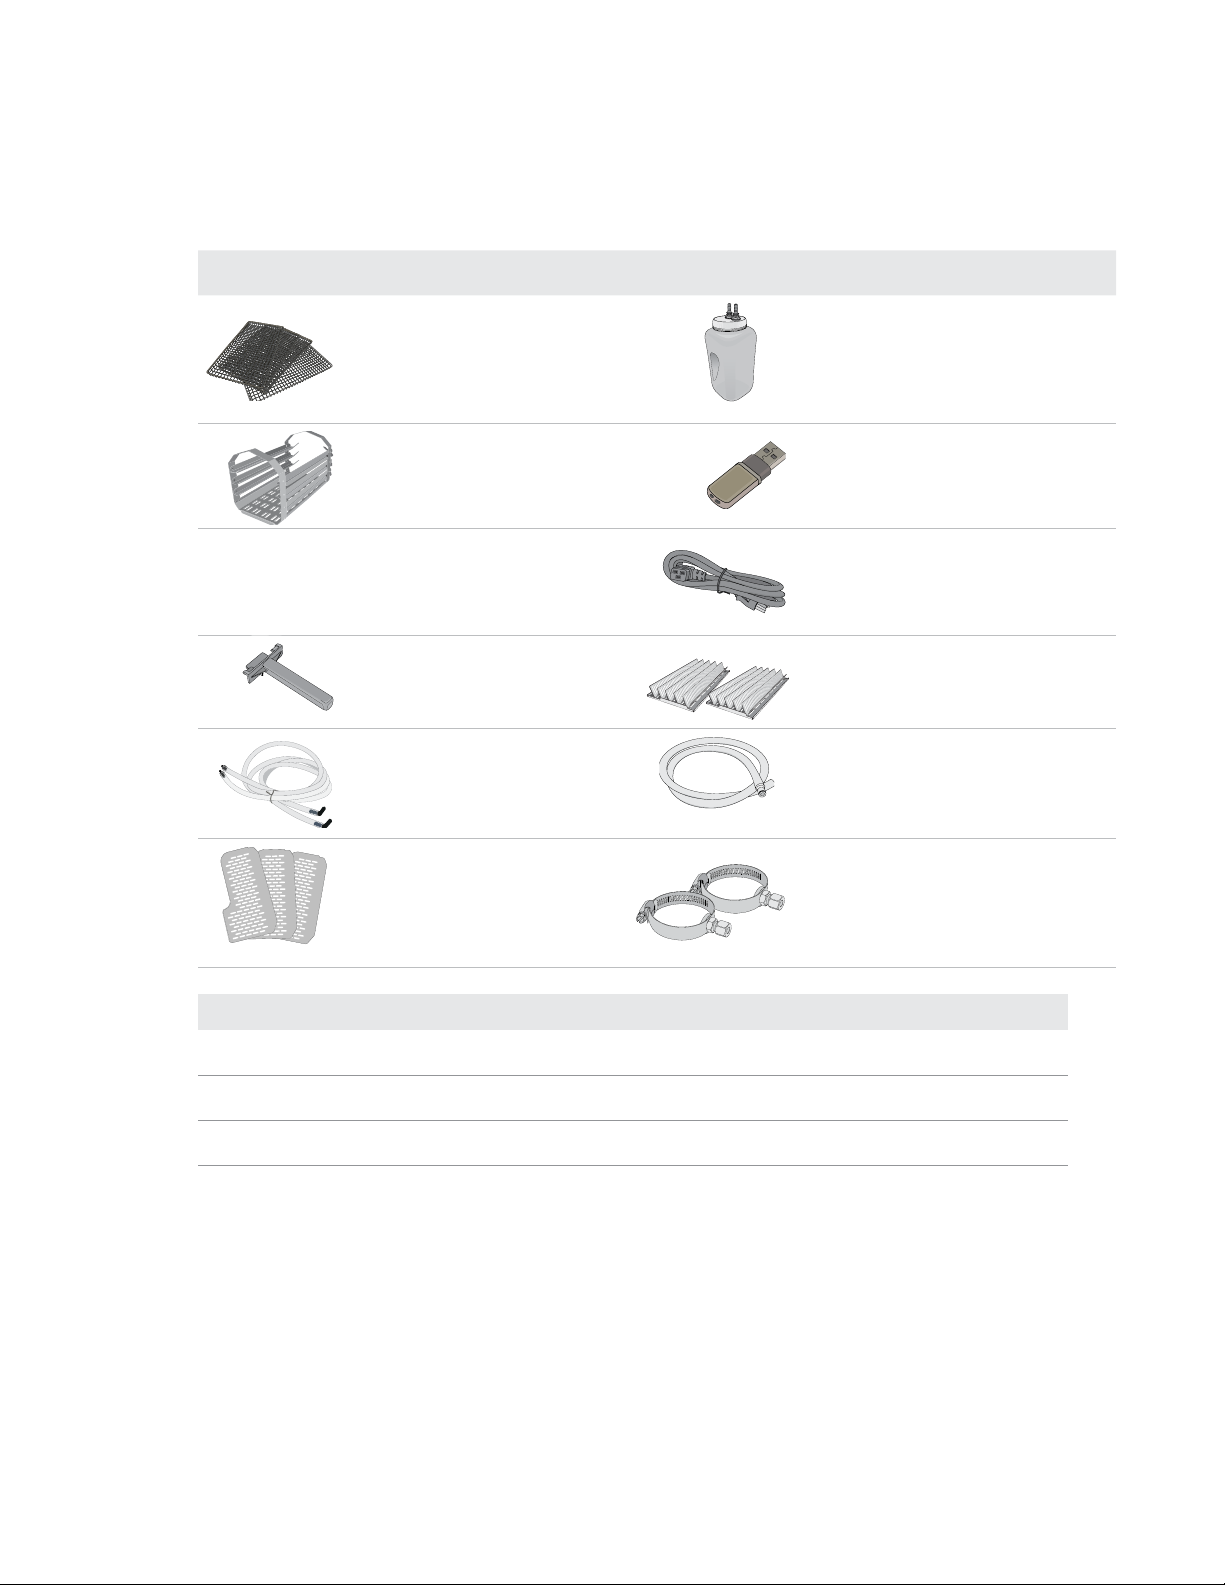
1.1 Checking the Package Contents 3
1.2 Important Information About Using
Your STATCL AVE 4
1.3 Operating Principles, Key Features and
Safety Devices 6
1.4 Unit Overview 8
1.5 Touchscreen Overview 9
1.6 Using the Operation Screens 9
1.7 Unlocking the Door 10
2. Set Up 11
2.1 Installing Your STATCLAVE 11
2.2 Connecting and Powering Your STATCLAVE 12
2.3 Connecting Your STATCLAVE’s Water
Draining System 12
2.4 Connecting your STATCLAVE to a Network 14
3. Getting Started 16
4. Filling the Water Reservoirs 17
4.1 Manual Filling Using Reservoir Top 19
4.2 Manual Filling Using Quick Connector at
Unit Front 20
4.3 Automatic Filling Using a Vista Pure Specialized
Water Filtration System with Accumulation Tank 21
4.4 Automatic Filling Using External Water
Tank and Auxiliary Pump 22
5. Loading Instruments 23
5.1 Using the Chamber Rack 24
5.2 Wrapped Instruments 25
5.3 Unwrapped Instruments 27
5.4 Rubber and Plastics 28
5.5 Textiles and Surgical Packs 28
5.6 Using Biological and Chemical Indicators 28
6. Using Your STATCLAVE 29
6.1 Running a Cycle 29
6.2 Stopping a Cycle 31
6.3 Using the Start Delay 32
6.4 Emergency Door Opening 33
6.5 Running a Vacuum Test 34
6.6 Running a Bowie-Dick Test 35
7. Sterilization Cycles 36
8. Using and Changing Settings 37
8.1 Setting Up Load Traceability with User ID,
PIN and Process Enforced Usage 39
8.2 Setting Drying Time 41
8.3 Setting the Stand-By Mode 41
8.4 Setting Up and Using Your STATCLAVE
Web Portal 41
8.5 Registering for STATCLAVE Online Access 42
9. Storing, Retrieving and Printing Sterilization
Records 43
9.1 Retrieving Cycle Information Using the
Touchscreen 43
9.2 Retrieving Cycle Information Using the
Web Portal 43
9.3 Retrieving Cycle Information Using the USB
Data Back Up 43
9.4 Connecting to a Printer 44
9.5 Adjusting your Print Settings 44
9.6 External Printer Specifications 45
10. Maintenance Procedures 46
10.1 Preventative Maintenance Message 46
10.2 Preventative Maintenance Schedule 46
10.3 Cleaning the Door Seal and Door Plate 47
10.4 Cleaning the Sterilization Chamber, Rack
and Trays 47
10.5 Cleaning and Disinfecting the External Surfaces 47
10.6 Draining the Reservoirs for Cleaning 48
10.7 Cleaning the Water Reservoirs and
Reservoir Filters 48
10.8 Cleaning the External Distilled Water Tank 49
10.9 Cleaning the Chamber Filters 49
10.10 Replacing the Bacteriological Filter 50
10.11 Replacing the Door Seal 50
10.12 Using on-Screen Instructions 51
10.13 Enabling a Technician to Access Your
STATCLAVE from a Remote Location 51
10.14 Preparing the Unit for Shipping 52
11. Troubleshooting 53
12. Ordering Spare Parts and Accessories 57
13. Warranty 58
Limited Warranty 58
14. Specifications 59
APPENDIX A 60
Software Icons 60
APPENDIX B 61
Software Screens 61
APPENDIX C 62
STATCLAVE Cybersecurity Statement 62

3
1. Your STATCLAVE
1.1 Checking the Package Contents
When you receive your STATCLAVE™, the items listed below will be included. If any of the items are
missing, contact your dealer immediately.
Included with Your STATCLAVE
4 Stainless steel wire
instrument trays 1 Wastewater bottle
1 Chamber rack 1 Memory stick
Operator’s manual Power cord
1 Tray extractor with door
unlocking pin 2 Pouched instrument racks
2 Long silicone tubes with
elbow connectors
1 Reservoir drain tube (for use
when cleaning reservoirs)
3 Drying plates Direct-to-drain hardware
The following terms appear in this manual:
CAUTION! A potential hazard to the operator or end patient
IMPORTANT! A situation that may affect the functioning of the unit.
TIP Additional information that may be helpful.

4
1.2 Important Information About Using Your STATCLAVE
Intended Use
The STATCLAVE G4 is a dynamic-air-removal (pre-vacuum) table-top steam sterilizer intended for use
by a health care provider to sterilize medical products by means of pressurized steam.
It is suitable for the sterilization of dental and medical instruments that are validated to be sterilized
by steam. The STATCLAVE G4 has not been designed to sterilize liquid loads, bio-medical waste
or materials not compatible with steam sterilization. The processing of such loads may result in
incomplete sterilization and / or damage to the autoclave.
Please refer to the table below for program description, cycle times, temperature and dry times.
Program Load Description Sterilization
Temperature /
Exposure Time
Drying Time Maximum
Load
Solid/Unwrapped IUSS CYCLE* for
unwrapped solid
instruments (mirrors,
explorers), hinged
instruments (hemostats)
on trays.
132˚C /270˚F
for 4 minutes
Not applicable 6 kg /13.2 lbs
Solid/Wrapped Wrapped IMS cassettes
with solid instruments,
rigid sterilization
containers with
solid instruments or
single pouched solid
instruments on a pouch
rack.
132˚C /270˚F
for 4 minutes
25 minutes (up to 6
kg /13.2 lbs of load)
6 kg /13.2 lbs
15 minutes (up to 1.4
kg / 3 lbs of load**)
Hollow/Unwrapped IUSS CYCLE* for
unwrapped dental
handpieces on trays.
132˚C /270˚F
for 4 minutes
Not applicable 6 kg /13.2 lbs
Hollow/Wrapped Single-pouched dental
handpieces on a pouch
rack.
132˚C /270˚F
for 4 minutes
25 minutes (up to 6
kg /13.2 lbs of load)
6 kg /13.2 lbs
15 minutes (up to 1.4
kg / 3 lbs of load)
Textiles/Porous
Wrapped
Tex tiles 32˚C /270˚F
for 4 minutes
20 minutes 2 kg /4.4 lbs
Rubber & Plastic IUSS CYCLE* for
unwrapped solid or hollow
instrument.
121 ˚C /250˚F
for 20 minutes
Not applicable 2 kg /4.4 lbs
*Immediate Use Steam Sterilization cycle.
**For optimal drying of these loads, SciCan recommends using only one pouch rack loaded on the second from top rail.

5
Get to Know Your STATCLAVE: Read this Manual
The details of installing, using and maintaining your STATCLAVE are all in this manual. Please read this
manual before operating the unit and keep it for future reference. Users should follow the operating
instructions and maintenance schedule described in this manual. Contents of this manual are subject
to change without notice to reflect changes and improvements to the STATCLAVE product.
For more information about instrument suitability for steam sterilization, consult the instrument
manufacturers’ reprocessing instructions.
Water Quality
High quality distilled water is recommended for use in your STATCLAVE. Deionized, demineralized, or
specially filtered water can also be used. Never use tap water.
User Qualifications
The operation of this unit should be restricted to trained and authorized personnel.
Repair and Modifications
Do not permit any person other than certified personnel to supply parts, service or maintain your
STATCLAVE. SciCan shall not be liable for incidental, special or consequential damages caused by any
maintenance or services performed on the STATCLAVE by a third party, or for the use of equipment or
parts manufactured by a third party, including lost profits, any commercial loss, economic loss, or loss
arising from personal injury.
Never remove unit panels. Never insert objects through holes or openings in the cabinetry (unless
explicitly instructed as in the emergency door opening procedure, for example). Doing so may damage
the unit and / or pose a hazard to the operator.
WiFi Compliance
This device has been tested and found to comply with the limits for a Class B digital device pursuant
to the Federal Communications Commission’s Part 15 Subpart B. The total radiated energy from
the Main antenna connected to the Wireless Card conforms to the FCC limit of the SAR (Specific
Absorption Rate) requirement regarding 47 CFR Part 2 Section 1093, when the sterilizer was tested.
The transmission antenna for the wireless card is located in the front fascia.
CAUTION! Follow your local guidelines governing verification of the sterilization procedure.

6
1.3 Operating Principles, Key Features and Safety Devices
The STATCLAVE is a chamber autoclave that uses steam to sterilize wrapped and unwrapped
instrument loads typically used in dental and medical offices. It has six sterilization cycles and each
finishes with optimized drying for fast, effective instrument processing.
How it Works
The STATCLAVE uses a pre- and post-vacuum to condition the load at the beginning and end of each
cycle.
›The pre-vacuum draw removes the air from the chamber before sterilization begins. This ensures
more efficient steam penetration into every load.
›The post-vacuum draw at the end of the cycle pulls the moist air from the chamber while heater
bands warm the chamber walls to speed drying.
›Finally, fresh, filtered air is drawn into the chamber to eliminate condensate and cool the
chamber. This reduces the cooling time and ensures the load is dry the moment you open the
door.
Why Connect It
The STATCLAVE’s WiFi-enabled G4 technology records and monitors information on every cycle to
protect your office and your patient. When your unit is connected to a network, it can automatically
send error codes for off-site service technicians to troubleshoot a problem early on - before it costs
your operation time and money. You can also access your STATCLAVE’s information through a portal
using your browser. Here you can view not only your unit’s current operations in real time, but also
access cycle history, printing and validation information and sterilization records dating back to the day
your unit was manufactured.
Pay close attention to the following symbols that appear on the unit:
Caution: A potential hazard to the
operator Venturi reservoir drain
Caution: Hot surface Clean water drain
Caution: Danger of electric shock.
Disconnect power supply when
servicing unit.
Condenser drain (only used for
shipping and servicing)
Clean water fill Exhaust drain

7
Other Features
Closed-door drying
Ensures your wrapped and pouched loads finish dry and ready to store.
Deep chamber
Holds up to 4 large and 4 small IMS cassettes or up to 20 pouched loads.
Reservoir fill options
Includes front and top options, as well as an autofill port at the back.
Chamber preheating
Programmable chamber preheating and unit Stand-by mode ensure the STATCLAVE is warm and
ready when you need it.
Delayed start option
Every sterilization cycle allows you to schedule cycles with your workflow or even start the day with
a clean instrument load.
Water quality sensor
Protects the unit from the long-term damage of unsuitable water.
Motor-less door latching mechanism
Provides improved reliability over motorized door locks.
Flip-top water reservoir
Makes the STATCLAVE easy to fill and clean.
Read-at-a-glance, color touchscreen
Offers real-time monitoring of all the important sterilization parameters.
Easy-to-use emergency door opening
Simple procedure to open the door and retrieve instruments in the event of a power loss.
Programmable features
Automate your regular vacuum tests to be completed BEFORE the start of your work day.
Low water indicator
Know when there is not enough water to run a full cycle - before you start it.
Space-saving design
Front venting and recessed connections at the back allow the unit to fit snugly into compact steri-
centers.
Door monitoring system
Tells you if the door is properly closed.
Safety Devices
Overheat thermostat
Band heater safety thermostats and steam generator safety thermostat protect the unit.
Pressure relief valve
Chamber pressure relief valve protects the unit and users.
Pressure or vacuum relief on power failure
Automatic pressure or vacuum relief protects users when the power is interrupted.
Electronics protection
Controller board fuses protect the unit’s electronics.

8
1. Wastewater reservoir drain quick-connect
(OUT)
2. Warm air exhaust
3. Clean water reservoir drain quick-connect
(OUT)
4. Clean water reservoir fill quick-connect (IN)
5. Power switch
6. Bacteriological filter (bacteria-retentive air
filter)
7. USB port
1.4 Unit Overview
8. Touchscreen
9. Chamber rack
10. Power cord input
11. Ethernet port (not visible)
12. Automatic fill port for clean water reservoir
13. Condenser drain port (to drain for shipping)
14. Overflow drain port for reservoirs
15. Exhaust drain port
16. RS232 port
17. Power port for external fill pump (option)
15
31
14
42
13
5
12
6
11
7
10
8
16
9
17

9
Connectivity: Access network and Internet.
USB: View cycle history.
Door Lock: Unlock door.
Settings: Access settings menu.
1.5 Touchscreen Overview
Home Screen
System icons:
1.6 Using the Operation Screens
1. Select a cycle.
Delayed start
Start
2. Press START.
3. Cycle in progress.
Current chamber temperature
Current chamber pressure
Stop
Appears during STERILIZATION and DRYING
to show time remaining.
Total time elapsed in the cycle - seen on cycle
screen for entire cycle
Solid /
Unwrapped
Hollow /
Unwrapped
Solid /
Wrapped
Test
Cycles
Hollow /
Wrapped
Rubber & Plastic and
Textiles/Porous
Complete cycle information in Section 7.
More information in Section 6.3

10
1.7 Unlocking the Door
The STATCLAVE will lock the chamber door when you select a cycle. To unlock the door, go to the
home screen and follow these steps.
1. PRESS lock icon.
2. PRESS unlock.
3. PRESS back.
4. Lock icon now changed to unlocked.

11
2. Set Up
2.1 Installing Your STATCLAVE
›Place the STATCLAVE on a flat level surface
strong enough to support a 165 lbs (75kg) load.
›Allow for at least 7” (180 mm) of space ABOVE
the unit to enable access to the reservoirs. If
there is less than 7” (180 mm) above the unit,
use a screwdriver to remove the front hinge of
the clean water reservoir so that it can slide in
and out of position from the front of the unit.
›On the right side of the unit, allow for at least 2”
(50 mm) of space for ventilation.
›The unit vents warm air from below the door.
Ensure the door overhangs the level surface.
Unit Dimensions and Operating Environment
Height with front legs retracted 19” / 483 mm
Height with front legs fully extended 19.5” / 495 mm
Width 17.75” / 450 mm
Depth 25” / 635 mm
Weight (empty) 136 lbs/ 61.7kg
Weight (with full reservoirs and full load) 175 lbs/ 79.5kg
Temperature and Humidity
Avoid installing your STATCLAVE in direct sunlight or close to a heat source such as vents or radiators.
The recommended operating temperatures are between 5-40˚C / 41˚F-104˚F with humidity of
maximum 80%.
Electromagnetic Environment
Your STATCLAVE has been tested and meets applicable standards for electromagnetic emissions.
While your unit does not emit any radiation, it may itself be affected by other equipment that does. We
recommend that your unit be kept away from potential sources of interference.
7”
2”
17.75”
24”
19”-
19.5”
IMPORTANT! To improve drainage, ensure the
unit is tilted toward the back. Use the leveling feet
to ensure the front of the unit is 1” (25mm) from the
level surface.
1” gap

12
2.2 Connecting and Powering Your STATCLAVE
1. Ensure the power switch at the front right of
the unit is in the OFF position and connect the
power cord supplied to the power port at the
back of the unit.
2. Connect directly to a power source. Don’t use
an extension cord.
3. Turn ON the power switch located at the front
right of the unit.
Electrical Connections
To power your unit, use properly grounded and fused power sources with the same voltage rating as
indicated on the label at the back of your STATCLAVE.
›DO use an outlet that is protected by a 15A breaker.
›DO use a dedicated circuit, single phase 120 V~ 60Hz, 12A.
Unit Electrical Characteristics:
›Protection class 1 device.
›Maximum power consumption of the autoclave is 1,440 Watts for 120V.
2.3 Connecting Your STATCLAVE’s Water Draining System
The STATCLAVE uses water from the Venturi reservoir to generate vacuum draws at the beginning and
end of each cycle. For the unit to operate, BOTH the clean water reservoir and the Venturi reservoir
must contain the minimum required water levels.
When the chamber releases steam it travels through the condenser and drains from the condenser
exhaust tube. Excess water in both the Venturi reservoir and the clean water reservoir drains from
the reservoir overflow tube. BOTH elbow fittings at the back of the unit must be connected to a water
draining system.
IMPORTANT! For the unit to function, BOTH reservoirs must be full and BOTH drain tubes
must be connected.
IMPORTANT! Keep the door open when
powering the unit ON for the first time to
allow the unit to accurately read the local
atmospheric pressure. If the unit misreads
the pressure, it may lock the door.

13
Connecting Directly to a Drain
Any new central drain point installation should be done by a technician. The drain points (C) must be
located on the upper portion of vertical drain pipe ABOVE the P-trap.
For direct-to-drain connections, you will need to use the direct-to-drain hardware (provided with the
unit).
1. The unit is shipped with plugs in its ports. To
remove a plug, apply even pressure to the
Inner Ring holding it down on either side of
the plug and pull out the plug.
2. Insert one elbow connector with silicone tube
to the metal exhaust port (A).
3. Insert the other elbow connector with silicone
tube to the plastic reservoir overflow
drain port (B).
4. Connect the exhaust tube with elbow fittings
(A) to the port installed on the drain pipe (C).
5. Connect the reservoir overflow tube (B) to the
remaining port on the drain pipe (C).
Do you want to drain the unit prior to shipping or cleaning? For instructions on how to completely drain
both reservoirs for shipping or cleaning, see Section 10.6 Draining the Reservoirs for Cleaning and Shipping.
IMPORTANT! Avoid excess sagging in the lines; cut both tubes to measure.

14
Connecting the Waste Bottle
The unit is shipped with a waste bottle in case a direct-to-drain installation is not possible. To use the
waste bottle, follow these steps:
1. Set the waste bottle (D) on the ground or in
the cabinetry below the unit.
2. Connect the exhaust tube (A) to a port on the
waste bottle cap (C).
3. Connect the reservoir overflow tube (B) to a
port on the waste bottle cap (C).
2.4 Connecting your STATCLAVE to a Network
Connecting to a Wired Network
IMPORTANT! Tubes should not be kinked,
bent or otherwise obstructed. The connection
point to the central drain must be lower than
the autoclave’s support surface otherwise the
reservoirs may not drain correctly.
IMPORTANT! Avoid excess sagging in the
lines; cut both tubes to measure.
1.
3.
2.
Add a small amount of water to the empty
waste bottle to give it stability.

15
Connecting to a Wireless Network
From the unit’s home screen, select , then follow these steps:
1. 2.
3. 4.
5. 6.
7. 8.
Data Security and WiFi
Ensuring your WiFi® connections are secure is an important element of safeguarding your organization’s data.
A WiFi network using WPA2™ provides both security (you can control who connects to it) and privacy (the
transmissions cannot be read by others) for communications as they travel across your network. For maximum
security, your network should include only devices with the latest in security technology – WiFi Protected
Access® 2 (WPA2).
Tips for securing your network
Change the Web Portal password from the default value and update it on a regular basis as per user’s office IT
policy. See the web Portal Help tab for instructions on changing your password.
Change the network name (SSID) from the default name.
Change the administrative credentials (username and password) that control the configuration settings of your
Access Point/Router/Gateway.
Enable WPA2-Personal (aka WPA2-PSK) with AES encryption.
Wireless transmission considerations
To comply with Federal Communications Commission and Industry Canada Radiofrequency exposure
compliance requirements, the antenna used for this transmitter must be installed to provide a separation
distance of at least 20 cm from all persons and must not be co-located or operating in conjunction with any
other antenna or transmitter.
For STATCLAVE’s Cybersecurity Statement, see Appendix C

16
3. Getting Started
Preparing Your STATCLAVE for Use
Once the STATCLAVE has been correctly installed, and before using it for the first time, make sure
BOTH the clean water and Venturi reservoirs contain distilled water. The STATCLAVE uses the Venturi
system to generate vacuum draws at the beginning and end of each cycle. Both reservoirs must
contain the minimum required water levels for the unit to function.
1. Power on the unit.
2. Follow the screen prompts to connect your
STATCLAVE using either WiFi or an Ethernet
cable connection. This will automatically set
the time and date for your unit.
3. Open the CLEAN WATER RESERVOIR
located on the top right of the unit. Using
a large container, fill with distilled water to
the maximum fill level line or until you hear 3
BEEPs.
(For more fill options see Section 4. Filling the
Water Reservoirs.)
If you do not wish to connect your STATCLAVE at this time, Press and select a language. Then press and
to scroll to the end of the introduction. You must Agree or Disagree with the Privacy Policy to get to the home
screen. (For more information on the Privacy Policy screen see Section 8. Using and Changing Settings)
From the home screen, select then and then select the GENERAL button to access the menu for time,
date, country, and time zone. (See Section 8. Using and Changing Settings)
SciCan recommends connecting and registering your STATCLAVE. To do this at a later time, See Section 8.5
Registering for STATCLAVE Online Access.
IMPORTANT! DON’T run the STATCLAVE without the chamber rack in place.
IMPORTANT! Keep the door open when
powering the unit ON for the first time to
allow the unit to accurately read the local
atmospheric pressure. If the unit misreads
the pressure, it may lock the door.

17
4. Open and fill the WASTEWATER RESERVOIR
to the maximum fill level.
5. Open the door, plug the USB storage device
into the USB port, and make sure the
bacteriological filter is secured in place.
6. Check your national and local guidelines for
any additional protocols and tests required
before using your unit.
CAUTION! Hot Chamber.
The unit’s Stand-by mode is preset to
maintain a hot chamber.

18
4. Filling the Water Reservoirs
Normal operation of the STATCLAVE requires a minimum amount of distilled water in BOTH the clean
water reservoir and Venturi reservoir.
To fill the Venturi reservoir:
1. Open the Venturi reservoir lid located on the
top left of the unit.
2. Fill it with distilled water to the maximum fill
line indicated in the reservoir.
Setting the water reservoir filling mode
Your STATCLAVE’s default filling option is MANUAL. If you are manually filling the reservoir, you do not
need to change the unit’s fill option settings.
If you are connecting your STATCLAVE to an external filling device such as a Vista Pure water
purification system or external water tank and auxiliary pump, make sure your unit is set to the
AUTOMATIC filling mode.
To change this setting from the home screen, select then and then follow these
steps:
To fill the clean water reservoir, there are four different methods:
›Manual filling using RESERVOIR TOP.
›Manual filling using the FRONT QUICK CONNECTOR.
›Automatic filling using VISTA PURE SPECIALIZED WATER FILTRATION SYSTEM with
accumulation tank.
›Automatic filling using an EXTERNAL WATER TANK AND AUXILIARY PUMP.
1. 2.
When filling the Venturi reservoir for the first
time, you will need to add an additional 0.5 US
gal / 2 L of water. This will fill the steam cooling
system’s condenser. To do this, simply fill the
Venturi reservoir to the maximum fill line and wait
as the Venturi reservoir water fills the condenser,
then top up the Venturi reservoir to the maximum
fill line again.

19
4.1 Manual Filling Using Reservoir Top
1. With the unit powered ON, flip open the clean
water reservoir lid located on the top right of
the unit.
2. Using a large container, fill with distilled water
to the maximum fill line or until you hear 3
BEEPs.
3. With the door open, access the LCD home
screen and select any cycle to view the
pre-cycle information screen.
4. The clean water level check mark will turn
yellow when the minimum water level is
reached and green when the reservoir is filled
to the maximum level.
You can start a cycle if water level icons are either
yellow or green.
If your unit is not directly connected to the
drain empty the waste bottle regularly or each time
you are filling the clean water reservoir.
Table of contents
Other Coltene Laboratory Equipment manuals
Popular Laboratory Equipment manuals by other brands

Blue-White industries
Blue-White industries F-452N installation instructions

Sutter Instrument
Sutter Instrument MP-225A Operation manual

LW Scientific
LW Scientific MX12 instruction manual

Struers
Struers Epovac instruction manual

Rohde & Schwarz
Rohde & Schwarz CMU-Z6 operating instructions

Oxford Instruments
Oxford Instruments ANDOR iVac Series Hardware guide