Combustion Research reflect-o-ray eds 3.5 Owner's manual

COMBUSTION RESEARCH CORPORATION
Issue Date: 4/12/1997 Revision Date: 10/28/08 Rev. 9 Bulletin RL3597102
TM TM
Reflect-O-Ray
®
Oil Fired EDS 3.5
Oil fired, Low Intensity Infrared Vacuum
Vented Infrared Heating Systems
Installation, Operating, Maintenance
and Parts Manual
Installer
Please take time to read and understand these
instructions prior to any installation. Installer must
give a copy of this manual to the owner.
Owner
Keep this manual in a safe place in order to provide
your serviceman with the necessary information.
WARNING
Read and understand these installation,
operating and maintenance instructions
thoroughly before installing or servicing
this equipment. Only trained, qualified gas
installation and service personnel may
install or service this equipment.
!
FOR YOU SAFTEY
If you have a Fuel Oil leak:
1. Open windows
2. DO NOT try to light any appliance.
3. DO NOT use electrical equipment.
4. Shut off Fuel Oil supply.
5. Leave the building.
6. Immediately call your local Fuel Oil
supplier after leaving the building.
Follow Fuel Oil supplier’s
instructions.
7. If you cannot reach your Fuel Oil
supplier, call the Fire Department.
WARNING
Fire Hazard
Do not store or use gasoline or other
flammable vapors and liquids in the
vicinity of this or any other appliance.
Some objects will catch fire or explode
when placed near this heater.
Failure to follow these instructions can
result in death, injury or property
damage.
!
Combustion Research Corp.
2516 Leach Rd.
Rochester Hills, MI 48309-3555
Telephone: 248.852.3611
Fax: 248.852.9165
www.combustionresearch.com

Reflect-O-Ray®EDS 3.5 Installation, Operation & Service
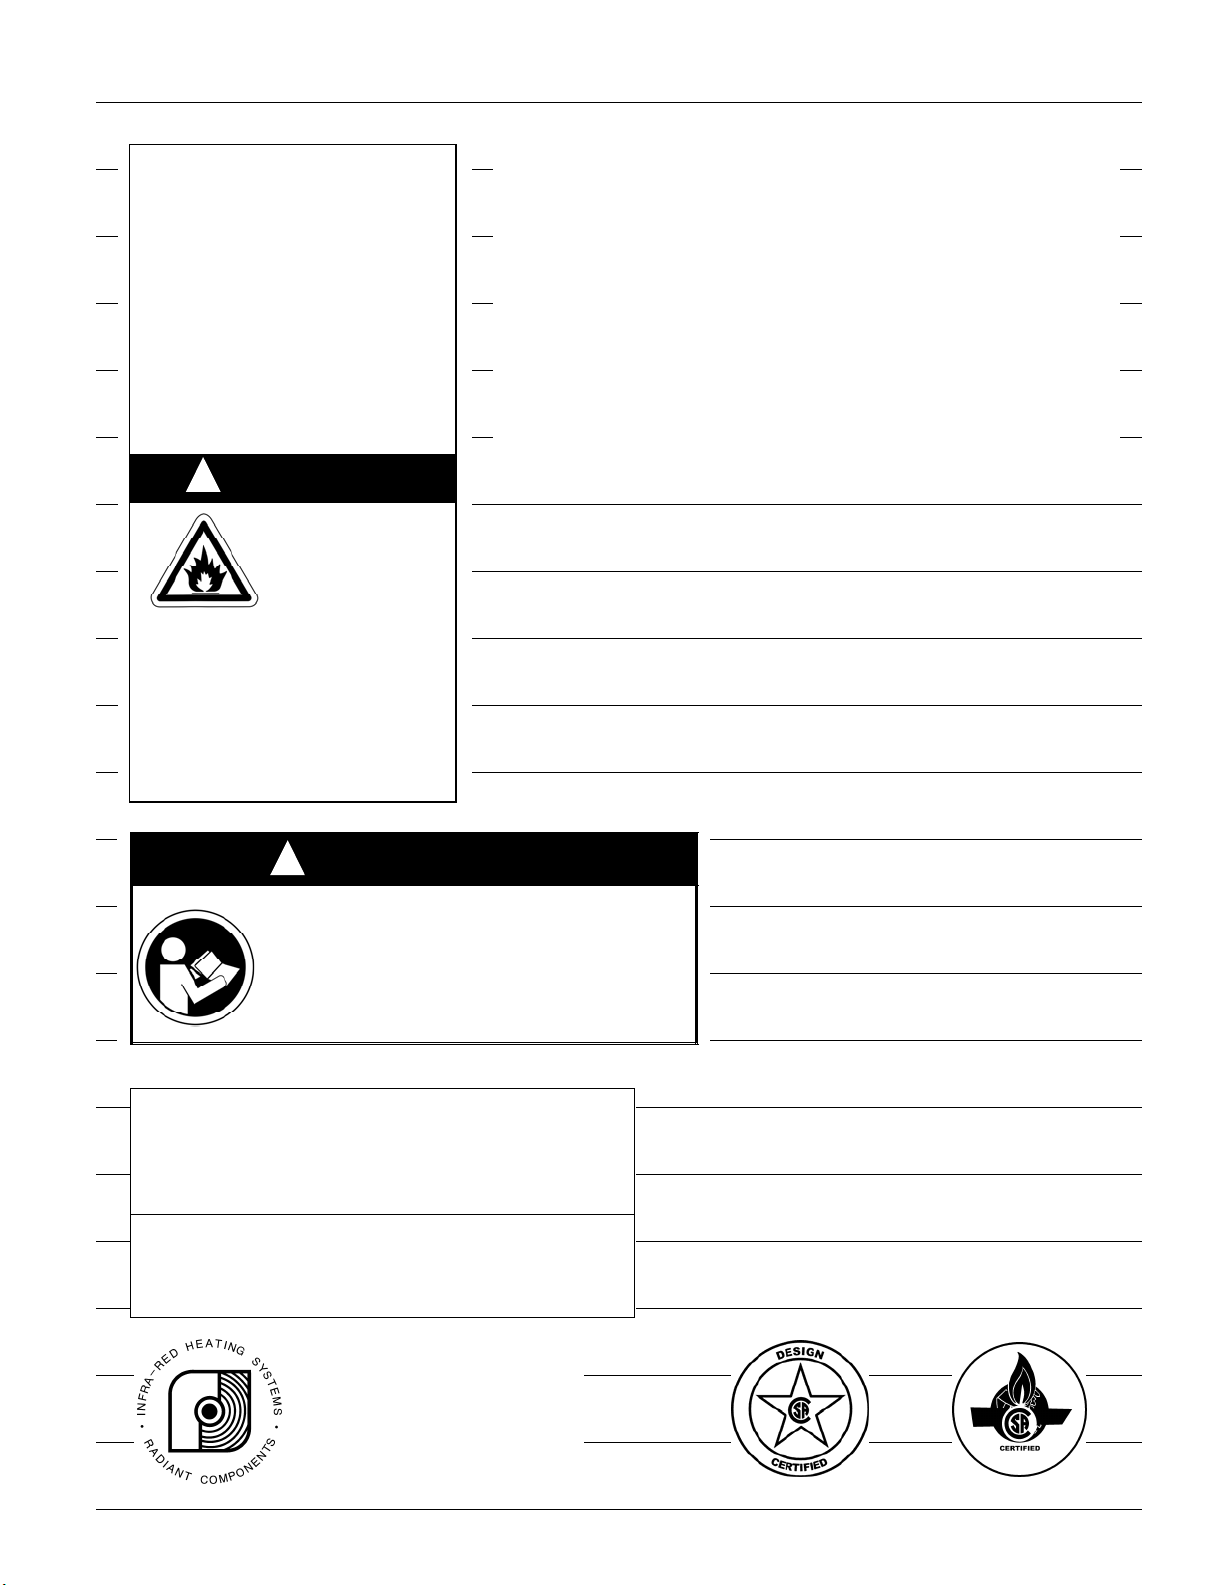
WARNING
FIRE OR EXPLOSION HAZARD
Can cause death, severe injury and/or property damage.
1. Read this manual carefully before installing or servicing
this equipment. Improper installation, service or
maintenance can cause death, injury or property
damage.
2. Check clearances listed in each burner to make sure the
product is suitable for your application.
3. Installer must be a trained, experienced service
technician.
4. All service must be performed only by a trained service
technician or representative
5. After installation is complete, check product operation as
provided in these instructions.
Combustibles: Failure to maintain the specified minimum
clearances to combustibles could result in a serious fire
hazard. Do not locate flammable or combustible materials
within this distance. Signs should be posted in storage
areas to specify maximum stacking height to maintain
required clearances to combustibles. Do not locate in
hazardous atmospheres containing flammable vapors or
combustible dust.
United States: Installations in public garages or airplane
hangars are permitted when in accordance with ANSI Z83.6
and NFPA-409 and 88 Codes.
Canada: Installation in public garages is permitted when in
accordance with CAN/CGA B.149.1 or .2. Installation in
airplane hangars is permitted when in accordance with the
requirements of the enforcing agency.
Ignition: This appliance does not have a pilot. It is equipped
with an ignition device, which automatically lights the burner.
Do not try to light the burner by hand.
Vehicles: Minimum clearances must be maintained from
vehicles parked, below the heater. Ensure that adequate
clearance is maintained where vehicles are in operation or
being serviced.
Oil Connection: There is an expansion of the radiant pipe
With each firing cycle, and this will cause the burner to move
with respect to the oil line. This can cause an oil leak
resulting in an unsafe condition if the oil connection does not
allow for expansion. Installation shall be in made in
accordance with installation local and national installation
codes.
Mechanical Hazard - Vacuum Exhauster: High speed
rotating vacuum exhauster impeller/wheel can cause severe
injury. Do not operate exhauster without impeller/wheel.
Loose clothing can be drawn into unguarded inlet and
entangle with impeller/wheel. Keep hands and fingers away
from inlet and outlet. Install exhaust duct with "bird screen"
or approved vent cap on vacuum exhauster outlet.
Mechanical Hazard - Suspension: Use appropriate
suspension hardware, beam clamps (rod or perforated
strap) and turnbuckles at predetermined locations. The
weight and normal movement of the heating system may
cause support failure if the following minimum suspension
requirements are not met. Distance between radiant tube
hangers must be 10-ft. (3 M) or less; chain size must be 3/0
minimum or equivalent. DO NOT suspend 1/4 hp and larger
vacuum exhausters with chain. Failure of the suspension
system and associated supports can cause death, severe
injury or property damage.
NOTICE CAUTION
Failure to follow these instructions can cause personal injury
or property damage:
Caution should be used when running the system near
combustible materials such as wood, paper, rubber, etc.
Consideration must be given to partitions, storage racks,
hoists, building construction, etc. Page 4 & 5 outlines
minimum acceptable clearances to combustibles.
If the building has a negative pressure or contaminants are
present in the air, an outside combustion air Supply to the
heaters is strongly recommended.
Do not use in an atmosphere containing halogenated
hydrocarbons or other corrosive chemicals. Some
compounds in the air can be drawn into the equipment and
can cause corrosion of some parts of the radiant tube heat
exchanger. The use of such chemical compounds in or near
the burner enclosure should be avoided where a longer life
of the burner, tubing, and other parts is desirable.
If this heating appliance and associated hardware is used
in agricultural structures which support life were failure
of this appliance could result in loss or injury, the user
should provide an adequate back-up system and a failure
alarm system. The user must accept the risk of such
loss or injury from the failure of the heating system.
This appliance could expose you to substances in fuel
or from fuel, which have been determined by the State
of California to cause cancer, birth defects, or other
reproductive harm.
--------------------------------------------------------------------------------
Failure to follow these instructions can cause damage to the
system components:
DO NOT high-pressure test the oil piping with the burners
connected. Failure to follow this procedure will exceed the
pressure rating of burner oil controls and this will require
complete replacement of these parts.
DO NOT operate a vacuum exhauster with an unrestricted
inlet. Operating a vacuum exhauster when not installed in
system requires that a damper be installed on the inlet,
which is one-half closed. An unrestricted airflow will
overload the motor causing burnout or failure.
This heater is designed for heating nonresidential indoor
spaces. These instructions, the layout drawing, local codes
and ordinances, and applicable standards that apply to oil
piping, electrical wiring, venting, etc., must be thoroughly
understood before proceeding with the installation.
!
!

Reflect-O-Ray®Oil Fired EDS 3.5 Installation, Operation & Service
INSTALLER
PLEASE TAKE TIME TO READ AND UNDERSTAND THESE INSTRUCTIONS
PRIOR TO ANY INSTALLATION OR SERVICE.Contact your representative or
the factory if you have any questions
OWNER
Retain this manual in a safe place to provide your serviceman with
information if the situation arises.
TABLE OF CONTENTS PAGE(S)
Warning Symbols 1
Standards, Certifications and Codes 1 & 2
Installer Qualification & Responsibility 2
Installation Notes 3
Tube Length Requirements 3
Vacuum Exhauster Selection 3
Clearance To Combustibles 4 - 6
System Installation 7 - 9
Damper Types 9 & 10
Suspension Methods 11
Seismic Restraint Suspension 12
Reflector Installation 13 - 15
Decorative Grille Installation 16
Radiant Tube Wall Penetration 17
Connecting Burner To Radiant Tube 18
Oil Supply 19
Oil Supply – Day Tank System 20
Oil Supply – “LOOP” System 21
Flexible Oil Connector Installation 22
Combustion Air 23
Vacuum Exhausters 24
Exhaust Flex Connections 25
Venting 26 – 29
Electrical Wiring & Control Panels 30 – 32
Burner Wiring Schematic 33
Burner Technical & Setup Data 34
Sequence Of Operation & General Safety Information 35 & 36
System Start Up 35 & 36
System Shut Down & Maintenance 36 – 42
Trouble Shooting Flow Chart 43 & 44
Vacuum Exhauster Parts List 46 & 46
Burner Parts List 47 – 49
Accessories & Optional Equipment 50 – 52
Warranty Statement 54 – 55
Reflect-O-Ray®heating systems DO NOT qualify for use in explosion proof installations.
Heaters SHALL NOT be used in living/sleeping areas.
Reflect-O-Ray®Oil Fired EDS 3.5 burner assemblies use No. 2 fuel only! WASTE OIL,
GASOLINE, CRANKCASE OIL OR ANY OIL CONTAINING GASOLINE OR OTHER TYPES OF OIL
IS NOT TO BE USED.
©2008 COMBUSTION RESEARCH CORPORATION, INC.
All rights reserved. No part of this work covered by the copyrights hereon in may be reproduced or copied in any form or by
any means - graphic, electronic, or mechanical, including photocopying, recording, taping, or information storage and
retrieval systems - without written permission of COMBUSTION RESEARCH CORPORATION, Inc.


Reflect-O-Ray®Oil Fired EDS 3.5 Installation, Operation & Service
Combustion Research Corporation Page 1
WARNING SYMBOLS
WARNING
Warning indicates a potentially hazardous situation which, if
not avoided, could result in death or injury.
CAUTION
Caution indicates a potentially hazardous situation which, if
not avoided, could result in minor or moderate injury.
NOTICE
Notice indicates a potentially hazardous situation which, if
not avoided, could result in property damage.
CHECKING SHIPMENT
Upon receipt of shipment, check shipment against Bill of
Lading for shortages. Also check for external damage to
cartons or tube bundles. Shortages and/or external damage
to cartons or tubes must be noted on the Bill of Lading in the
presence of delivery trucker. The delivery trucker should
acknowledge any shortages or damage by initialing this
"noted" Bill of Lading.
Claims for damaged material, or shortages that were not
evident upon receipt of shipment must be reported to carrier
and Combustion Research Corporation Sales
Representatives within 72 hours.
Before starting to assemble the heater, make sure
that all optional and accessory items are accounted
for and are available for assembly. It is also important
to verify that the correct Btu input burner is supplied
for the project.
IMPORTANT
WARNING
FIRE HAZARD
IMPROPER INSTALLATION CAN
CAUSE DEATH, SEVERE INJURY
AND/OR PROPERTY DAMAGE.
Read and understand these installation, operating and
maintenance instructions thoroughly before installing or
servicing this equipment. Only trained, qualified fuel oil
installation and service personnel may install or service
this equipment.
These instructions, the layout drawing, local codes and
ordinances, and applicable standards such as apply to oil
piping and electrical wiring must be thoroughly understood
before proceeding with the installation.
TESTED UNDER STANDARDS
AMERICAN STANDARDS – UL 731-1995
CANADIAN STANDARDS – CAN/CSA B140.04-04
BUILDING CODES
In the absence of local codes, the installation must conform
to the latest edition of:
United States: National Fuel Gas Code, ANSI Z223.1
(NFPA 54).
Canada: CAN/CGA B149.1 & .2 and the Canadian Electrical
Code C22.1
AIRCRAFT HANGERS
Heaters for use in aircraft hangers must be installed in
accordance with;
United States: Refer to Standard for Aircraft Hangars,
ANSI/NFPA 409 (latest edition).
In Canada: Refer to Standard CAN/CGA B149.1 and
B149.2 and applicable Standards for Aircraft Hangars.
Basic guidelines are as follows:
1. Suspended heaters in aircraft storage or service areas
shall be installed at least ten feet (10') above the upper
surface of wings or engine enclosures of the highest aircraft
which may be housed in the hanger. This should be
measured from the bottom of the heater to the wing or
engine enclosure, whichever is highest from the floor.
2. In other sections of aircraft hangers, such as shops or
offices communicating with airplane storage or servicing
area, heaters shall be installed in accordance with their
listings and mounted not less than eight feet (8') above the
floor.
3. Heaters installed in aircraft hangers shall be located so as
not to be subject to injury by aircraft, cranes, moveable
scaffolding or other objects. Provisions shall be made to
ensure accessibility to suspended heaters for recurrent
maintenance purposes.
PUBLIC GARAGES
Heaters for use in public garages must be installed in
accordance with:
United States: Standard for Parking Structures NFPA 88A
(latest edition) or the Code for Motor Fuel Dispensing
Facilities and Repair Garages NFPA 30A (latest
edition).
Canada: Refer to CAN/CGA B149.1 and B149.2: Installation
Codes and applicable Standards for Public Garages.
Basic guidelines are as follows:
1. Heaters shall be installed in accordance with their listings
and not be mounted less than eight feet (8') above the floor.
Minimum clearances to combustibles must be maintained
from vehicles parked below the heater.
2. When installed over hoists, clearance to combustible
material must be maintained from upper most point of the
hoist, or provided as insulating or reflective barrier on the
hoist (consult representative or factory for guidance).
!
!
!

Reflect-O-Ray®Oil Fired EDS 3.5 Installation, Operation & Service
Page 2 Combustion Research Corporation
ELECTRICAL GROUNDING
The burner and blower unit must be electrically grounded in
accordance with the following codes:
United States: Refer to National Electrical Code®,
ANSI/NFPA 70 (latest edition). Wiring must conform to the
latest edition of National Electrical Code®, local ordinances,
and any special diagrams furnished.
Canada: Refer to Canadian Electrical Code CSA C22.1 Part
1 (latest edition).
OIL SUPPLY SYSTEM
The method of pipe sizing must conform to the U.S. National
Standards: NFPA 30&31 or CAN 1-B139-00 Installation
Code for Oil Burning Equipment, and should be installed in
accordance with all National and Local Codes and
ordinances.
CLEARANCES AND ACCESSIBILITY
Inlet air assemblies are to be installed with the air opening
pointing toward the ground to protect against rain and snow.
Inlet is provided with a bird screen. Adequate clearance
must be provided around the inlet air assembly opening to
provide an unobstructed entry for the combustion air. The
air should be taken from outside the building. Clearances
must be sufficient to provide accessibility for servicing. The
air inlets must be a minimum of six feet (6') from the exhaust
port.
AGRICULTURAL INSTALLATIONS
In agricultural installations Reflect-O-Ray®heating systems
must be installed as vented systems only.
HAZARDOUS LOCATIONS
Where there is the possibility of exposure to combustible
airborne materials or vapor, consult the local Fire Marshal,
the fire insurance carrier, or other authorities for approval of
the proposed installation. Reflect-O-Ray®heating
systems DO NOT qualify for use in explosion proof
installations.
INSTALLER QUALIFICATIONS
Only firms or individuals qualified to perform work in
accordance with the applicable specifications should be
engaged to install a Reflect-O-Ray®system. Consult local
Building Inspectors, Fire Marshals, or the local applicable
Combustion Research Corporation representative for
guidance.
INSTALLER RESPONSIBILITY
Reflect-O-Ray®systems are installed on the basis of
information given in a layout drawing. Together with these
instructions and the cited codes and regulations comprise
the information needed to complete the installation. The
installer must furnish all needed material that is not
furnished as standard Reflect-O-Ray®equipment, and it is
his responsibility to see that such materials, as well as the
installation methods he uses result in a job that is workman
like and in keeping with all applicable codes.
In storage areas where stacking of materials may occur,
the installer must provide signs that specify the
maximum stacking height so as to maintain the required
clearance to combustibles.
GENERAL CONSIDERATIONS
Combustion Research Corporation Factory Representatives
are experienced in the application of this equipment and can
be called on for suggestions about installation which can
give the owner of the building a more satisfactory and
economical installation.
When installing the Reflect-O-Ray®system, take maximum
advantage of the building upper structure, beams, Joists,
purloins etc. from which to suspend the system. Mount units
at minimum height for ease of installation and maintenance
but of specified height to fully utilize the building.
The general lay out of the Reflect-O-Ray®heating system
has been established by the engineering drawing. The
Reflect-O-Ray®heaters are used to heat building structures
as well as localized areas that would include doors, loading
docks and isolated workstations throughout the building.
The location of the Reflect-O-Ray®heaters should be such
that the area is covered uniformly, in that the heat is
positioned on the perimeter or to each side of the area to be
heated, rather than directly overhead. This will give a better
comfort condition for workers who would be in these areas.
Consult with your representative or the factory for additional
guidance in designing the optimum layout for your project.
Reflect-O-Ray®is a suspended system, which requires that
consideration be given to the factors that determine its
stability, flexibility, safety, and satisfactory operation. Before
installation, the contractor should inspect the building along
with the owner (or engineer) responsible for the building to
check on the use of the building. Inspection of the building
including the use of floor space for storage and height of
materials stored in the building must be noted so that there
are no problems with clearances to combustibles. Particular
care should be taken over doors and high objects such as
busses, trucks, cranes, car lifts, etc. Whenever possible use
side wall penetrations for combustion air inlets to burners
and exhaust venting.
DO -
Maintain specified clearances to combustibles, and
to heat sensitive material, equipment, and
workstations.
Provide approved heat radiation shielding or barriers
if needed. Refer to the National Fuel Gas Code for
guidance.
Provide access for general servicing; provide easy
access for complete removal of burner and blower.
Familiarize yourself with local and national codes.
Develop a planned installation procedure, which will
conserve material and labor on the job. Check to
see that all material and equipment is on the job
before starting installation. Be sure to accommodate
thermal expansion of the hot tube.
Use the oil connector ONLY as shown in the
instructions.
Provide end clearance so tubing won't expand and
touch a wall or a structural member.

Reflect-O-Ray®Oil Fired EDS 3.5 Installation, Operation & Service
Combustion Research Corporation Page 3
INSTALLATION NOTES
A. GENERAL INSTALLATION LAYOUT
1. Height from floor - 10' to 30' (refer to chart for
recommended minimum mounting heights). There are
no restrictions on the mounting height of the equipment
providing the design is based on the full heat loss of the
building. Consideration must be given to the building
heat loss so as to cover the air infiltration and/or the
mechanical ventilation of the building. For serviceability
and optimum performance the system should be
mounted with careful consideration to the use of the
building.
B. RADIANT TUBE ELEMENT LENGTHS FOR
STANDARD (OIL FIRED OIL FIRED EDS 3.5)
SYSTEMS.
1.To dissipate maximum heat and avoid continuous
condensation in the radiant tube elements, each burner
will be provided with the minimum or maximum tube
lengths as outlined in the following chart. A heavy walled
16 gauge aluminized steel tube (10' -0") long is used
adjacent or downstream of each burner. The remainder
of the radiant tubing shall be of spiral wound aluminized
steel tube. Each single flow of radiant tube shall
incorporate an adjustable damper for regulating burner
airflow.
2.A multiple burner system consists of two or more
burners. Refer to the following charts for radiant tube
lengths and elbow and tee placement.
C. RADIANT TUBE ELEMENT LENGTHS FOR HIGH
OUTPUT (OIL FIRED OIL FIRED EDS 3.5) SYSTEMS.
1. To dissipate maximum heat and avoid continuous
condensation in the radiant tube elements, each burner
will be provided with the minimum tube lengths as
outlined in the following chart. A heavy walled 16-gauge
aluminized steel tube 10' 0" long is used adjacent to
each burner. The remainder of the radiant tubing shall be
of spiral wound aluminized steel tube. Tee's must be
installed after any turbulator tube. Each single flow of
radiant tube shall incorporate an adjustable damper for
regulating burner airflow. NOTE: The radiant tubes for
the Reflect-O-Ray®OIL FIRED EDS 3.5 systems can
and may be heat treated for optimum heat transfer.
DESIGN TUBE LENGTH REQUIREMENTS
FOR OPTIMUM EFFICIENCIES
The dimensions in the table listed below are basic
guidelines used in the design of the Reflect-O-Ray®Oil Fired
OIL FIRED EDS 3.5 systems. Every effort should be made
to hold the dimensions given on the layout drawing. The
factory should verify any deviations from the layout drawing
or for alternate and/or customized layouts.
Burner Type 0500.R
125,000 Btu/hr 0510.R
105,000 BTU/HR 0520.R
70,000 Btu/hr
Standard Output System – Radiant Tube Between Any
Burner & Vacuum Exhauster 90’ 70’ 80’ 60’ 70’ 50’
High Output (Reduced Tube Length) Systems 80’ 60’ 70’ 40’ 60’ 40’
Maximum Flows Through One Radiant Tube 2 3 4
Minimum Distance Before Elbow 30’ 25’ 20’
Minimum Distance Before Tee 40’ 40’ 30’
Minimum Distance Before Damper 30’ 30’ 30’
* - Distances used with 0304.INSL radiant tube assemblies.
VACUUM EXHAUSTER SELECTION
Recommended Maximum Number of Burners Per Vacuum Exhauster
Note: The factory must be consulted for any deviations to the basic design criteria listed below. Burner inputs
may be mixed with each system (vacuum exhauster).
BURNER ASSEMBLIES
Vacuum Exhauster 0500.R 0510.R 0520.R
0402.WO/DI 4 4 6
0401.WO/DI 3 4 4
0201.WO 2 2 2
*40’ * 40’ BurnerBurner
40’
10’
40’ + 10’ + 40’ = 90’ From Vacuum Exhauster to either burner
* - In multiple burner systems the radiant
tubing runs do not have to be equal or
balanced in len
g
th.
Vacuum
Exhauster

Reflect-O-Ray®Oil Fired EDS 3.5 Installation, Operation & Service
Page 4 Combustion Research Corporation
CLEARANCE TO COMBUSTIBLES
WARNING
FIRE AND EXPLOSION HAZARD
Placement of explosive objects, flammable objects, liquids and vapors
close to the heater may result in death, serious injury, fire and/or
explosion or property damage. Do not store or use explosive objects,
liquids and vapor in the vicinity the heater.
In all situations the clearance to combustibles
must be maintained. Failure to observe
clearances to combustibles will result in death,
serious injury, or property damage. In storage
areas where stacking of materials may occur, the
installer must provide signs, which specify the
maximum stacking height so as to maintain the
required clearance to combustibles. Minimum
clearances must be maintained from vehicles
parked, below the heater. Ensure that adequate
clearance is maintained where vehicles are in
operation or being serviced. Consideration must be
given when running the radiant tube next to wood,
paper, storage racks, hoists, building construction,
etc. For building personnel safety, it is
recommended that the system not be mounted lower
than 9' from the floor unless fitted with protective
screens. The following illustrations and information
give minimum acceptable clearance to combustibles.
Minimum clearances to combustibles must be maintained
for wall, floor, ceiling temperatures. The maximum
temperature on combustible surfaces adjacent to the
infrared emitter tubing network during normal operation
shall not be more than 90° F in excess of room
temperature. Clearances must also be maintained from
vehicles parked below as well as storage racks,
partitions, hoists, building construction, etc.
In storage areas where stacking of materials may occur,
the installer must provide signs that specify the maximum
stacking height so as to maintain the required clearance to
combustibles.
0360.00 or 0360.02 Reflector- HORIZONTAL MOUNT
MODEL A B B1* CD
0500.R 7” 60” 30” 36” 36”
0510.R 6” 60” 30” 36” 36”
C D
A
B0520.R 6” 60” 30” 36” 36”
* B1 – Bottom Clearance when P/N 0304.INSUL.25 radiant tube is used
“B” Clearances (bottom) can be reduced to 15”, 25’ downstream of burner
0360.00 or 0360.02 Reflector - 30° MOUNT
MODEL A B B1* CD
0500.R 7” 60” 30” 36” 36”
0510.R 6” 60” 30” 36” 36”
CD
A
B0520.R 6” 60” 30” 36” 36”
* B1 – Bottom Clearance when P/N 0304.INSUL.25 radiant tube is used
“B” Clearances (bottom) can be reduced to 15”, 25’ downstream of burner
!

Reflect-O-Ray®Oil Fired EDS 3.5 Installation, Operation & Service
Combustion Research Corporation Page 5
0812.00 or 0812.SS Reflector - HORIZONTAL MOUNT
MODEL A BB1* CD
0500.R 7” 72” 25” 30” 30”
0510.R 6” 72” 25” 30” 30”
D
A
B
C
0520.R 6” 72” 25” 30” 30”
* B1 – Bottom Clearance when P/N 0304.INSUL.25 radiant tube is used
“B” Clearances (bottom) can be reduced to 15”, 25’ downstream of burner
0812.00 or 0812.SS Reflector – 30° MOUNT
MODEL A BB1* CD
0500.R 7” 72” 25” 30” 30”
0510.R 6” 72” 25” 30” 30”
D
A
B
C0520.R 6” 72” 25” 30” 30”
* B1 – Bottom Clearance when P/N 0304.INSUL.25 radiant tube is used
“B” Clearances (bottom) can be reduced to 15”, 25’ downstream of burner
0363.00 or 0363.02 Reflector - HORIZONTAL MOUNT
MODEL A B C D
0500.R 7” 72” 42” 42”
0510.R 6” 72” 30” 56”
D
A
B
C
0520.R 6” 72” 30” 56”
0500.R - “B” Clearances (bottom) can be reduced to 40”, 20’ downstream of burner
0510.R - “B” Clearances (bottom) can be reduced to 40”, 20’ downstream of burner
0520.R - “B” Clearances (bottom) can be reduced to 24”, 20’ downstream of burner
0363.00 or 0363.02 Reflector – 30° MOUNT
MODEL A B C D
0500.R 7” 72” 42” 42”
0510.R 6” 72” 30” 56”
D
A
B
C0520.R 6” 72” 30” 56”
0500.R - “B” Clearances (bottom) can be reduced to 40”, 20’ downstream of burner
0510.R - “B” Clearances (bottom) can be reduced to 40”, 20’ downstream of burner
0520.R - “B” Clearances (bottom) can be reduced to 24”, 20’ downstream of burner

Reflect-O-Ray®Oil Fired EDS 3.5 Installation, Operation & Service
Page 6 Combustion Research Corporation
INVERTED REFLECTOR
0360.00 or 0360.02 Reflector
With an Inverted 0360.00 or
0360.02 Reflector.
- Applies To All Inputs -
4” Gap
40”40”
5”
22”
“U” BEND END CLEARANCE
ROOF
“U” Tube Reflector End
Min. 18”
Clearance

Reflect-O-Ray®Oil Fired EDS 3.5 Installation, Operation & Service
Combustion Research Corporation Page 7
SYSTEM INSTALLATION
WARNING
COLLAPSE, FIRE AND EXPLOSION HAZARD
Improper suspension of the tube heater may
result in collapse and being crushed. Always
suspend from a permanent and secure part of
the building structure that can evenly support
the total force and weight of entire the heating
system.
Failure to suspend properly and maintain minimum
clearance to combustibles may result in death,
serious injury, fire and/or explosion or property
damage. Always maintain minimum clearances and
post clearance signs where needed.
Combustion Research Corporation recommends that
Reflect-O-Ray ®Oil Fired OIL FIRED EDS 3.5®systems are
hung by means of chain. DO NOT STRETCH OR INSTALL
CHAIN OTHER THAN IN A VERTICAL FASHION WHEN
INITIALLY INSTALLED (BURNER NOT FIRING).
WARNING
DO NOT SUSPEND VACUUM EXHAUSTER
BY CHAIN - USE THREADED ROD, ANGLE
IRON, ETC.
If chain is not supplied by Combustion Research
Corporation, furnish a chain with a minimum 90 lb. workload
(trade size #3 or larger).
CAUTION: This infrared tube system will expand and
contract upon each call for heat and allowances must be
made to accommodate this expansion.
Provisions must be made to limit lateral movement when
systems are installed in site conditions where open doors
may create a wind condition. See page 12 for details.
SUSPENSION COMPONENTS - Sub Assembly and
Installation
1. Using the system layout, beginning at the vacuum
exhauster position, determine location of suspension
points of system in relation to building structure, paying
close attention to dimensional limits as shown on page 3.
2. Determine suspension requirements for chain, wire rope,
beam clamps, etc. with the type of mounting hardware
as illustrated. Secure appropriate of each item before
starting installation. Suspension hardware may not be
furnished with this system.
3. If any suspension supports are to be anchored in
cement, drill and insert Acherman-Johnson stud anchors
(or equivalent) as required. DO NOT install anchors in
existing cracks or joints.
4. Determine suspension chain lengths and proceed to cut
and pre assemble suspension components.
NOTE: Each Reflect-O-Ray®OIL FIRED EDS 3.5 burner
assembly is equipped with a suspension point. Adjust as
required to keep the burner assembly level and square to
the radiant tubing.
5. Install beam clamps, eyebolts, etc. at predetermined
suspension locations - refer to the installation layout and
the illustration on page 11 of this manual for guidance.
IMPORTANT NOTE: If wind or sever air movement can be
encountered in the building (such as found in airplane
hangers where opposing doors are simultaneously open) or
if your area is prone to seismic activity, additional support of
the radiant tube and reflector network will be required. See
page 12 for details
RADIANT TUBE INSTALLATION
The Reflect-O-Ray®OIL FIRED EDS 3.5 radiant heating
system is sealed system. Therefore the heat radiant tubing
installation must be adhered to as outlined in this manual for
optimum performance as designed.
RECOMMENDED HANGER LOCATIONS
For standard systems, the first hanger should be located
approximately 5" from the burner and the next two
combination hangers shall be hung on approximately 56"
centers. The rest of the system combination hangers may
be hung on approximately 9'-10"' centers with intermediate
reflector supports placed halfway between hangers.
For systems using 0304.INSL tubes , the first hanger should
be located approximately 5" from the burner and the next
five (5) combination hangers shall be hung on approximately
56" centers. The rest of the system combination hangers
may be hung on approximately 9'-10"' centers with
intermediate reflector supports placed halfway between
hangers
NOTE – THE WELD SEAM ON THIS FIRST (AND
SECOND IF PROVIDED) SECTION OF TUBE MUST BE
POSITIONED SO THAT IT IS ON THE BOTTOM OF THE
TUBE WHEN INSTALLED.
Weld Seam
Position Bottom of Tube
Burner Tube End View
Each reflector should be supported at two points, either with
two combination hangers or with one combination hanger
and an intermediate support
NOTE: When a vertical rise of tube is necessary, use a
combination hanger (P/N 0361.00) at both the lower
horizontal run hanger and at the upper horizontal run. If the
vertical run exceeds ten feet (10') a midway support must be
installed. This support may be secured to a wall, beam or
fabricated support. It is recommended that the vertical run
not exceed twenty-five feet (25').
!
!

Reflect-O-Ray®Oil Fired EDS 3.5 Installation, Operation & Service
Page 8 Combustion Research Corporation
Radiant Tube Sub-Assembly:
CAUTION
CUT HAZARD - SHARP EDGES.
Wear protective gloves when installing and handling
and cutting radiant tubes. Failure to follow these
instructions will result in personal injury.
If is recommend that a maximum of twenty-foot lengths of
radiant tube and possibly an elbow be assembled on the
floor before raising into position.
Experience has shown that it is best to start laying out the
system from the exhauster end, although this is not a
requirement. Avoid small segments that cannot be
supported properly according to the instructions in this
manual.
1. Apply sealer sparingly from the tube furnished to the
outside of the heat tube coupler, elbows, and other
fittings.
NOTE: Failure to use sealer can result in loss of vacuum.
A
pply sealer sparingly to
outside of cou
p
ler
Placement of screws @
a
pp
roximatel
y
120°
2. Secure joint with sheet metal screws to provide a
mechanical joint rather than rely on friction. Use damp
cloth to remove excess sealer. Heat tube and fitting
assembly ends are designed for minimum clearance and
tight fitting to minimize air in filtration.
3. Insert coupler inside tube section. Be sure the radiant
tube is butted up tightly against the stop rim in the middle
of the coupler. Note: Tolerances are closely controlled at
this point to insure as tight a joint as possible. At this
point make sure that radiant tube sections to be joined
are straight and in line.
4. Attach combination hanger (0361.00) to the radiant tube
at dimensional support locations as outlined in this
manual. Combination hangers should be position so that
The locking loop / 45° suspension point, face the same
direction. Combination hanger’s (0361.00) shall be
positioned at all elbows and tee’s so as to provide
support for the adjoining reflector.
5. Position the intermediate reflector supports (0362.00)
between the combination hangers illustrated below.
6. Using two or more men, raise the length of pre
assembled tube sections up to suspension height, and
using "S" hooks or turnbuckles attach tube hangers to
suspension hardware.
7. Check to be sure all suspension hardware, chain, wire
rope, etc., is hanging straight. Reposition hangers where
necessary until suspension is straight.
8. Adjust suspension length until heat tube is straight and in
line. If possible, heat tube should be parallel with floor.
9. Proceed in manner described above to complete
hanging the remainder of the radiant tubes as described
and detailed in this owner's manual and the layout
drawing.
NOTE: Review system layout carefully before any cutting
radiant tube. If cuts are not made where shown, radiant
tube lengths may be short and require additional tube
couplers to complete the project.
When cutting radiant tubes, de-burr them with a file to
remove sharp edges and facilitate easier assembly with
the couplers.
10.Make final check to be sure heat tube is straight and in
line before installing reflectors as illustrated on pages 13
- 15.
HANGER & SUPPORT LOCATIONS – STANDARD INSTALLATION
HANGER & SUPPORT LOCATIONS – “INSL” TUBE SYSTEM
5" 58" 58" 59" 118" 59" 118"
Hanger Hanger Hanger HangerSupport Support Hanger
5" 59" 59" 59" 118"
Hanger Hanger Hanger Hanger Hanger
Hanger
59"59"
0304.INSL.25 – “INSL” Tube
0304.AS.16 – Aluminized Tube
Hanger
!

Reflect-O-Ray®Oil Fired EDS 3.5 Installation, Operation & Service
Combustion Research Corporation Page 9
COMBUSTION TUBE INSTALLATION
The first section or radiant tube downstream of the burner
is a heavy wall 16 Ga. aluminized steel tube. This tube is
referred to as the combustion tube. One end of this tube
is swaged to fit inside the next spiral radiant tube. The
end that is un-swaged is coupled to the burner assembly –
see page 19. It is necessary that the weld seam on this
combustion tube be positioned so that it is on the bottom
when installed.
This applies for both straight tube and “U” tube systems.
When the systems are mounted on a 30° angle the weld
seam should always be on the bottom.
INSTALL COMBUSTION TUBE
WITH WELD SEAM ON BOTTOM ! IMPORTANT !
INSUL-TUBE ASSEMBLY
Burner
0507.00 DRAW BAND
COUPLER, SUPPLIED
WITH BURNER
20’ SECTION – INSULATED TUBE
DO NOT CUT OR MODIFY
P/N 0304.INSL.25
UNASSEMBLED COMPONENT VIEW –
(
TOP
)
SWAGED END – INSERT INTO SPIRAL TUBE
5’ EXTENSION TUBE – 16 GA. ALUMINIZED
STEEL – COMPONENT OF P/N 0304.INSL.25
0507.00 DRAWBAND COUPLER – COMPONENT OF P/N
0304.INSL.25 – POSITION BOLT ASSEMBLY TOWARDS
THE FLOOR
BURNER FLOW
A
SSEMBLED VIEW –
(
TOP
)
BURNER FLOW
SEAL ALL SWAGED JOINTS AND SECURE
WITH SHEET METAL SCREWS
SECURELY TIGHTEN DRAWBAND COUPLERS
AND SECURE WITH SHEET METAL SCREWS
DO NOT USE SEALER ON THESE JOINTS
DAMPER TYPES
Damper assemblies are to be installed as per layout
drawing. Each burner flow must be equipped with a
damper assembly so that accurate vacuum settings can
be made.
NOTE: Install damper handles on the side or bottom,
position locating holes so that they face, or rotate
downward. The damper handle can be rotated by
removing the two nuts, which hold the blade, and setting
plate in place. Rotate 180° and reassemble - take care so
as not to "strip out" handle. When turning the damper
handle, the center-retaining spud on the opposite side
should rotate simultaneously.
Install Handle On Side Or Bottom Of Tube
(
Position locatin
g
holes as shown
)
0341.00 DAMPER ASSEMBLY
NOTE: 0341.00 damper assembly for use with single
burner systems and when DAMPER TEE'S are not
practical.

Reflect-O-Ray®Oil Fired EDS 3.5 Installation, Operation & Service
Page 10 Combustion Research Corporation
0307.AS.B - Damper TEE
Single
Burner Flo
w
To Vacuum Exhauste
r
Single
Burner Flow
0307.AS.C - Damper
Single
Burner Flo
w
To Vacuum Exhauster
Single
Burner Flow
0307.AS.XB - "X" Fitting With Dampers
To Vacuum
Exhauster
From Upstream
Burner Flow
(
s
)
Single
Burner Flo
w
Single
Burner Flow
0307.AS.XC - "X" Fitting With Dampers
From Upstream
Burner Flow
To Vacuum
Exhauster
Single
Burner Flow
Single
Burner Flow

Reflect-O-Ray®Oil Fired EDS 3.5 Installation, Operation & Service
Combustion Research Corporation Page 11
SUSPENSION METHODS
WARNING
COLLAPSE, FIRE AND EXPLOSION HAZARD
Improper suspension of the tube heater may result in
collapse and being crushed. Always suspend from a
permanent and secure part of the building structure
that can evenly support the total force and weight of
entire the heating system.
Failure to suspend properly and maintain minimum
clearance to combustibles may result in death,
serious injury, fire and/or explosion or property
damage. Always maintain minimum clearances and
post clearance signs where needed.
Radiant tube and reflector system shall be suspended by
chain (trade size #3 or larger), wire rope, etc., minimum
workload of 90 Lbs. All suspension hardware must be
corrosion resistant. For fine adjustment turnbuckles may be
used.
NOTES:
SUSPEND IN VERTICAL FASHION WHEN INITIALLY
INSTALLED (BURNER NOT FIRING).
Suspend the burner assembly with 1/0 closed loop chain
or greater – minimum working load of 200 lbs. Radiant
tube and reflector system is to be suspended with trade
size #3 chain or heavier – working load of 90 lbs.
minimum. A minimum of 12" (30 cm) of hanging chain is
recommended. This allows for system expansion and
contraction, reducing the likelihood of reflector and radiant
tube warping and/or expansion noise.
CAUTION: Infrared tube systems expand and contract
upon each call for heat. System expansion of up to 3” can
be expected.
Provisions must be made to limit lateral movement when
systems are installed in site conditions where open doors
may create a wind condition – see page 12 for guidelines.
Radiant tubes DO NOT require sloping.
For fine adjustment turnbuckles may be used.
NOTES:
•SECURE TURNBUCKLES SO THAT THEY WILL NOT
UNWIND OR UN-SCREW.
•CRIMP "S" HOOKS CLOSED BEFORE LEAVING
JOB. REFLECTORS ARE NOT TO BE INSTALLED
ON TOP OF COMBINATION HANGERS.
Threaded Rod
and Turn Buckle Secure turnbuckle
with JAM nuts or wire
to prevent unwinding
Beam Clamp
All ”S” Hooks MUST Be
Manually Closed By
Installer
Chain
Wood Beam
Eye Bolt Screw
with Washer and
Locknut
Chain
Concrete
Beam
Suitable Expansion
A
ncho
r
Bar Clamp
Chain
Beam Clamp
Beam
!

Reflect-O-Ray®Oil Fired EDS 3.5 Installation, Operation & Service
Page 12 Combustion Research Corporation
SEISMIC RESTRIANT SUSPENSION METHODS
For standard seismic restraint such as earthquake prone
areas, install seismic restraint chain or cable as shown
below. If high winds can be encountered in the building,
such as found in airplane hangers where opposing doors
are simultaneously open, or system is installed near or
below the door opening, additional support of the radiant
tube and reflector network will be required. See the
“Seismic Suspension For High Wind Applications” below
for details. If there are any questions regarding what
method is best suited for your application consult your
sales representative or contact the factory. If the system
is a straight system (no elbows or tee's), apply an anti
sway chain or wire rope which is parallel to the radiant
tube at approximately the middle of the run.
Install the cable clamp
approximately 3” from
the edge of the reflector.
Clamp tight to prevent
chains or cables from
sliding on hanger
Seismic Restraints
Use chain or min. 1/8”
aircraft cable 30° Min.
45° Max. 30° Min.
45° Max.
30° Min.
45° Max. 30° Min.
45° Max.
SEISMIC RESTRAINT FOR HIGH WIND APPLICATIONS
In high wind conditions it is recommended that
seismic restraints and reflector retention wire be
installed. See details below for recommended
installation of seismic restraint and anti sway
retention chains (wire rope). The vertical threaded
rod shall be attached and suspend the reflector
hangers at intervals of eight to ten feet (8' - 10'). At
least one vertical threaded rod shall be placed at
every elbow and/or tee connection. The threaded
rod is used to prevent the system from lifting during high
wind conditions, the chain or wire rope will keep the
system from swaying from side to side. When connecting
threaded rod to "Z" purlin use beam clamp or drill a hole
through "Z" purlin and secure with two 3/8" nuts and a lock
washer. If the system is a straight system (no elbows or
tee's), apply an anti sway chain or wire rope which is
parallel to the radiant tube at approximately the middle of
the run.
Punch or drill a small hole (approximately 1/8”) in the reflector near the
reflector hanger. Insert an appropriate length of 14 Ga. galvanized wire
through this hole and encircle the combination hanger. Maintain a loose loop
around the hanger, this will allow for expansion of the system. Twist the ends
of the wire together and trim as required. This retention wire may be installed
on both sides, or edges of the reflector for severe wind conditions.
30° MIN.
45° MAX. 30° MIN.
45° MAX.

Reflect-O-Ray®Oil Fired EDS 3.5 Installation, Operation & Service
Combustion Research Corporation Page 13
REFLECTOR INSTALLATION
CAUTION
CUT HAZARD - SHARP EDGES.
Wear protective gloves when installing and handling
and cutting reflectors. Failure to follow these
instructions will result in personal injury.
Radiant heat tube combination hangers are an integral part
of the reflector support system. Improperly installed radiant
tube hangers will distort reflectors and result in an
undesirable appearance of the entire system, and can lead
to vibration and noise.
Check to be sure all combination hangers and intermediate
supports are hanging straight. Tubes must be straight and
in line before installing reflectors.
Install reflector elbows and "tees" where required.
1. Starting from burner slide reflector through tube hanger
until end stops against drawband coupler. Nearest the
burner, attach reflector end cap with 4 sheet metal
screws.
2. Adjust position of reflector supports so that reflector is
held level and parallel with heat tube. Where possible,
position one support at overlapped ends of reflectors.
3. Using same procedure, continue to install reflector
sections until entire system is complete. Make sure
each reflector section is overlapped a minimum of 1 -2"
and secured as outlined on this page.
4. When last section of reflector has been installed, inspect
heat tube and reflector assembly as follows:
a. Check to be sure all heat tubes are straight and in
line. Adjust suspension when necessary.
b. Make sure all radiant tube joints are properly
aligned, sealed, and secured.
c. Check all heat tube suspension points, clamps,
turnbuckles, lock nuts, etc. are in place and tight.
All suspension chain should be hanging straight
down.
d. Check all reflector joints for minimum 1 - 2" overlap.
e. Overlapped joints are secured with sheet metal
screws. Make sure expansion joint is in every
straight run - see the following expansion joint
illustration.
f. Check all reflector hangers and supports for location
and make sure reflectors are straight and in line.
g. Make sure all combination hanger hooks are closed.
TYPICAL REFLECTOR LAYOUT WITH
EXPANSION JOINTS
An expansion joint consists of a reflector overlap without
being secured together. This allows for freedom of
movement during heat up and cool down. Expansion joints
are to be placed at approximately the center of each straight
run of reflectors with a maximum of three (3) reflectors
connected together. Additional expansion joints in each
straight run may be necessary.
All other reflector joints, reflector elbows and reflector tee's
should be overlapped 1 - 2" and sheet metal screwed
together, DO NOT position an expansion joint at an elbow or
tee.
Burner
Building
Wall
Vacuum
Exhauste
r
Expansion
Joint
Expansion
Joint
Expansion
Joint
!

Reflect-O-Ray®Oil Fired EDS 3.5 Installation, Operation & Service
Page 14 Combustion Research Corporation
TUBE & REFLECTOR HANGING METHODS
The Reflect-O-Ray®System reflectors can be suspended
horizontally or at a 30° angle. The combination hanger is
designed so that the reflector angle will be horizontal when
suspended from the top loop or at a 30° angle when
suspended from the offset loop – see the illustration below.
The panel hangers may also be suspended horizontally or at
a 30° angle – see illustration below.
Horizontal Mounting With
“Combination” Hanger 30° Mounting With
“Combination” Hanger Horizontal Mounting With
“Panel” Hanger 30° Mounting With “Panel”
Hanger
PERIMETER MOUNTING
In areas of high heat loss such as doorways and the
perimeter of some buildings, it may be desirable to
install the reflectors so that heat is concentrated and
directed to a specific area rather than straight down.
Two options are available to accomplish this, 1) angle
mount the reflector as shown above or 2) install side
shields.
SIDE SHIELD INSTALLATION
Optional side shield reflectors may be installed on either
side or both sides of the reflector. The 10-ft. (3 m) long side
shields should line up with a reflector and have identical
overlap and expansion joints.
1. Position the side shield reflector next to the reflector, and
mark the areas where relief notches must be cut.
2. Cut the appropriate relief notches as noted.
3. Secure the side shield to the reflector with #8 x 3/8"
sheet metal screws. The screws should be used
approximately every 24" (61 cm).
4. Install the side shield supports every five feet (5’)
5. An expansion joint must be used in each straight run.
This expansion joint should match the location of the
expansion joint for the reflectors. All overlap areas
should also match the reflector overlap.
In applications where excessive air movement is
encountered, such as open doors and the like, the Side
Shields should be fastened together with 2 sheet metal
screws or pop rivets at each overlap joint. NOTE: DO NOT
screw the expansion joints together.
FIELD FAB
RELIEF NOTCH
IN SHIELD
SECURE WITH
S/M SCREW
SECURE SIDE
SHIELD HANGER
WITH S/M SCREW
SECURE SIDE
SHIELD SUPPORT
(P/N 0368.00) TO
TUBE WITH S/M
SCREW
0367.00
SIDE SHIELD
0360.00 REFLECTOR & 0367.00 SIDE SHIELD
FIELD FAB
RELIEF NOTCH
IN SHIELD
SECURE WITH S/M SCREW
SECURE
SIDE SHIELD
HANGER WITH
S/M SCREW
SECURE SIDE SHIELD
SUPPORT (P/N 0368.0010)
TO TUBE WITH S/M SCREW
0367.00
SIDE SHIELD
0812.00 REFLECTOR & 0367.00 SIDE SHIELD
FIELD FAB
RELIEF NOTCH
SECURE WITH
S/M SCREW
SECURE
SIDE SHIELD
HANGER WITH
S/M SCREW
SECURE SIDE
SHIELD SUPPORT
(P/N 0366.0050)
TO TUBE WITH
S/M SCREW 0366.00
SIDE SHIELD
0363.00 REFLECTOR & 0366.00 SIDE SHIELD

Reflect-O-Ray®Oil Fired EDS 3.5 Installation, Operation & Service
Combustion Research Corporation Page 15
REFLECTOR ELBOW CONNECTION
Reflector Elbow
Secure To Connecting Reflector
With Sheet Metal Screws
REFLECTOR TEE CONNECTION
Use Sheet Metal Screws To Secure
"Tee" In Place
Field Cut Reflector To Provide
Clearance For Radiant Tube
Reflector TEE
For "X" fittings (PN 0307.AS.X) use the same technique
shown, cutting and another relief hole on the opposite side
of the reflector and installing a second reflector tee.

Reflect-O-Ray®Oil Fired EDS 3.5 Installation, Operation & Service
Page 16 Combustion Research Corporation
DECORATIVE GRILLE INSTALLATION
CAUTION
CUT HAZARD - SHARP EDGES.
Wear protective gloves when installing and handling
aluminum decorative grille and side shields. Failure to
follow these instructions will result in personal injury.
When installing the heating system above a suspended
ceiling, unpainted aluminum decorative grille must be used
directly beneath the radiant tube system. The use of regular
ceiling tiles directly beneath the radiant tube will create an
unsafe condition.
The unpainted aluminum decorative grille provides an
attractive finish to the system when installed over a
suspended ceiling. The aluminum Decorative Grille (PN
0369.00) comes in standard 2 ft. x 4 ft. (60 cm x 120 cm)
sections and is installed in place of the ceiling tile. The
decorative grill should extend completely under all of the
radiant tube as well as the burner assembly.
The radiant tube is suspended in normal fashion, centered
over the decorative grille. The radiant tube must be
installed, as shown below, with a minimum distance from the
radiant tube to the decorative grille of 6" (15.2 cm) to a
maximum of 10" (25.4 cm).
"T" bar heat shields (PN 0369.21) must be installed over
ceiling "T" frame members that pass underneath the radiant
tube. The Decorative Grille Side Shield reflector (PN
0369.11) is available in 10-ft. (3 m) lengths. Lay the side
shield along the standard reflector and cut suitable notches
for the reflector hangers and "T" bar sections. As sharp
edges can be encountered when working the aluminum
decorative grille and side shields, gloves should be worn.
"T" Bar Heat Shield
P.N. 0369.21 Suspended Ceiling
"T" Bar Framing
Decorative Grille
2 ft. (60 cm) Wide
Decorative Grille
Side Shield (10’ Long)
P.N. 0369.11
Reflector and
Radiant tube
Cut Relief Notches in Side Shield to
A
ccommodate Tube & Reflector Hangers
!
Table of contents
Other Combustion Research Heater manuals