Comelit IPCAM1848A User manual


This manual suits for next models
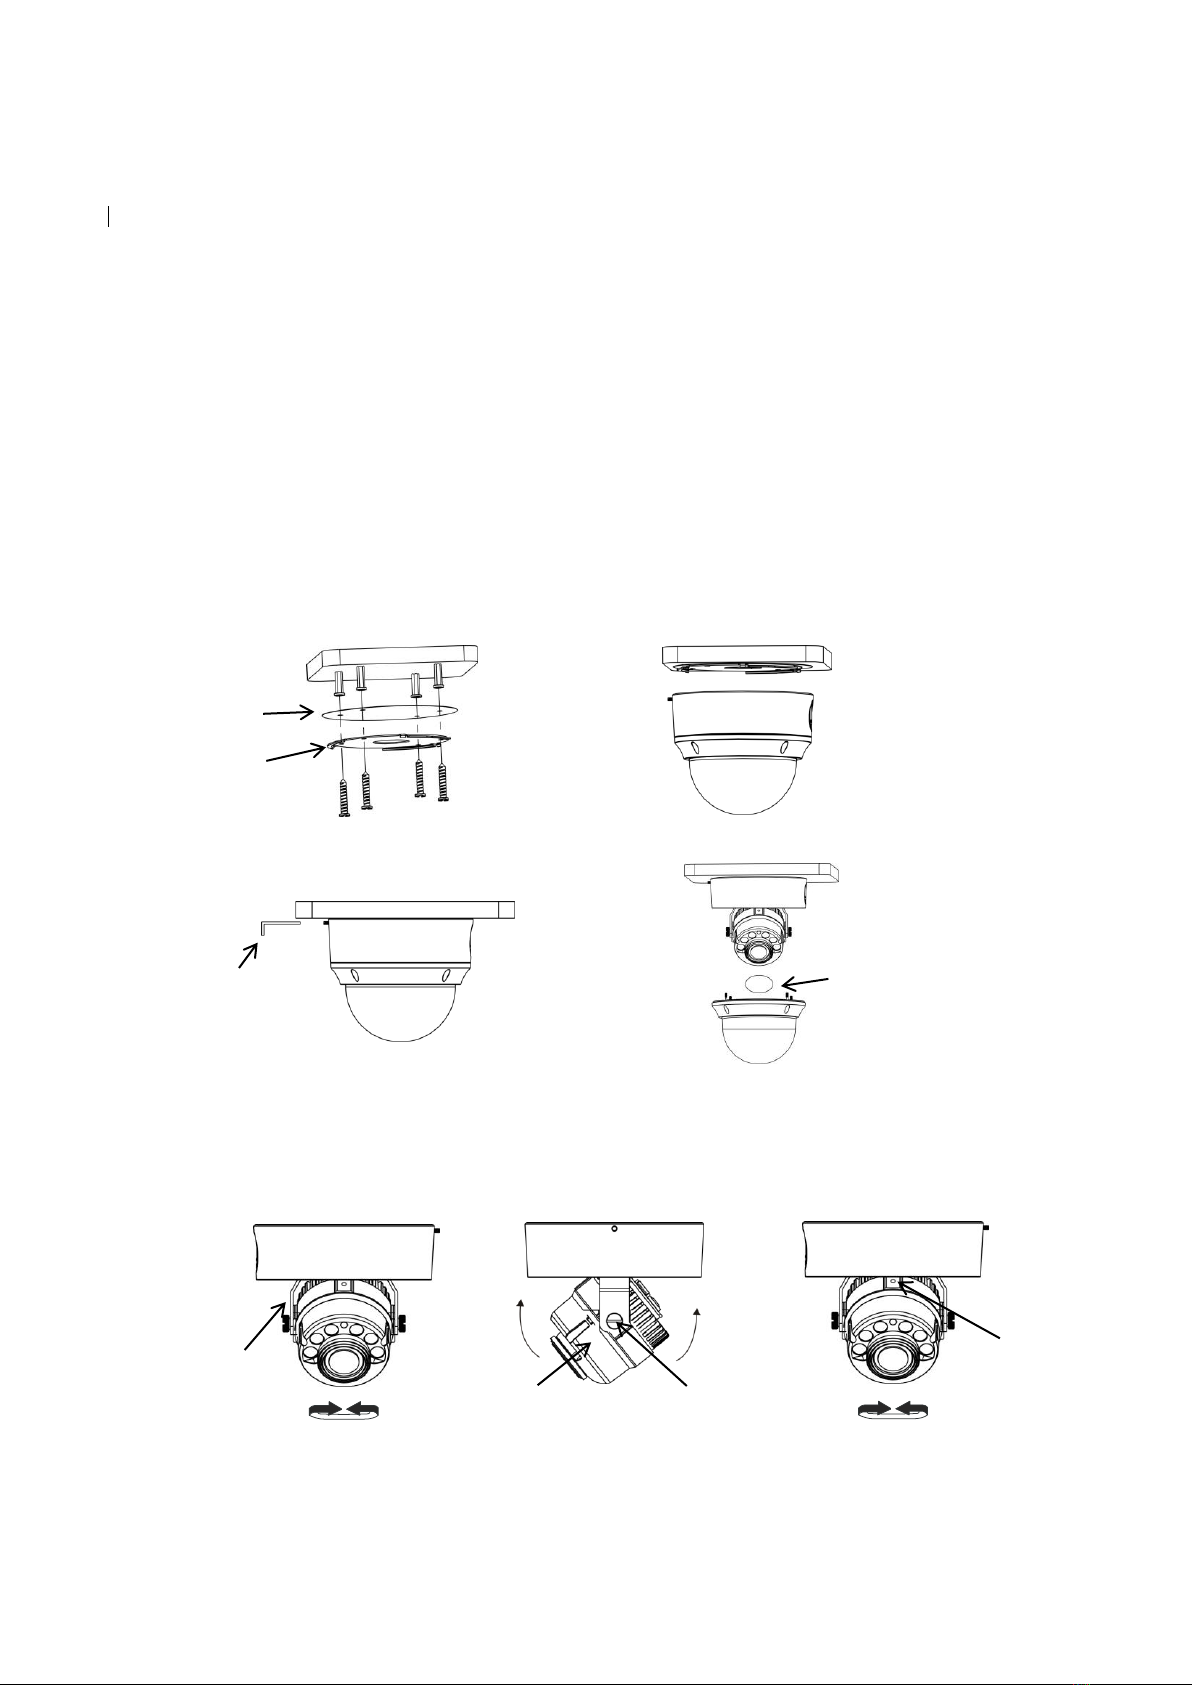
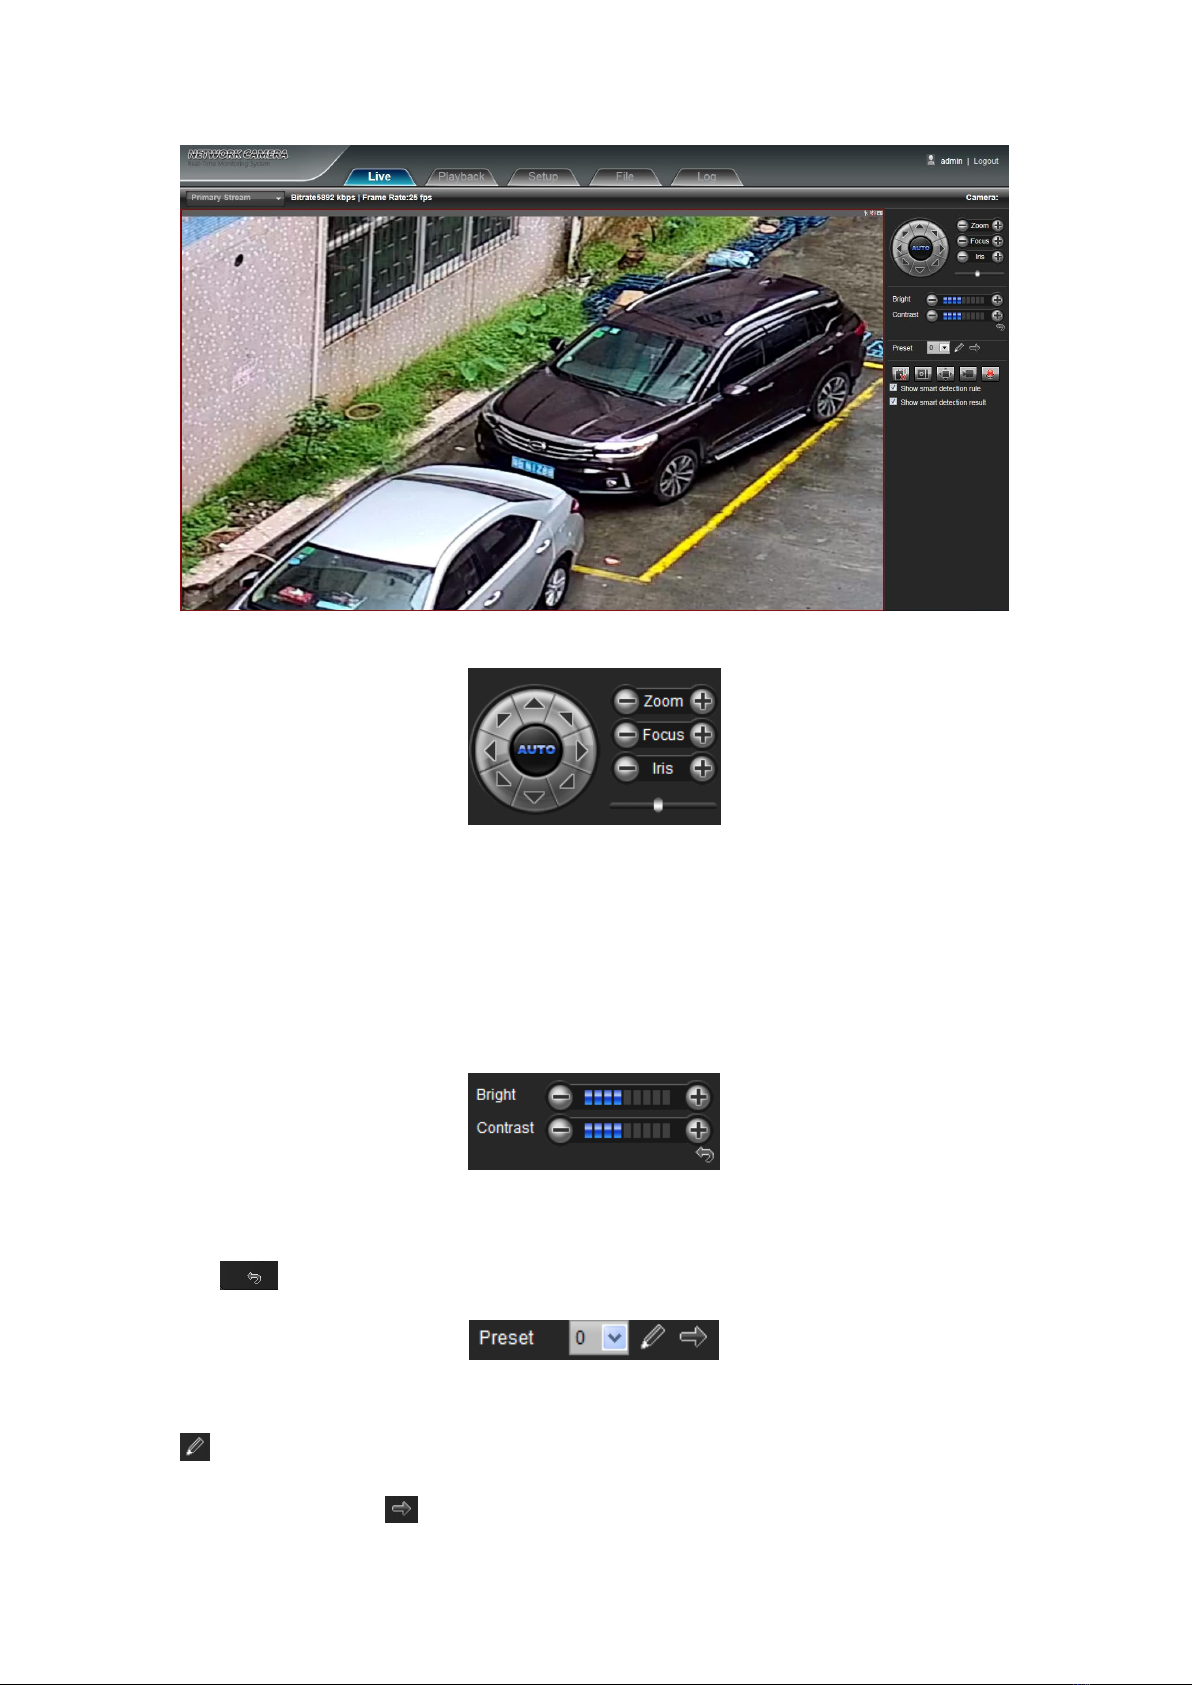
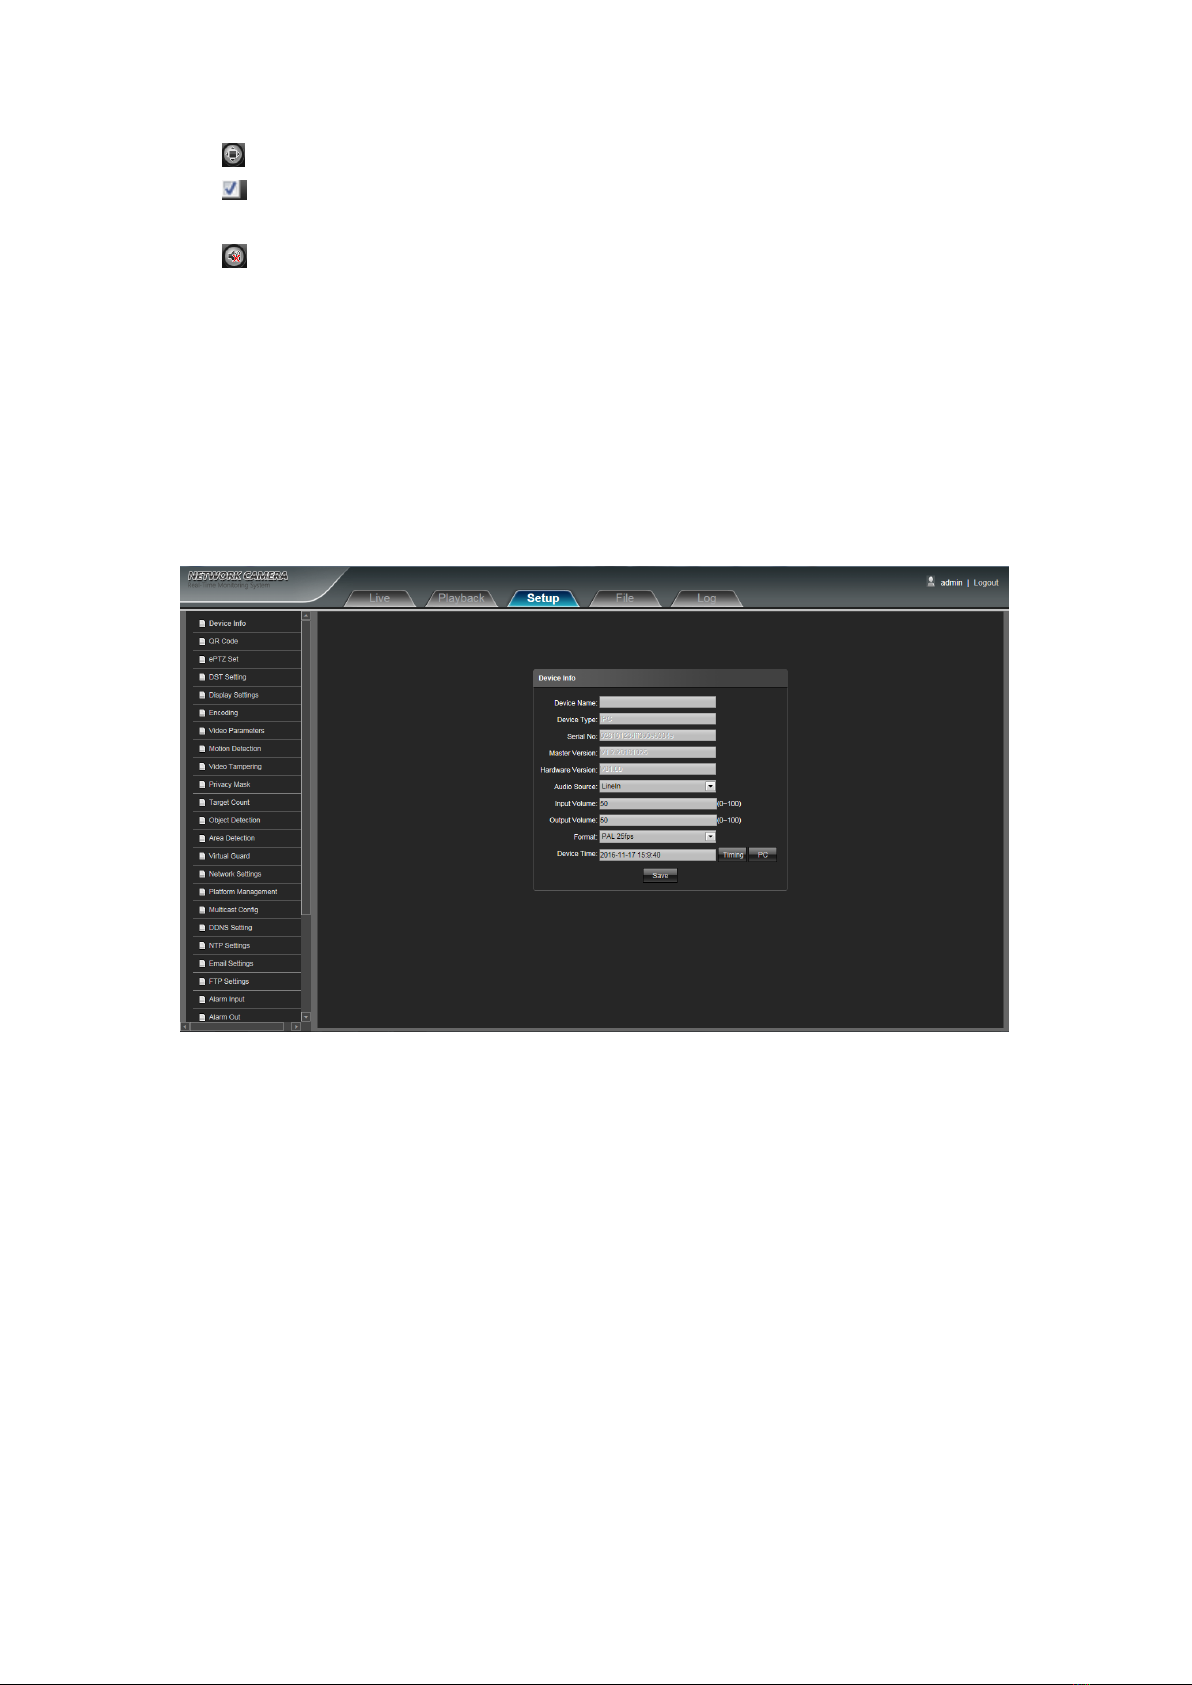
6
Table of contents
Languages:
Other Comelit Security Camera manuals

Comelit
Comelit IPTCAMN04FA User manual

Comelit
Comelit HDCAM360A User manual

Comelit
Comelit AHCAM 100 Series User manual

Comelit
Comelit IPTHCAM1DUAL User manual

Comelit
Comelit ADVANCE Series User manual

Comelit
Comelit HCAM635B User manual

Comelit
Comelit IPPTZ779C User manual

Comelit
Comelit IPDCAMS05F01B User manual

Comelit
Comelit WIKIT040A User manual

Comelit
Comelit Smart Series User manual

Comelit
Comelit 100 SERIES User manual

Comelit
Comelit IPCAM650A User manual

Comelit
Comelit AHPTZ110A User manual

Comelit
Comelit AHCAM722A User manual

Comelit
Comelit AHPTZ110A User manual

Comelit
Comelit 40437 User manual

Comelit
Comelit 40863 User manual

Comelit
Comelit AHCAM722A User manual

Comelit
Comelit IPCAM720A Instruction manual

Comelit
Comelit IPPTZ120IRC User manual


