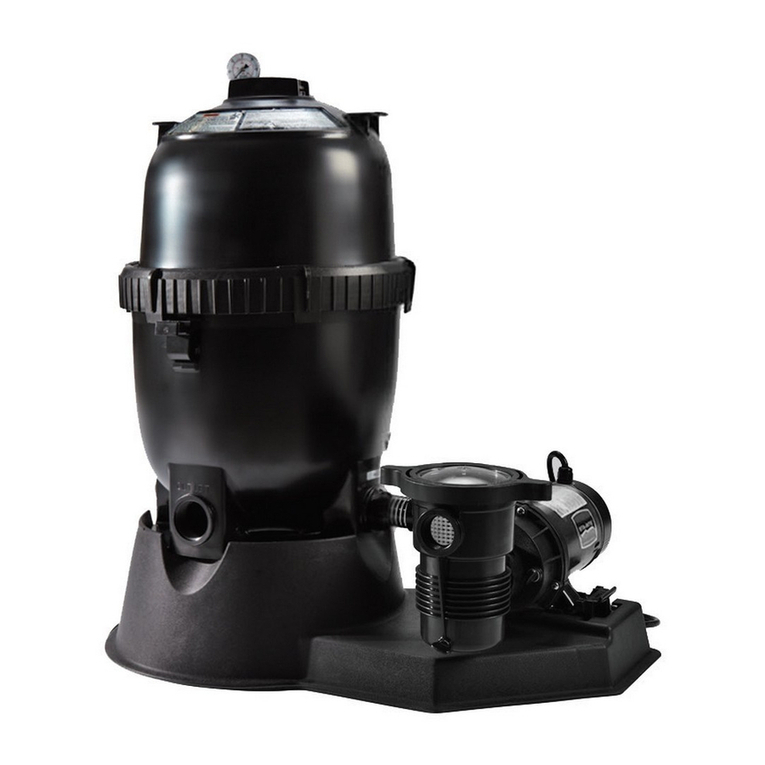
COMFORTPOOL FuzzyClean 7000 User manual

FuzzyClean
7000
9500

| NL
2
Inhoud
Veiligheidsvoorschriften__________________________________________________________________3
1. Algemene informatie _________________________________________________________________4
1.1. Veiligheidsinstructies_______________________________________________________________4
1.2. Technische gegevens en specificaties _________________________________________________5
1.3. Uitpakken van de filterpomp _________________________________________________________5
1.4. Elektrische aansluiting______________________________________________________________5
1.5. Locatie van de filterpomp ___________________________________________________________6
2. Installatie instructies _________________________________________________________________6
2.1. Montage van waterpomp en bodemplaat _______________________________________________6
2.2. Montage pompfittingen _____________________________________________________________6
2.3. Montage filtertank _________________________________________________________________6
2.4. Slangaansluiting __________________________________________________________________7
3. Gebruiksinstructies __________________________________________________________________7
3.1. Opstarten van de filterpomp _________________________________________________________7
3.2. Reinigen van de filterbollen__________________________________________________________8
3.3. Zwembadwaterzuiveringsmiddelen____________________________________________________8
3.4. Filtertijd _________________________________________________________________________8
4. Zwembadbodem reinigen _____________________________________________________________8
5. Winterklaar maken en opbergen________________________________________________________9
6. Belangrijke do’s & don’ts _____________________________________________________________9
6.1. Do’s ____________________________________________________________________________9
6.2. Don’ts __________________________________________________________________________9
7. Installatie illustraties ________________________________________________________________10
8. Onderdelen ________________________________________________________________________11
9. Garantie___________________________________________________________________________12

| NL
3
Veiligheidsvoorschriften
LEES AL DEZE INSTRUCTIES ZORGVULDIG DOOR EN VOLG ZE OP. HET NIET OPVOLGEN VAN
DEZE WAARSCHUWINGEN KAN SCHADE AAN EIGENDOMMEN, ELEKTRISCHE SCHOKKEN,
PERSOONLIJK LETSEL OF ZELFS DE DOOD TOT GEVOLG HEBBEN.
WAARSCHUWINGEN
▪Dit apparaat is geen speelgoed, het apparaat en het snoer buiten bereik van kinderen houden.
▪Dit apparaat kan worden gebruikt door kinderen van 8 jaar en ouder en personen met verminderde fysieke,
sensorische of mentale vermogens, of een gebrek aan ervaring en kennis, mits dit gebeurt onder toezicht
of mits zij instructies hebben gekregen over het veilig gebruik en de risico’s van het product.
▪Het opzetten en afbreken van dit product, en de reiniging en het gebruiksonderhoud dient alleen te worden
gedaan door een volwassene.
▪Pas op voor een elektrische schok. Gebruik geen verlengsnoeren, timers, contactdozen, dubbelstekkers, et
cetera. Sluit defilterpomp alleen aan op een stopcontact met aardlekschakelaar. Bij twijfel of het stopcontact
geaard is, neem contact op met een erkend elektricien om dit te verifiëren.
▪Elektrische bedrading moet door een professional worden geïnstalleerd en moet de lokale coderingen en
verordeningen volgen.
▪Plaats het product en de stroomadapter nooit in de buurt van het zwembad. Het product moet minstens 3,5
meter van het zwembad verwijderd zijn om te voorkomen dat kinderen het systeem gebruiken om in het
zwembad te klimmen.
▪Graaf het netsnoer niet in de grond in. Leg het zo neer dat het niet kan worden beschadigd door
grasmaaiers, heggenscharen of andere machines.
▪Het netsnoer kan niet worden vervangen. Wanneer dit snoer beschadigd is dient het product te worden
vernietigd.
▪Om een mogelijke elektrische schok te voorkomen, mag u de stekker niet in het stopcontact steken of uit
het stopcontact halen wanneer u natte handen heeft of met uw voeten in het water staat.
▪Plaats de filterpomp nooit in het water en dompel deze ook niet onder.
▪Alvorens u de filterpomp of het zwembad gaat reinigen of verplaatsen dient u altijd de stekker van de
filterpomp uit het stopcontact te halen.
▪Plaats of gebruik de filterpomp niet in de nabijheid van giftige stoffen, ontvlambare of brandbare vloeistoffen
zoals benzine, of explosieve of ontvlambare dampen.
▪Zorg voor elk gebruik van de pomp dat alle klemmen zijn vastgedraaid en dat alle slangen correct zijn
aangesloten.
▪Pas op voor het risico op bekneld raken door de zuigkracht van de pomp dat, indien niet vermeden, kan
leiden tot ernstig letsel of de dood. Blokkeer de aanzuiging bij de pomp in het zwembad niet, aangezien dit
kan leiden tot ernstig letsel of de dood.
▪Ingesloten lucht in het filtersysteem kan ertoe leiden dat het tankdeksel eraf vliegt en dat kan leiden tot de
dood, ernstig letsel of schade aan de filterpomp. Zorg ervoor dat alle lucht uit het systeem is voordat u de
filterpomp aanzet.
▪Wijzig nooit de positie van de 7-wegklep terwijl de filterpomp aan staat. Schakel altijd eerst het systeem uit.
▪Gebruik nooit de hendel van de 7-wegklep als een handvat om de pomp te dragen of op te tillen.
▪De filterpomp mag niet worden gebruikt als er mensen in het water zijn.
▪De temperatuur van het water mag niet hoger zijn de 35°C, of onder het vriespunt komen.
▪Het product mag uitsluitend gebruikt worden volgens de instructies zoals beschreven in deze handleiding.
▪Als er zich abnormale omstandigheden voordoen (zoal geluid, geur of rook) schakel dan onmiddellijk de
stroom uit en neem contact op met de verkoper. Probeer niet zelf de filterpomp te demonteren of te
repareren, hierdoor vervalt de garantie.

| NL
4
Bovenstaande veiligheidsinstructies vormen geen exhaustieve lijst van alle mogelijke risico’s en gevaren
van het gebruik van dit product. Eigenaars en gebruikers van de filterpomp dienen dit apparaat met
voorzichtigheid en gezond verstand te gebruiken.
1. Algemene informatie
Deze handleiding biedt informatie met betrekking tot de installatie, het gebruik en het onderhoud van ons
filtersysteem. We raden u aan deze handleiding in zijn geheel te lezen en te bewaren voor toekomstig gebruik.
De pomp die bij het filtersysteem wordt geleverd, is een horizontale, zelfaanzuigende centrifugaalpomp. Voor
een correcte werking van de pomp mag de watertemperatuur niet hoger zijn dan 35 °C. De materialen die in
de pomp zijn gebruikt, hebben strenge hydraulische tests en elektrische inspecties ondergaan. De filtertank die
in het filtersysteem is opgenomen, bestaat uit hoogwaardig polypropyleen (PP). Het wordt als één geheel
vervaardigd, is corrosiebestendig en bestand tegen in de handel verkrijgbare zwembadchemicaliën.
(Voorwaarde: naleving van de standaard aanbevolen specificaties voor de pH- en chloorwaarde). Het is
uitgerust met een tankafvoersysteem. De filtertank wordt gebruiksklaar geleverd met een goedgekeurde
filterpomp met haar- en pluisjesmand en een plastic basis voor montage ter plaatse.
Lees deze handleiding zorgvuldig door voordat u met de installatie begint. Het filtersysteem en de pomp
moeten worden geïnstalleerd in overeenstemming met alle federale en lokale regelgeving die van kracht is
voor het installatiegebied. Wij wijzen alle verantwoordelijkheid af voor de gevolgen van het niet naleven van de
installatie-instructies. We raden u aan de instructies over de stroombron op te volgen om overbelasting van de
pompmotor en/of elektrische schokken te voorkomen.
Filtermateriaal is niet inbegrepen.
1.1. Veiligheidsinstructies
Uw filterpomp is geconstrueerd en getest en heeft de fabriek in technisch operationele staat verlaten. Om deze
toestand te behouden en een veilige werking te garanderen, dient de gebruiker de opmerkingen en
productinformatie in deze technische handleiding in acht te nemen. Als er enige indicatie is dat een veilig
gebruik niet meer mogelijk is, moet het apparaat worden losgekoppeld van het elektriciteitsnet en worden
beveiligd tegen onbedoeld gebruik.
Dit is het geval wanneer:
▪Het apparaat zichtbare schade heeft.
▪Het apparaat niet meer functioneel lijkt.
▪Na langdurige opslag in slechte omstandigheden.

| NL
5
1.2. Technische gegevens en specificaties
De aanbevolen filterlooptijd is 2x per dag, gedurende 4 tot 5 uur, met zwembadbodemreiniging indien nodig.
De belangrijkste onderdelen van het filtersysteem zijn:
▪Filterpomp
▪Filtertank
▪Tankdeksel
▪Deksel V-band met bout en moer
▪Bodemplaat
▪Slang met fittingen
Controleer of u al deze onderdelen heeft voordat u met de installatie van de filterpomp begint.
Specificaties
FuzzyClean 7000
FuzzyClean 9500
Waterstroomvolume (Q)
7000 l/uur
9500 l/uur
Max. werkdruk
1,5 bar / 22 psi
1,5 bar / 22 psi
Filtratiegebied
40 cm
40 cm
Nominale spanning
220-240 V
220-240V
Pompkracht
½ PK
¾ PK
Max. omgevingstemperatuur
35°C
35°C
Volume filterbollen
445 g
925 g
1.3. Uitpakken van de filterpomp
Haal het product en alle onderdelen voorzichtig uit de doos. Kruis alle onderdelen in de doos aan met de
referentietabel van de onderdelenlijst om er zeker van te zijn dat alle onderdelen aanwezig zijn voordat u met
de montage begint.
OPMERKING: Sommige onderdelen bevinden zich mogelijk in de filtertank. Om toegang te krijgen tot deze
onderdelen, moet u het tankdeksel verwijderen. Zie pagina 11 voor het volledige onderdelendiagram.
1.4. Elektrische aansluiting
▪De filterpomp die u heeft gekocht, is uitgerust met een standaard elektrisch snoer en stekker die alleen
mogen worden aangesloten op een stopcontact dat wordt beschermd door een aardlekschakelaar van
30 mA, welke is geïnstalleerd door een professionele elektricien, rekening houdend met lokale
regelgeving en voorschriften.
▪Om elektrische schokken te voorkomen, mogen geen verlengsnoeren voor het netsnoer worden
gebruikt.

| NL
6
1.5. Locatie van de filterpomp
▪Voor de werking van dit filtersysteem met bovengrondse zwembaden heeft u een skimmer nodig die in
uw zwembad is geïnstalleerd. Ofwel een geïntegreerde skimmer (ingebouwd in de zwembadwand) of
een hangende skimmer (bevestiging aan de zwembadwand).
▪De plaats waar u de filterpomp installeert moet voldoende veiligheidsmarge bieden ten opzichte van de
zwembadwand.
▪We raden aan om het filtersysteem op een betonnen plaat of iets dergelijks te plaatsen. Niet
rechtstreeks in aarde of gras, dit kan leiden tot oververhitting en overstroming van de pomp.
▪Zorg ervoor dat de installatie waterpas is.
▪Extra montageaccessoires zoals slangen en slangklemmen zijn verkrijgbaar bij uw zwembaddealer.
2. Installatie instructies
2.1. Montage van waterpomp en bodemplaat
Zet de pomp vast op de bodemplaat met het meegeleverde bevestigingsmateriaal voor de pomp (figuur 5).
2.2. Montage pompfittingen
1. Zie figuur 6.
2. Schroef de Ø 32/38 mm slangconnector in de middelste poort van de waterpomp. Zorg ervoor dat de O-
ring A tussen de poort en de connector is geplaatst.
3. Verwijder de ring met schroefdraad (kraag) van de buitenste opening van de pomp.
4. Plaats O-ring B in de groef rond de haar- en pluiszeefmand.
5. Plaats het transparante deksel van de haar- en pluiszeef op zijn plaats en schroef de ring met
schroefdraad (kraag) weer stevig vast over het deksel.
6. Plaats O-ring C (Ø 32 mm) in de naar buiten gerichte opening van het transparante deksel van de haar-
en pluiszeef.
7. Schroef de Ø 32/38 mm slangconnector in de opening van het doorzichtige deksel van de haar- en
pluiszeef.
2.3. Montage filtertank
1. Bevestig de filtertank op de bodemplaat zoals afgebeeld (figuur 7). De voetjes aan de onderkant van de
filtertank passen in de gaten op de bodemplaat.
2. Schroef de filtermand op de centrale buis (figuur 1). Bevestig de centrale buis met filtermand op de bodem
van de filtertank (figuur 2). Vul de tank met de meegeleverde filterbollen (figuur 3).
3. Bevestiging van de filtertank (figuur 4). Zorg ervoor dat de hoofdtankafdichting rond de bovenkant van de
filtertank in goede staat verkeerd, schoon is en stevig in de groef zit. Zorg ervoor dat de groef geen zand
bevat. Plaats het tankdeksel voorzichtig op de filtertank. Het tankdeksel moet zo worden geplaatst dat de
inkeping op het deksel is uitgelijnd met het bijpassende lipje op de filtertank. Zet het tankdeksel en de
filtertank vast met de sluitring van het tankdeksel en zet vast met de moer en bout.

| NL
7
2.4. Slangaansluiting
Zie figuur 8-11. Dit filtersysteem is ontworpen om aan de sluiten op zwembaden met standaard Ø 32 of 38 mm
aansluitingen. Als uw zwembad een andere maat en/of type slangaansluiting heeft, heeft u een adapter nodig
om de aansluiting passend te maken. Deze is verkrijgbaar bij uw zwembaddealer.
Voordat u begint met het aansluiten van slangen op de filterpomp moet u ervoor zorgen dat er geen water kan
stromen door de aanzuig- of retourslangen die op het zwembad zijn aangesloten. Sommige zwembaden
hebben afsluiters voor de wateruitlaat en -inlaat, andere niet. Als u geen afsluiter heeft, blokker dan de poorten
met een verwijderbare plug om te voorkomen dat er water in en door de slangen stroomt.
1. Bevestig de slang die uit de skimmer van het zwembad komt (wateruitlaat van het zwembad) op de Ø
32/38 mm slangaansluiting die uit het deksel van de haar- en pluiszeef komt.
2. Zet de slang vast met een slangklem.
3. Smeer de retourpoort op het tankdeksel lichtjes in met synthetisch PTFE-smeermiddel, verkrijgbaar bij een
zwembadwinkel of bouwmarkt.
4. Bevestig de zwembadretourslang (vanaf de waterinlaat van het zwembad) aan op de retourpoort op het
tankdeksel.
5. Zet de slang vast met een slangklem.
OPMERKING: zorg ervoor dat u de retourslang niet vastzet aan de afvoer-/backwashpoort van de filterpomp.
3. Gebruiksinstructies
Zodra het filtersysteem correct is gemonteerd, de tank gevuld is met filterbollen en de slangen zijn aangesloten
zoals hierboven beschreven, kunt u beginnen met filteren.
3.1. Opstarten van de filterpomp
Zorg ervoor dat de pomp niet op een stopcontact is aangesloten. Schakel de filterpomp pas in wanneer
hieronder wordt geadviseerd om dit te doen.
Voordat u de filterpomp gaat gebruiken is het belangrijk om ervoor te zorgen dat het filtersysteem buiten het
zwembad is geplaatst en lager is dan het waterniveau van het zwembad. De slangaansluitingen moeten ook
correct aangesloten en vastgezet zijn.
1. Vul uw zwembad met water als u dit nog niet heeft gedaan. Zorg ervoor dat het waterpeil minstens 2,5 tot
5 cm boven de bovenkant van de slanginlaat (skimmer) en retourpoorten in het zwembad staat. Het
filtersysteem wordt nu ontlucht. Open eventueel de ontluchtingsschroef (manometer) aan de bovenzijde
van het filterdeksel tot het water eruit stroomt.
2. Ontgrendel de afsluiter bij de zwembaduitlaat (skimmer) in het zwembad. Als u de zwembaduitlaat
(skimmer) hebt afgesloten met een plug, verwijdert u de plug om het water in de inlaatslang te laten
stromen. Met het filterpompsysteem geïnstalleerd op een niveau lager dan het waterniveau van uw
zwembad, stroomt het water automatisch in het pompfiltersysteem. Laat de filtertank met water vullen.
3. Controleer het filtersysteem en de aansluitslangen op lekkages en los deze indien nodig op.
Lekkagepunten kunnen worden verholpen door teflon-tape, verkrijgbaar bij een zwembadwinkel of

| NL
8
bouwmarkt, om de aansluitingen te wikkelen voordat de verbindingsslang wordt bevestigd. Uw
filtersysteem is nu klaar voor gebruik.
3.2. Reinigen van de filterbollen
▪Bij het eerste gebruik niet terugspoelen (backwash).
▪Het is niet nodig om een backwash uit te voeren tenzij de manometer van de tank 25 psi bereikt.
▪We raden aan om de filterbollen aan het einde van het seizoen uit de filtertank te halen, in een waszak
te doen, in de wasmachine te wassen (zonder wasmiddel), te laten drogen en terug te plaatsen in de
tank voor het volgende seizoen.
3.3. Zwembadwaterzuiveringsmiddelen
Zwembadwaterzuiveraars of andere chemische additieven die zich hechten aan deeltjes met het oog op een
betere filtratie zoals vlokkingsmiddel, mogen niet worden gebruikt als u filterbollen als filtermedium in deze
filterpomp gebruikt. Filterbollen filteren tot een zeer kleine deeltjesgrootte, 3 micron. Daarom zal de toevoeging
van zwembadwaterzuiveraars de effectiviteit van de filterbollen niet verbeteren. Het voorzuiveringsmiddel of
een soortgelijk chemisch additief veroorzaakt waarschijnlijk schade aan de filterbollen, wat resulteert in een
aanzienlijke vermindering van het filtervermogen. Bovendien kan mogelijke schade aan de filtertank of zijn
interne componenten optreden.
Comfortpool is niet verantwoordelijk voor schade veroorzaakt aan de filterbollen, de filtertank of een van de
interne componenten van de filtertank waar een voorzuiveringsmiddel of andere chemische toevoegingen die
zich hechten aan fijnstof in het zwembad zijn gebruikt.
3.4. Filtertijd
Het water in het zwembad moet 2 tot 3 keer per dag minimaal 4 à 5 uur per dag rondgepompt en gefilterd
worden, afhankelijk van het gebruik van het zwembad en de belasting en de grootte van het filtersysteem. De
benodigde tijd is gebaseerd op de prestatie van het filtersysteem en de grootte van het zwembad. We raden
echter een minimale looptijd van 12 uur per dag aan.
4. Zwembadbodem reinigen
Het stofzuigen van de zwembadbodem gebeurt in de normale filtermodus. De zwembadstofzuiger wordt door
middel van een zwembadstofzuigerslang en zwembadstofzuigerplaat direct op de skimmer aangesloten.
Schakel de pomp pas in als de zwembadstofzuiger is aangesloten en klaar is voor gebruik.
BELANGRIJK: De zwembadvacuümslang moet volledig met water gevuld zijn zodat de pomp geen aanzuiging
verliest en de filtertank met lucht vult.

| NL
9
5. Winterklaar maken en opbergen
▪Koppel de pomp los van de voedingsbron.
▪Sluit de afsluiters of blokkeer de waterstroom bij de inlaat- en retourpoorten van het zwembad.
▪Koppel het filtersysteem los van het zwembad, laat de tank en de slangen leeglopen.
▪Droog alle onderdelen van de filterpomp en slangen, en zorg dat ook de binnenkant compleet droog is.
Het opbergen van de filterpomp of onderdelen hiervan wanneer deze nog vochtig zijn kan schimmel
en schade aan het apparaat of de onderdelen ervan veroorzaken. Wanneer dit het geval is vervalt de
garantie.
▪De pomp en filtertank kunnen geen vorst verdragen —de vorst beschadigt het materiaal en de
garantie is niet langer geldig.
▪Bewaar het filtersysteem op een plaats die beschermd is tegen vorst en zeer lage temperaturen. In
een garage of geïsoleerde berging wordt aangeraden.
6. Belangrijke do’s & don’ts
6.1. Do’s
▪Let op en noteer de filterdruk wanneer de filterbollen schoon zijn. Verwijder en reinig de filterbollen
wanneer u de druk op de manometer ziet stijgen tot meer dan 25 psi.
▪Bescherm de onderste filtermand tijdens het schoonmaken van de filterbollen. Vul de tank met enkele
centimeters water (ongeveer 1/8 van de tankhoogte) terwijl de filterbollen worden schoongemaakt.
▪Installeer en reinig de katoenen staarten met de volgende instructies:
- Open het deksel van de filtertank.
- Verwijder eventueel resterend vuil uit het filter en maak het grondig schoon.
- Vul de filtertank voor ongeveer 2/3 met filterbollen (700 g filterbollen staat gelijk aan 25 kg
filterzand).
- Sluit het filter en begin direct met filteren.
- Bij de eerste installatie niet terugspoelen.
- Een backwash is niet nodig, tenzij de manometer van de tank 25 psi bereikt.
- We raden aan om aan het einde van het seizoen katoenen staarten uit de filtertank te halen, in
een waszak te doen, in de wasmachine te wassen (zonder wasmiddel), te laten drogen en
terug te plaatsen in de tank voor het volgende seizoen.
6.2. Don’ts
▪Maak de filterbollen niet té schoon. Filterbollen werken halverwege de cyclus efficiënter. Een bepaald
niveau van vuil in de filterbollen helpt zelf bij filtratie en maakt het filter effectiever. Te veel of te vaak
schoonmaken zal de efficiëntie verminderen.
▪Laat het filtersysteem niet drooglopen (zonder water)! De filterpomp mag nooit draaien zonder water.
Schade aan de pomp veroorzaakt door drooglopen valt NIET onder de garantie.

| NL
10
7. Installatie illustraties

| NL
11
1
10
9
7
8
6
5
4
2
3
8. Onderdelen
Nr.
Onderdeel
Qty
Onderdeelnr.
Voor model
1
Drukmeter
1
17001
7000 & 9500
2
Filterdeksel
1
17003
7000 & 9500
3
O-RING
1
17004
7000 & 9500
4
Linker klemring
1
L00169
7000 & 9500
Rechter klemring
1
L00170
7000 & 9500
Klempin
1
L00171
7000 & 9500
M8*80 bout
1
L00172
7000 & 9500
Kunststof moer
1
L00173
7000 & 9500
5
Filtertank
1
1701025
7000
Filtertank
1
1701050
9000
6
Filtermand
1
17011
7000 & 9500
7
Harde buis
1
17012
7000 & 9500
8
Afvoerklep
1
17013
7000 & 9500
O-ring
1
17014
7000 & 9500
9
Pompbout vleugelmoer
POMP MONTAGE
2
P00175
7000 & 9500
Pompbout vlak water
POMP MONTAGE
2
P00176
7000 & 9500
Pompbout borgring
POMP MONTAGE
2
P00177
7000 & 9500
Pompbout moer
POMP MONTAGE
2
P00178
7000 & 9500
10
Bodemplaat
1
17019
7000 & 9500
11
Waterpomp ½ PK
1
SPS1A450
7000
Waterpomp ¾ PK
1
SPS1A550
9000
12
Slangklem
1
17021
7000
Slangklem
2
17021
9000
13
Flexibele slang
1
1702225
7000
Flexibele slang
1
1702250
9000
14
Slang verloopstuk
1
17023
7000
Slang verloopstuk
2
17023
9000
Nr.
Onderdeel
Qty
Onderdeelnr.
1
Waterpomp/motor
1
SPS1A250
SPS1A450
SPS1A550
2
Transparante haar- en pluiszeef
1
P00131
3
Ø 32/38 mm slangconnector
2
P00132
4
O-ring A
1
P00182
5
O-ring B
1
P00183
6
O-ring C
1
P00184
7
Zeef kraag
1
P00133
8
Zeefmand
1
P00134
9
Deksel afvoerklep
1
P00135
10
Afvoerklep O-ring
1
P00136
11
Motorpompafdichting
1
P00137
11
Motorpompafdichting
1
P00138
11
Motorpompafdichting
1
P00138
12
Waaierconstructie
1
P00139
12
Waaierconstructie
1
P00140
12
Waaierconstructie
1
P00140
13
Asafdichting en veerconstructie
1
P00141
13
Asafdichting en veerconstructie
1
P00142
13
Asafdichting en veerconstructie
1
P00142

| NL
12
9. Garantie
Dit product is gefabriceerd met gebruikmaking van de beste kwaliteitsmaterialen en vakmanschap. Wij garanderen dat alle
onderdelen van de filterpomp vrij zijn van fabricagefouten in materiaal en afwerking voor een periode van 1 jaar vanaf de
aankoopdatum, voor de slangen en aansluitingen geldt dit voor een periode van 180 dagen. Deze beperkte garantie wordt
verstrekt als aanvulling op en zonder afbreuk te doen aan uw consumentenrechten. Als deze garantie niet overeenkomt
met uw wettelijke rechten, zullen de wettelijke rechten gelden.
Deze garantie beperkt zich tot de eerste koper en is niet overdraagbaar. Bewaar uw origineel aankoopbewijs, daar het
aankoopbewijs dient te worden overlegd ingeval van een klacht. Zonder aankoopbewijs is deze beperkte garantie niet
geldig.
Als er zich een productiefout binnen bovenstaande periode voordoet kunt u contact opnemen met de verkoper. Als er sprake
is van garantie zal het product kosteloos gerepareerd worden of vervangen worden door hetzelfde of een, door Comfortpool
bepaald, gelijkwaardig product. De aansprakelijkheid van Comfortpool zal nooit de reparatie of vervanging van defecte
onderdelen te boven gaan, en zal geen kosten omvatten voor arbeid om een defect onderdeel te verwijderen en opnieuw
te installeren, noch het transport van en naar de fabriek of leverancier, noch enig ander materiaal dat nodig is voor het
uitvoeren van een eventuele reparatie. Kosten van water, zwembadchemicaliën of waterschade worden niet door deze
garantie gedekt. Ook is de garantie niet van toepassing bij schade aan eigendommen of personen.
Deze beperkte garantie is niet van toepassing in onderstaande gevallen:
▪Indien de filterpomp is onderworpen aan nalatigheid, abnormaal gebruik of toepassing, een ongeluk, onjuist gebruik,
verkeerde stroomtoevoer, ander gebruik dan in de handleiding beschreven staat en onjuist onderhoud of opslag;
▪Indien de filterpomp onderhevig is aan schade veroorzaakt door omstandigheden buiten de macht van Comfortpool,
inclusief maar niet beperkt tot, normale slijtage en beschadiging veroorzaakt door blootstelling aan vuur,
overstroming, vrieskou, regen en andere natuurkrachten;
▪Indien er aanpassingen, reparaties of demontage van de filterpomp zijn uitgevoerd door iemand anders dan de
leverancier;
▪Op artikelen die niet van het merk Comfortpool zijn, of op artikelen van het merk Comfortpool die in combinatie met
artikelen of onderdelen van een ander merk worden gebruikt.
Dit is de enige garantie die uitgegeven is door Comfortpool. Comfortpool verleent geen andere garantie of voorwaarden,
hetzij schriftelijk of mondeling, en wijst uitdrukkelijk alle garanties en voorwaarden af die niet in deze garantieverklaring zijn
opgenomen. Andere garanties dan deze en de wettelijk bepaalde rechten in uw land zijn niet van toepassing. Comfortpool
is onder geen enkele voorwaarde aansprakelijk richting de koper of enige andere partij voor indirecte of vervolgschade
veroorzaakt door dit product, van welke aard dan ook.
www.comfortpool.com
Milieuprogramma’s, Europese AEEA-richtlijn
Gelieve de regelgeving van de Europese Unie na te leven en zo het milieu te beschermen. Voer afgedankte
elektrische apparatuur af naar een speciaal gemeentelijk inzamelpunt dat elektrische en elektronische apparatuur
correct recyclet. Werp het niet weg bij ongesorteerd afval. Haal eventuele verwijderbare batterijen uit de
afgedankte apparatuur.
© 2021 Comfortpool. Alle rechten voorbehouden. Niets van dit document mag worden vermenigvuldigd of
doorgegeven in welke vorm of op welke wijze dan ook, zij het elektronisch, mechanisch, op fotokopie,
opgenomen of op enige andere wijze, zonder de voorafgaande schriftelijke toestemming van Comfortpool.

| EN
13
Table of contents
Safety and precautions__________________________________________________________________14
1. General information _________________________________________________________________15
1.1. Safety notes ____________________________________________________________________15
1.2. Technical data and specifications ____________________________________________________15
1.3. Unpacking your filter system________________________________________________________16
1.4. Power source instructions__________________________________________________________16
1.5. Positioning your filter system________________________________________________________16
2. Installation instructions______________________________________________________________17
2.1. Assembly of water pump and base plate ______________________________________________17
2.2. Pump fittings assembly ____________________________________________________________17
2.3. Filter tank assembly ______________________________________________________________17
2.4. Hose connection _________________________________________________________________17
3. Operation instructions ________________________________________________________________18
3.1. Filter system start up______________________________________________________________18
3.2. Cleaning the filter balls ____________________________________________________________18
3.3. Important note regarding clarifiers____________________________________________________18
3.4. Filtering time ____________________________________________________________________19
4. Vacuuming the pool_________________________________________________________________19
5. Winterizing and storage______________________________________________________________19
6. Important do’s & don’ts ______________________________________________________________19
6.1. Do’s ___________________________________________________________________________19
6.2. Don’ts _________________________________________________________________________20
7. Installation illustration _______________________________________________________________21
8. Parts______________________________________________________________________________22
9. Warranty __________________________________________________________________________23

| EN
14
READ AND FOLLOW ALL THESE INSTRUCTIONS CAREFULLY. FAILURE TO FOLLOW THESE
WARNINGS COULD RESULT IN PROPERTY DAMAGE, ELECTRIC SHOCK, PERSONAL INJURY OR EVEN
DEATH.
Safety and precautions
READ AND FOLLOW ALL THESE INSTRUCTIONS CAREFULLY. FAILURE TO FOLLOW THESE
WARNINGS AND INSTRUCTIONS COULD RESULT IN PROPERTY DAMAGE, ELECTRIC SHOCK,
PERSONAL INJURY OR EVEN DEATH.
WARNINGS
▪This appliance is not a toy, keep the appliance and its cord out of the reach of children.
▪This appliance can be used by children aged 8 years and over and persons with reduced physical, sensory,
or mental capabilities, or lack of experience and knowledge, provided it is done under supervision or
provided they have been instructed on the safe use and risks of the product.
▪Assembling, installing, disassembling, cleaning, and doing maintenance on this product should only be done
by an adult.
▪Beware of electric shock. Do not use extension cords, timers, plug adaptors or converter plugs, etc. Only
connect the filter pump to a socket with a residual current-operated circuit breaker. If in doubt as to whether
the outlet is grounded, contact a licensed electrician to verify.
▪Electrical wiring must be installed by a trained professional and adhere to local code and regulations.
▪Never place the filter pump and adapter near the pool. The product must be more than 3.5 meters from the
pool to prevent children from using the system to access the pool.
▪Do not bury the power cord in the ground. Place it so that it cannot be damaged by lawn mowers, hedge
trimmers or other machines.
▪The power cord cannot be replaced. If this cord is damaged, the product must be destroyed.
▪To avoid possible electric shock, do not plug in or unplug the power cord when your hands are wet or when
you are standing in water.
▪Never place or submerge the filter pump in water.
▪Before cleaning or moving the filter pump or pool, always unplug the filter pump from the electrical outlet.
▪Do not place or use the filter pump in the vicinity of toxic substances, flammable or combustible liquids such
as petrol, or explosive or flammable gasses.
▪Before each use of the pump, make sure that all clamps are tightened and that all hoses are properly
connected.
▪Risk of suction entrapment hazard, which, if not avoided can result in serious injury or death. Do not block
pump suction at the pump or in the pool as this can cause severe injury or death.
▪Trapped air in the pump-filter system may cause the tank cover to be blown off which can result in death,
serious injury, or damage to the pump-filter system. Ensure all air is out of the system before operating.
▪Never use the valve lever as a handle to carry or lift the filter.
▪Never change the position of the Multi-Port Valve while the system is operating. Always unplug the system
first.
▪The filter pump must not be used when people are in the water.
▪Do not use this filter pump to vacuum the pool.
▪The maximum water temperature at which the pump may be used is 35 °C, the minimum 0 °C.
▪The product may only be used in accordance with the instructions as described in this manual.
▪If any abnormal conditions (such as noise, odor, or smoke) occur, turn off the power immediately and contact
the seller. Do not attempt to disassemble or repair the filter pump yourself, as this will void the warranty.
The above-mentioned safety instructions and cautions do not constitute an exhaustive list of all possible
risks and dangers associated with the use of this product. Owners and users of the filter pump should
exercise caution and common sense when using this product.

| EN
15
1. General information
This manual provides information relating to the installation, utilization, and maintenance of our filtration
system. We recommend that you read this manual in its entirety and keep it for future reference.
The pump included with the filtration system is a horizontal, self-priming centrifugal pump. For the pump to
function correctly, the water temperature must not exceed 35℃/95℉. The materials used in the pump have
undergone stringent hydraulic testing and electrical inspections. The filter tank included in the filtration system
consists of high-grade polypropylene (PP). It is manufactured as a single unit and is corrosion resistant and
resistant to commercially available swimming pool chemicals. (Prerequisite: Compliance with the standard
recommended specifications for the pH- and chlorine value). It is equipped with a tank drainage system. The
filter tank comes ready to attach with an approved filter pump with hair and lint basket, and a plastic base for
ready on- site mounting.
Read this manual carefully before installation. The filtration system and pump must be installed in accordance
with all federal and local codes and standards in effect for the area of installation. We decline all responsibility
for the consequences of failure to comply with the installation instructions. We recommend that you comply
with the power source instructions to avoid overloading the pump motor and/or electric shock. Your pool filter
system has been engineered and manufactured to our highest standard for dependability, ease of operation
and safety. With proper care, it will give you years of durable, trouble-free performance.
Filter material is not included.
1.1. Safety notes
Your filter pump was constructed and tested and left the manufacturing plant in technically operational
condition. To maintain this condition and ensure safe operation, the user should observe the notes and product
information contained in this technical manual. If there is any indication that safe operation is no longer
possible, the device is to be disconnected from the power supply and secured against accidental use.
This is the case when:
▪The device has visible damage.
▪The device no longer appears functional.
▪After long periods of storage in poor conditions.
1.2. Technical data and specifications
The recommended filter run time is twice a day for 4 to 5 hours with floor vacuum cleaning as needed.
The major components of your system are:
▪Filter pump
▪Filter tank
▪Tank lid
▪Lid V-band with bolt and nut
▪Base plate
▪Hose with fittings

| EN
16
Confirm you have all these parts before starting installation.
Specifications
FuzzyClean 7000
FuzzyClean 9500
Flow volume (Q)
7000 l/h
9500 l/h
Max. operating pressure
1,5 bar / 22 psi
1,5 bar / 22 psi
Filtration area
40 cm / 16"
40 cm / 16"
Rated voltage
220-240 V
220-240V
Power
½ HP
¾ HP
Max. ambient temperature
30°C
30°C
Volume filter balls
445 g / 1 lbs.
925 g / 2.5 lbs.
1.3. Unpacking your filter system
Carefully remove the product and all component parts from the box. Cross reference all parts in the box with
the parts list reference chart to make certain all parts are present before beginning assembly.
NOTE: Some parts may be located within the filter tank. To access these parts, you must remove the tank
cover. Refer to page 22 for a complete parts diagram.
1.4. Power source instructions
▪The filter pump system you have purchased is equipped with a standard electrical cord and plug which
should only be connected to a power outlet protected by a 30 mA Ground-Fault-Circuit-Interrupter
(GFCI) that has been installed by a professional electrician and adheres to local codes and regulations.
▪To avoid electric shock, power cord extensions should not be used.
1.5. Positioning your filter system
▪For the operation of this filter system with Above Ground pools, you need a skimmer installed in your
pool. Either an integrated skimmer (built into the pool wall) or a suspended skimmer (attachment to the
pool wall).
▪The installation area must allow an adequate safety margin to the pool wall.
▪We recommend putting the filter system on a concrete slab or similar. Be sure the installation is level.
▪Additional installation accessories such as hoses, hoses clamps are available from your pool dealer.

| EN
17
2. Installation instructions
2.1. Assembly of water pump and base plate
Secure the water pump to the base plate with the provided pump mounting hardware. (Figure 5)
2.2. Pump fittings assembly
1. Refer to figure 6.
2. Screw the 1¼"-1½ " hose connector into the center port of the water pump. Ensure that the O-ring A is
installed between the port and the connector.
3. Remove the threaded ring (collar) on the outer opening of the pump.
4. Place O-ring B in the groove around the hair and lint strainer basket.
5. Place the transparent hair & lint strainer cover in place and then screw the threaded ring (collar) back on
securely over the cover.
6. Insert O-ring C (1¼") inside the outward facing opening of the transparent hair & lint strainer cover.
7. Screw the 1¼"-1½ " hose connector into the opening of the transparent hair & lint strainer cover.
2.3. Filter tank assembly
1. Attach the filter tank to the base plate as shown (figure 7). The feet on the bottom of the filter tank fit within
the holes provided on the base plate.
2. Screw the filter basket onto the central pipe (figure 1). Fix the central pipe with the filter basket onto the
bottom of the filter tank (figure 2). Fill the tank with filter balls which provided in the package (figure 3).
3. Securing filter assembly (figure 4). Ensure the main tank seal around the top of the filter tank is in good
condition and securely seated in the groove. Be sure groove is free of sand. Carefully place the tank cover
onto the filter tank. The tank cover should be oriented so that the notch on the cover is aligned with the
matching tab on the filter tank - this ensures proper alignment. Secure tank cover and filter tank with the
tank cover lock ring assembly and tighten with the knob and bolt.
2.4. Hose connection
This pool filter system is designed to connect to pools with standard 1 ¼" or 1 ½" diameter hose connectors.
If your pool has a hose connector size and/or type different than described here, you may need to purchase an
adapter at your local pool supply store or hardware retailer.
Before you begin to connect hoses to the filter and pump, make certain that no water can flow through the
intake or return hoses connected to the pool. Some pools have shut off valves in their intake and return ports,
others do not. If you do not have a shut off valve, block the ports with a removable plug to prevent water from
passing into and through the hoses.
1. Attach the hose coming from your pool’s skimmer (outlet of pool) to the 1 1 ¼" - 1 ½" hose connector
extending from the hair & lint strainer cover.
2. Secure with a hose clamp.
3. Lightly lubricate the pool return port on the tank cover with synthetic PTFE lubricant, available at any pool
supply store or hardware store.
4. Attach the pool return hose (inlet of pool) to the pool return port on the tank cover.

| EN
18
5. Secure with a hose clamp.
NOTE: Be careful not to secure the return hose to the waste/backwash port.
3. Operation instructions
Once the filter system has been properly assembled, the tank filled with filter balls and the hoses connected as
described above, you may begin with filtration.
3.1. Filter system start up
Do not plug the system in until advised to do so below. Make certain the pump is not plugged into a power
supply.
Before operating the filter system, it is important to ensure that the filter system is positioned outside the pool
and is lower than the pool’s water level. The hose connections must also be correctly connected and fastened.
1. If you have not done so already, fill your pool with water. Ensure that the water level is at least 1"-2" (2.5 –
5 cm) above the top of the hose intake (skimmer) and return ports in the pool. The filter system is now
vented. If applicable, open the vent screw (pressure gauge) on the upper side of the filter cover until the
water flows out.
2. Release the shut off valve at the intake port (skimmer) in the pool. If you plugged the intake port
(skimmer), remove the plug to allow the water to flow into the intake hose. With the filter-pump system
installed in a location level lower than your pool’s water level - water will automatically flow into the filter
pump. Allow the filter tank to fill with water.
3. Check the filter system and the connection hoses for leaks and resolve, if necessary. Leakage points may
possibly arise due to manufacturing tolerances, which can be resolved by wrapping Teflon tape, available
at any plumbing or hardware store, around the connections before the connection hose is attached. Your
filter system is now ready for use.
3.2. Cleaning the filter balls
▪Do not back wash on initial operation.
▪No need to back wash unless tank’s pressure gauge reaches 25 psi.
▪We recommend removing the filter balls from filter tank at the end of the season, place them in a mesh
bag, wash them in the washing machine (without detergent), let dry and return to tank for next season.
3.3. Important note regarding clarifiers
Pool water clarifiers or other chemical additives that bond to particulate matter for the purpose of improved
filtration must not be used if filter balls are the filtration media for your pool. Filter balls filter down to a small
particle size, 3 microns. Therefore, the addition of a clarifier will not improve the effectiveness of filter balls. The
clarifier or a similar chemical additive is likely to cause damage to the filter balls resulting in significant

| EN
19
reduction in the filtration capability. In addition, possible damage to the filtration tank or its internal components
may occur.
Comfortpool will not be responsible for damage caused to the filter balls, the filtration tank or any of the internal
components of the filtration tank where a clarifier or other chemical additives that bond to particulate matter
have been used in the pool.
3.4. Filtering time
The water in the pool should be circulated and filtered at least 4 to 5 hours 2 to 3 times in a 24-hour period,
depending on the load and the size of the filter system. The time required is based on the performance of the
filter system and the size of the swimming pool. However, we recommend a minimum running time of 12 hours
per day.
4. Vacuuming the pool
Pool vacuuming is done in normal filter mode. The pool vacuum is connected by use of a pool vacuum hose and
vacuum plate directly into the skimmer. Do not turn on the pump until the pool vacuum is connected and ready
for operation.
IMPORTANT: The pool vacuum hose must be fully filled with water so that the pump does not lose prime and fill
the tank with air.
5. Winterizing and storage
▪Unplug the pump from the power source.
▪Close the shut off valves or block the flow of water at the pool inlet and return ports.
▪Disconnect the filtration system from the pool, drain the tank and hoses.
▪Dry all parts of the filter pump and hoses, and make sure the interior is completely dry as well. Storing
the filter pump or parts of it while still damp can cause mold and damage the appliance or its
components. If this is the case, the warranty will void.
▪The pump and filter tank cannot endure frost —frost will damage the materiel and the warranty is no
longer valid.
▪Store the filter system in a location protected from frost and severely cold temperatures. In a garage or
insulated storage shed is recommended.
6. Important do’s & don’ts
6.1. Do’s
▪Be aware and make note of the filter pressure when the filter balls are clean. Remove and clean the
filter balls when you see the pressure increase to over 25 psi on the pressure gauge.

| EN
20
▪Protect bottom filter basket while cleaning the filter balls. Fill the tank with a few inches (about 1/8 of
tank height) of water while the filter balls are being cleaned.
▪Install and clean the cotton tails with the following instructions:
- Open the cover of the filter tank.
- Empty any residual matter from the filter and clean it thoroughly.
- Fill the filter tank about 2/3 with filter balls, 1.5 lbs. (700g) filter balls 55 lbs. (25kg) sand.
- Close the filter and start filtering immediately.
- Do not back wash on initial installation.
- No need to back wash unless tank’s pressure gauge reaches 25 PSI.
- We recommend removing filter balls from filter tank at end of the season, place in a mesh bag,
wash in a washing machine (no detergent), let dry and return to tank for next season.
6.2. Don’ts
▪Do not over clean the cotton tails. This filter media operates more efficiently during mid-cycle. Some
level of debris in the cotton tails helps filtration and makes the filter more effective. Too much cleaning
will reduce efficiency.
▪Do not let the filtration system run dry (without water)! Damage to the pump caused by dry running is
NOT covered by the warranty.
This manual suits for next models
1
Table of contents
Languages:
Popular Swimming Pool Filter manuals by other brands

GRE
GRE AR-125 Installation and maintenance manual

Procopi
Procopi Aquareva RTM SIDE S-610-A Installation and operating instructions

AQUAMAXX
AQUAMAXX Bullet-1 installation guide

New Water
New Water 400 user manual

CMP
CMP 25100 Series INSTALLATION INSTRUCTIONS & PRODUCT MANUAL

Splash
Splash 91001 owner's manual

emaux
emaux MAX SERIES MFS17 user guide

Skimz
Skimz Oval D Series Quick installation guide

ChlorKing
ChlorKing NEXGEN60 Installation, operation and maintenance manual

Steinbach
Steinbach Speedclean Comfort 75 owner's manual

BSV
BSV PRO200 IP65 user manual

Innovative Water Care
Innovative Water Care Pulsar Precision 30 System Operation and installation manual