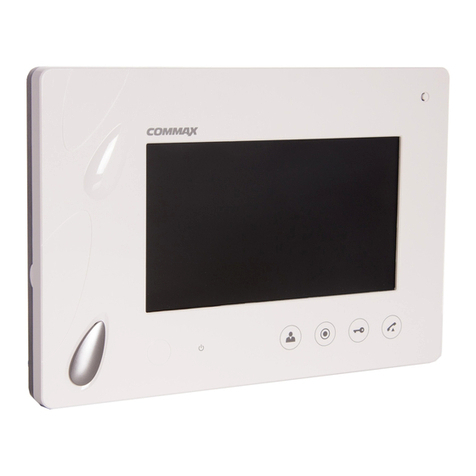
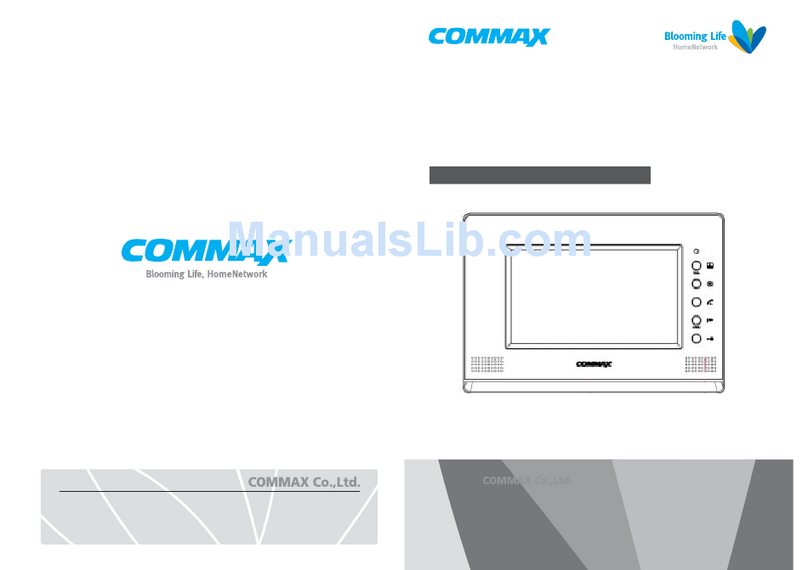
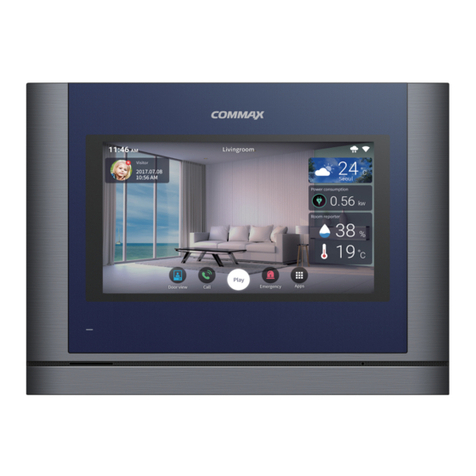
Commax CDS-70M User manual

•Thank you for purchasing COMMAX products.
•Please carefully read this User’s Guide (in particular, precautions for safety) before using a product and follow
instructions to use a product exactly.
•The company is not responsible for any safety accidents caused by abnormal operation of the product.
513-11, Sangdaewon-dong, Jungwon-gu, Seongnam-si, Gyeonggi-do, Korea
Int’l Business Dept. Tel. : +82-31-7393-540~550 Fax. : +82-31-745-2133
Web site : www.commax.com
•Thank you for purchasing COMMAX products.
•Please carefully read this User’s Guide (in particular, precautions for safety) before using a product and follow
instructions to use a product exactly.
•The company is not responsible for any safety accidents caused by abnormal operation of the product.
CDS-70M
User Manual

●Thank you very much for purchasing of COMMAX products.
●Please red carefully this user manual and follow its rules.
Contents
1. Greetings ⋯⋯⋯⋯⋯⋯⋯⋯⋯⋯⋯⋯⋯⋯⋯⋯⋯⋯⋯⋯⋯⋯⋯⋯⋯⋯⋯⋯⋯⋯⋯⋯⋯⋯⋯⋯⋯⋯⋯⋯
2. Warning and caution ⋯⋯⋯⋯⋯⋯⋯⋯⋯⋯⋯⋯⋯⋯⋯⋯⋯⋯⋯⋯⋯⋯⋯⋯⋯⋯⋯⋯⋯⋯⋯⋯⋯⋯⋯
3. Part names ⋯⋯⋯⋯⋯⋯⋯⋯⋯⋯⋯⋯⋯⋯⋯⋯⋯⋯⋯⋯⋯⋯⋯⋯⋯⋯⋯⋯⋯⋯⋯⋯⋯⋯⋯⋯⋯⋯⋯
4. Composition of the picture ⋯⋯⋯⋯⋯⋯⋯⋯⋯⋯⋯⋯⋯⋯⋯⋯⋯⋯⋯⋯⋯⋯⋯⋯⋯⋯⋯⋯⋯⋯⋯⋯⋯
5. Using telephone function ⋯⋯⋯⋯⋯⋯⋯⋯⋯⋯⋯⋯⋯⋯⋯⋯⋯⋯⋯⋯⋯⋯⋯⋯⋯⋯⋯⋯⋯⋯⋯⋯⋯
Calling general telephone ⋯⋯⋯⋯⋯⋯⋯⋯⋯⋯⋯⋯⋯⋯⋯⋯⋯⋯⋯⋯⋯⋯⋯⋯⋯⋯⋯⋯⋯⋯⋯⋯⋯⋯
Making a call with household ⋯⋯⋯⋯⋯⋯⋯⋯⋯⋯⋯⋯⋯⋯⋯⋯⋯⋯⋯⋯⋯⋯⋯⋯⋯⋯⋯⋯⋯⋯⋯⋯⋯
Calling lobby ⋯⋯⋯⋯⋯⋯⋯⋯⋯⋯⋯⋯⋯⋯⋯⋯⋯⋯⋯⋯⋯⋯⋯⋯⋯⋯⋯⋯⋯⋯⋯⋯⋯⋯⋯⋯⋯⋯⋯⋯
Phone records ⋯⋯⋯⋯⋯⋯⋯⋯⋯⋯⋯⋯⋯⋯⋯⋯⋯⋯⋯⋯⋯⋯⋯⋯⋯⋯⋯⋯⋯⋯⋯⋯⋯⋯⋯⋯⋯⋯⋯
Address list ⋯⋯⋯⋯⋯⋯⋯⋯⋯⋯⋯⋯⋯⋯⋯⋯⋯⋯⋯⋯⋯⋯⋯⋯⋯⋯⋯⋯⋯⋯⋯⋯⋯⋯⋯⋯⋯⋯⋯⋯
Favorites ⋯⋯⋯⋯⋯⋯⋯⋯⋯⋯⋯⋯⋯⋯⋯⋯⋯⋯⋯⋯⋯⋯⋯⋯⋯⋯⋯⋯⋯⋯⋯⋯⋯⋯⋯⋯⋯⋯⋯⋯⋯
6. Emergency log ⋯⋯⋯⋯⋯⋯⋯⋯⋯⋯⋯⋯⋯⋯⋯⋯⋯⋯⋯⋯⋯⋯⋯⋯⋯⋯⋯⋯⋯⋯⋯⋯⋯⋯⋯⋯⋯⋯
Emergency occurrence ⋯⋯⋯⋯⋯⋯⋯⋯⋯⋯⋯⋯⋯⋯⋯⋯⋯⋯⋯⋯⋯⋯⋯⋯⋯⋯⋯⋯⋯⋯⋯⋯⋯⋯
Emergency log ⋯⋯⋯⋯⋯⋯⋯⋯⋯⋯⋯⋯⋯⋯⋯⋯⋯⋯⋯⋯⋯⋯⋯⋯⋯⋯⋯⋯⋯⋯⋯⋯⋯⋯⋯⋯⋯⋯
7. Identifying visitors ⋯⋯⋯⋯⋯⋯⋯⋯⋯⋯⋯⋯⋯⋯⋯⋯⋯⋯⋯⋯⋯⋯⋯⋯⋯⋯⋯⋯⋯⋯⋯⋯⋯⋯⋯⋯
8. Checking CCTV ⋯⋯⋯⋯⋯⋯⋯⋯⋯⋯⋯⋯⋯⋯⋯⋯⋯⋯⋯⋯⋯⋯⋯⋯⋯⋯⋯⋯⋯⋯⋯⋯⋯⋯⋯⋯⋯
9. Settings ⋯⋯⋯⋯⋯⋯⋯⋯⋯⋯⋯⋯⋯⋯⋯⋯⋯⋯⋯⋯⋯⋯⋯⋯⋯⋯⋯⋯⋯⋯⋯⋯⋯⋯⋯⋯⋯⋯⋯⋯⋯
10. Wiring ⋯⋯⋯⋯⋯⋯⋯⋯⋯⋯⋯⋯⋯⋯⋯⋯⋯⋯⋯⋯⋯⋯⋯⋯⋯⋯⋯⋯⋯⋯⋯⋯⋯⋯⋯⋯⋯⋯⋯⋯⋯
11. Caution in use ⋯⋯⋯⋯⋯⋯⋯⋯⋯⋯⋯⋯⋯⋯⋯⋯⋯⋯⋯⋯⋯⋯⋯⋯⋯⋯⋯⋯⋯⋯⋯⋯⋯⋯⋯⋯⋯
12. Miscellaneous ⋯⋯⋯⋯⋯⋯⋯⋯⋯⋯⋯⋯⋯⋯⋯⋯⋯⋯⋯⋯⋯⋯⋯⋯⋯⋯⋯⋯⋯⋯⋯⋯⋯⋯⋯⋯⋯⋯
Contents
1. Greetings
1
1
1
2
4
5
6
7
7
8
9
10
11
13
13
13
14
16
18
22
23
23

2
Please follow the things described below in order to prevent any
danger or property damage.
Warning
Caution
Prohibition.
No disassembly
No touch
Must follow strictly.
Shows plugging out the power cord
without an exception
Shows the warning and caution for an electric shock.
Shows the warning and caution for a fire.
It may cause a serious damage or
injury if violated.
It may cause a minor damage or
injury if violated.
Power & Installation
Warning
Please don’t use several
products at the same time on
one power socket.
·It may cause a fire due to an
abnormal overheating.
Please don’
tbend the power
cable excessively or it may
cause an electric shock.
·fire when using a damaged
power cable.
Please don’
t handle the power
cable with a wet hand.
·It may cause an electric
shock.
Please plug out the power
cable from the socket when
not using it for a long period
of time.
·It may shorten the product
lifespan or cause a fire.
Please don’t install the
product in the place where
there is much oil, smoke or
humidity.
·It may cause an electric
shock or fire.
Please don’t install the
product with the lightening
and thunder.
·It may cause an electric
shock or fire.
Please don’
tuse and connect
this product with other
products with different rated
voltage
·It may cause a disorder or
fire.
When installing the product
that generates heat, please
install the product away from
the wall (10cm) for the
ventilation.
·It may cause a fire due to
the increased internal
temperature.
2. Warning and caution

3
Cleaning & Use
Please don’
tdisassemble,
repair or rebuild this product
arbitrarily (please contact the
service center if a repair is
needed.
·Itmay cause an electric
shock or fire.
Please plug the power cable
firmly into the inner end
·It may cause a fire.
Please hold the plug tightly
when unplugging the power
cable (a part of the copper
wire may be disconnected if
the grabbing is only made on
the cord when pulling out the
cable).
·It may cause an electric
shock or fire
When connecting the power
cables after cutting the cable,
please install the product with
power off
·It may cause an electric
shock or fire
When installing the product,
please fix it firmly while using
the wall-mounting unit and
screws.
·It may cause an injury from
the falling object.
Please be careful when using
an AC circuit breaker since
there is a possibility of an
electric shock.
When cleaning the product,
please rub it with a soft and
dry cloth after plugging out
the power cable. (Please don’
t
use any chemical products
such as wax, benzene, alcohol
or cleanser.)
Please don’
t drop the product
on the ground and don’
tapply
a shock .
·It may cause a failure.
Please use the designated
connection cable within the
maximum calling distance
designated for the product
·It may reduce the product
performance.
Please check the use voltage
and current for the DC-only
products and use the
appropriate rectifier.
·It may cause a fire.
Please avoid direct rays of the
sun or heating devices at a
time of installation.
·It may cause a fire.
Please don’t install the
product on an unstable place
or small support board.
·It may cause an injury if it
falls down while in use.
Ifan abnormal sound, burning
smell or smoke is coming out
ofthe product, please plug out
the power cable and contact a
service center.
·It may cause an electric
shock or fire.
Please don’tinsert any
metallic or burnable materials
into the ventilation hole.
·It may cause an electric
shock or fire.
Please use only the designated
batteries for the products of
using DC power.
·Itmay cause an electric
shock or fire.
Cleaning & UsePower & Installation
Warning
Caution
3. Part names
4
Name
1
2
3
4
5
6
Handset
LCD (7" TFT LCD)
DIAL KEY
CMOS CAMERA
FUNCTION KEY
POWER SWITCH
7
8
9
10
11
12
LAN PORT
CONSOL
CCTV
USB
DC JACK (DC 14V, 2.1A)
TELEPHONE (LOCAL LOOP)
NameNo. No.

①
①MENU
Under 4 kinds of menu such as call, security, control, handiness. various functions can be
used.
Call: using general telephone or calling household residents.
Emergency log: checking current emergency situation
Visitors: checking saved image while visitors’ call
CCTV: checking CCTV images
4. Composition of the picture
5
③
③Notice
Can check the data as below. Moreover, after pressing the upper part of the
screen, drag the task bar to down. Then, Notice screen is open.
②
②BUTTON
④
④Clock
Going to HOME screen.
Volume Down
Volume Up
OPTION MENU(background image, set-up)
Going back
Fail to telephone registration
Success to telephone registration
Recording visitors’ image
Emergency
Missed calls

6
5. Using telephone functions.
Calling screen
①Telephone
②Recent call record
③Address list
④Favorites
⑤inputted telephone no.
⑥General call
⑦Calling among households
⑧Deletion
⑨Making a call
The screen connecting to call and call screen
①Activated call sign
②Stand-by call sign
③Calling
④Call Ended
⑤Rejection the received call,
cancellation
⑥Saving the images of visitors
⑦Adjusting the call sound and
the call volume
⑧Unlock the lobby door
⑨Connecting screen
※Above call connecting screen differs depending on general telephone, household telephone,
lobby phone.
※In some parts of equipment, CID function (caller identification) is not offered.

•Receiving a call
1. General telephone is indicated with the sound.
2. To call, press (call) or To reject, press (rejection).
3. To end the call, press (Call).
※In some parts of equipment, CID function (caller identification) is not offered.
•Calling the household
1. After holding the handset or pushing the speaker phone button, press
(Household) on the screen of the phone.
2. After inputting the building and household number, press (call).
(Input the asterisk between the building and household number)
Ex) 3 building 102 household -> 3*102
3. You can hear the dial tone and connecting screen is indicated.
4. Press (End) to end the call.
7
•Making a general calls (Option)
1. After holding the handset or pushing the speaker phone button, press (general) on the
screen of the phone.
2. After entering the other party’s number, press (Call). Ex) 01022223333
3. While hearing the dial tone, the connecting call screen will be displayed.
4. Press (End) to end the call. .
Connecting the general call screen

8
•To get the phone of household
1. The household telephone with bell sound is indicated.
2. To call, press (call) or To reject, press (rejection).
3. To end the call, press (end).
※In a household, video telephone can be used through the camera of a guard station
but in a guard station, the screen of a household is not shown.
•Making a call with lobby
1. The figure of visitor with bell sound is shown on the screen
2. To call, press (call) or to reject, press (rejection).
3. To end the call, press (end).
•To unlock the lobby door
1. Press (Unlock) while you are on the phone.
2. With the sound of "The door has been open", it ends.
•Saving the visitor’s image of common entrance(lobby)
1. Press (Photo) while calling lobby or being on the phone.
2. With the message that it is saved on the task bar on the upper side of the screen,
(Visitor icon) is shown.
•Checking the missed call
1. If you have the missed calls, (Missed call) will be displayed on the notice at the
top of the screen.
2. Drag the upper part of the screen to don and select missed call. And it will be
converted into the phone records, then you can check missed calls.
※In some parts of equipment, CID function(caller identification) is not offered.

9
•Call history
1. You can call again to him or her by pressing in the middle of call history.
Call history screen
2. If you press the recorded call list in a short time to select, additional function such as
checking information of recent call list, phone call, an address list can be used.
Saved call record screen 1

3. If you press the recorded call list in a long time to select, call, number edit, adding to
address list, recent call list, delete function in a call list can be used.
Saved call record screen 2
•Address list screen
1. Click the saved article in an address list.
Address list screen
10

2. After pressing , it can be added in favorites.
3. After pressing , you can have a conversation.
Saved address list screen
•Favorites
1. Through the address list, the saved list can be checked then press to make a
call.
Favorites screen 1
①
②
③
11

2. After pressing , you can make favorites or cancel it.
3. You can make a call by clicking.
Favorites screen 2
12

6. Emergency log
•Emergency occurence
You can check occurred household building and number and time of emergency.
In a household, you can also check the process like emergency occurrence Stop
Control of return. If you press the receipt button, emergency-received information can
send to the server. To speak with household in a state of emergency over the phone,
press the call button or hold the handset. Then, receipt is done automatically.
Emergency occurrence screen
•Emergency log
If you press emergency log, you can access to the server and check emergency
situation until now.
Emergency log screen
13

①Menu
By pressing menu, it can be covert into selection mode.
Viewing menu : Select mode entry and return to viewing pictures mode
Selecting all : selecting all pictures in a page
Cancellation : Lifting the select mode of selected images
Dele : Deleting the selected images
②Recorded location and checking the information during your absence. You can check
the location that the image recorded
③Time recorded the saved images
④Page information
⑤Move to previous page
⑥Move to next page
7. Checking visitors
Through the camera installed in lobby, you can check visitors’ images and pictures
taken from CCTV in a household.
• Checking saved pictures
1. Through the screen of checking visitors, pictures taken in a lobby, CCTV is
distinguished and saved date and time can be checked.
2. You can delete the saved pictures with ①(Viewing menu)
Checking the saved pictures screen
14
Lobby Recorded images in the lobby
CCTV Recorded images by CCTV

•Deletion of the saved images
1. Press the picture ①(Viewing menu) or press the picture you want to select more than
2 minutes, it will be converted into [selection mode].
2. Select a picture you want or select all pictures with
3. In case of cancellation of selection, press the selected picture again or press if
you want to all cancellation.
4. In case that you have some pictures to delete, press
•Viewing expansion mode
1. If you press the picture to expand, expanded pictures can be checked.
2. To go back to previous page, press on the upper part of the screen.
※In selection mode, expansion mode is not allowed.
15

16
Checking CCTV screen
①CCTV image screen
②Saving screen
③DVR Selection
④Channel list
⑤Favorites
⑥Selection list
⑦Saved article ofIcon to
save the favorites
8. Checking CCTV
Installed CCTV images can be checked and saved. Also, 4 CCTV screens can be
checked at the same time
•Viewing CCTV images and Saving
1. If you press ④(Channel list) after selecting relevant ③(DVR), connected
⑥(CCTV list) is shown.
2. If you press CCTV list you want, ①(CCTV image screen) is shown.
3. To save the screen you want, press ②(Saving).
4. Saved images can be checked in a gallery or checking visitors.
※DVR is the equipment to save CCTV images, as DVR restricts CCTV number
toconnect with apartment house which is a lot of households, DVR can be multiple
units. After pressing the selecting menu, DVR list of the number installed can be
checked in menu screen which can be seen.
•Favorites registration and cancellation
1. In CCTV main screen, if you press 7(asterisk) of CCTV article you want, it can be
registered or canceled as favorites.
•Checking favorites and looking by multi channel.
1. If you press ⑤(Favorites) of checking CCTV screen, added CCTV list can be checked.
2. If you press on the lower right of the screen, CCTV screen can be
checked as multi channel. (4channels can be seen at the same time and in case of
more than 5, the rest of the screen can be checked by 2 left and right button.
3. To go back to the main screen, press ④(Back) button

17
•Checking the information of CCTV
1. If you press ③(toggle), you can check the designated name and DVR of CCTV like ①.
※This function is for particular site.
CCTV Multiview
①Information of CCTV
②Move of screen
③Checking the
information of CCTV
④Going back

9. Configuration
Able to set every configuration such as network, Home network system, language and
time.
•Going to configuration mode
1. By clicking on the top of the screen, you can enter the configuration mode to set
the environment.
•COMMAX user option
Set the COMMAX connection and management
1. Password change
You can change the password to off emergency situation and go out mode.
☞Click the password-changing button.
☞If the entering password screen is displayed, click the password box. Then you
can use virtual keyboard mode.
☞Enter the current password and then click the next button. Enter the new
password and click the next button, enter the new password again to verify
whether the password you enter earlier is correct.
☞After clicking the complete button, you can go back to the password changing
mode.
☞Press the confirm button to complete new password changing.
※Don’t forget your password.
※Password is 4 digit number. (Default password is 1234.)
※If the password you entered doesn’t match to the current password, you cannot
change the current password.
※If new password doesn’t match to the new password confirmation, the password is
not changed.
Configuration screen
18

•Connection to COMMAX and management
It sets up the configuration of COMMAX connection and management for telephone,
home control, security function, etc. but public access to set up the configuration is
prohibited(the manager of installation only). This product is not working if you do not
enter correct value.
1. Cable connection
Cable network to use the COMMAX connection and management can be set
☞Enter the IP address, gateway, net mask, DNS. (ask to an installer)
2. To set up the server IP
Local server, SIP server, update, IP address of CCTV server can be set.
☞Press the icon to set.
☞If the window to input is marked, enter the relevant IP address after pressing the
screen to input.
3. Call prix fixe
☞In the menu, press the call prix fixe.
☞If the window to input of call prix fixe is marked, press the confirm button by
entering the relevant number.
•Sound and display
1. To set the mute mode
Can change to mute mode. (Except for media and alarm)
☞Press the mute mode.
☞If the mute mode is checked, the icon of sound setting at the bottom is
inactivated. And is marked in the task bar on the top of the screen. If checking
of the mute mode is cancelled, the icon of the sound set at the bottom is activated
and in the task bar of the top is removed.
2. To set the bell sound/media volume
☞Press the volume for bell sound or media.
☞Adjust the volume by moving the stick if the window for volume is marked in a
screen.
☞Save the setup by pressing the confirm button.
3. To set Call/Alarm bell sound
☞Press the bell sound of call or alarm.
☞In case of telephone bell sound, list screen of caller’s location is displayed. (In
case of bell sound, select the list right)
☞After selecting the location to set, select the bell sound.
(Can here the bell sound in advance)
19
Table of contents
Other Commax Intercom System manuals

Commax
Commax CAV-40QG User manual

Commax
Commax DRC-4LN User manual

Commax
Commax DRC-4BA User manual

Commax
Commax DP-4VHP User manual

Commax
Commax T45-K User manual

Commax
Commax CIOT-700M User manual

Commax
Commax CMV-70MX User manual

Commax
Commax CIOT-L20M User manual

Commax
Commax CMV-70MX User manual

Commax
Commax CDV-70UM User manual

Commax
Commax DR-2GS User manual

Commax
Commax CDV-70QT User manual

Commax
Commax CDV-43K2 User manual

Commax
Commax DRC-40K User manual

Commax
Commax CDV-1020AE User manual

Commax
Commax DR-2L User manual

Commax
Commax DR-2A2N User manual

Commax
Commax DP-20H User manual

Commax
Commax CDV-35A User manual

Commax
Commax TP–nKP User manual