à 0,4 mm, avec réglages automatiques précis
pour un summum de précision.
• Performance avancée avec dispositif à piles
jumelées durables pour un rasage fiable et
rapide.
• Technologie avancée d'affûtage électro-
chimique des lames pour un tranchant et une
durabilité extrêmes.
• ACL affichant la longueur choisie et le niveau
de charge.
• Peigne guide protecteur fournissant le
summum en uniformité; amovible pour faciliter
le nettoyage.
• Système de charge rapide: une charge de 90
minutes donne 45 minutes d'utilisation, une
charge rapide de 5 minutes permet un rasage
unique.
• Fil électrique du genre rasoir pour une
recharge pratique ou l'utilisation branchée
dans la salle de bain.
• Boîtier incurvé ergonomique pour un contrôle
simple et un confort absolu.
MODE D'EMPLOI
ENTRETIEN DE VOTRE
RASOIR EFFILEUR
IMPORTANT : CHARGE
PREMIÈRE UTILISATION
• La i-stubbleMD est facile à utiliser mais au
départ, vous devez le charger pendant au
moins 16 heures avant de l'utiliser. Même si
vous voulez l'utiliser branché au secteur, cette
super charge initiale assurera un rendement
18. L’adaptateur est conforme à la Partie 15 des règle-
ments FCC. Le fonctionnement dépend des deux condi-
tions suivantes :
(1)L’adaptateur ne doit pas entraîner d’interférence
nuisible; et
(2) l’adaptateur doit accepter toute interférence reçue,
y compris l’interférence qui peut entraîner un
fonctionnement non désiré.
Avertissement : Les changements ou modifications
apportés à cet appareil qui ne sont pas expressément
approuvés par le tiers responsable de la conformité peu-
vent annuler l’autorité de l’usager à utiliser l’équipement.
CONSERVEZ CES
DIRECTIVES
MANUEL D'UTILISATION
Maintenez votre style, au jour le jour, avec la
nouvelle technologie de contrôle de la pousse.
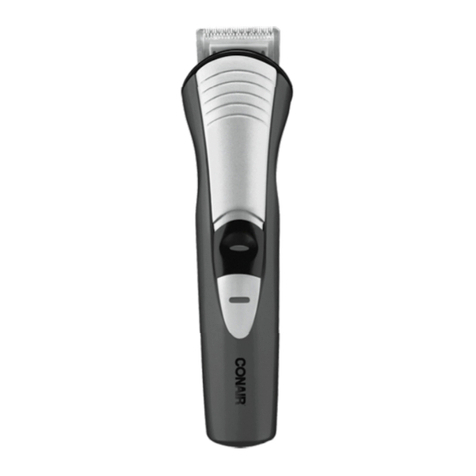
La tondeuse i-stubbleMD Conair pour homme
offre 15 réglages ultra précis pour maintenir
votre style facial en tout temps. Que vous pré-
fériez la pousse de trois jours, une barbe plus
longue ou plus courte, la i-stubble vous offre le
summum en contrôle. La commande motorisée
de longueur permet un réglage précis, d'une
pousse de 0,4 mm jusqu'à la longueur que vous
désirez exactement. La tête flottante unique en
son genre suit les courbes du visage avec une
précision et un confort exceptionnels, donnant
une tonte ultra précise.
CARACTÉRISTIQUES
• Tête flottante unique en son genre qui suit
les courbes du visage pour une précision et un
confort exceptionnels.
• Commande motorisée de longueur débutant
optimal et une tonte douce et rapide à chaque
utilisation.
Après la charge initiale, une pleine charge ne
prendra que 90 minutes. La capacité maximale
des piles ne s'atteint qu'après 3 cycles de
charge/décharge.
• Branchez l'adaptateur dans la prise au bas
de la tondeuse i-stubble.
• Branchez l'adaptateur dans une prise de
courant dans la salle de bain.
• Assurez-vous toujours que le témoin de
charge sur l'ACL s'allume quand vous
branchez le l électrique à la tondeuse.
CHARGE RÉGULIÈRE
• Une pleine charge prend 90 minutes et
permettra une utilisation minimale continue
sans l de 45 minutes. La durée des piles est
indiquée sur l'ACL.
• An de maintenir les piles à leur capacité
optimale de charge, chargez la tondeuse
pendant 16 heures environ tous les 3 mois.
• La i-stubble comporte une fonction de
charge rapide. Une charge de 5 minutes
permettra une utilisation d'environ 3 minutes.
UTILISATION AVEC LE FIL ÉLECTRIQUE
• Branchez le l directement dans la i-stubbleMD.
• Branchez l'adaptateur dans une prise de
courant appropriée pour un rasoir dans la salle
de bain.
• Voyez toujours à ce que la i-stubbleMD soit hors
circuit et débranchée après l'utilisation à moins
que vous ne vouliez la charger.
MISE EN CIRCUIT
Appuyez sur le bouton « Power on/off »; le
témoin des piles à l'ACL exécutera quelques
cycles avant d'indiquer la charge restante.
MISE HORS CIRCUIT
Pour mettre la i-stubbleMD hors circuit, tenez le
bouton « Power on/off » enfoncé pendant 2
secondes.
PRÉPARATION À L'UTILISATION
Inspectez toujours la tondeuse avant
l'utilisation an de vous assurer que la tête est
libre de poils et de saletés et qu'elle fonctionne
en douceur.
UTILISATION DU PEIGNE GUIDE
Le peigne guide permet de changer la longueur
de tonte. Vous devrez faire quelques essais an
de trouver la longueur que vous préférez, mais
comme guide, 0,4 mm donnera des poils très
courts alors que 1,6 mm donnera une
repousse plus longue. 2 mm+ donnera une
barbe courte.
• Assurez-vous que le peigne guide soit bien
placé en le pressant légèrement pour le xer
en place.
• Utilisez les boutons « up » et « down » de
contrôle numérique pour ajuster la position du
guide télescopique.
• La longueur de tonte s'afche à l'ACL avec «
mm ». Délez à travers les réglages à l'aide
des boutons de contrôle numérique. 15
réglages sont possibles : 0,4, 0,6, 0,8, 1,0, 1,2,
1,4, 1,6, 1,8, 2,0, 2,5, 3,0, 3,5, 4,0, 4,5 et
5,0 mm.
• Choisissez une longueur et sa valeur restera
afchée à l'ACL.
• Appuyez sur l'interrupteur pour mettre la
i-stubbleMD en marche.
UTILISATION DE LA TONDEUSE SANS LE
PEIGNE GUIDE
• L'utilisation sans le peigne guide est
parfaite pour le découpage et la nition
générale du délignage.
• Pour enlever le peigne guide, tenez la
tondeuse d'une main et, à l'aide du pouce et
de l'index, soulevez chaque côté du peigne
guide (ill. 1). Faites basculer le peigne guide
vers l'arrière et enclenchez-le en l'encliquant
sur l'agrafe au dos de la tondeuse (ill. 2).
• Mettez la i-stubble en marche en appuyant
sur le bouton « power on/off ». L'ACL
s'illumine et les lames se mettent à bouger.
• Pour une tonte ultra ne, vous pouvez
utiliser la tondeuse sans le peigne guide. Vous
obtiendrez ainsi une tonte extrêmement
courte.
IMPORTANT: Notez qu'en utilisant la
tondeuse sans le peigne guide, la longueur de
tonte sera inférieure à 0,4 mm. La longueur
indiquée à l'ACL n'a aucune valeur quand le
peigne guide est enlevé.
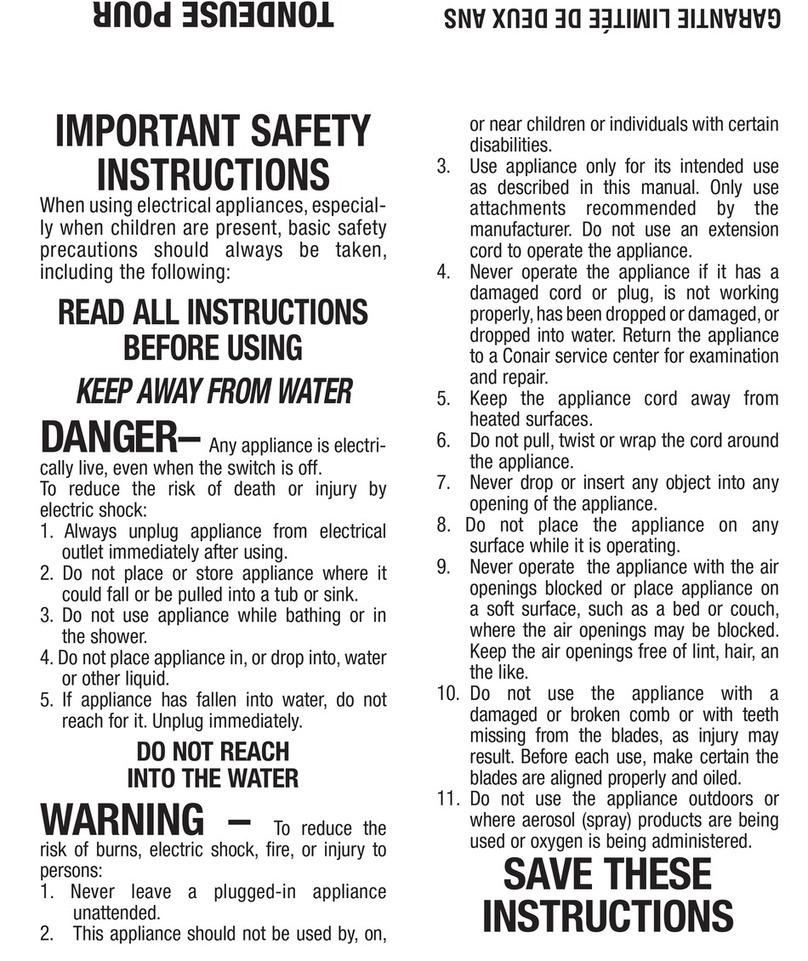
IMPORTANT SAFETY
INSTRUCTIONS
When using electrical appliances, especially
when children are present, basic safety precau-
tions should always be taken, including
the following:
READ ALL INSTRUCTIONS
BEFORE USING
KEEP AWAY FROM WATER
DANGER – Any appliance is electrically
live, even when the switch is off.
To reduce the risk of death or injury by
electric shock:
1. Unplug this appliance before cleaning.
2. Do not place or store appliance where it
can fall or be pulled into a tub or sink.
3. Do not use while bathing or in a shower.
4. Do not place in, or drop into water or
other liquid.
5. Do not reach for an appliance that has
fallen into water. Unplug immediately.
6. Except when charging, always unplug this
appliance from electrical outlet immediately
after using.
7. Never operate the adaptor if the
specification is out of the rating.
DO NOT REACH
INTO THE WATER
WARNING – To reduce the risk of
burns, electric shock, fire, or injury to persons:
1. This appliance should never be left
unattended when plugged in. Do not pull,
twist, or wrap line cord around appliance.
2. This appliance should not be used by, on,
or near children or individuals with certain
disabilities.
3. Use this appliance only for its intended
purpose as described in this manual. Do not
use attachments not recommended by the
manufacturer. Do not use an extension cord to
operate this appliance.
4. Never operate this appliance if it has a
damaged cord or plug, or if it is not working
properly, if it has been dropped or damaged,
or dropped into water. Return the appliance to
a service
center for examination and repair.
5. Keep the cord away from heated surfaces.
6. Never drop or insert any object into any
opening on this appliance.
7. Do not place appliance on any surface while
it is operating.
8. Do not use this appliance with a damaged
or broken comb or with teeth missing from the
blades as injury may occur. Before use, make
certain blades are aligned properly. (See “Care
of your trimmers”).
9. Do not use outdoors or operate where
aerosol (spray) products are being used or
where oxygen is being administered.
10. Never operate the appliance with the
air openings blocks or while on a soft
surface, such as a bed or couch, where the
air openings may be blocked. Keep the air
openings free of lint, hair, and the like.
11. Always attach plug to appliance first, then
to outlet. To disconnect, turn all controls to
“OFF” then remove plug from outlet.
12. Avoid skin contact with moving blades.
13. When using the appliance with its cord, be
mindful of tangles or kinks in the cord. If the
cord does become tangled during use, turn the
unit off and straighten cord before operating
again.
14. Do not short the polarity (output cord),
ensure jack is plugged into the unit before
plugged the adaptor into outlet.
15. This power unit is intended to be correctly
oriented in vertical or floor mount position.
16. Be sure voltage is in correct voltage before
plugging in.
17. For connection to a supply not in North
America, use an attachment plug adapter of
the proper configuration for the power outlet.
18. The adaptor complies with Part 15 of
the FCC Rules. Operation is subject to the
following two conditions:
(1) the adaptor may not cause harmful
interference, and
(2) the adaptor must accept any interference
received, including interference that may
cause undesired operation.
Warning: Changes or modifications to this
unit not expressly approved by the party
responsible for compliance could void the
user's authority to operate the equipment.
SAVE THESE
INSTRUCTIONS
USER MANUAL
Maintain your look, everyday with the next
generation in stubble control technology.
The Conair For Men i-stubble™ has 15 ultra
precise length settings, so you can maintain
your preferred facial hair style at all times.
Whether you’re looking for a short shadow look,
a longer stubble look, or even a short beard, the
i-stubble™ is the ultimate in stubble control.
The motorized length control gives precise
adjustment from a 0.4mm shadow so you can
get exactly the look you want. Its unique floating
contouring head tracks the curves of your face
for exceptional accuracy and comfort to give
you an ultra precise stubble shave.
FEATURES
• Unique floating contouring head tracks the
curves of your face for exceptional accuracy
and comfort.
• Motorized length control from a 0.4mm
shadow with precise automatic adjustments
for ultimate accuracy.
• Advanced power performance with long-
lasting dual battery system for reliable and
fast stubble shaving.
• Advanced blade technology with electro-
chemically sharpened blades for extreme
sharpness and durability.
• LCD screen displays selected length and
charge level.
• Protective comb guide delivers ultimate length
consistency, removable for easy cleaning.
• Rapid charging system, 90 minute charge
provides 45 minutes use or 5 minutes quick
charge for a single stubble shave.
• Shaver-style power lead for convenient
rechargeable or corded use in the bathroom.
• Ergonomic design with curved body for easy
control and complete comfort in use.
INSTRUCTIONS
FOR USE
CARE OF YOUR TRIMMER
IMPORTANT : CHARGING
FIRST TIME USE
• The i-stubble™ is so easy to use, but before
you do anything you must take your time to
charge the unit for 16 hours before its rst use.
Even if you want to use it plugged in to your
outlet, this initial super-charge ensures
optimum power performance to give smooth
fast trimming every time. After the rst charge
a full charge will only take 90 minutes.
Maximum battery capacity will only be reached
after 3 charging/discharging cycles.
• Connect the power adaptor to the socket on
the underside of the i-stubble™ trimmer.
• Plug the power adaptor into a suitable
bathroom outlet.
• Always check that the charging indicator on
the LCD comes on when you connect the
power lead into the product.
REGULAR CHARGING
• A full charge will take 90 minutes and will
supply enough power for minimum 45 minutes
continuous cordless use. The remaining battery
life is shown on the LCD display.
• In order to maintain the optimum capacity of
the rechargeable batteries, the appliance
should be recharged for 16 hours every 3
months approximately.
• The i-stubble™ comes with a quick charge
feature. A 5 minute charge will provide enough
power for approximately 3 minutes use.
OPERATION WITH POWER CORD
(NOT CORDLESS)
• Plug the power cord directly into the
i-stubble™.
• Plug the power adaptor into a suitable
bathroom outlet.
• Always ensure the i-stubble™ is switched
off and unplugged after use, unless you intend
to keep the i-stubble™ on charge.
SWITCHING ON
Press the ‘Power on/off’ button and release,
the battery indicator on the LCD screen will
cycle through a few times before the remaining
battery life is displayed.
SWITCHING OFF
To switch off the i-stubble™ hold down the
‘Power on/off’ button for 2 seconds then release.
PREPARATION FOR USE
Always inspect the i-stubble™ before use to
ensure the cutting head is free from hair and
debris and is running smoothly.
USING THE COMB GUIDE
The comb guide allows you to change the
cutting length of your trimmer. You’ll need to
experiment to nd your preferred length, but as
a guide, 0.4mm will give you very short
stubble, whilst 1.6mm will give you a longer
stubble look. 2mm+ will give you a short
beard.
• Ensure the comb guide is correctly posi-
tioned by pushing the comb guide gently
downwards to secure into place.
• Use the digital touch control ‘‘up’’ or ‘‘down’’
buttons to adjust the telescopic comb guide to
the required length.
• The cutting lengths are displayed on the LCD
screen in ‘‘mm’’ – scroll through the available
length settings with the digital touch controls.
There are 15 length settings available: 0.4mm,
0.6, 0.8, 1.0, 1.2, 1.4, 1.6, 1.8, 2.0, 2.5, 3.0,
3.5, 4.0, 4.5, 5.0mm.
• Select your required length – the length
setting will then remain displayed on the LCD
screen.
Fig. 1 Fig. 2
Ill. 1 Ill. 2
CONSIGNES DE SÉCURITÉ
L’utilisation d’un appareil électrique, surtout en présence
d’enfants, demande que l’on prenne certaines précau-
tions élémentaires dont les suivantes :
LIRE TOUTES LES DIRECTIVES
AVANT L'UTILISATION
GARDER LOIN DE L'EAU
DANGER – Tout appareil est sous tension,
même quand il est éteint. Pour réduire le risque de
mort ou de blessure par choc électrique:
1. Le déconnecter avant de le nettoyer.
2. Ne pas le placer ni le ranger là où il peut être tiré ou
tomber dans une baignoire ou un évier.
3. Ne pas l’utiliser dans la baignoire ni dans la
douche.
4. Ne pas le placer ni l’échapper dans l’eau ou un
liquide.
5. Ne pas saisir un appareil qui est tombé
dans l’eau. Le débrancher immédiatement.
6. Toujours débrancher l’appareil de la prise de cou-
rant après l’avoir utilisé.
7. Ne jamais utiliser l'unité si les spécifications sont
hors limite.
NE LE SAISISSEZ PAS DANS L'EAU
AVERTISSEMENT –Afin de réduire
le risque de brûlure, de choc électrique, d’incendie ou
de blessure :
1. Ne jamais laisser un appareil branché sans surveil-
lance. Ne pas tirer, tordre ou enrouler le fil autour de
l’appareil.
2. L’appareil ne doit pas être utilisé par, sur ou près
d’enfants ou de personnes souffrant de certaines infir-
mités.
3. Ne l’utiliser que tel que prévu. Ne pas utiliser
d’accessoires non recommandés par le fabricant.
Ne pas utiliser de rallonge avec l’appareil.
4. Ne jamais l’utiliser si le cordon ou la fiche est endom-
magée, s’il ne fonctionne pas bien, s’il a été échappé,
endommagé ou échappé dans l’eau. Le présenter à un
service après-vente où il sera inspecté et réparé.
5. Protéger le cordon des surfaces chaudes.
6. Ne jamais échapper ni insérer un objet dans une
ouverture.
7. Ne pas déposer l’appareil sur une surface alors qu’il
est en marche.
8. Ne pas l’utiliser avec un peigne endommagé ou si des
dents sont cassées car on risque de se blesser. Avant de
l’utiliser, s’assurer que les lames sont bien alignées. Voir
« Entretien de la tondeuse ».
9. Ne pas l’utiliser à l’extérieur ni là où l’on utilise des
aérosols ou administre de l’oxygène.
10. Ne jamais utiliser l’appareil si les évents sont
obstrués ou sur une surface souple comme un lit ou un
divan où les évents pourraient devenir obstrués. Garder
les évents libres de charpies, cheveux, etc.
11. Brancher le cordon à l’appareil puis à la prise. Pour
le débrancher, éteindre l’appareil puis sortir la fiche de la
prise de courant.
12. Éviter de toucher la peau avec les lames en marche.
13. Lors de l’utilisation, ne pas tordre ni pincer le cordon.
Si le cordon s’emmêle, éteindre l’appareil et détordre le
cordon avant de continuer l’utilisation.
14. Ne pas court-circuiter (fil électrique). S'assurer que
la fiche est branchée dans l'unité avant de brancher
l'adaptateur dans la prise de courant.
15. Ce transformateur doit être correctement orienté
pour le montage selon la verticale ou sur le sol.
16. S'assurer que la tension de secteur convient avant
de brancher l'unité.
17. Pour le branchement à un secteur autre que nord-
américain, utilisez une fiche adaptatrice convenant à la
prise de courant.
