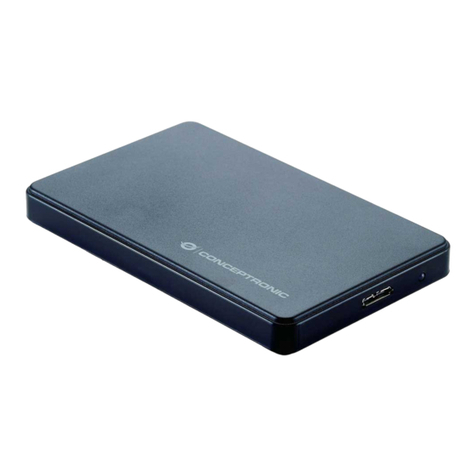
Conceptronic CHD3SU User manual

NEDERLANDS
1
Conceptronic Grab’n’GO CHD3SU
Snelstart handleiding
Hartelijk gefeliciteerd met de aanschaf van uw
Conceptronic Serial ATA naar USB 2.0 Harddiskbox.
In de bijgaande Snelstart handleiding wordt stap voor stap uitgelegd hoe u de Conceptronic
Serial ATA naar USB 2.0 Harddiskbox installeert.
Ingeval van problemen adviseren wij u onze support-site te bezoeken (ga naar:
www.conceptronic.net en klik op ‘Support’). Hier vindt u een database met veelgestelde
vragen waar u hoogstwaarschijnlijk de oplossing voor uw probleem kunt vinden.
Heeft u andere vragen over uw product die u niet op de website kunt vinden, neem dan
Voor meer informatie over Conceptronic producten kunt u terecht op de Conceptronic
website: www.conceptronic.net.
Bij software/drivers installatie: Het is mogelijk dat onderstaande installatie iets afwijkt van
de installatie op uw computer. Dit is afhankelijk van de Windows versie die u gebruikt.
1. Introductie
Met dit product kunt u op een snelle en eenvoudige manier extra ruimte beschikbaar
maken op uw Desktop of Notebook computer. U kunt een Serial ATA harde schijf in de
CHD3SU monteren om u te voorzien van draagbare opslagruimte.
De harde schijf box is ideaal voor het overzetten van data, het maken van back-ups of
voor gebruik als 2e harde schijf op uw computer.
2. Inhoud van de verpakking
De volgende onderdelen dienen aanwezig te zijn in de verpakking:
1x CHD3SU
4x HDD Montageschroef (niet meegeleverd indien er al een SATA-schijf geassembleerd is)
1x CHD3SU Spanningsadapter
1x USB Kabel
1x Standaard voor CHD3SU
1x Snelstart Handleiding
1x Garantiekaart
NEDERLANDS
2
3. Hardware Installatie CHD3SU
3.1 De CHD3SU monteren (Indien er geen harde schijf aanwezig is)
Als u de CHD3SU heeft aangeschaft met een voorgemonteerde harde schijf kunt u
deze stap overslaan en doorgaan bij stap 3.2.
a. Verwijder de 2 schroeven aan de achterzijde van de CHD3SU en verwijder de
achterplaat.
b. Schuif de harde schijf slede voorzichtig uit de behuizing.
c. Schuif de SATA harde schijf voorzichtig in de slede. De SATA connector van de
slede dient in de harde schijf gedrukt te worden.
Let op: De CHD3SU is ALLEEN geschikt voor Serial ATA schijven (SATA-I, SATA-II) !

NEDERLANDS
3
d. Plaats de slede op zijn kop en gebruik de 4 meegeleverde schroeven om de schijf
aan de slede vast te zetten.
e. Schuif de slede terug in de behuizing, plaats de achterplaat terug en gebruik de 2
schroeven om de achterplaats vast te zetten op de slede.
3.2 Kabels aansluiten
a. Sluit de spanningsadapter aan op uw stopcontact en op de CHD3SU.
b. Verbind de USB kabel met de CHD3SU en met een vrije USB poort op uw
computer.
c. Gebruik de schakelaar op de achterzijde van de CHD3SU om het apparaat aan te
zetten. Het Conceptronic Logo op de voorzijde zal blauw oplichten.
Windows 2000 & XP zullen de schijf automatisch herkennen. Er is geen
stuurprogramma installatie benodigd om de CHD3SU te gebruiken.
4. Veilig loskoppelen van de Harddiskbox
Het apparaat moet eerst uitgeschakeld worden voordat u het apparaat uit uw
computer haalt, anders kan er data verloren gaan. U kunt de ‘USB Mass Storage
Device’ loskoppelen door te dubbelklikken op het icoon op uw taakbalk.
‘Hardware apparaat uitwerpen of loskoppelen’ (“Remove or eject hardware
components” ) verschijnt op het scherm nadat u dubbelklikt. Stop hier het USB
apparaat en bevestig met ‘uitwerpen’ of ‘loskoppelen’ . Er verschijnt een
waarschuwing als u het apparaat niet de-activeert voordat u het loskoppelt van uw
computer.

NEDERLANDS
4
5. Een partitie aanmaken en formatteren op de CHD3SU
Het is mogelijk dat de schijf die u gebruikt nog niet gepartitioneerd/geformatteerd is.
In deze situatie zal de CHD3SU geen schijf weergeven binnen uw besturingssysteem.
Om een partitie te maken en/of te formatteren kunt u de standaard Windows
applicatie gebruiken.
1. Klik op “Start”, “Uitvoeren”, geef het commando “diskmgmt.msc” en kies “OK”.
2. Selecteer de externe harde schijf en klik met de rechtermuisknop. Indien er al
een partitie aanwezig is die u wilt verwijderen, kies “Partitie Verwijderen”. Kies
voor het maken van een nieuwe partitie voor de optie “Nieuwe Partitie...”.
3. De “Wizard Nieuwe Partitie” zal verschijnen. Klik op “Volgende”.
4. Kies bij het aanmaken voor “Primaire Partitie” en klik op “Volgende”.
5. Geef een grootte voor de nieuwe partitie. Standaard staat deze maximaal. Klik op
“Volgende”.
2
Let op: Het partitioneren of formatteren van een harde schijf zal alle bestaande
data op de schijf verwijderen!

NEDERLANDS
5
6. U kunt een stationsletter toewijzen. Standaard wordt de eerst beschikbare
stationsletter gebruikt. Klik op “Volgende”.
7. Controleer of het bestandssysteem op “NTFS” staat. Daarnaast kunt u een
volumenaam toewijzen aan de schijf en kiezen voor snel formatteren. Klik op
“Volgende” om door te gaan.
8. U krijgt een samenvatting van de gemaakte opdrachten. Door op “Voltooien” te
klikken worden de gemaakte opdrachten uitgevoerd en is de harde schijf klaar
voor gebruik.
De harde schijf in uw CHD3SU is nu klaar voor gebruik.
7
7

ENGLISH
6
Conceptronic Grab’n’GO CHD3SU
Quick Installation Guide
Congratulations on the purchase of your
Conceptronic Serial ATA to USB 2.0 Harddiskbox.
The enclosed Hardware Installation Guide gives you a step-by-step explanation of how to
install the Conceptronic Serial ATA to USB 2.0 Harddiskbox on your PC or notebook.
When problems occur, we advise you to go to our support-site (go to
www.conceptronic.net and click ‘support’). Here you will find a lot of possibilities to solve
your problems.
When you have other questions about your product and you cannot find it at our website,
For more information about Conceptronic products, please visit the Conceptronic Web Site:
www.conceptronic.net.
The Software installation as described below, may be slightly different from the installation
on your computer. This depends on the Windows version you are using.
1. Introduction
This product provides a fast and easy way to add extra storage space to your Desktop
or Notebook. You can assemble a Serial ATA hard disk in the CHD3SU to provide you
with portable storage.
The hard disk box is perfect for transferring data, making backups or for use as a
second hard disk on your computer.
2. Package Contents
The following items must be present in your package:
1x CHD3SU
4x Screw for HDD assembly (not included when CHD3SU is pre-assembled)
1x CHD3SU Power Supply
1x USB Cable
1x Stand for CHD3SU
1x Warranty Card 1x Quick Installation Guide

ENGLISH
7
3. Hardware Installation CHD3SU
3.1 Assembling the CHD3SU (When no hard disk is installed yet)
If you bought the CHD3SU with a hard disk pre-installed, you can skip this step and
continue to step 3.2
a. Remove the 2 screws at the back of the CHD3SU and remove the back plate.
b. Gently slide the hard disk tray out of the housing.
c. Gently place the hard disk in the tray. The Serial ATA connector of the tray will
connect to the interface on the Harddisk.
Note: The CHD3SU can only be used with Serial ATA hard disks (SATA-I, SATA-II) !

ENGLISH
8
d. Turn over the tray and use the 4 supplied screws to fasten the hard disk to the
tray.
e. Slide back the tray in the housing, attach the back plate to the backside of the
tray and use the 2 screws to fasten the back plate.
3.2 Cable connections
a. Connect the power supply to the power outlet and to the hard disk.
b. Connect the USB cable to the CHD3SU and to a free USB port on your computer.
c. Use the power switch on the back of the CHD3SU to turn on the device. The
Conceptronic Logo on the front of the CHD3SU will light up blue.
Windows 2000 & XP Automatically will recognize the hard disk. No driver installation
is required to operate the CHD3SU.
4. Safely removing the Harddiskbox
The device must be deactivated before disconnecting the device otherwise data could
be lost. You can deactivate “USB Mass Storage Device” by double clicking the icon in
the taskbar.
“Remove or eject hardware components” appears on the screen after double clicking.
Activate the appropriate USB component here and confirm with “Deactivate”. A
warning appears if you do not deactivate the device before disconnecting.

ENGLISH
9
5. Create and format a partition on the CHD3SU
It is possible that the hard disk you are using is not partitioned/formatted yet. In this
situation the CHD3SU will not show a replaceable hard disk with partitions in your
operating system. To create and/or format the partition on the CHD3SU, you can use
the default Windows format utility.
1. Click on “Start”, “Run”, execute the command “diskmgmt.msc” and press “OK”.
2. Select your external hard disk and right click on it. If there is a partition present
which you want to delete, choose “Delete Partition”. To create a new partition,
select “Create New Partition”.
3. The “New Partition Wizard” will appear. Click “Next”.
4. Select the option “Primary Partition” and click “Next”.
5. Set up the size of your new partition. It is set to the maximum size by default.
Click “Next”.
6. Assign a drive letter for your new partition. By default, the first free drive letter
is assigned. Click “Next”.
2
Note: When creating and/or formatting the Harddisk all current data will be
deleted!

ENGLISH
10
7. You can make different settings to format the hard disk. At “File System”, you
can choose between NTFS or FAT32. You can also assign a volume name for the
partition and choose for “Quick Format”. Click “Next” to continue.
8. You will see a summary of the selected commands. By selecting “Finish”, all
commands will be executed and your hard disk will be ready to use.
The hard disk built-in your CHD3SU is now ready for use.
7
7
Note: Partitions bigger than 32GB can only be formatted with the NTFS file system
when using Windows Disk Management!

ESPAÑOL
11
Conceptronic Grab’n’GO CHD3SU
Guía de iniciación rápida
Felicidades por la compra de su Disco Duro Serial ATA a USB 2.0 de
Conceptronic.
La guía de instalación de hardware le orientará paso a paso sobre cómo instalar el Disco
Duro Serial ATA a USB 2.0 de Conceptronic en su ordenador de sobremesa o portátil.
Caso de experimentar problemas, recomendamos acceda a nuestra página de soporte 2-
Tech (acceda a www.conceptronic.net ‘Technical support’ (soporte técnico) y haga clic en
‘on-line support’ (soporte en línea). Ahí encontrará una gran cantidad de posibles
soluciones a sus problemas.
Si tiene otras preguntas sobre su producto y no las encuentra en nuestro sitio web, póngase
en contacto con nuestro servicio técnico por correo electrónico:
Para obtener más información acerca de productos de Conceptronic por favor visite el lugar
Web de Conceptronic: www.conceptronic.net.
La instalación de software, tal y como se describe a continuación, puede ser algo diferente
de la instalación en su ordenador. Eso depende de la versión de Windows que esté usando.
1. Introducción
Este producto le proporciona una forma rápida y fácil de añadir capacidad de
almacenamiento a su ordenador de sobremesa o portátil. Puede montar un disco duro
SATA en el CHD3SU para obtener almacenamiento portátil.
El disco duro externo es perfecto para transferir datos, realizar copias de seguridad o
para usar como segundo disco duro de su ordenador.
2. Contenido del paquete
En el paquete deben encontrarse los siguientes elementos:
1x CHD3SU
4x tornillos para el montaje del HHD (no incluidos si el CHD3SU ya está montado
previamente)
1x alimentación del CHD3SU
1x cable USB
1x Base para el CHD3SU
1x Tarjeta de garantía 1x Guía de instalación rápida

ESPAÑOL
12
3. Instalación del Hardware del CHD3SU
3.1 Montaje del CHD3SU (Cuando todavía no está instalado el disco duro)
Si adquirió el CHD3SU con un disco duro preinstalado, puede saltarse este paso y
seguir al 3.2
a. Retire los 2 tornillos de la parte trasera del CHD3SU y retire la tapa trasera.
b. Deslice suavemente la bandeja del disco duro hacia fuera de la carcasa.
c. Coloque suavemente el disco duro en la bandeja. El conector Serial ATA de la
bandeja se conectará a la interfaz del disco duro.
Nota: El CHD3SU puede utilizarse únicamente con discos duros Serial ATA (SATA-I
y
SATA-II).

ESPAÑOL
13
d. Voltee la bandeja y use los 4 tornillos proporcionados para fijar el disco duro a la
bandeja.
e. Vuelva a deslizar la bandeja hacia el interior de la carcasa, acople la placa
trasera a la parte posterior de la bandeja y use los 2 tornillos para fijar la placa
trasera.
3.2 Conexión de los cables
a. Conecte el cable de alimentación a la toma de alimentación y al disco duro.
b. Conecte el cable USB al CHD3SU y a un puerto USB libre de su ordenador.
c. Use el interruptor de alimentación de la parte trasera del CHD3SU para encender
el dispositivo. El logo Conceptronic del frontal del CHD3SU se iluminará con una
luz azul.
Windows 2000 y XP reconocen automáticamente el disco duro. La instalación de los
drivers no es necesaria para el funcionamiento del CHD3SU.
4. Desinstalación seguramente
El controlador debe ser desactivado antes de desconectar el aparato sino los datos se
perderán. Puede desactivar “USB Mass Storage Device” haciendo doble clic en el icono
de la barra de tareas.
“Remove or eject hardware components” aparecerá en la pantalla después de hacer
doble clic. Active aquí el componente USB adecuado y confirme dando clic a
“Deactivate”. Aparecerá una advertencia si Ud. no desactiva el aparato antes de
desconectarlo.

ESPAÑOL
14
5. Crear y formatear una partición en el CHD3SU
Es posible que el disco duro que esté usando no esté todavía particionado/formateado.
En este caso, el CHD3SU no mostrará un disco duro extraíble con particiones en su
sistema operativo. Para crear y/o formatear la partición en el CHD3SU, puede usar la
utilidad predeterminada de formato de Windows.
1. Haga clic en “Inicio”, en “Ejecutar”, ejecute el comando “diskmgmt.msc” y
pulse “Aceptar”.
2. Seleccione su disco duro externo y haga clic con el botón derecho sobre él. Si hay
una partición que desea eliminar, seleccione “Eliminar partición”. Para crear una
nueva partición, seleccione “Crear nueva partición”.
3. A continuación aparecerá el “Asistente para crear una nueva partición”. Haga
clic en “Siguiente”.
4. Seleccione la opción “Partición primaria” y haga clic en “Siguiente”.
5. Configure el tamaño de la nueva partición. Por defecto está configurada en el
tamaño máximo. Haga clic en “Siguiente”.
2
Nota: Si crea y/o formatea el disco duro, se eliminarán todos los datos actuales.

ESPAÑOL
15
6. Asigne una letra de unidad para la nueva partición. Por defecto se asigna la
primera letra de la unidad libre. Haga clic en “Siguiente”.
7. Puede aplicar diferentes ajustes para formatear el disco duro. En “Sistema de
archivos” puede elegir entre NTFS o FAT32. También puede asignar un nombre
de volumen a la partición y seleccionar “Formato rápido”. Haga clic en
“Siguiente” para continuar.
8. Finalmente aparecerá un resumen de los comandos seleccionados. Al seleccionar
“Finalizar”, se ejecutarán todos los comandos y el disco duro estará listo para su
uso.
El disco duro incorporado su CHD3SU está ahora listo para el uso.
7
7
Nota: Las particiones superiores a 32 GB sólo se podrán formatear con el sistema
de archivo NTFS cuando se utiliza el Gestor de Disco de Windows.

DEUTSCH
16
Conceptronic Grab’n’GO CHD3SU
Schnellstart Anleitung
Wir gratulieren Ihnen zum Erwerb Ihrer seriellen ATA auf USB 2.0
Festplattenbox von Conceptronic.
In beiliegendem Hardwareinstallationshandbuch wird Ihnen Schritt für Schritt gezeigt, wie
die serielle ATA auf USB 2.0 Festplattenbox von Conceptronic auf einem PC oder Notebook
installiert werden muss.
Sollten irgendwelche Probleme auftreten, empfehlen wir ihnen, auf unsere Support-Seite
im Internet zu gehen (www.conceptronic.net) und auf 'Support’ zu klicken. Dort werden sie
die "Frequently Asked Questions" Datenbank finden.
Falls sie andere Fragen zu ihrem Produkt haben und sie diese nicht auf unserer Website
Weitere Informationen zu den Conceptronic Produkte finden Sie auf der Website von
Conceptronic: www.conceptronic.net.
Die nachstehend beschriebene Software-Installation kann sich bei Ihrem Rechner aufgrund
des verwendeten Windows-Version leicht unterscheiden.
1. Einleitung
Dieses Produkt bietet auf schnelle und einfache Weise zusätzlichen Speicherplatz für
Ihren Desktop- oder Notebook-Computer. Sie können einer SATA-Festplatte als
tragbaren Speicher im CHD3SU installieren.
Die Festplattenbox ist ideal für die Übertragung von Daten, das Erstellen von Backups
oder als zweite Festplatte für Ihren Computer.
2. Packungsinhalt
In der Verpackung ist Folgendes enthalten:
1x CHD3SU
4x Schrauben für die Montage der Festplatte (nicht im Lieferumfang enthalten,
wenn die CHD3SU bereits vormontiert ist)
1x CHD3SU-Netzteil
1x USB-Kabel
1x Ständer für CHD3SU
1x Garantiekarte 1x Schnellinstallationsanleitung

DEUTSCH
17
3. Hardwareinstallation CHD3SU
3.1 Installation der CHD3SU (wenn noch keine Festplatte installiert ist)
Wenn Sie die CHD3SU mit einer vorinstallierten Festplatte gekauft haben, können Sie
diesen Schritt überspringen und bei Schritt 3.2 fortfahren.
a. Entfernen Sie die 2 Schrauben auf der Rückseite der CHD3SU und danach die
hintere Abdeckung.
b. Ziehen Sie den Festplattenschacht vorsichtig aus dem Gehäuse.
c. Legen Sie die Festplatte vorsichtig in den Schacht. Der serielle ATA-Anschluss des
Schachts wird mit der Schnittstelle der Festplatte verbunden.
Hinweis: Die CHD3SU kann nur mit seriellen AT
A
-Festplatten (SAT
A
-I, SAT
A
-II)
verwendet werden!

DEUTSCH
18
d. Drehen Sie den Schacht um und befestigen Sie die Festplatte mit den 4
mitgelieferten Schrauben am Schacht.
e. Schieben Sie den Schacht in das Gehäuse, legen Sie die hintere Abdeckung an die
Rückseite des Schachts und befestigen Sie die Abdeckung mit den 2 Schrauben.
3.2 Kabelanschlüsse
a. Schließen Sie das Stromkabel an der Stromversorgung und an der Festplatte an.
b. Schließen Sie das USB-Kabel an der CHD3SU und an einen freien USB-Port Ihres
Computers an.
c. Betätigen Sie den Powerschalter auf der Rückseite des Geräts, um das Gerät
einzuschalten. Das Conceptronic Logo auf der Rückseite der CHD3SU leuchtet
blau.
Windows 2000 und XP erkennen die Festplatte automatisch. Für den Betrieb der
CHD3SU ist keine Treiberinstallation erforderlich.
4. Deinstallation
Deaktivieren Sie das Gerät, bevor Sie die Verbindung zum PC unterbrechen. Es könnte
sonst zu einem Datenverlust kommen. Drücken Sie hierzu auf das Icon “Hardware
entfernen oder
auswerfen”.
Es erscheint die Meldung “USB Massenspeicher anhalten”. Klicken Sie auf diese
Meldung. Als nächstes erscheint der Hinweis, dass Sie das Gerät nun entfernen können.

DEUTSCH
19
5. Eine Partition auf der CHD3SU erstellen und formatieren
Möglicherweise ist die Festplatte, die Sie verwenden, noch nicht
partitioniert/formatiert. In diesem Fall zeigt die CHD3SU keinen Wechseldatenträger
mit Partitionen in Ihrem Betriebssystem an. Sie können das Standard-Formatierungs-
Hilfsprogramm von Windows für das Erstellen und/oder Formatieren der Partition auf
der CHD3SU verwenden.
1. Klicken Sie auf „Start” und „Ausführen”, geben Sie den Befehl „diskmgmt.msc”
ein und klicken Sie auf „OK”.
2. Wählen Sie Ihre externe Festplatte und rechtsklicken Sie darauf. Wenn eine
Partition vorhanden ist, die Sie löschen möchten, wählen Sie „Partition löschen”.
Um eine neue Partition zu erstellen, wählen Sie „Neue Partition erstellen“.
3. Es erscheint der „New Partition Wizard” [Einrichtungsassistent], Klicken Sie auf
„Weiter".
4. Wählen Sie die Option „Primäre Partition” und klicken Sie auf „Weiter”.
5. Geben Sie die Größe der neuen Partition ein. Standardmäßig ist die maximale
Größe eingegeben. Klicken Sie auf „Weiter".
Hinweis: Wenn Sie die Festplatte neu anlegen bzw. formatieren, werden alle
laufenden Daten gelöscht!
2

DEUTSCH
20
6. Ordnen Sie der neuen Partition einen Laufwerkbuchstaben zu. Standardmäßig
wird der erste freie Laufwerkbuchstaben zugeordnet. Klicken Sie auf „Weiter".
7. Sie können verschiedene Einstellungen für die Formatierung der Festplatte
vornehmen. Unter „Dateisystem“ können Sie zwischen NTFS und FAT32 wählen.
Sie können der Partition auch einen Volume-Namen zuweisen und die
Durchführung einer „Schnellformatierung” festlegen. Klicken Sie auf „Weiter“.
8. Es erscheint eine Zusammenfassung der ausgewählten Befehle. Nachdem Sie auf
„Fertigstellen” geklickt haben, werden alle Befehle ausgeführt und die Festplatte
ist betriebsbereit.
Die Festplatte eingebaut in Ihre CHD3SU ist jetzt bereit für Gebrauch.
7
7
Hinweis: Partitionen, die größer sind als 32GB, können bei Verwendung von Windows
Disk Management [Datenträgerverwaltung] nur mit dem NTFS-Dateisystem
formatiert werden!
Other manuals for CHD3SU
1
Table of contents
Languages:
Other Conceptronic Enclosure manuals

Conceptronic
Conceptronic Grab'n'GO CHD3UL Version 2.0 User manual

Conceptronic
Conceptronic HDE02B User manual

Conceptronic
Conceptronic CHD2MUW User manual

Conceptronic
Conceptronic CH3B2E User manual

Conceptronic
Conceptronic CH3ENAS User manual

Conceptronic
Conceptronic DDE03G User manual

Conceptronic
Conceptronic CHD3SU User manual

Conceptronic
Conceptronic CHD3DUSB3 User manual

Conceptronic
Conceptronic CHD2MUSB3B User manual

Conceptronic
Conceptronic DANTE04B User manual