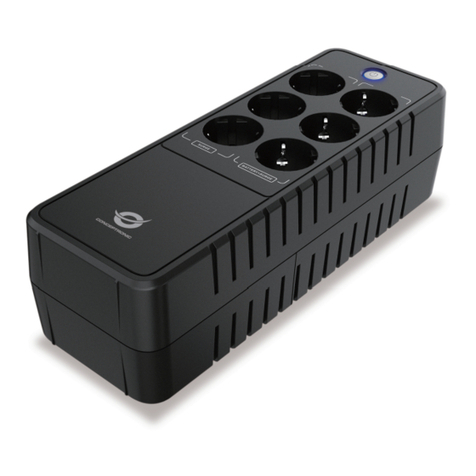
Conceptronic CUPS650 User manual

Multi Language Quick Guide
UPS
CUPS650,CUPS850
V1.0

English
1
23
Conceptronic CUPS650,CUPS850
1. Package contents
The following items are present in the package of the Conceptronic UPS:
•UPS
•Input Schuko power cable
•Output power cable (IEC-IEC)
•USB cable
•Multi language quick installation guide
2. Product overview
FRONT PANEL
1. USB Port
2. LED Indicators –
AC Mode: Green lighting
Battery Mode: Green flashing
3. Power Switch
REAR PANEL
1. AC input
2. Output receptacles
3. Tvss (RJ11)

English
3. Installation & usage
Inspection
Remove the UPS from its packaging and inspect it for damage that may have
occurred during shipping. If any damage is discovered, repack the unit and
return it to the place of purchase.
Charging
This unit is shipped from the factory with its internal battery fully charged,
however, some charge may be lost during shipping and the battery should be
recharged prior to use. Plug the unit into an appropriate power supply and
allow the UPS to charge fully by leaving it plugged in for at least 6 hours with
no load (no electrical devices such as computers, monitors, etc.) connected.
Placement
Install the UPS unit in any protected environment that provides adequate
airflow around the unit, and is free from excessive dust, corrosive fumes and
conductive contaminants. Do not operate your UPS in an environment where
the ambient temperature or humidity is high.

English
On the other hand, place the UPS away from the monitor at least 20cm to
avoid interference.
Connection
Plug the UPS into a 2-pole, 3-wire grounded receptacle. Then connect one
computer-related device into each of the power receptacles supplied on the
back of the UPS.
20CM

English
Turn On/Off
To turn on the UPS unit, press the power switch lightly. To turn off the UPS
unit, press the power switch again.
DC Start
All Aurora Series are equipped with DC Start. To start the UPS when AC
utility power is not available, simply press the power switch.
Green Power Function
All Aurora UPS is equipped with Green Power Function. For saving power
and protecting battery, the method of deep discharging protection is adopted
on inverter mode.
Software Installation on your PC
Connected by USB to a PC or notebook, the Software enables
communication between the UPS and the computer. The UPS software
monitors the status of the UPS, shuts down the system before the UPS is
exhausted and can remotely observe the UPS via the Network (enabling
users to manage their system more effectively). Upon AC failure or UPS
battery low, UPS takes all necessary actions without intervention from the
system administrator. In addition to automatic file saving and system shut-
down functions, it can also send warning messages via pager, e-mail etc.
Enter the following serial No. to install software: 511C1-01220-0100-478DF2A
After the software is successfully installed, the communication with UPS has

English
been established and a green icon will appear in the system tray.
Double-click the icon to use the monitor software (as above).
You can schedule UPS shutdown/start-up and monitor UPS status through PC.
Detail instructions please refer to the e-manual in the software.

English
TROUBLE SHOOTING
Symptom
Possible Cause
Remedy
No LED display on
the front panel.
1. Battery weak.
1. Charge battery up to 8 hours.
2. Battery defect.
2. Replace with the same type of
battery.
3. Power switch is not pressed.
3. Press the power switch again.
Alarm buzzer beeps
continuously when
AC supply is normal.
Overload of the UPS.
Verify that the load matches the UPS
capability specified in the spec.
When power failure,
back-up time is
shorten.
1. Overload of the UPS.
1. Remove some noncritical load.
2. Battery voltage is too low.
2. Charge battery 8 hours or more.
3. Battery defect due to high
temperature operation
environment, or improper
operation to battery.
3. Replace with the same type of
battery.
Mains normal but
LED is flashing.
Power cord is loose.
Reconnect the power cord properly.
If any abnormal situations occur that are not listed above, please call service people immediately.
Enjoy the use of your Conceptronic UPS!

Deutsch
1
23
Conceptronic CUPS650,CUPS850
1. Packungsinhalt
Folgende Teile befinden sich in der Verpackung von Conceptronic
UPS:
•UPS
•Input Schuko power cable
•Output power cable (IEC-IEC)
•USB cable
•Multi language quick installation guide
2. Gerätekomponenten
Frontblende
1. USB-Port
2. LED-Indikatoren –
Netzmodus: Leuchtet grün
Akkumodus: Blinkt grün
3. Netzschalter
Rückblende
1. Wechselspannungseingang
2. Ausgänge
3. Tvss (RJ11)

Deutsch
3. Installation & Verwendung
Prüfung
Nehmen Sie die USV aus ihrer Verpackung und prüfen sie auf mögliche
Transportschäden. Falls Sie Schäden bemerken sollten, packen Sie das
Gerät wieder ein und geben es an die Verkaufsstelle zurück.
Aufladen
Dieses Gerät wird ab Werk mit vollständig aufgeladenem internen Akku
versendet; dennoch kann während des Transports ein Teil der Ladung
verlorengehen, weshalb Sie den Akku vor der Benutzung aufladen
sollten. Schließen Sie das Gerät an eine geeignete Stromversorgung an
und lassen die USV vollständig aufladen, indem Sie sie mindestens 6
Stunden ohne anliegende Last (elektrische Geräte, wie Computer,
Monitore etc.) angeschlossen lassen.
Aufstellung
Installieren Sie die USV in einer beliebigen geschützten Umgebung, die
angemessene Luftzirkulation rund um das Gerät bietet, frei von
übermäßigem Staub, korrosiven Dämpfen und leitenden
Verunreinigungen ist. Nutzen Sie ihre USV nicht in einer Umgebung, in
der die Umgebungstemperatur oder Feuchtigkeit hoch ist.

Deutsch
Halten Sie gleichzeitig jedoch zur Vermeidung von Störungen einen
Mindestabstand von 20 cm zwischen USV und Monitor ein.
Anschluss
Schließen Sie die USV an eine 2-polige, 3-adrige geerdete Steckdose an.
Schließen Sie dann ein Computer-relevantes Gerät an einem der
Ausgänge an der Rückseite der USV an.
Ein-/Ausschalten
Drücken Sie zum Einschalten der USV leicht den Netzschalter. Drücken
Sie zum Abschalten der USV erneut den Netzschalter.
20CM

Deutsch
Gleichspannungsstart
Die gesamte Aurora-Serie ist mit einer Gleichspannungsstartfunktion
ausgestattet. Starten Sie die USV, wenn kein Netzstrom verfügbar ist,
indem Sie einfach den Netzschalter betätigen.
Energiesparfunktion
Alle USV-Geräte der Aurora-Serie sind mit einer Energiesparfunktion
ausgestattet. Zum Energiesparen und zum Schutz des Akkus findet im
Invertermodus die Methode des Tiefentladeschutzes Anwendung.
Softwareinstallation auf Ihrem PC
Wenn das Gerät per USB mit einem PC oder Notebook verbunden ist,
ermöglicht die Software eine Kommunikation zwischen USV und
Computer. Die USV-Software überwacht den USV-Status, schaltet das
System ab, bevor die USV erschöpft ist, und kann die USV extern über
das Netzwerk beobachten (ermöglicht Nutzern die effektivere Verwaltung
ihres Systems). Bei einem Stromversorgungsfehler oder erschöpftem
USV-Akku, führt die USV alle notwendigen Schritte durch, ohne dass ein
Eingreifen durch den Systemadministrator erforderlich ist. Zusätzlich zur
automatischen Dateispeicherung und Systemabschaltung kann sie
außerdem Warnmeldungen per Pager, E-Mail etc. versenden.
Geben Sie folgende Seriennummer zur Softwareinstallation ein: 511C1-
01220-0100-478DF2A
Nach erfolgreicher Softwareinstallation wird die Kommunikation mit der

Deutsch
USV hergestellt und ein grünes Symbol erscheint im Systemtray.
Doppelklicken Sie zur Nutzung der Monitorsoftware auf das Symbol (wie
oben gezeigt).
Sie können per PC die USV-Abschaltung/-Einschaltung planen und den USV-
Status überwachen.
Detaillierte Anweisungen entnehmen Sie bitte der elektronischen Anleitung in
der Software.

Deutsch
Problemlösung
Symptom
Mögliche Ursache
Lösung
Keine LED-Anzeige
an der Frontblende.
1. Akku schwach.
1. Akku bis zu 8 Stunden aufladen.
2. Akku defekt.
2. Mit demselben Akkutyp ersetzen.
3. Netzschalter nicht betätigt.
3. Drücken Sie den Netzschalter noch
einmal.
Alarmsummer ertönt
kontinuierlich bei
normaler
Netzstromversorgun
g.
Überlastung der USV.
Prüfen Sie, ob die Last mit der in den
Spezifikationen angegebenen USV-
Leistung übereinstimmt.
Bei einem
Stromversorgungsfe
hler verringert sich
die Zeit der
Ausfallsicherung.
1. Überlastung der USV.
1. Einige nicht kritische Lasten
entfernen.
2. Akkuspannung ist zu gering.
2. Akku 8 Stunden oder länger
aufladen.
3. Akku aufgrund hoher
Umgebungstemperatur oder
unsachgemäßen Akkubetriebs
defekt.
3. Mit demselben Akkutyp ersetzen.
Netzstromversorgun
g normal, aber LED
blinkt.
Netzkabel ist locker.
Netzkabel erneut richtig anschließen.
Bei unnormalen Situationen, die oben nicht aufgelistet sind, wenden Sie sich bitte umgehend
an den Kundendienst.
Viel Spaß mit Ihrem Conceptronic UPS!

FRANCAIS
1
23
Conceptronic CUPS650,CUPS850
1. Contenu du Coffret
Les éléments suivants se trouvent dans l'emballage de votre
Conceptronic UPS:
•UPS
•Input Schuko power cable
•Output power cable (IEC-IEC)
•USB cable
•Multi language quick installation guide
2. Aperçu du produit
PANNEAU AVANT
1. Port USB
2. Voyants DEL -
Mode CA : Éclairage vert
Mode batterie : Clignotement vert
3. Bouton d'alimentation
PANNEAU ARRIÈRE
1. Entrée CA
2. Prises de sortie
3. Tvss (RJ11)

FRANCAIS
3. Installation & Utilisation
Inspection
Retirez l'UPS de son emballage et vérifiez l'éventuelle présence de
dégâts qui auraient pu survenir lors de l'expédition. Si vous découvrez
des dégâts, remettez l'appareil dans l'emballage et renvoyez-le au point
d'achat.
Recharge
L'appareil est expédié de l'usine avec sa batterie interne pleinement
rechargée, cependant, une partie de la recharge peut être perdue lors de
l'expédition, et la batterie doit être rechargée avant utilisation. Branchez
l'appareil sur une source d'alimentation appropriée et laissez l'UPS se
recharger pleinement en le laissant connecté au moins 6 heures sans
charge (aucun appareil électrique, par exemple ordinateur, moniteur, etc.)
connectée.
Disposition
Installez l'UPS dans un environnement protégé, sans poussière et avec
une circulation d'air suffisante autour de l'appareil, et sans fumée
corrosive ou contaminants conducteurs. N'utilisez pas l'UPS dans un
environnement avec une température ambiante ou une humidité élevée.

FRANCAIS
Placez toujours l'UPS à au moins 20 cm du moniteur pour éviter les
interférences.
Connexion
Branchez l'UPS sur une prise bipolaire à trois fils reliée à la terre. Puis
branchez un périphérique lié à l'ordinateur sur une des prises
d'alimentation à l'arrière de l'UPS.
20CM

FRANCAIS
Mise sous tension / hors tension
Pour allumer l'appareil UPS, appuyez légèrement sur le bouton
d'alimentation. Pour éteindre l'appareil UPS, appuyez à nouveau sur le
bouton d'alimentation.
Démarrage CC
Tous les appareils de la série Aurora sont équipés du démarrage CC.
Pour démarrer l'UPS lorsque l'alimentation CA n'est pas disponible,
appuyez simplement sur le bouton d'alimentation.
Fonction d'alimentation verte
Tous les UPS Aurora sont équipés de la fonction Alimentation verte.
Pour économiser de l'énergie et protéger la batterie, la méthode de
protection contre la décharge profonde est adoptée en mode inverseur.
Installation du logiciel sur votre PC
Connecté par USB à un PC ou ordinateur portable, le logiciel permet
d'établir la communication entre l'UPS et l'ordinateur. Le logiciel de l'UPS
surveille l'état de l'UPS, éteint le système avant que l'UPS ne soit épuisé,
et peut surveiller l'UPS à distance via le réseau (permettant aux
utilisateurs de gérer leur système plus efficacement). En cas de panne
CA ou de batterie faible de l'UPS, celui-ci prend les mesures nécessaires
sans intervention de l'administrateur système. En plus d'enregistrer les
fichiers et d'éteindre le système automatiquement, il peut envoyer des
messages d'avertissement par pager, e-mail, etc.

FRANCAIS
Saisissez le numéro de série suivant pour installer le logiciel : 511C1-01220-
0100-478DF2A
Une fois le logiciel bien installé, la communication avec l'UPS a été établie et
une icône verte s'affichera dans la barre du système.
Double-cliquez sur l'icône pour utiliser le logiciel de surveillance (comme ci-
dessus).
Vous pouvez planifier l'arrêt/le démarrage de l'UPS et surveiller l'état de
l'UPS via le PC.
Pour plus d'instructions, veuillez vous reporter au manuel électronique du
logiciel.

FRANCAIS
DÉPANNAGE
Problème
Cause possible
Résolution
Aucune DEL ne
s'affiche sur le
panneau avant.
1. Batterie faible.
1. Rechargez la batterie pendant
jusqu'à 8 heures.
2. Panne de batterie.
2. Remplacez uniquement avec une
batterie du même type.
3. Le bouton d'alimentation n'est pas
enclenché.
3. Appuyez à nouveau sur le bouton
d'alimentation.
La sonnerie d'alarme
retentit constamment
même si
l'alimentation secteur
est normale.
Surcharge de l'UPS.
Vérifiez que la charge correspond aux
capacités de l'UPS indiquées dans les
spécifications.
En cas de panne
d'alimentation, la
durée de soutien est
réduite.
1. Surcharge de l'UPS.
1. Retirez des charges non critiques.
2. La tension de la batterie est trop
faible.
2. Rechargez la batterie pendant 8
heures ou plus.
3. Panne de batterie en raison d'un
environnement trop chaud, ou
d'une utilisation inappropriée de la
batterie.
3. Remplacez uniquement avec une
batterie du même type.
Alimentation normale
mais DEL
clignotante.
Le cordon d'alimentation est mal
branché.
Rebranchez-le correctement.
Si une situation anormale survient et qu'elle n'est pas répertoriée ci-dessus, appelez
immédiatement la personne responsable de l'entretien.
Profitez de votre Conceptronic UPS!

ESPANOL
1
23
Conceptronic CUPS650,CUPS850
1. Contenido del paquete
El paquete contiene los siguientes artículos de Conceptronic UPS:
•UPS
•Input Schuko power cable
•Output power cable (IEC-IEC)
•USB cable
•Multi language quick installation guide
2. Descripción del producto
PANEL FRONTAL
1. Puerto USB
2. Indicadores LED –
Modo de CA: Encendido en verde
Modo de batería: Intermitente en verde
3. Conmutador de alimentación
PANEL POSTERIOR
1. Entrada de CA
2. Tomas de salida
3. Tvss (RJ11)
Other manuals for CUPS650
1
This manual suits for next models
1
Table of contents
Other Conceptronic UPS manuals

Conceptronic
Conceptronic ZEUS03EP User manual

Conceptronic
Conceptronic CUPS650US User manual

Conceptronic
Conceptronic ZEUS 01E User manual

Conceptronic
Conceptronic ZEUS02ES User manual

Conceptronic
Conceptronic CUPS1200 User manual

Conceptronic
Conceptronic CUPS650 User manual

Conceptronic
Conceptronic ZEUS 05E User manual

Conceptronic
Conceptronic CUPS600 User manual