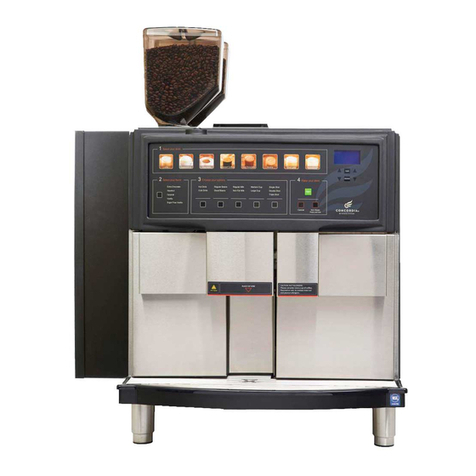
Concordia XpressTouch User manual

User Guide
X
p
ressTouch
(
X
T
)


Table of Contents
Important Safety Information ................................2
Machine Operation...........................................................2
Hot Surfaces and Liquids.................................................2
Electrical...........................................................................2
Espresso Grinders ............................................................2
The XpressTouch System..................................... 3
The Xpress System Components.......................... 4
Using the Espresso System......................................5
Starting the System..............................................5
How to Pour Drinks............................................. 6
Machine Access Lock ........................................... 8
Service Switch ..................................................... 9
The Service Switch in the VEND position........................9
The Service Switch in the CLEAN position......................9
The Service Switch and Cleaning the Machine................9
Beans and the Bean Hoppers ................................10
Bean Hoppers.....................................................10
Filling a Bean Hopper.....................................................10
Inserting the Hopper Stopper........................................10
Removing a Bean Hopper............................................... 11
Removing the Hopper Stopper....................................... 11
Milk and the Milk System...................................... 12
Refrigeration Unit..............................................12
Placing Milk in the Machine...........................................12
Milk Weight Trays ..........................................................12
Checking the Refrigeration Unit Temperature..............13
The Flavor System ................................................ 14
Flavor Storage....................................................14
Replacing Empty Flavor Boxes...........................14
Flavor Storage....................................................15
Replacing Empty Syrup/Sauce Bottles............... 15
Chocolate Sauce .................................................16
Cleaning and Maintenance.................................... 17
Cleaning ............................................................. 17
Cleaning Timers.............................................................. 17
Cleaning Tasks ................................................... 17
Daily Cleaning Procedures.................................18
With the Service Switch in the CLEAN position:...........18
Empty the Grounds Bin .................................................24
Monthly Cleaning Procedures........................... 24
Check Air Filter...............................................................24
Removing the Air Filter..................................................24
Cleaning a Bean Hopper.................................................25
Preventive Maintenance.....................................25
Ordering Cleaning and Replacement Items........25
Operational Messages...........................................26
Error Messages.....................................................27
Troubleshooting ...................................................28
FAQ ......................................................................30
Machine Warranty................................................33
Terms and Conditions...........................................35
Customer Service (800) 778-0990 2
Important Safety Information
The safety of you and your customers is important to Concordia. The Xpress machines dispense hot
liquids and steam. Please follow all safety precautions outlined in this manual, in order to reduce the risk
of electric shock, burns, and/or injury to persons or property.
Machine Operation
Do not use the machine for anything other than its specific intended purpose.
Close supervision is required anytime the machine is used near children.
Machine must be installed in a safe and stable location and in accordance with Concordia’s
installation requirements.
Do not attempt to override safety interlocks.
Do not operate the machine with unauthorized parts or attachments. Improper use may cause
fire, electrical shock, hazard, or injury.
WARNING: Use of unauthorized parts or attachments will nullify the machine warranty.
Hot Surfaces and Liquids
Care must be taken around the machine, as hot liquids and steam are produced and dispensed.
Serious burns can occur.
Do not touch hot surfaces or parts.
Electrical
To protect against electrical hazards, do not immerse the power cord, plugs, or machine in water
or any other liquid.
Turn the power switch to “OFF” when the machine will not be used for an extended period.
Do not operate the machine with an improper or damaged power cord or plug, or after the
machine has been damaged in any manner.
Espresso Grinders
Do not operate machine without bean hoppers in place.
The grinding mechanisms and burr blades are powerful; avoid contact with all moving parts.
Never feed coffee beans into the grinder by hand.
Never place a foreign object, finger, or hand into the grinding mechanism.

Customer Service (800) 778-0990 3
The XpressTouch System
The XpressTouch (XT & XT6) machine grinds fresh whole beans, brews fresh espresso, steams fresh
milk, infuses flavors, and delivers a perfect, freshly brewed, gourmet espresso beverage.
1. Bean Hoppers
2. Touch Screen
3. Product Outlet
4. Power Switch
5. Drain Tray and Grate
6. Refrigeration Unit
7. Service Switch
8. Machine Access Lock
9. Grounds Bin
10. Optional Flavor System (Not Shown)
1
2
8
3
4
5
6
7
9

Customer Service (800) 778-0990 4
The Xpress System Components
1. Bean Hoppers
Located on top of the machine, each bean hopper holds 2 lbs. of fresh, whole espresso roast
beans.
2. Touch Screen
The touch screen provides a user-friendly interface for selecting and pouring beverages, and for
the initiating and completing the cleaning process.
3. Product Outlet
The product outlet is where drinks and hot water are dispensed.
4. Power Switch
The power switch is located behind the left front door of the machine and controls the machine
power supply.
5. Drain Tray and Grate
The drain tray and grate direct excess liquid to the drain.
6. Refrigeration Unit
The refrigeration unit holds two 1-gallon (4-liter) milk containers.
7. Service Switch
The service switch is used to alternate between VEND mode and CLEAN mode, and is located
behind the left machine door.
8. Machine Access Lock
The doors of the machine can be locked, providing security in a self-service environment.
9. Grounds Bin
The grounds bin holds the used espresso grounds. The message MACHINE TEMPORARILY
OUT OF SERVICE, Used Coffee Grounds Bin is Full. Please Empty the Bin to Continue will
appear on the display approximately every 30 drinks.
10. Optional Flavor System
NOT SHOWN – see pages 17-19
Optional flavor system connects the patented EspressJet flavor system to the machine, to provide
selected flavors for a customer’s drink, utilizing either BIB flavors or bottled flavors.

Customer Service (800) 778-0990 5
Using the Espresso System
Starting the System
The power switch is located behind the left door.
1. Press the power switch to the ON position to start the machine.
2. Close the door. The machine will not warm up if the door is open.
3. The display will read:
MACHINE WARMING UP
Machine warm-up takes approximately 10-15 minutes. During warm-up, the machine is heating the water,
generating steam, and calibrating the brew group.
NOTE: If the machine stays in the MACHINE WARMING UP status for longer than 20 minutes, review
troubleshooting tips on page 26.
WARNING: Wait at least 10 seconds between turning the machine off and back on again. Quickly
flipping the power switch on and off can blow a fuse within the machine and/or result in machine
malfunction.

Customer Service (800) 778-0990 6
How to Pour Drinks
1. PLACE A CUP UNDER THE PRODUCT OUTLET
2. SELECT
YOUR
BEVERAGE
Touch the button for the type of drink you would like.
LATTE
CAPPUCCINO
CHAI LATTE
MOCHA
BREWED COFFEE/AMERICANO
ESPRESSO
STEAMED MILK
HOT CHOCOLATE
3. BEVERAGE
OPTIONS
These buttons determine the size and the elements of the drink.
TEMPERATURE
The default is HOT DRINK. Touch to select COLD DRINK.
MILK
The default is REGULAR MILK. Touch to select NON-FAT MILK.
BEAN
The default is REGULAR BEANS. Touch to select DECAF BEANS.
SIZE
The default is MEDIUM CUP, a 12oz (360mL) drink with one shot of espresso. Touch to select
LARGE CUP, a 16oz (480mL) drink with two shots of espresso.
Select NEXT to go to additional Options.
4. ESPRESSO SHOT
Touch to select from SINGLE SHOT, DOUBLE SHOT, or TRIPLE SHOT.
FLAVOR
The default is for no flavor to be added to a drink. Touch a button to select a flavor for a drink.
NOTE: Only one flavor can be chosen per milk-based drink, and no flavor can be chosen for
brewed coffee or espresso. It is possible to add a second flavor to a hot chocolate, chai latte, or
mocha drink. It is not possible to add two flavors to any other drink.
Select Beverage Select Options Select More Options

Customer Service (800) 778-0990 7
NOTE: Selecting CHOCOLATE will add a serving of chocolate to a drink. If selected with a
mocha or hot chocolate, an extra serving of chocolate will be added.
Select START to make your beverage.
5. MAKING A DRINK
The drink pour will start.

Customer Service (800) 778-0990 8
Machine Access Lock
To prevent unauthorized machine access, lock the doors by using the key provided.

Customer Service (800) 778-0990 9
Service Switch
Located behind the left machine door, the service switch is used to place the unit in either VEND or
CLEAN mode.
The Service Switch in the VEND position
Normal operating position.
Cleaning and programming buttons are disabled.
The Service Switch in the CLEAN position
The display on the touch screen will change to the SERVICE MENU screen.
The Service Switch and Cleaning the Machine
1. During cleaning, the service switch must be in the CLEAN position.
2. Open the left door.
3. Press the service switch into the CLEAN position.
4. Follow the cleaning instructions outlined on page 16.
5. Once cleaning is complete, press the service switch into the VEND position.

Customer Service (800) 778-0990 10
Beans and the Bean Hoppers
The XpressTouch series is configured to deliver both regular and decaffeinated espresso beverages.
Always use fresh, whole espresso roast beans to ensure a quality beverage.
How to Store Espresso Roast Beans
Espresso roast beans are typically sealed in airtight packaging by the roaster. Once the bag is opened,
the freshness of the beans will begin to decrease.
NOTE: Do not store espresso roast beans in a freezer or refrigerator. Dry storage only.
Bean Hoppers
The standard bean hopper holds approximately 2lbs (1kg) of beans. One bean hopper is labeled DECAF.
Filling a Bean Hopper
1. Remove the bean hopper lid
2. Pour fresh, whole espresso roast beans into the bean hopper
3. Replace the bean hopper lid
NOTE: If it is necessary to remove the bean hopper, insert the hopper stopper first. Be sure to remove
the hopper stopper when finished.
DO Use fresh, whole, espresso roast beans.
DO NOT Place ground coffee into the bean hopper.
DO NOT Place foreign materials in the bean hopper.
DO NOT Feed beans into the grinder by hand.
Inserting the Hopper Stopper
The hopper stopper blocks the hopper chute when removing a full bean hopper.
1. Place the hopper stopper in the slot at the base of the bean hopper and push it into the bean
hopper. The hopper stopper has a hole at one end. Insert the hopper stopper so that the hole
faces you, and then push the hopper stopper in until the hole aligns with the hopper.
2. With the hopper stopper in place, you can remove a full hopper from the machine, by lifting
straight up. Remember to hold lid on the hopper when removing.

Customer Service (800) 778-0990 11
Removing a Bean Hopper
Once both hopper stoppers are in place, simply lift the bean hopper upwards.
Removing the Hopper Stopper
To remove the hopper stopper once the bean hopper is back in its proper position on top of the espresso
machine, simply pull the hopper stopper from the bean hopper.
Hopper Stopper

Customer Service (800) 778-0990 12
Milk and the Milk System
Refrigeration Unit
The refrigeration unit is designed to accommodate two standard 1-gallon (4-liter) milk containers.
The following types of milk can be used in the Xpress:
Whole
2%
1%
Non-Fat
WARNING: Do NOT use any type of flavored milk or any type of milk substitute, such as soy or almond
milk. The sugars in flavored milk (including eggnog) can damage the machine and clog the milk delivery
tubes.
Placing Milk in the Machine
Milk #1 is placed in front, and Milk #2 is placed in rear. When pouring a drink, the machine uses Milk #1
by default.
1. Open the refrigeration unit door and place the opened Milk #2 container in the refrigeration unit.
2. Place the rear milk pick-up tube in milk container.
3. Slide the container into the rear of the refrigeration compartment while feeding the milk pick-up
tube fully into the milk container.
DO ensure the milk pick-up tube is fed into the middle of the container.
DO NOT place the milk pick-up tube into the milk container handle.
DO NOT kink or bend the milk pick-up tubes.
DO NOT pull excessively on the milk pick-up tubes.
4. Repeat process using the front milk pick-up tube and Milk #1 container.
5. Close the front doors to the machine.
Milk Weight Trays
In the refrigeration unit, the milk containers sit on top of milk weight trays. These trays monitor the milk
supply on hand, and when the milk level is low, a notification message is displayed.

Customer Service (800) 778-0990 13
Milk weight trays need to be correctly positioned in the refrigeration unit in order to allow the milk delivery
system to operate properly. There are notches on the sides of the weight trays, and a correctly positioned
weight tray will fit on the bottom of the refrigeration unit, as shown in the photo below.
It is important to use the milk containers the machine is calibrated for or the milk weight tray sensors will
not work properly.
Checking the Refrigeration Unit Temperature
The temperature for the refrigeration unit is always displayed on the machine’s touch screen.
If the refrigeration unit door has been open for an extended period of time, it is normal that the
temperature will rise. To return the refrigeration unit to the proper temperature, close the refrigeration unit
door. Check the temperature in an hour. If the temperature is not correct (between 35-41°F) at that time,
please contact your local Service Agent or contact Concordia Customer Service.

Customer Service (800) 778-0990 14
Nozzle
Connector
The Flavor System
Flavor Storage
For Bag-in-Box Flavor System - The flavor storage area contains the flavors used to make the drinks.
Each dispensing tube has a colored band, and each flavor box has a corresponding sticker with the same
color. It is important to properly connect the flavor tubes, in order to ensure that customers receive the
correct flavor, and to ensure flavor tubes are not contaminated with secondary flavors.
Black Blue Yellow White Green Red
Chocolate
Sauce Sugar-Free
Vanilla Caramel Vanilla Hazelnut Chai
It is necessary to periodically check the flavor boxes, as the levels are not automatically monitored. To
check the level of flavor, lift the box. If the box is very lightweight, the flavor level is getting low and it may
be necessary to replace the box.
Replacing Empty Flavor Boxes
Before replacing a flavor box, verify the bag is empty. For chocolate sauce boxes, the bag inside the box
may crease or partially collapse and block the flow of flavor. It may only be necessary to manipulate the
bag for chocolate sauce to flow properly. For instructions on how to do this, please call Concordia for
assistance at 1-800-778-0990.
1. Place box on a flat surface, so that the “OPEN HERE” locations faces upward.
2. Open box at the “OPEN HERE” location, and extract the connector.
3. Remove protective seal from the connector.
4. Clean the nozzle thoroughly with a wet cloth, to
remove any debris, and remove syrup or sauce
residue.
5. Hold connector firmly with hand.
6. Insert correct color-coded nozzle into connector
firmly, until the nozzle handle clicks into place.
7. Prime the flavor to ensure that the flavor is
flowing properly. See instructions below.
WARNING: Do not try to insert the nozzle without holding the connector, or the connector may be
pushed into the box.
NOTE: When removing an empty flavor box, DO NOT pull by grabbing the tubing or connector on a
flavor box. Once the nozzle is removed from the connector, remove the empty box from the flavor storage
area. Do NOT place the nozzle on the floor.
NOTE: It is normal that there may still be a small amount of syrup or sauce in a bag when the bag is
empty. A small amount of syrup or sauce may also drip when the nozzle is removed from the bag.

Customer Service (800) 778-0990 15
Flavor Storage
For Bottle Flavor System - The flavor cabinet located on the left of the machine contains the flavors
used to make the drinks. Each dispensing tube has a colored band, place each bottle to corresponding
connector with the same color. It is important to properly connect the flavor tubes, in order to ensure that
customers receive the correct flavor, and to ensure flavor tubes are not contaminated with secondary
flavors.
Replacing Empty Syrup/Sauce Bottles
1. Press the quick disconnect to release the tube.
2. Remove tube and bottle from cabinet. Then remove the syrup tube and lid from bottle and clean
with warm soapy water (discard bottle). Replacement tubes and lids have been provided for quick
replacement (can clean used tubes and connector after replacement).
3. Connect new bottle and tube.
4. You will need to prime the bottle of flavor to ensure proper drink production.
Primingtheflavorsystem:
Open left door and Press the SERVICE SWITCH into the CLEAN position and shut door.

Customer Service (800) 778-0990 16
Screen 1 below will be shown on the touchscreen. Select FLAVOR PRIME and Screen 2 will come up.
Select each flavor 1 at a time. Example: Press Chocolate Sauce then START PRIMING. Once you see
and smell chocolate sauce, press STOP PRIMING.
Once all flavor(s) have been primed, open left door and Press the SERVICE SWITCH into the VEND
position and shut door.
Chocolate Sauce
It is necessary to pre-warm the chocolate sauce before use. The minimum temperature must be 85°F
(29°C); otherwise, it will not flow properly. If chocolate sauce is not flowing, and the flavor box is not
empty, confirm the warming tray is on and operating. If it is not, call customer service. The power switch
for the warming tray is on the back of the tray. The bottle of chocolate sauce also needs to be warmed.
NOTE: It can take up to 24 hours for a bag of chocolate to warm up to the proper temperature. The
warming tray has been constructed with room for an additional pre-warmed chocolate sauce. Due to the
length of time necessary to heat chocolate sauce, it is strongly recommended to have a second box of
chocolate sauce on the warming tray at all times.
WARNING: If under-heated chocolate sauce is used, the chocolate flavor tube may rupture.
Screen 1 Screen 2

Customer Service (800) 778-0990 17
Cleaning and Maintenance
Cleaning
To maintain machine warranty, ensure sanitation, avoid mechanical failure, and ensure continual
operation, the XpressTouch must be cleaned and maintained on a regular basis.
Concordia cleaning products must be used in order to ensure proper cleaning and to maintain machine
warranty. Please see page 22 for ordering information.
NOTE: Cleaning products should be stored away from the flavor cabinet. Do NOT store cleaning
products in the flavor cabinet or near consumables.
Cleaning Timers
Every 150 drinks or 24 hours, the machine’s display will read DAILY CLEANING DUE. The machine must
be cleaned within two hours or 50 drinks or the machine will be disabled and will stop dispensing drinks.
Once the cleaning process is performed, the system will reset and normal operation will resume.
All timers start after the first drink is poured following a cleaning. For example, if you clean the machine
on Friday night and it is idle Saturday and Sunday, the timers are not started until the first drink is poured
Monday morning.
Cleaning Tasks
Daily cleaning and maintenance can be performed in less than 15 minutes a day!
1. Run the clean cycle.
2. Empty the grounds bin.
3. Clean the drain grate and drain tray.
4. Clean exterior surfaces.
5. Clean the interior of the refrigeration unit.
6. Clean the product nozzle.
To perform cleaning procedures, the service switch must be in the CLEAN position. For more information
about the service switch, please see page 12.

Customer Service (800) 778-0990 18
Daily Cleaning Procedures
1. Remove milk from Refrigerator (right door) and keep cold during cleaning cycle.
2. Empty the grounds bin (white box inside left door). Rinse if necessary and then replace back in the
machine (leave out of machine for 15 seconds). Push all the way in and shut door.
3. Clean the product nozzles with a clean towel and hot water. Remove any dried debris in nozzle area.
To perform cleaning procedures, the service switch must be in the CLEAN position.
The service switch is located behind the left door.
With the Service Switch in the CLEAN position:
The display on the touch screen will change to the SERVICE MENU screen (Screen 1).
Select CLEANING SERVICE on Screen 1
Select DAILY CLEANING on Screen 2
The MILK CLEANING screen (Screen 3) will appear. Select CONTINUE
Cleaning Kit includes (cleaner 1, cleaner 2, 3 cups, brew tablets, and gloves):
Screen 1 Screen 2 Screen 3
Service Switch
This manual suits for next models
2
Table of contents
Other Concordia Coffee Maker manuals

Concordia
Concordia 2500i User manual

Concordia
Concordia INTEGRA 4 User manual

Concordia
Concordia Integra User manual

Concordia
Concordia Xpress series User manual

Concordia
Concordia 1500s User manual

Concordia
Concordia 2500s User manual

Concordia
Concordia Integra 1 User manual

Concordia
Concordia Integra User manual
Popular Coffee Maker manuals by other brands

Electrolux
Electrolux Favola Easy ELM 5000 Instruction book

Black & Decker
Black & Decker TCM450B Use and care book

Saeco
Saeco Saeco Poemia HD8323/98 Specifications

Shine KITCHEN
Shine KITCHEN SCB-100 Operation manual

Nuova Simonelli
Nuova Simonelli Aurelia User handbook

Electrolux
Electrolux EKF3 series Instruction book