Conduant DM-4 User manual

ReadOnly-0-Rev-1-DM4 User Manual.doc 10/21/2005
DM-4 Real-time Storage Chassis
Installation and User Manual

2
Copyright and Trademarks
The information in this document is subject to change without notice.
This document contains proprietary information that is protected by copyright. All
rights are reserved. No part of this document may be photocopied, reproduced, or
translated to another language without the prior written consent of Conduant
Corporation.
Printed in the United States.
©2005 Conduant Corporation. All rights reserved.
StreamStor is a trademark of Conduant Corporation.
All other trademarks are the property of their respective owners.
Publication date: October 21, 2005

DM-4 CHASSIS USER MANUAL
3
About This Manual
This manual is intended to serve the following purposes:
to provide an overview of the DM-4 Real-Time Storage Chassis
to act as a guide for hardware installation
to act as a reference for the operator
It is suggested that you periodically check the Conduant web site for the most
recent application notes, and technical bulletins.
If you are unable to locate the information you need, please feel free to contact us
by e-mail or phone.

DM-4 CHASSIS USER MANUAL
4
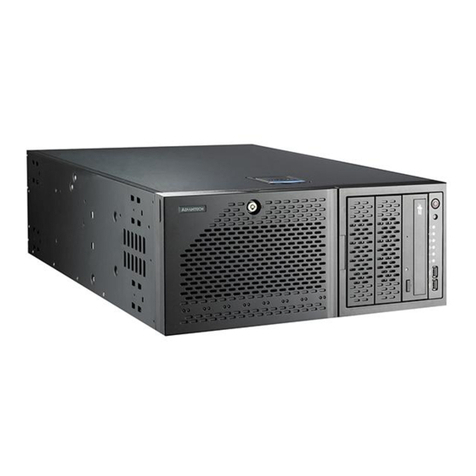
About the DM-4 Real-Time Storage Chassis
Thank you for purchasing a Conduant DM-4 Real-Time Storage Chassis. The
chassis is designed specifically for use with the StreamStor real-time recording
system. The StreamStor system consists of a controller card that typically plugs
into a PCI, CompactPCI or PXI bus, high performance disk drives, device
drivers, software development tools, and additional utility software. The DM-4
chassis incorporates 4 SerialATA disk drives and includes the power supply and
cooling fans to support these drives.
Figure 1
The DM-4 is designed to be mounted in an EIA equipment rack either above or
below the chassis housing the StreamStor controller. The interface cable is front
panel mounted to simplify installation in PXI or CompactPCI applications.

DM-4 CHASSIS USER MANUAL
5
Components
The DM-4 Storage Chassis generally consists of the following components:
•1U Storage Chassis
•StreamStor SATA-4 Interface cable
•AC Power cord
•User Manual
CAUTION: Please read the entire installation section before starting to install the DM-4 chassis. This
manual assumes that the user is knowledgeable and comfortable with basic computer cabling,
power connections, and rack mount systems. If you are unsure as to how to proceed, please
contact Conduant support.

DM-4 CHASSIS USER MANUAL
6
Unpacking / Handling
Carefully inspect all shipping packages for any sign of damage. In particular, look
for wrinkled or bent corners, holes, or other signs of bad handling or abuse. If
you notice any damage to the packaging, immediately open the boxes and inspect
the contents for damage. Pay close attention to the components near the area
where the packing material was damaged. Report any damage to the carrier and
Conduant immediately.
Disk Drives
Hard disk drives such as those that have been included with your system are
susceptible to excess shock and careless handling. Please observe the following
handling precautions:
Allow the chassis to reach room temperature BEFORE installing it. This
may take several hours depending on shipping conditions. Disk drive
damage can occur if the system is powered while the drives are at
temperature extremes.
Do not drop, jar or bump the chassis. Even setting the chassis on a hard
surface too roughly can damage the recording surfaces, heads, or other
mechanical components inside the disk drives.
Never disconnect/connect the interface cable while power is on (LED
Green).

DM-4 CHASSIS USER MANUAL
7
Planning Your Installation
The DM-4 chassis is designed to install into a standard 19” EIA equipment rack.
Airflow for cooling the disk drives and power supply is supplied by rear mounted
fans that move air through the front panel and out the rear panel. The
installation must supply adequate clearance to avoid impeding this airflow path.
The system also requires clearance for the front SS4 interface cable and rear
clearance for the AC power cord.
The DM-4 chassis has been designed for rack mount applications and only
requires 1U (1.75”) of vertical space for installation. In a typical configuration,
the chassis is mounted at the front using the removable rack mount ears. Rear
supports are recommended but are not supplied. Chassis dimensions are detailed
in figures 2-4.
Figure 2
Figure 3

DM-4 CHASSIS USER MANUAL
8
Figure 4
Adhesive backed rubber feet are also included with the system to provide a
surface for tabletop or stacked installation. Simply remove the adhesive cover
from the foot and apply the pads in the 4 recessed areas on the bottom of the
DM-4 chassis.
To connect the SS4 interface cable simply orient it correctly so that the wide ends
of the D shaped interface line up and push it firmly into place. The connector
includes latches on each side to provide a secure connection that won’t pull off
by accident. Disengage the connector by sliding back the black shell to spread
the latch hooks on each side and pull straight out.

DM-4 CHASSIS USER MANUAL
9
Operation
The DM-4 chassis is very simple to operate and requires only an AC power
connection and a StreamStor SS4 interface connection to a controller such as the
PXI-808 board. The power supply included with the DM-4 is compatible with
most major AC power systems around the world and will auto-sense for 100-
240VAC @ 50-60 Hz. Please insure that your local power supply meets this
requirement. The power cord included with your system is designed for 120V-
60Hz AC power connections.
The power supply interface is on the rear panel of the DM-4 and includes a
power switch and AC cord receptacle. The switch on the power supply controls
delivery of AC power. This power switch is normally left in the on position ( 1 )
for normal operation but should be off when connecting or disconnecting the
AC power cord. When the AC power is enabled the system will enter standby
mode and light an LED on the front panel (see figure 5). When in standby mode
the LED will be red and the disk drives will not have power. Pressing the front
panel power switch once (hold in momentarily) will start the drive power-on
process. The LED will blink for several seconds and then turn green to indicate
that the drives are powered on and ready for StreamStor access.
Figure 5
Powering down the system is simply the reverse of the procedure above. When
the system is powered (LED green), press the power switch once (hold in
momentarily) to switch off power to the drives. The LED will turn RED to
indicate that the system is back in the standby state. Note that if the drives are
powered off while StreamStor is in a ready state, you must reset the StreamStor
card to force the connection between the StreamStor card and the drives to
reinitialize. See the StreamStor SDK documentation for more information on
resetting the StreamStor controller.
The front panel also includes two service access locks (see figure 5). These locks
provide access to the internal drive tray for drive replacement or servicing. The
latches require a ½ to ¾ turn to lock or unlock in the direction indicated.
CAUTION: The drive tray is not intended to be used for customer access. Please contact Conduant support
before unlocking or removing the drive service tray to avoid possible voiding of your system
warranty.

DM-4 CHASSIS USER MANUAL
10
Technical Support
Conduant wants to be sure that your DM-4 system works correctly and stays
working correctly. In the unlikely event, however, that you are unable to get your
new system to work properly, or if a working system ceases to function, we will
do all that we can to get your system back online.
Solving the problem is largely a matter of data collection and steps that must be
taken one at a time. In order for us to better serve you, we ask that you take the
time to perform the following steps prior to calling us. This way, you can provide
us with the most meaningful information possible that will help us solve the
problem.
Is the problem one that obviously requires replacement parts due to physical damage to the
system? If yes, then please gather the information described below and report the problem to tech
support, by phone or through the Conduant web site.
Have you confirmed that no cabling has been inadvertently disconnected or damaged while
working around the equipment?
Is the StreamStor card properly seated in the PCI (CPCI/PXI) slot?
Do all the systems have good power connections and voltages?
Does the confidence test sscfg.exe (on Windows) or ssopen/sstest (on Linux) run OK?
Has the software installation been corrupted? Try re-installing software.
Have you checked the Conduant web site for technical bulletins?
Have you recently installed a new Linux kernel or compiler or a new Windows Service Pack?
If the above steps did not resolve the problem, then please initiate a trouble ticket
on the support section of the Conduant website at www.conduant.com Please
provide as much information as possible about your system and the problem.
We will do all that we can to resolve the problem as quickly as possible.
Table of contents