Connective Peripherals ES-U-1001-A User manual

Connective Peripherals Pte Ltd
178 Paya Lebar Road, #07-03 Singapore 409030
Tel.: +65 67430980 Fax: +65 68416071
Neither the whole nor any part of the information contained in, or the product described in this manual, may be adapted or reproduced
in any material or electronic form without the prior written consent of the copyright holder. This product and its documentation are
supplied on an as-is basis and no warranty as to their suitability for any particular purpose is either made or implied. Connective
Peripherals Pte Ltd will not accept any claim for damages howsoever arising as a result of use or failure of this product. Your statutory
rights are not affected. This product or any variant of it is not intended for use in any medical appliance, device or system in which the
failure of the product might reasonably be expected to result in personal injury. This document provides preliminary information that may
be subject to change without notice. No freedom to use patents or other intellectual property rights is implied by the public ation of this
document. Connective Peripherals Pte Ltd, 178 Paya Lebar Road, #07-03 Singapore 409030. Registered Number: 201617872E
Copyright © Connective Peripherals Pte Ltd
The ES-U-xxxx-x adapters are a series of USB Serial Converters from Connective Peripherals Pte Ltd.
They provide a simple method of adapting legacy RS-232 or RS-422/485 devices to work with modern
USB ports using a trusted and reliable FTDI chip set. Available in a variety of enclosures and port
numbers, they are ideal for allowing factory automation equipment, multi-drop data collection devices,
barcode readers, time clocks, scales, data entry terminals and serial communication equipment to be
connected to USB ports in industrial environments.
This manual covers the following USB to Serial Converter products. For older products from the ES-U-
xxxx-xx series please refer to the earlier version 1.4 of this manual available from the Connective
Peripherals website.
ES-U-1001-A
ES-U-1032-RM
ES-U-2002-M
ES-U-2101-MB
ES-U-1101-MB
ES-U-2001B
ES-U-2102-M
ES-U-3001-MB
ES-U-1002-A
ES-U-2101B
ES-U-2104-M
ES-U-3008-RM
ES-U-1002-M
ES-U-2001C
ES-U-2008-M
ES-U-3016-RM
ES-U-1008B
ES-U-2101C
ES-U-2016-RM
Connective Peripherals Pte Ltd
USB to Serial Converters Manual
Document Reference No.: CP_000032
Version 2.0
Issue Date: 2019-04-29

USB to Serial Converters Manual
Version 2.0
Document Reference No.: CP_000032 Clearance No.: CP#022
Copyright © Connective Peripherals Pte Ltd 2
Table of Contents
1Introduction.................................................................... 4
2Specifications.................................................................. 5
2.1 Standard Features .................................................................... 5
2.2 Features by Model..................................................................... 6
3Features of the ES-U-xxxx-x Family ................................ 7
3.1 USB and Serial Interface ........................................................... 7
3.2 Case Styles ............................................................................... 8
3.3 Power Supply............................................................................ 9
3.4 Optical Isolation & Surge Protection ....................................... 10
3.5 Configuring for RS-232, RS-422 and RS-485 Modes ................ 10
4Installing the Converter ................................................ 12
4.1 Installation Steps ................................................................... 12
4.2 Windows 7 to Windows 10...................................................... 12
4.3 Verifying the Installation ........................................................ 18
4.4 Changing COM Port Properties and COM Number .................... 19
4.5 OS Support - Linux, Mac and Older Windows Verisons ............ 21
5Switch and Jumper Settings.......................................... 23
5.1 General Notes and Warnings................................................... 23
5.2 ES-U-2x01B / ES-U-2x01C Adapters (Plastic Enclosure)......... 24
5.3 ES-U-2xxx-M and ES-U-2xxx-RM with 3 DIP Switches ............ 26
5.4 ES-U-2xxx-M with 4 DIP Switches .......................................... 28
5.5 ES-U-3xxx-x and ES-U-2101-MB ............................................. 29
6Connector Pinout Information....................................... 32
6.1 RS-232 Signal Pin-out ............................................................. 32
6.2 RS-422 Signal Pin-out ............................................................. 35
6.3 RS-485 Signal Pin-out (Half Duplex)....................................... 38
6.4 RS-485 Signal Pin-out (Full Duplex) ....................................... 40
6.5 5V Power Output (ES-U-1002-M only) .................................... 42
7Troubleshooting ............................................................ 43
7.1 Hardware ................................................................................ 43

USB to Serial Converters Manual
Version 2.0
Document Reference No.: CP_000032 Clearance No.: CP#022
Copyright © Connective Peripherals Pte Ltd 3
7.2 Removing existing FTDI drivers .............................................. 44
7.3 Device Driver Options ............................................................. 46
7.4 Further Information on Resolving Driver Issues ..................... 47
8Contact Information...................................................... 48
Appendix A - List of Figures and Tables ............................. 49
List of Figures ................................................................................. 49
List of Tables ................................................................................... 49
Appendix B - Revision History............................................ 51

USB to Serial Converters Manual
Version 2.0
Document Reference No.: CP_000032 Clearance No.: CP#022
Copyright © Connective Peripherals Pte Ltd 4
1Introduction
The ES-U-xxxx-x family of converters provide a quick and simple way to add serial communication ports
to your computer. They connect to a single USB port on your computer to instantly provide up to 32 serial
ports. They take advantage of the plug-and-play and hot-plug features of the USB bus to make it easier
than ever to add communication ports to your system.
Installation is easy. There are no IRQ & COM port conflicts as the port doesn't require any additional IRQ,
DMA or memory resources on the system. Each RS-232 or RS-422/RS-485 port functions as a native
Windows COM port, and is compatible with Windows serial communication applications.
The ES-U-xxxx-x converters provide instant connectivity to RS-232 or RS-422/RS-485 compatible devices,
including factory automation equipment, multi-drop data collection devices, barcode readers, time clocks,
scales, data entry terminals and a variety of other devices in industrial environments.
This manual covers the following models:
USB to RS-232 converters
•Single channel (ES-U-1001-A, ES-U-1101-MB)
•Dual channel (ES-U-1002-A, ES-U-1002-M)
•8-channel (ES-U-1008B)
•32-channel (ES-U-1032-RM)
USB to RS-422/485 converters
•Single channel (ES-U-2001B, ES-U-2101B, ES-U-2001C, ES-U-2101C)
•Dual channel (ES-U-2002-M, ES-U-2102-M)
•Quad channel (ES-U-2104-M)
•8-channel (ES-U-2008-M)
•16-channel (ES-U-2016-RM)
USB to RS-232/422/485 converters
•Single channel (ES-U-3001-MB, ES-U-2101-MB)
•8-channel (ES-U-3008-RM)
•16-channel (ES-U-3016-RM)

USB to Serial Converters Manual
Version 2.0
Document Reference No.: CP_000032 Clearance No.: CP#022
Copyright © Connective Peripherals Pte Ltd 5
2Specifications
2.1 Standard
Features
•Internal Transmit and Receive buffers
•Requires no IRQ, DMA, I/O port
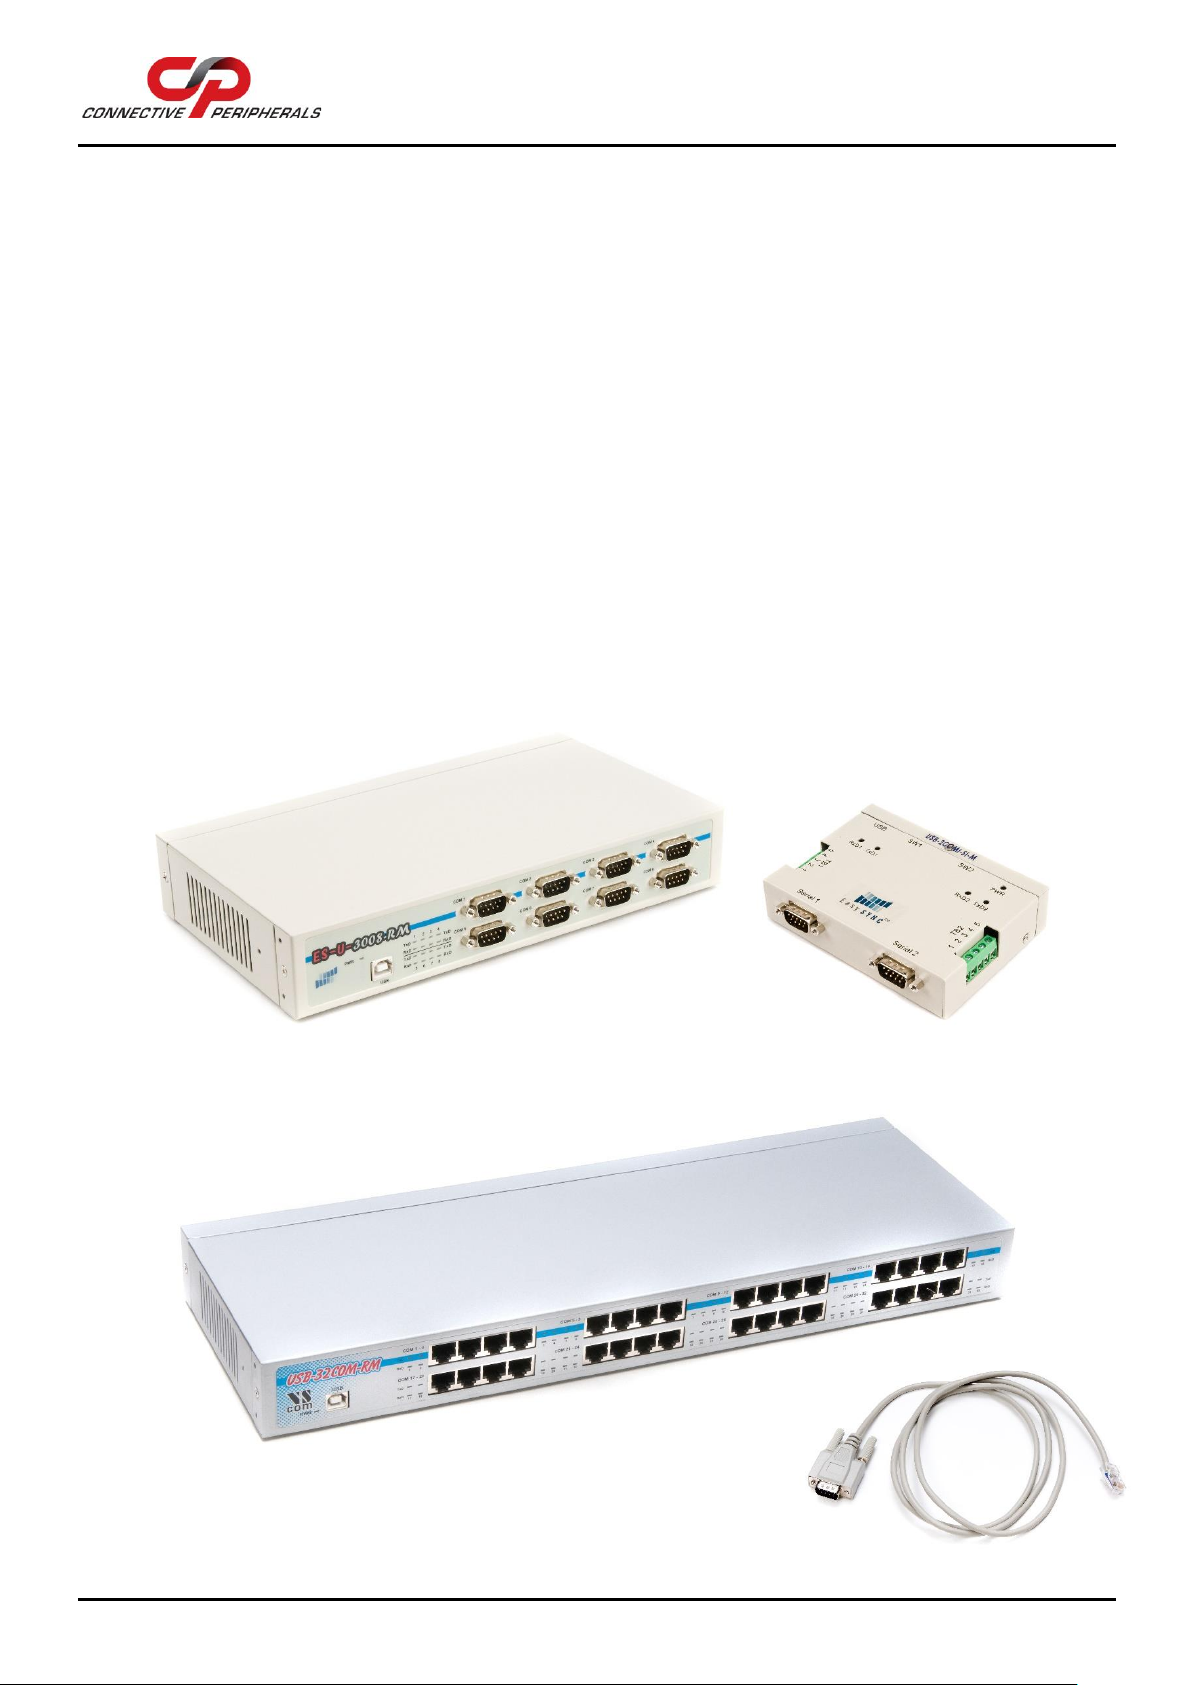
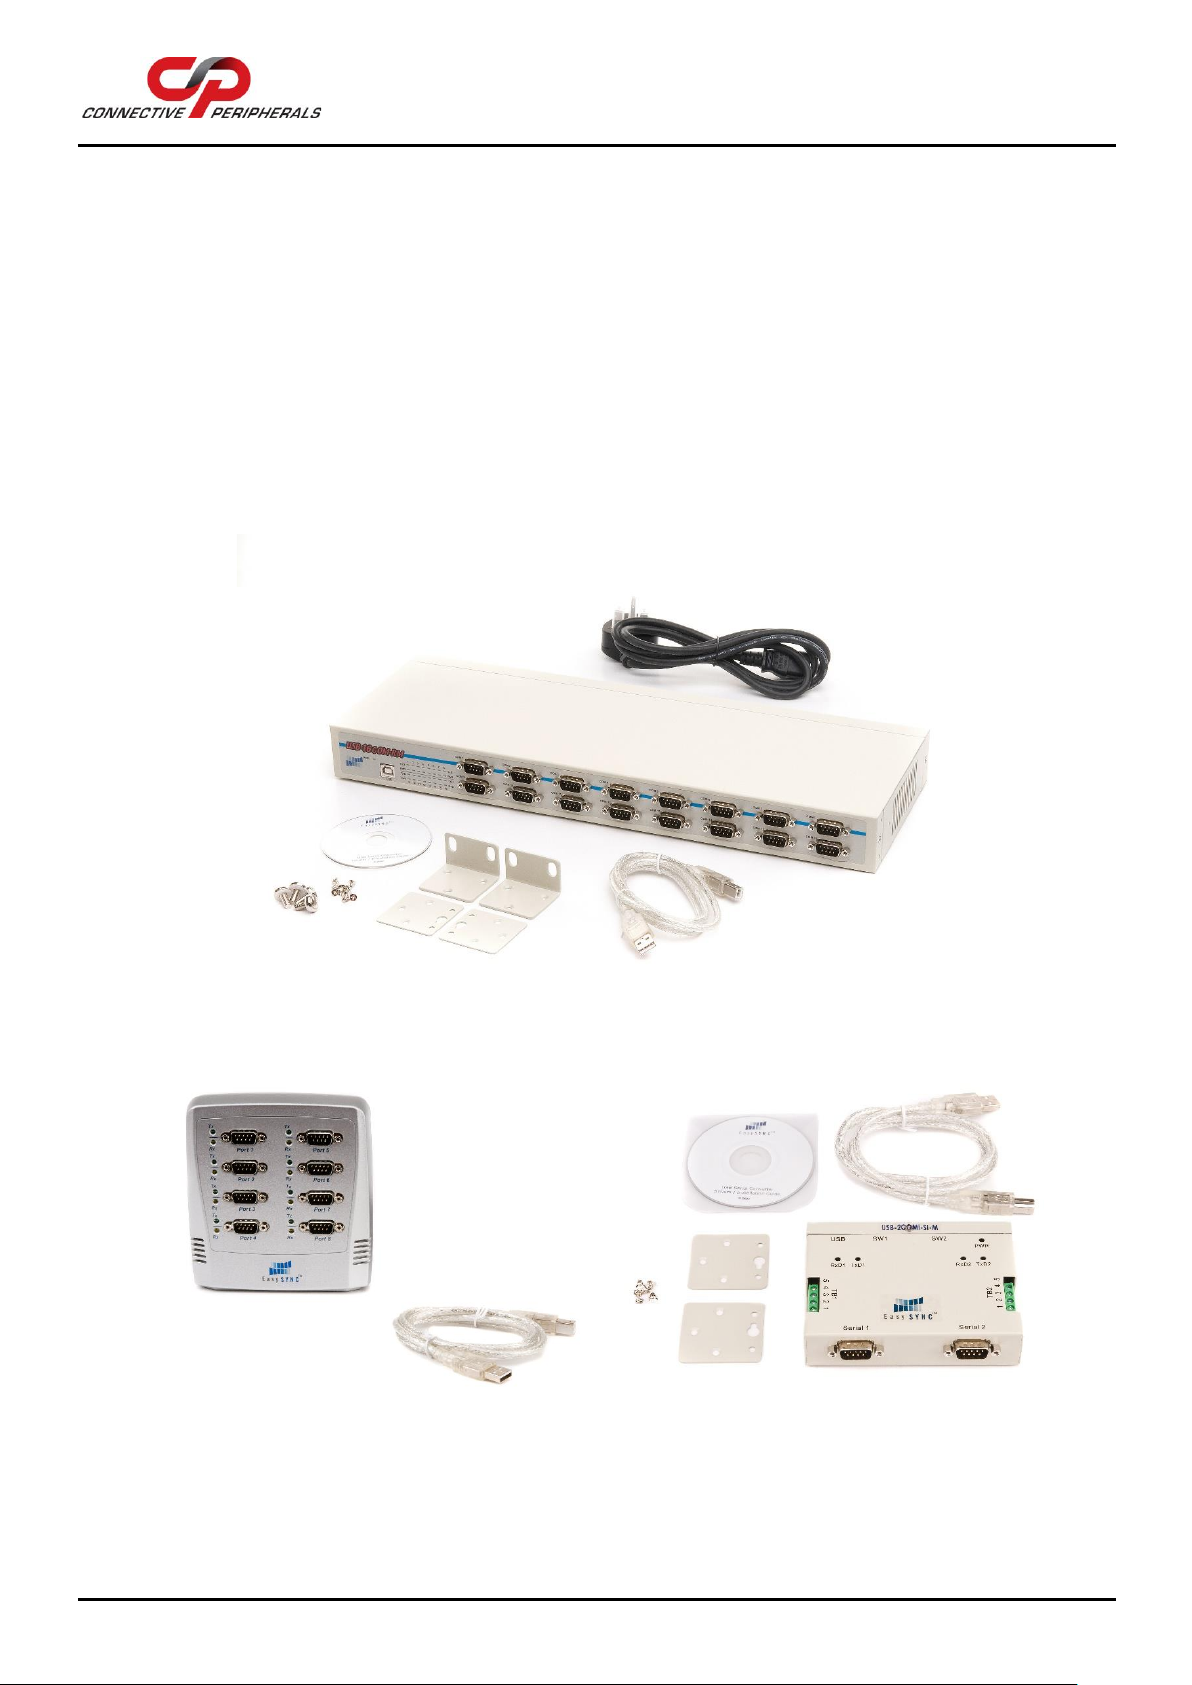
•DB-9 male serial connectors (terminal blocks on some models) (see Note 1)
•LEDs for each port indicate TxD and RxD
•Virtual COM port drivers available
oWindows 7 up to Windows 10
oMAC OSX 10.9 onwards
oLinux Kernel 3.0.0-19 (e.g. (Ubuntu version 11.10)
oOther legacy drivers available from the FTDI website
USB to RS-232 Features (available on ES-U-1xxx and ES-U-30xx)
•Adds RS-232 ports via USB connection
•RS-232 data signals : DCD, RxD, TxD, DTR, GND, DSR, RTS, CTS, RI (See Note 2)
USB to RS-422/RS-485 Features (available on ES-U-20xx and ES-U-30xx) (See Note 3)
•Adds RS-422 / RS-485 ports via USB connection
•Auto transmit buffer control for 2-wire RS-485 half-duplex operation
•Internal termination and bias resistors on some models (enabled by jumper)
•RS-422 data signals : TX-, TX+, RX+, RX-, GND, RTS-, RTS+, CTS+, CTS- (see Note 2)
•RS-485 signals (half duplex) : Data+, Data-, GND
•RS-485 signals (full-duplex) : TX-, TX+, RX-, RX+, GND
Additional Opto-isolation Features (available on ES-U-11xx and ES-U-21xx)
•Each RS-232 or RS-422/RS-485 port is individually isolated with 2000 volt DC optical isolation
•Each RS-232 or RS-422/RS-485 port is individually protected by a surge protector to withstand
electrostatic discharge and power surges up to 25KV ESD
Note 1 ES-U-1032-RM has RJ45 ports which can be converted to DB-9 male if required using the supplied cables
Note 2 Terminal block has subset of these signals only –see section 6 for details
ES-U-2101-MB also features RS232 but only a subset of these signals –see section 6 for details
Note 3 Support multiple serial protocols - Jumpers or DIP switches are used to select the required serial protocol

USB to Serial Converters Manual
Version 2.0
Document Reference No.: CP_000032 Clearance No.: CP#022
Copyright © Connective Peripherals Pte Ltd 6
2.2 Features by Model
The table below summarises the features for each model in the ES-U-xxxx-x family.
Table 1 - Features of the ES-U-xxxx-x converters
Power supply types are USB (USB powered), Ext (external power adapter) or Int (internal power supply)
* Power adapter voltages and currents shown in the comments column are for indication only and are
subject to change. To avoid damage, always use the adapter which was provided with your converter to
ensure that you are supplying the correct voltage for operation.
Model Number
Serial Interfaces
Case
Power
Supply
Opto
Isolated
Additional features and Notes
Ports
RS232
RS422
RS485
Metal
Rack
ES-U-1001-A
1
Y
-
-
-
-
USB
-
ES-U-1101-MB
1
Y
-
-
Y
-
USB
Y
Revision B of ES-U-1101-M which
supports higher data throughput
ES-U-1002-A
2
Y
-
-
-
-
USB
-
ES-U-1002-M
2
Y
-
-
Y
-
USB
-
5V 150mA output on 2-way
screw terminal
ES-U-1008B
8
Y
-
-
-
-
USB
-
ES-U-1032-RM
32
Y
-
-
Y
Y
Int
-
RJ45 serial connectors
ES-U-2001B
1
-
Y
Y
-
-
USB
-
Rev B of ES-U-2001
ES-U-2001C
1
-
Y
Y
-
-
USB
-
Rev C of ES-U-2001
ES-U-2101B
1
-
Y
Y
-
-
USB
Y
Rev B of ES-U-2101
ES-U-2101C
1
-
Y
Y
-
-
USB
Y
Rev C of ES-U-2101
ES-U-2101-MB
1
Y
Y
Y
Y
-
USB
Y
6-way screw terminal
ES-U-2002-M
2
-
Y
Y
Y
-
USB
-
5-way screw terminals
ES-U-2102-M
2
-
Y
Y
Y
-
USB
Y
ES-U-2002-M with isolation
ES-U-2104-M
4
-
Y
Y
Y
-
Ext
Y
5VDC (2A) power adapter (barrel
plug) *
ES-U-2008-M
8
-
Y
Y
Y
-
Ext
-
12VDC (1.5A) power adapter (3-
pin terminal) *
ES-U-2016-RM
16
-
Y
Y
Y
Y
Int
-
ES-U-3001-MB
1
Y
Y
Y
Y
-
USB
-
6-way screw terminal, 5V output
Rev B of ES-U-3001-M which
supports higher data throughput
ES-U-3008-RM
8
Y
Y
Y
Y
Y
Int
-
ES-U-3016-RM
16
Y
Y
Y
Y
Y
Int
-

USB to Serial Converters Manual
Version 2.0
Document Reference No.: CP_000032 Clearance No.: CP#022
Copyright © Connective Peripherals Pte Ltd 7
3Features of the ES-U-xxxx-x Family
3.1 USB and
Serial
Interface
USB Interface
All devices in the ES-U-xxxx-x series feature a standard USB type-B socket. A standard USB A-B cable is
supplied to connect to the PC.
Serial Interface
The ES-U-xxxx-x converters have DB-9 male connectors for connection to the RS-232/422/485 interface.
Some models have the following additional features:
•Terminal block connections providing a subset of the signals
•Optional 5V output.
The ES-U-1032-RM unit has RJ45 connectors on the front panel instead of DB-9, but is provided with
adapter cables to convert these to DB-9 male connectors if required.
Figure 1 - DB-9 Male serial connectors. Some models also feature terminal blocks.
ES-U-3008-RM
ES-U-2102-M
ES-U-1032-RM

USB to Serial Converters Manual
Version 2.0
Document Reference No.: CP_000032 Clearance No.: CP#022
Copyright © Connective Peripherals Pte Ltd 8
Figure 2 - ES-U-1032-RM (RJ45 connectors) is supplied with RJ45-to-DB-9 cables
3.2 Case Styles
The ES-U-xxxx-x converters are available in Plastic, Metal and Metal Rackmount enclosure styles. All units
can be used on a desktop with the self-adhesive feet provided.
•Plastic case desktop converters are supplied with USB cable and (when required depending on
model) power adapter localised to country of sale.
•Metal case converters are supplied with wall mounting hardware, USB cable and power adapter
with plug localised to country of sale (when required depending on model).
•Metal rack mount converters are supplied with rack mounting hardware, USB cable and power cable
localised to country of sale.
Transmit and receive LEDs for each port are included on the front or top panel of the enclosure, to show
when data is being transmitted or received by the associated port. A power LED is also included (on units
with metal enclosures) to show that the converter is receiving power.
Figure 3 - Example of the Metal Rack-mount enclosure
Figure 4 - Examples of the Plastic and Metal (wall mountable) enclosures
ES-U-1016-RM
ES-U-1008B
ES-U-2102-M

USB to Serial Converters Manual
Version 2.0
Document Reference No.: CP_000032 Clearance No.: CP#022
Copyright © Connective Peripherals Pte Ltd 9
3.3 Power
Supply
Depending on the model, power will either be supplied from the USB port, from an external power adapter
or from an internal switching supply. The different types are described below. Table 1 on page 6 shows
which type of power supply is required for each converter model.
USB powered
These devices are powered directly from the USB port. No power supply is required for these converters.
It is recommended to connect them direct to a PC’s USB port. If necessary to use a USB hub, it is strongly
recommended to use a self-powered hub (which has its own PSU) as bus-powered hubs may not be able
to provide sufficient power.
Power Adapter
These devices are provided with an external power adapter in the package. The adapter supplied has a UK,
EU or USA plug depending on the country of sale and so may vary from the one shown below. The low
voltage connector is either a 3-pin terminal block connector or a barrel-type jack as shown below,
depending on the model. For more details, see Table 1 on page 6.
The low voltage cable should be connected to the power (or DC in) socket on the converter, and the AC
input plug should be connected to a power source before using the converter.
Always use the supplied adapter to power your ES-U-xxxx-x converter; damage will occur if an
adapter providing the wrong voltage is used and is not covered by the warranty.
Figure 5 - Some models use a power adapter with barrel or terminal connector
Internal Switching Power Supply
The rack mountable (ES-U-xxxx-RM) devices require an AC input (100V ~ 240V, 47 –63 Hz) for the internal
switching power supply. A power cable is supplied with the converter, and connects to the power inlet
socket on the rear panel. The cable has a UK, EU or USA plug depending on the country of sale and so may
vary from the one shown below.
Barrel Plug
connector
Terminal
Block
connector
ES-U-2108-M
ES-U-2008-M

USB to Serial Converters Manual
Version 2.0
Document Reference No.: CP_000032 Clearance No.: CP#022
Copyright © Connective Peripherals Pte Ltd 10
Figure 6 - Rack-mount models have an internal supply with AC input connector
3.4 Optical
Isolation &
Surge
Protection
Optical isolation and surge protection are available in the ES-U-11xx and ES-U-21xx converters.
Each serial port is individually optically isolated with 2000 volt DC optical isolation. The optical isolation
protects your PC or notebook from spikes and surges on the RS-232 or RS-422/RS-485 network, by
converting the electrical data into an optical signal and then changing it back into electrical data. Your
computer is well protected, since the surges and spikes cannot cross the optical link.
Each serial port is individually protected by surge protector to withstand electrostatic discharge and power
surges up to 25KV ESD.
3.5 Configuring for RS-232, RS-422 and RS-485 Modes
The ES-U-2xxx-x and ES-U-3xxx-x converters can be configured for different interface types. These
converters have DIP switches or internal jumpers to select the required interface. They also feature internal
jumpers to select options such as termination and biasing of the RS-422 and RS-485 lines.
Please refer to section 5 for more information on the DIP switch and jumper settings available on each
model of converter.
Figure 7 - ES-U-2xxx and ES-U-3xxx have DIP switches to select the serial mode
ES-U-2016-RM
ES-U-3008-RM

USB to Serial Converters Manual
Version 2.0
Document Reference No.: CP_000032 Clearance No.: CP#022
Copyright © Connective Peripherals Pte Ltd 11
Figure 8 - ES-U-3008-RM has a set of jumpers for each port (one set circled)

USB to Serial Converters Manual
Version 2.0
Document Reference No.: CP_000032 Clearance No.: CP#022
Copyright © Connective Peripherals Pte Ltd 12
4Installing the Converter
4.1 Installatio
n Steps
The main steps in configuring your converter are as follows:
1. Configure the switches and jumpers on your converter to match your serial bus type. See section
5 for details of the settings for your particular model of converter.
Do not connect the converter to the power supply, the PC USB port or the RS-232/422/485 serial
network at this stage. Note that ES-U-1xxx-x converters do not have any DIP switches or jumpers
and you can proceed to step 2 immediately.
2. Install the drivers for the converter on your computer. Refer to section 4.2 for Windows 7 up to
Windows 10. For other OS please refer to section 4.5.
Note that if older FTDI drivers are already present on your system, see section 7.2 for details on
how to remove them before proceeding to install the driver.
3. Verify the installation (see section 4.3)
4. If you encounter issues, see section 7 for troubleshooting information.
4.2 Windows 7
to
Windows
10
The driver installation can be done using either the Driver Executable or the Windows Update method
below.
You need to have administrator privileges to install any new drivers in Windows. To install the
driver or update the configuration please log onto Windows as "Administrator" or ask your system
administrator to install the USB to serial driver.
Option1 - Driver Executable
The driver executable provides a fast and easy installation.
a. Download the latest version of the driver setup executable file from the following link.
Version 2.12.28 was the latest driver executable available when this manual was published
(as circled below), but please check the link to the driver page below before installing your
converter and use the latest version.
http://www.ftdichip.com/Drivers/VCP.htm
To download the file, go to the comments column and right-click on the link “Setup
Executable”

USB to Serial Converters Manual
Version 2.0
Document Reference No.: CP_000032 Clearance No.: CP#022
Copyright © Connective Peripherals Pte Ltd 13
Figure 9 Driver download from FTDI website
Note: If you wish to install the converter on a computer which is never connected to the
internet, you can download the file using another computer and use a USB flash drive or
similar to copy the file over to the computer which will be used with the converter.
a. Un-zip the file to extract the executable installer CDM21228_Setup.exe (for example, this
can be done by right-clicking the downloaded CDM21228_Setup.zip file and selecting
“Extract All…” ) and selecting a suitable folder. By default, Windows will create a folder
with the extracted files in it. Then browse to the folder which was created during the un-
zip process.
b. Right-click on the CDM21228_Setup.exe file and select ‘Run as Administrator’ to ensure
that the program is run with administrator privileges.
c. Windows may display the warning below. This is just to notify you that you are running a
file which was downloaded from the internet. If this appears, click ‘Yes’.
Figure 10 User account control
d. The driver install wizard will appear a shown below. Click ‘Extract’ to proceed.

USB to Serial Converters Manual
Version 2.0
Document Reference No.: CP_000032 Clearance No.: CP#022
Copyright © Connective Peripherals Pte Ltd 14
Figure 11 Install Wizard initial window
e. Windows will now extract the files provided in the setup program.
Figure 12 Install Wizard –extracting files
f. Click ‘Next’ to begin installing the driver.
Figure 13 Install Wizard –ready to install

USB to Serial Converters Manual
Version 2.0
Document Reference No.: CP_000032 Clearance No.: CP#022
Copyright © Connective Peripherals Pte Ltd 15
g. You must review the license terms shown before installing the driver, and then select the
appropriate radio button. By proceeding with the installation, you confirm your
acceptance of these terms.
Figure 14 Install Wizard –license agreement
h. The wizard will then show the drivers being installed.
Figure 15 Install Wizard –installing
i. Finally, the following screen will show that the drivers were installed correctly. Both items
have green ticks next to them and have status ‘Ready to use’.

USB to Serial Converters Manual
Version 2.0
Document Reference No.: CP_000032 Clearance No.: CP#022
Copyright © Connective Peripherals Pte Ltd 16
Figure 16 Install Wizard –completion
The driver files are now on your system, and installation of any FTDI products will complete automatically
using this latest driver when they are connected.
You can now connect your USB device and wait for Windows to install it as a USB Serial converter and
associated USB Serial Port.
You can now proceed to section 4.3 to verify the installation.
Option 2 - Windows Update
If your computer is currently connected to the internet, these steps will help you to install the
driver automatically using Windows Update.
If you have already completed the steps in Option 1 above, jump to section 4.3 below as the driver
is already installed.
Windows has settings which control whether it will check online for drivers. The actual windows
may be subject to change but will be similar to those shown in Figure 17 below. If your computer
is not connected to the internet or if you have configured Windows to not allow checking online for
drivers, you can use the Driver Executable method above instead (see the start of section 4.2).

USB to Serial Converters Manual
Version 2.0
Document Reference No.: CP_000032 Clearance No.: CP#022
Copyright © Connective Peripherals Pte Ltd 17
Figure 17 –Windows update settings
a. Connect the power supply cable to the power inlet socket on the rear panel of the converter,
and connect the adapter to a power outlet. (skip this step if your converter is a USB-
powered model)
b. Connect the USB cable to your converter and the other end to an available USB port on
your PC.
c. The computer will recognise the converter and display the Found New Hardware wizard. If
this appears, proceed to the next step.
Note that depending on your Windows update and Windows Driver settings, you may not
see the New Hardware Wizard. You may instead see a small green animated icon in the
task bar which shows that Windows is searching Windows Update in the background. In
this case you can click the icon to see the status as shown below. Once it has found the
drivers and installed them, you can proceed to step g.

USB to Serial Converters Manual
Version 2.0
Document Reference No.: CP_000032 Clearance No.: CP#022
Copyright © Connective Peripherals Pte Ltd 18
Figure 18 –Windows installing driver in background
d. Select the option to allow Windows to connect to Windows Update to search for a driver.
Note that you must be connected to the internet to allow this to work. If you are not able
to connect to the internet during the install process, use the Driver Executable method. In
this case, disconnect the USB cable from the computer and cancel the Found New Hardware
wizard before proceeding to step (a) of the Driver Executable section above (see the start
of section 4.2).
e. Select ‘Install the software automatically (recommended)’. Windows will download the
driver from Windows Update and install it.
f. For some converters in the ES-U-xxxx family, Windows will display the Found New
Hardware wizard several more times to install all of the serial ports on the converter. Each
time the wizard is displayed, repeat steps (c) to (e) above.
g. Once installation is complete, you will see the following message. Please proceed to section
4.3 below to verify the installation. You do not need to run the steps shown in the Driver
Executable section in Option 1 above.
Figure 19 - Hardware installed successfully
4.3 Verifying
the
Installatio
n
Once Windows indicates that the device is installed, you should see the USB Serial Converter in Device
manager. An example is shown in Figure 20. Note that for some products, the description may have been
customized and so the text descriptions may not match the ones circled below exactly.
The device will show under the Universal Serial Bus Controllers section. In most cases, it will also show
under Ports (COM & LPT). This depends on whether the Virtual Com Port (VCP) mode is enabled.
Some application software requires you to enter the COM port number assigned to your serial adapter.
This can be found under the Ports (COM & LPT section). In the example in Figure 20, the 4-port converter
has COM ports 4 –7 assigned.

USB to Serial Converters Manual
Version 2.0
Document Reference No.: CP_000032 Clearance No.: CP#022
Copyright © Connective Peripherals Pte Ltd 19
Figure 20 - Device Manager after installing a converter with four ports
4.4 Changing
COM Port
Properties
and COM
Number
This feature is particularly useful for programs which only work with COM1 through COM4. Please note that
you cannot change to a COM port number which is already in use.
To change the virtual COM port properties:

USB to Serial Converters Manual
Version 2.0
Document Reference No.: CP_000032 Clearance No.: CP#022
Copyright © Connective Peripherals Pte Ltd 20
1. Double-click the "USB Serial Port "in the Device Manager.
2. Select "Port Setting" and “Advanced”.
3. Click the drop down arrow on COM Port Number, scroll to the required COM port and Select "OK".
4. Return to the Device Manager Screen. You will see that the USB Serial Port installation has been
changed to the new COM Port Number.
Figure 21 - Advanced port settings dialog
This manual suits for next models
18
Table of contents
Other Connective Peripherals Media Converter manuals