CONQUEST MAXIMA 50BT User manual

CONQUEST MAXIMA 50BT
FLOOR SCRUBBER
OPERATOR MANUAL
T: 1800 826 789
E: support@conquestequipment.com.au
W: conquestequipment.com.au
FIMAX-OM-V01

Scan QR code to access your
Maxima 50BT Floor Scrubber Operator video

MAIN MACHINE COMPONENTS
The main machine components are the following:
1. Control handlebars.
2. Dead man's lever.
3. Reverse control button.
4. ECO-MODE button.
5. Control display.
6. Cover for FFM “FIMAP FLEET MANAGEMENT” SOS button (Optional).
7. FFM “FIMAP FLEET MANAGEMENT” SOS button (Optional).
8. Main key switch.
9. Emergency button.
10. Brush uncoupling switch (50 BT version).
11. Squeegee body control lever.
12. Brush head control pedal.
13. Support hook for recovery tank drainage tube.
14. Recovery tank drainage tube.
15. Support hook for spray gun.
16. Solution tank level indicator.
17. On-board battery charger (optional).
18. Solution tank drainage cap.
19. Squeegee body.
20. Squeegee body support.
21. Vacuum tube.
22. Water ow adjustment tap.
23. Vacuum accessory support (optional).
24. Brush support.
25. Squeegee body support (optional).
26. Headlights (optional).
27. Brush head body.
28. Solution tank.
29. Solution tank ller cap/measuring inlet.
30. Solution tank ller tube cap.
31. Cover cap for FFF “FIMAP FAST FILL” quick coupling kit (optional).
32. Recovery tank.
33. Recovery tank lifting handle.
34. Recovery tank cover lifting handle.
35. Control handle for accessory compartment door.
36. Accessory compartment door.
37. Detergent solution lter.
38. Electric brake control lever.
3
23 24
20
18
21
19
22
24
34
32
35
33
36
28
26
30 31
38
29
1
5
34 5 6
2
10
9 16
13
12
14
11
15
8

CONTENTS
MAIN MACHINE COMPONENTS...............................................3
CONTENTS.................................................................................4
GENERAL SAFETY REGULATIONS.........................................4
RECHARGING THE BATTERIES .........................................................5
USING THE MACHINE .........................................................................6
DEACTIVATION OF THE MACHINE.....................................................8
MAINTENANCE ....................................................................................8
TRANSPORT ........................................................................................9
SYMBOLS USED IN THE MANUAL ........................................10
PURPOSE AND CONTENT OF THE MANUAL .......................10
TARGET GROUP......................................................................10
STORING THE USE AND MAINTENANCE MANUAL.............10
ON CONSIGNMENT OF THE MACHINE .................................10
INTRODUCTORY COMMENT ..................................................10
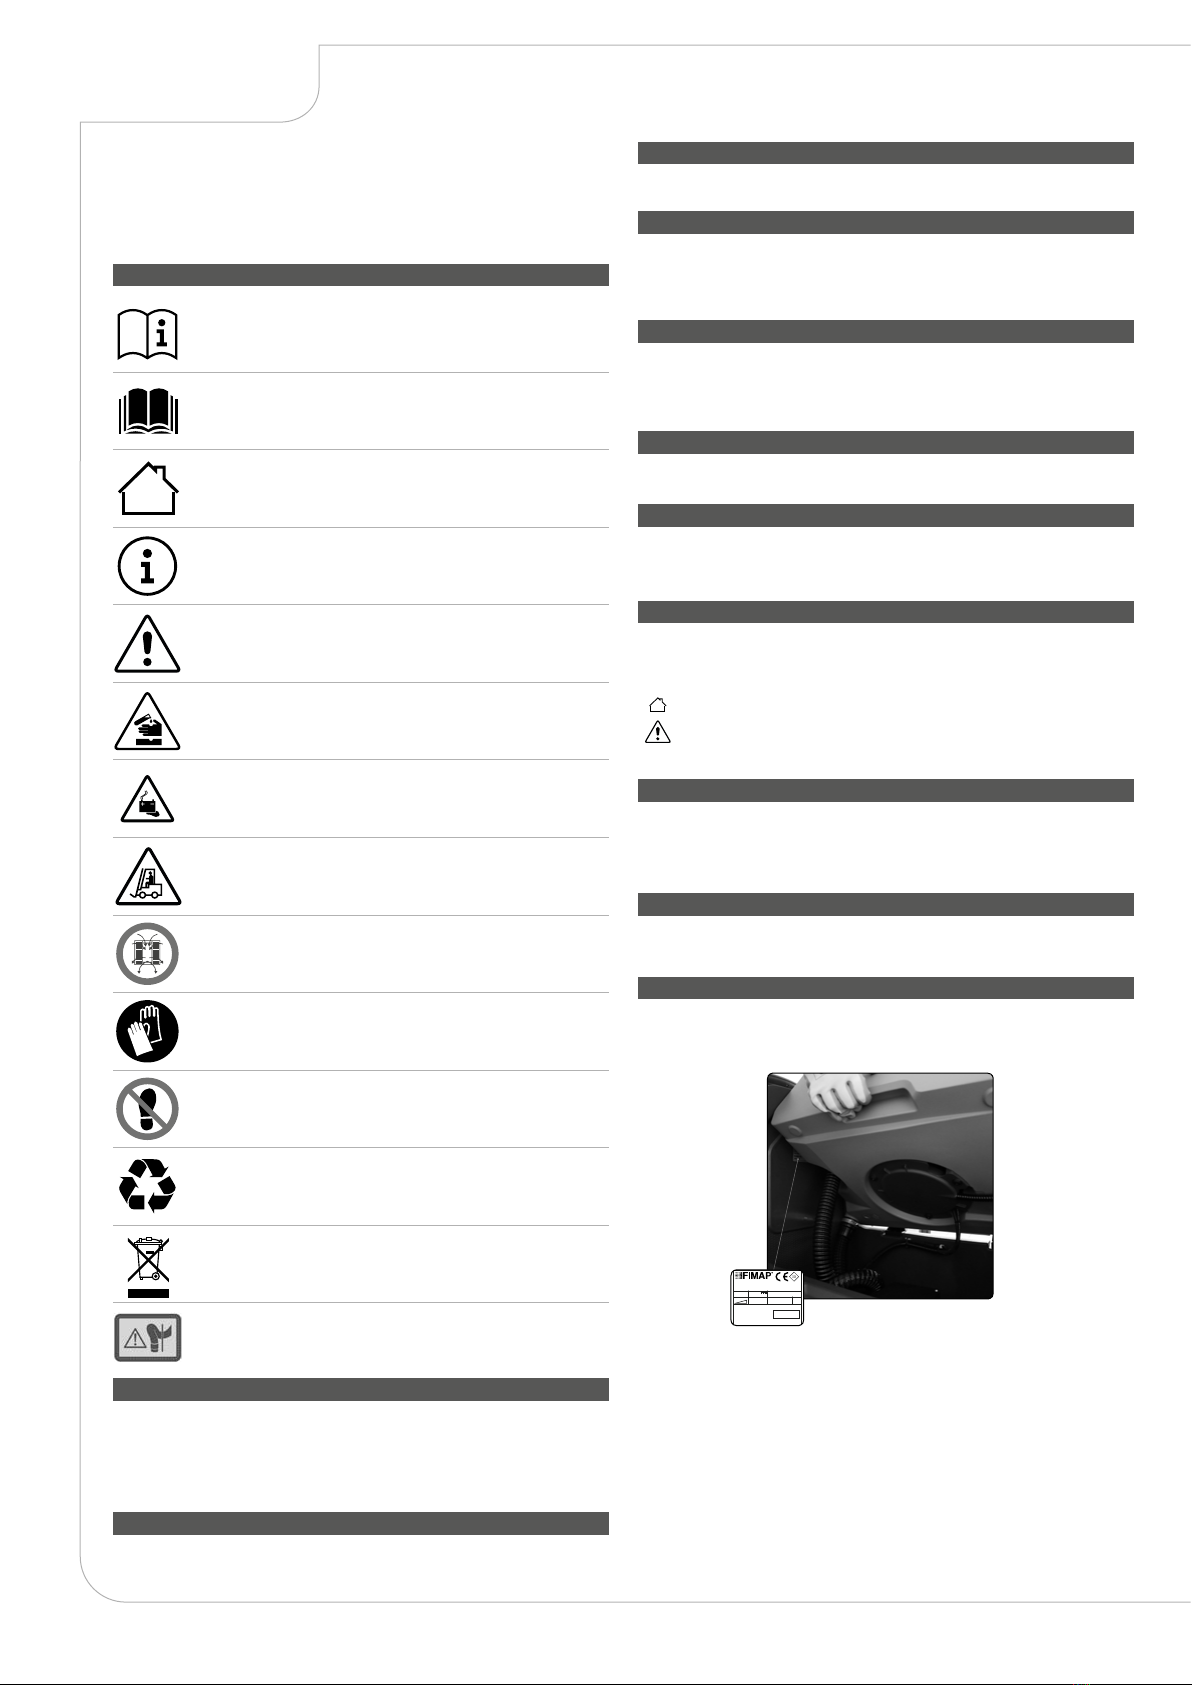
IDENTIFICATION DATA............................................................10
TECHNICAL DESCRIPTION ....................................................10
INTENDED USE........................................................................10
SAFETY ....................................................................................10
CONVENTIONS ........................................................................10
SERIAL NUMBER PLATE ........................................................10
TECHNICAL DATA ................................................................... 11
SYMBOLS USED ON THE MACHINE .....................................12
LABELS USED ON THE MACHINE.........................................12
MACHINE PREPARATION .......................................................13
HANDLING THE PACKAGED MACHINE ...........................................13
HOW TO UNPACK THE MACHINE ....................................................13
HOW TO MOVE THE MACHINE ........................................................13
MACHINE SAFETY MEASURES........................................................14
TYPE OF BATTERY TO BE USED .....................................................14
BATTERY MAINTENANCE AND DISPOSAL......................................14
INSERTING THE BATTERIES IN THE MACHINE..............................14
CONNECTING THE BATTERIES TO THE MACHINE SYSTEM........14
RECHARGING THE BATTERIES .......................................................14
ASSEMBLING THE BRUSH (50BT VERSIONS)................................15
ASSEMBLING THE BRUSH (60BT VERSIONS)................................15
ASSEMBLING THE ABRASIVE PAD (50BTO VERSIONS)................15
ASSEMBLING THE CYLINDRICAL BRUSHES
(50BTS VERSIONS) ...........................................................................15
ASSEMBLING THE SQUEEGEE BODY.............................................15
FILLING THE SOLUTION TANK WITH WATER .................................16
DETERGENT SOLUTION...................................................................16
HOUR METER ....................................................................................16
BATTERY CHARGE LEVEL INDICATOR ...........................................16
PREPARING TO WORK ...........................................................16
STARTING WORK ....................................................................17
SCRUBBING WITH DRYING ..............................................................17
SCRUBBING WITHOUT DRYING ......................................................17
DRYING...............................................................................................17
REGULATING THE FLOW OF DETERGENT SOLUTION .................18
REGULATING THE FORWARD SPEED ............................................18
REVERSE GEAR ................................................................................18
EMERGENCY BUTTON......................................................................18
HILLYARD ECO MODE.......................................................................18
EXTRA BRUSH HEAD PRESSURE ...................................................18
RECOVERY TANK OVERFLOW.........................................................19
AT THE END OF THE WORK...................................................19
RECOMMENDED MAINTENANCE WORK .............................19
EMPTYING THE RECOVERY TANK ..................................................19
CLEANING THE DEBRIS HOPPER (50BTS VERSION)....................19
CLEANING THE SQUEEGEE BODY..................................................20
CLEANING THE BRUSH HEAD BRUSH (50BT VERSION) ..............20
CLEANING THE BRUSH HEAD BRUSHES (60BT VERSIONS) .......20
CLEANING THE CYLINDRICAL BRUSHES (50BTS VERSIONS).....20
CLEANING THE RECOVERY TANK...................................................20
EMPTYING THE SOLUTION TANK....................................................21
CLEANING THE WATER SYSTEM FILTER .......................................21
CLEANING THE VACUUM TUBE .......................................................21
EXTRAORDINARY MAINTENANCE OPERATIONS ...............21
REPLACING THE BRUSH HEAD BRUSH (50BT VERSIONS)..........21
REPLACING THE BRUSH HEAD BRUSH (60BT VERSIONS)..........22
REPLACING THE ABRASIVE PAD (50BTO VERSIONS) ..................22
REPLACING THE CYLINDRICAL BRUSHES (50BTS VERSIONS) ..22
REPLACING THE SQUEEGEE BODY RUBBER BLADES................22
ADJUSTMENT INTERVENTIONS............................................22
ADJUSTING THE SQUEEGEE BODY RUBBER BLADES ...............22
DISPOSAL ................................................................................23
CHOOSING AND USING THE BRUSHES ...............................23
EC DECLARATION OF CONFORMITY ...................................23
TROUBLESHOOTING..............................................................24
The following symbols are used to indicate any
potentially hazardous situations. Always read
this information carefully and take the necessary
precautions to protect any people and/or objects that
may be present.
Operator cooperation is paramount for accident
prevention. No accident prevention programme
can be eective without the full cooperation of
the person directly responsible for operating the
machine. The majority of occupational accidents that
happen either in the workplace or whilst moving are
caused by failure to respect the most basic safety
rules. An attentive, careful operator is most eective
guarantee against accidents and is fundamental in
order to implement any prevention programme.
DANGER: Indicates an imminent danger that
could cause serious injury or death.
WARNING: Indicates a probable dangerous
situation that could cause serious injury or death.
CAUTION: Indicates a probable dangerous
situation that could cause minor injuries.
ATTENTION: Indicates a probable dangerous
situation that could damage objects.
GENERAL SAFETY
REGULATIONS
4

DANGER:
• If the battery charger power cable is damaged or broken, it should be replaced by the
manufacturer or authorised service personnel, or another qualied person, in order to
protect against hazards.
• The socket for the battery charger cable must have a prescribed earth connection.
•Keep sparks, ames, and incandescent materials at a safe distance from the batteries.
Explosive gases are emitted during normal use.
• Highly explosive hydrogen gas is generated while charging the batteries. Keep the recovery
tank unit in the maintenance position during the entire battery recharging cycle, and only
perform the procedure in well-ventilated areas at a safe distance from any open ames.
• Before charging, make sure the electric cable that connects the battery charger to the
batteries is not damaged. If it is, don't use it; contact technical assistance.
• Before starting to charge the batteries, check there is no stagnant water or humidity in the
on-board battery charger socket.
• Before charging, make sure the electric cable that connects the battery charger to the mains
is not damaged. If it is, don't use it; contact technical assistance.
• Do not disconnect the DC cable of the battery charger from the machine socket while
the battery charger is operating. This is necessary in order to avoid electric arcs forming.
To disconnect the battery charger when it is charging, rst disconnect the AC power cable.
WARNING:
• Do not use an incompatible battery charger as it could damage the batteries and potentially
cause a re.
•The batteries emit hydrogen gas. This gas can cause explosions or res. Keep a safe
distance from ames or sparks. Keep the covers open when charging the batteries.
• Before using the battery charger, make sure the frequency and voltage values indicated on
the machine data plate coincide with the network values.
• Keep the battery charger cable at a safe distance from any hot surfaces.
• Never smoke in the vicinity of the machine while the batteries are charging.
• Before starting the charging operation, carefully read the user manual of the battery charger
that you want to use.
RECHARGING THE BATTERIES
5

DANGER:
• In the event of danger, take prompt action by pressing the emergency button on the back of
the machine (near the control handlebars).
•Never collect gases, explosive/inammable liquids or powders, nor acids and solvents!
These include gasoline, paint thinners and fuel oil (which, when mixed with the vacuum air,
can form explosive vapours or mixtures), and also non-diluted acids and solvents, acetones,
aluminium and magnesium powders. These substances may also corrode the materials
used to construct the machine.
• If the machine is used in dangerous areas (e.g. petrol stations), the relative safety standards
must be observed. It is forbidden to use the machine in environments with a potentially
explosive atmosphere.
WARNING:
• Always use the machine in compliance with its intended use, taking into consideration local
conditions and looking out for the presence of others when working, especially children.
• The machine should only be used by people trained in its use and who have shown that
they know how to use the machine and have been expressly authorised to do so.
• This machine should not be used by persons (including children) with physical, sensorial
or mental impairments and by persons with little experience and/or little knowledge of the
machine itself.
• The machine must only be used by authorised, trained personnel.
• Do not use the machine on surfaces with a slope greater than the one indicated on the serial
number plate.
•The machine is not suitable for cleaning rough or uneven oors. Do not use the machine
on slopes.
•In the event of a re, use a powder extinguisher. Do not use water.
• Adapt the speed to the adhesion conditions.
• Do not use the machine if you do not have the requisite knowledge or authorisation.
• Do not use the machine if you have not read and understood the following user manual.
•Do not use the machine under the inuence of alcohol or drugs.
• Do not use the machine while using a mobile phone or other electronic devices.
• Do not use the machine if it is not working correctly.
•Do not use the machine in areas where there are inammable vapours or liquids or
combustible powders.
• Do not use the machine in areas where it is too dark to see the controls or operate the
machine safely, unless the work lights or the front headlights are on.
• To prevent the unauthorised use of the machine, the power supply must be disconnected:
switch the machine o using the main switch (by removing the key from the block) and
disconnect the battery connector from the electrical system connector.
USING THE MACHINE
6

CAUTION:
• Children must be supervised to ensure they do not play with the machine.
• During machine operation, pay attention to other people and especially to children.
• The machine must only be powered with a voltage equal to that shown on the serial
number plate.
• Read the labels on the machine carefully. Do not cover them for any reason, and replace
them immediately if they become damaged.
• The machine must only be used and stored in an enclosed or covered environment.
• The machine must not be used or stored outdoors in damp conditions or directly exposed
to rain.
• The machine does not cause harmful vibrations.
• Use the machine only in the way described in this manual.
• Do not pick up anything that is burning or smouldering, like cigarettes, matches or glowing
embers.
• Reduce speed on slopes and dangerous corners.
• Reduce speed before making a turn.
• Always follow the instructions for mixing, use and disposal on the containers of the chemical
substances.
ATTENTION:
•Always take appropriate measures to protect any individuals and/or objects that may be
present while using this machine.
•Be careful to avoid collisions with shelving or scaolding, above all if there is a risk of
objects falling from heights.
• Do not place any liquid containers on the machine.
• The machine must only be used under temperature conditions ranging from 0 °C to +40 °C.
•When using detergents to clean the ooring, always follow the instructions and respect the
warnings indicated on the container labels.
• Always use appropriate gloves and protective equipment when handling the detergents
used to clean the oor.
• Avoid working with the brushes when the machine is standing still, so as not to damage the
oor.
•In the event of a re, use a powder re extinguisher if possible, and avoid the use of water.
•Do not allow any objects to penetrate into the machine openings. Do not use the machine if
the openings are obstructed.
• Keep the machine openings free of dust, lint, hairs, or any other foreign materials that could
reduce the airow.
•Do not remove or alter any labels xed to the machine.
• Only use the brushes and pad holders that have been supplied with the machine, or those
specied in the Use and Maintenance Manual. The use of other brushes or felt pads may
compromise the machine safety conditions.
• Before starting to work, check there are no leaks.
• Before starting to work, check that all the safety devices have been installed and are
working correctly.
7

WARNING:
•Always protect the machine against sunlight, rain, and other atmospheric agents, both while
it is stationary and while it is functioning. Store the machine in a dry, sheltered place: this
machine is only designed for use under dry conditions, and must not be used or stored
outdoors in humid conditions.
• Do not park the machine near combustible materials, powders, gases or liquids.
•Stop the machine on a at surface.
•Make sure the electric brake is engaged, then switch o the machine via the main switch
(removing the key from the block) and disconnect the battery connector from the electrical
system connector.
• If the machine is left unattended, it must be protected from any accidental movements
ATTENTION:
•The machine must only be stored under temperature conditions ranging from 0 °C to +40 °C.
The humidity level must be between 30% and 95%.
DEACTIVATION OF THE MACHINE
DANGER:
•To avoid short-circuits when working in the vicinity of electrical components: avoid the use of
non-insulated tools; do not place or allow metallic objects to fall upon the electrically powered
components; remove rings, watches and/or clothing with metallic parts that might come into
contact with the electrically powered components.
•Do not work underneath the raised machine without adequate xed safety supports.
WARNING:
•Read all the relevant instructions carefully before performing any maintenance/repair
operations.
•If the machine does not work properly, check this is not caused by failure to carry out routine
maintenance. Otherwise, ask for the intervention of the authorised technical assistance centre.
• Restore all electrical connections after any maintenance interventions.
CAUTION:
•When doing maintenance work, switch o the machine using the main switch. Remove the
key from the block and disconnect the battery connector from the electrical system connector.
•Avoid contact with moving parts. Do not wear loose clothing or jewellery, and tie long hair
back.
• Block the wheels before lifting the machine.
• Lift the machine with equipment that can sustain the weight to be lifted.
ATTENTION:
•Never tamper with the machine protection devices for any reason. Always follow the supplied
routine maintenance instructions scrupulously.
MAINTENANCE
8

•If the machine needs to be pushed for maintenance purposes (batteries absent; discharged
batteries; etc.), never exceed 4 km/h.
•If there are any machine operation anomalies, check they are not due to a lack of proper
maintenance. Otherwise, request the intervention of authorised personnel or an authorised
service centre.
•If any parts need to be replaced, always request ORIGINAL spare parts from an authorised
dealer or retailer.
•To ensure machine safety and its proper functioning, always have the scheduled maintenance
interventions (specied in the appropriate section of this manual) performed by authorised
personnel or by an authorised service centre.
•Do not clean the machine with direct or pressurised jets of water, or with corrosive substances.
•If lead batteries (WET) have been installed on the machine, avoid tilting it beyond 30° in
relation to the horizontal plane, as this could cause the highly corrosive liquid to leak out of
the batteries.
• Avoid contact with the battery acid.
•Keep all metal objects away from the batteries.
• Use a non-conductive device to remove the battery.
• Use a hoist and suitable equipment when lifting the batteries.
•The battery must be installed by qualied personnel.
• Always observe the safety measures of the site regarding battery removal.
• If the machine needs to be tilted for maintenance procedures, remove the batteries.
• Have the machine checked by an authorised technical assistance centre every year.
•When disposing of consumable materials, observe the laws and regulations in force. Once
the machine has reached the end of its service life, the materials contained within it must be
disposed of in an appropriate manner, keeping in mind that the machine itself has been built
using fully recyclable materials.
•Only push or tow the machine when the seat is occupied by an operator able to control the
machine.
•Do not wash the machine with pressurised water, or wet it in the vicinity of electrical components.
•All repairs must be carried out by qualied personnel.
• Do not physically change the design characteristics of the machine.
• Use spare parts provided by authorised service centres.
• Wear personal protective equipment as required and as suggested in the manual.
WARNING:
• Drain both tanks before transport.
•Bring both the squeegee and the brushes to a working position before securing the machine
to the transport vehicle.
• Use a ramp, truck or trailer that can support the weight of the machine and the operator.
•The ramp gradient must not be such as to cause damage to the machine as it moves up onto
the vehicle.
•Make sure the electric brake is correctly engaged after loading the machine onto the transport
vehicle.
TRANSPORT
9

Warning symbol:
Carefully read the sections preceded by this symbol meticulously following the
instructions indicated for the safety of the operator and the device.
Covered place symbol:
The operations preceded by this symbol must always be carried out in a dry, covered area.
Danger symbol (moving carriages):
Indicates that the packed product should be handled with suitable carriages that
conform to legal requirements.
Disposal symbol:
Carefully read the sections marked with this symbol for disposing of the appliance.
Recycling symbol:
Tells the operator to carry out the operations in compliance with environmental
regulations in force in the place where the appliance is being used.
Symbol of the open book with i:
Indicates the need to consult the instruction manual.
The descriptions contained in this document are not binding. The company therefore reserves the
right to make any modications at any time to elements, details, or accessory supply, as considered
necessary for reasons of improvement or manufacturing/commercial requirements. The reproduction,
even partial, of the text and drawings contained in this document is prohibited by law.
The company reserves the right to make any technical and/or supply modications. The images
are shown as reference only and are not binding as to the actual design and/or equipment.
Symbol of the open book:
Tells the operator to read the user manual before using the device.
Symbol indicating the compulsory use of protective gloves:
Indicates that the operator should always wear protective gloves, to avoid the risk of
serious injury to his hands from sharp objects.
Mandatory room ventilation symbol:
Informs the operator that the room must be ventilated while the batteries are being
recharged.
Symbol indicating a treading ban:
Informs the operator that it is forbidden to tread on machine components, as this could
lead to serious injury.
Danger symbol (corrosive substances):
The operator should always wear protective gloves to avoid the risk of serious injury to
the hands caused by corrosive substances.
Danger symbol (battery acid leakage):
Indicates the danger of leaking acid or acid fumes from the batteries while they are
being recharged.
SYMBOLS USED IN THE MANUAL
Information symbol:
Indicates additional information for the operator, to improve the use of the device.
PURPOSE AND CONTENT OF THE MANUAL
TARGET GROUP
STORING THE USE AND MAINTENANCE MANUAL
ON CONSIGNMENT OF THE MACHINE
The aim of this manual is to provide customers with all the information needed to use the machine
in the safest, most appropriate and most autonomous way. This includes information concerning
technical aspects, safety, operation, downtime, maintenance, spare parts and scrapping. The operators
and qualied technicians must carefully read the instructions in this manual before carrying out any
operations on the machine. If in doubt about the correct interpretation of instructions, contact your
nearest Customer Service Centre to obtain the necessary clarications.
This manual is written both for operators and for qualied machine maintenance technicians. Operators
must not perform operations that should be carried out by qualied technicians. The manufacturer is not
liable for damages resulting from failure to comply with this veto.
The Use and Maintenance Manual must be stored in its special pouch close to the machine, protected
from liquids and anything else that could compromise its legibility.
When the machine is consigned to the customer, an immediate check must be performed to ensure all
the material mentioned in the shipping documents has been received, and also to check the machine
has not suered damage during transportation. If this is the case, the carrier must ascertain the extent
of the damage at once, informing our customer service oce. It is only by prompt action of this type that
the missing material can be obtained, and compensation for damage successfully claimed.
IDENTIFICATION DATA
For technical assistance or to request replacement parts, always give the model, the version and the
serial number (written on the relevant plate).
TECHNICAL DESCRIPTION
INTENDED USE
SAFETY
The MAXIMA2017 is a oor scrubbing machine that can work on various types of oor and dirt thanks to
the mechanical action of a brush and the chemical action of a water-detergent solution. As it advances,
it collects the dirt removed, along with the detergent solution not absorbed by the ooring itself. The
machine must only be used for this purpose.
This scrubbing machine was designed and built for the cleaning (scrubbing and drying) of smooth,
compact ooring in the commercial, residential and industrial sectors by a qualied operator in proven
safety conditions. The scrubbing machine is not suitable for cleaning rugs or carpet oors. It is only
suitable for use in closed (or at least covered) places.
ATTENTION: the machine is not suitable for use in the rain, or under water jets.
IT IS FORBIDDEN to use the machine for picking up dangerous dusts or inammable liquids in
places with an explosive atmosphere. In addition, it is not suitable as a means of transport for
people or objects.
Operator cooperation is paramount for accident prevention. No accident prevention programme can
be eective without the full cooperation of the person directly responsible for machine operation. The
majority of occupational accidents that happen either in the workplace or whilst moving are caused by
failure to respect the most basic safety rules. An attentive, careful operator is most eective guarantee
against accidents and is fundamental in order to implement any prevention programme.
INTRODUCTORY COMMENT
Any oor scrubbing machine can only work properly and eectively if used correctly and kept in full
working order by performing the maintenance operations described in the attached documentation. We
therefore suggest you read this instruction booklet carefully and read it again whenever diculties arise
while using the machine. If necessary, remember that our assistance service (organised in collaboration
with our dealers) is always available for advice or direct intervention.
SERIAL NUMBER PLATE
CONVENTIONS
The serial number plate is located above the electric system panel, inside the machine. It shows the
general machine characteristics, in particular the serial number. The serial number is a very important
piece of information and should always be provided together with any request for assistance or to
purchase spare parts.
All references to forwards and backwards, front and rear, right and left indicated in this manual should
be understood as referring to the operator in the driving position, with his/her hands on the control
handlebars.
Symbol of the squeegee body vacuum tube position:
Used to indicate the correct position of the squeegee body vacuum tube. The tube must
be positioned behind the squeegee body lifting chain.
10
Design by FIMAP Verona(Italy)
Assembled in FIMAP Verona(Italy)
Via Invalidi del Lavoro, 1 S. Maria di Zevio - Verona- Italy

TECHNICAL DATA
Remarks:
(1) Machine weight: refers to the overall machine weight without the batteries, and with both tanks empty.
(2) Machine weight during transport: refers to the overall machine weight with the batteries, but with both tanks empty.
(3) Machine weight during work operations: refers to the overall machine weight with the batteries, with the solution tank full and the detergent canister full (valid for FSS versions), but with the recovery tank
empty.
11
TECHNICAL DATA Unit of measurement
symbol
MAXIMA 2017
BASE 50 BT
MAXIMA 2017
BASE 60 BT
MAXIMA 2017
BASE 50 BTO
MAXIMA 2017
BASE 50 BTS
Rated machine power W 1075 1575 1255 1275
Working capacity up to sq.m. 1785 2118 1778 1771
Working width mm 510 605 508 506
Squeegee width mm 712 782 712 782
Brush head brush diameter (number - diameter) mm 1 - 510 2 - 300 - -
Dimensions of abrasive pad (width x depth) mm - - 508 x 355 -
Dimensions of cylindrical brush (diameter - length) mm - - - 150 - 506
Number of brush head brush rotations rpm 140 - 600
Number of pad oscillations rpm - - 2400 -
Brush head motor (voltage / nominal power) V / W 24 - 500 24 - 500 24 - 680 24-350
Maximum weight exerted on the brush head kg - - - -
Maximum possible gradient for uphill and downhill movement
(weight(2))% 10
Maximum slope during ascent and descent with the transport
program (weight(2))% 10
Maximum ambient temperature for machine operation °C +40
Minimum ambient temperature for using the machine's
scrubbing functions °C 0
Traction motor (voltage / rated power) V / W 24 - 150
Maximum forward speed in transport mode Km/h 3.5
Vacuum motor (voltage - nominal power rating) V / W 24 - 422
Vacuum on vacuum head mbar 120,62
Maximum solution tank capacity l 53
Maximum recovery tank capacity l 57
Machine dimensions (length - width - height) mm 1295 - 712 - 1095 1270 - 640 - 1095 1220 - 712 - 1095 1265 - 785 - 1095
Battery compartment dimensions (width - useful height - length) mm 485 - 253 - 351
Recommended battery V / AhC512 - 112
Maximum individual battery weight (recommended) kg 39
Machine weight(1) kg 112
Machine weight during transport(2) kg 190
Machine weight during work operations(3) kg 245
Sound pressure level (ISO 11201) - LpA dB (A) <70 <70 <70 <70
Uncertainty KpA dB (A) 1,5 1,5 1,5 1,5
Hand vibration level (ISO 5349) m/s2<2,5 <2,5 <2,5 <2,5
Vibration measurement uncertainty - - - -

SYMBOLS USED ON THE MACHINE
LABELS USED ON THE MACHINE
Symbol of maximum temperature for lling the solution tank:
Located on the front of the solution tank, to indicate the maximum temperature
of the water for lling the solution tank safely.
Filter body position symbol:
Located on the right-hand side of the machine to indicate the position of the
detergent solution lter.
Label for detergent solution tap control:
Located on the right-hand side of the machine, to identify the control knob of
the detergent solution tap.
Label for brush head tilt adjustment:
Located on the front of the machine, to identify the knob for adjusting the brush
head body tilt.
Label indicating the need to read the Use and Maintenance Manual:
Attached to the machine in order to warn the operator to read the user and
maintenance manual (this document) before using the machine for the rst
time.
Battery recharge hazard label:
Located inside the machine (above the electric system carter), to warn the
operator of the possible risk during battery recharging
Battery recharge warning label:
Located inside the machine (above the electric system carter), to warn the
operator when it's necessary to recharge the batteries.
Daily care warning label:
Applied to the machine to remind the operator of the necessary procedures to
properly care for the machine itself.
Machine use warning label:
Located on the rear of the machine, to warn the operator which substances
cannot be removed with the machine.
Solution tank lter daily care warning label:
Applied to the machine to remind the operator to clean the solution tank after
each use.
Moving brush hazard label:
Used on the machine to warn the operator not to place his/her hands near the
moving brush.
Label warning about the risk of crushed hands:
Indicates danger to hands due to crushing between two surfaces.
Position symbol for the solution tank drainage cap:
Applied to the back of the machine to identify the solution tank drainage cap.
Position symbol for the recovery tank drainage tube:
Applied to the back of the machine to identify the recovery tank drainage tube.
Position symbol for the brush head control pedal:
Located on the rear part of the machine, to identify the brush head control pedal.
Symbol for extra brush head pressure activation:
Located on the rear part of the machine, to identify the correct position of the
brush head control pedal in order to activate the extra pressure function.
Squeegee body working position symbol:
Located on the rear part of the machine, to indicate the squeegee control lever
rotation direction for bringing the squeegee to its working position.
Symbol for squeegee body idle:
Located on the rear part of the machine, to indicate the squeegee control lever
rotation direction for bringing the squeegee to its idle position.
Battery connection symbol:
Located on the front of the solution tank, to indicate how to connect the 12V
batteries in order to obtain a total voltage of 24V.
Main switch symbol:
Located near the control panel, to indicate the main key switch.
Brush uncoupling label:
This is applied to the machine, near the control handlebars, to indicate the
brush uncoupling control switch.
12

MACHINE PREPARATION
HANDLING THE PACKAGED MACHINE
The machine is contained in specic packaging, and since the
packaging elements (plastic bags, staples, etc.) are a potential source
of danger, they should not be left within the reach of children, disabled
persons, etc.
The machine's overall weight including packaging is 000 Kg.
The overall dimensions of the package are: A=765 mm B=1460 mm
C=1270 mm.
ATTENTION: it is recommended that all the packaging
components be kept for any future machine transportation.
ATTENTION: move the packaged product with handling
equipment that complies with legal requirements regarding size
and mass of the packaging.
HOW TO UNPACK THE MACHINE
The machine is shipped in specic packaging. To remove it, proceed as follows:
1. Place the lower part of the outer packaging in contact with the oor.
NOTE: use the pictograms printed on the box as a reference.
2. Remove the outer package.
CAUTION: these operations must be carried out using protective gloves to avoid any possible
contact with the edges or tips of metal objects.
3. Make sure the machine is switched o. If it isn't, turn the main switch (1) to “0” by rotating the key
a quarter turn in the direction shown by the arrow (Fig.1). Remove the key from the instrument
panel.
4. Grip the handle (2) on the right-hand side of the recovery tank (Fig.2) and turn the tank as far as
it will go, until it reaches the maintenance position.
5. Connect the pad battery connector (3) to the main system connector (4) (Fig.3).
CAUTION: this process must be carried out by qualied personnel.
6. Grip the handle (2) on the right-hand side of the recovery tank and turn the tank until it reaches
the work position.
7. The machine is xed to the pallet by means of wedges (5) that block the wheels and brush head
(Fig.4). Remove the wedges.
8. Insert the ignition key and switch on the machine. Turn the main switch (1) to “I” by rotating the
key a quarter turn in the direction of the arrow (Fig.5).
9. Raise the brush head body and fully depress the "BRUSH HEAD CONTROL" pedal (6) at the
rear of the machine (Fig.6).
NB:to lock the brush head in the raised position, depress the pedal (6) fully and then move it
towards the right-hand side of the machine (Fig.6).
10. Raise the squeegee body and turn the squeegee control lever (7) in the direction of the arrow
(Fig.7). The lever is located on the back of the machine.
11. Press the “REVERSE ACTIVATION - DEACTIVATION” button (8) on the control handlebars (Fig.8).
NB:as soon as the button (8) on the control panel is pressed, the green LED (“REVERSE
ACTIVE”) will switch o (Fig.8).
12. Activate the dead man's lever (9) underneath the control handlebars (Fig.9) to start moving the
machine in reverse.
13. Use a ramp to bring the machine down from the pallet.
CAUTION: do not t the brush and the rear squeegee body before unloading the machine, and
avoid any violent jolts to the brush head and squeegee support.
NB: the ramp gradient must not be such as to cause damage to the machine as it comes
down.
14. Switch o the machine by turning the main switch (1) to "0", making a quarter turn of the key in
the direction of the arrow (Fig.1). Remove the key from the instrument panel.
15. Grip the handle (2) on the right-hand side of the recovery tank (Fig.2) and turn the tank as far as
it will go, until it reaches the maintenance position.
16. Disconnect the pad battery connector (3) from the main system connector (4) (Fig.3).
ATTENTION: this process must be carried out by qualied personnel.
17. Grip the handle (2) on the right-hand side of the recovery tank and turn the tank until it reaches
the work position.
HOW TO MOVE THE MACHINE
To transport the machine safely, proceed as follows:
DANGER: before starting any task, make sure the current regulations concerning the safe
transport of dangerous substances are scrupulously observed.
1. Check the solution tank and recovery tank are empty. If they aren't, empty them (see
“EMPTYING THE SOLUTION TANK” and “EMPTYING THE RECOVERY TANK”).
2. Insert the key (1) in the main switch on the control panel. Set the main switch to “I” by turning the
key (1) to the right (Fig.1).
3. Raise the brush head body and fully depress the "BRUSH HEAD CONTROL" pedal (2) at the
rear of the machine (Fig.2).
NB:to lock the brush head in the raised position, depress the pedal (2) fully and then move it
towards the right-hand side of the machine (Fig.2).
4. Raise the squeegee body and turn the squeegee control lever (3) in the direction of the arrow
(Fig.3). The lever is located on the back of the machine.
5. When you push the dead man's lever (4) (Fig.4), the machine will begin to move.
6. Use a ramp to move the machine up onto the transport vehicle.
CAUTION: during this operation, check there are no people or objects near the machine.
NB: the ramp gradient must not be such as to cause damage to the machine as it goes up.
7. Once the machine is on the means of transport, set the main switch to “0” by turning the key (1)
to the left (Fig. 5). Remove the key from the main switch.
8. Grip the handle (5) and raise the recovery tank to its maintenance position (Fig.6).
9. Disconnect the battery connector (6) from the main system connector (7) of the machine (Fig.7).
10. Grip the handle (5) and lower the recovery tank to its working position.
WARNING: secure the device according to the directives in force in the country of use, so that it
cannot slide or tip over.
13
2
8
1
7
3
9
1
2
7
8 9
3
4
4
4
5
1
6
5
7
6
7
54 6
1
5
6
21 3
12
3

MACHINE SAFETY MEASURES
To ensure that work is carried out in the best safety conditions, proceed as follows:
1. Make sure the electric brake is engaged, then rotate the lever (1) in the direction of the arrow.
The lever is located on the rear right-hand side of the machine (Fig.1).
2. Make sure the recovery tank is empty. If it isn't, empty it using the tube (2) on the rear left-hand
side of the machine (Fig.2) (see "EMPTYING THE RECOVERY TANK").
ATTENTION: the tanks should be emptied in the place used for draining dirty water.
ATTENTION: the place designated for this operation must comply with current environmental
protection regulations.
3. Switch o the machine by turning the main switch (3) to "0", making a quarter turn of the key in
the direction of the arrow (Fig.3).
4. Raise the brush head body and fully depress the "BRUSH HEAD CONTROL" pedal (4) at the
rear of the machine (Fig.4).
NB:to lock the brush head in the raised position, depress the pedal (4) fully and then move it
towards the right-hand side of the machine (Fig.4).
5. Raise the squeegee body and turn the squeegee control lever (5) in the direction of the arrow
(Fig.5). The lever is located on the back of the machine.
6. Grip the handle (6) on the right-hand side of the recovery tank (Fig.6) and turn the tank as far as
it will go, until it reaches the maintenance position.
7. Disconnect the electrical system connector (7) from the battery connector (8) (Fig.7).
ATTENTION: this process must be carried out by qualied personnel.
8. Grip the handle (6) on the right-hand side of the recovery tank and turn the tank until it reaches
the work position.
ATTENTION: make sure the battery charger supply cable is disconnected from the mains
socket.
TYPE OF BATTERY TO BE USED
Power to the machine must be supplied by two sealed traction batteries with gas recombination or gel
technology. The batteries must meet the requirements laid out in the norms: CEI EN 60254-1:2005-12
(CEI 21-5) + CEI EN 60254-2:2008-06 (CEI 21-7). For the best work results, we suggest the use of
two 12V MFP 112 Ah/C5batteries.
BATTERY MAINTENANCE AND DISPOSAL
For battery maintenance and recharging, respect the instructions provided by the battery
manufacturer. When the batteries reach the end of their service life, they must be disconnected by
specialised and properly trained personnel, and must be subsequently removed from the battery
compartment using suitable lifting devices.
NB: dead batteries are classied as dangerous waste and as such must be delivered to an
authorised body for disposal.
INSERTING THE BATTERIES IN THE MACHINE
The batteries must be housed in the relative compartment beneath the recovery tank. They should be
handled using lifting equipment that is suitable in terms of both the weight and the coupling system.
DANGER: make sure you comply with the accident prevention regulations in force in the
country where you work or with DIN EN 50272-3 and DIN EN 50110-1, before any handling of
the batteries.
CAUTION: to prevent an accidental short circuit use insulated tools to connect the batteries,
and do not place or drop metal objects on the battery. Remove rings, watches and any clothing
with metal parts that may come into contact with the battery terminals.
The various phases for inserting the batteries in the battery compartment are as follows:
1. Make sure the machine is in a safe condition (see “MACHINE SAFETY MEASURES”).
2. Grip the handle (1) on the right-hand side of the recovery tank (Fig.1) and turn the tank as far as
it will go, until it reaches the maintenance position.
3. House the batteries in the compartment, positioning the poles “+” and “-“ opposite each other
(Fig.2).
NB: for battery maintenance and daily recharging, you must fully respect the indications
provided by the manufacturer or retailer.
WARNING: all installation and maintenance operations must be carried out by specialised
personnel.
NB: before installing the battery, clean the battery compartment. Check that the connectors on
the cables supplied are functioning correctly.
WARNING: check that the characteristics of the battery that you are looking to use are
appropriate for the type of work to be performed. Check the battery charge and the condition of
the contacts on the battery.
NB: you are advised to only lift and move the batteries with lifting and transportation means
suitable for the specic weight and size
WARNING: the lifting hooks must not damage the blocks, connectors or cables.
WARNING: before inserting the batteries, remember to cover the terminals with a little grease
to protect them against external corrosion.
CONNECTING THE BATTERIES TO THE MACHINE SYSTEM
The batteries should be connected so as to obtain a
total voltage of 24V.
ATTENTION: it is recommended that all
installation and maintenance operations be
carried out by expert personnel, trained at the
specialised assistance centre.
CAUTION: to prevent an accidental short circuit
use insulated tools to connect the batteries, and
do not place or drop metal objects on the battery.
Remove rings, watches and any clothing with
metal parts that may come into contact with the
battery terminals.
The various phases for inserting the batteries in the battery compartment are as follows:
1. Using the supplied jumper cable (1), connect the batteries to the "+" and "-" poles in sequence.
2. Connect the battery connector cable (2) to the “+” and “-“ poles to obtain a voltage of 24V at the
terminals.
3. Connect the electric system connector (3) to the battery connector (2).
RECHARGING THE BATTERIES
The batteries must be charged prior to rst use, and whenever they no longer provide sucient
power.
ATTENTION: to avoid any permanent damage to the batteries, it is essential to avoid their
complete discharge; begin recharging them within a few minutes of noting the "discharged
batteries" signal.
ATTENTION: never leave the batteries completely discharged, even if the device is not being
used.
1. Bring the appliance to the area where the batteries are charged.
2. Make sure the machine is in a safe condition (see “MACHINE SAFETY MEASURES”).
ATTENTION: park the machine in an enclosed place, on a at and level surface; near the
machine there must be no objects that could either damage it, or be damaged through contact
with it.
ATTENTION: the room used to recharge the batteries must be adequately ventilated to prevent
the accumulation of gases that leak from batteries.
3. Grip the handle (1) on the right-hand side of the recovery tank (Fig.1) and turn the tank as far as
it will go, until it reaches the maintenance position.
ATTENTION: the following operations must be carried out by qualied personnel. An incorrect
connection of the connector may cause a malfunction of the device.
14
23
1
2
3
1
3
1
1
1 2
2
45
4
5
6
6
7
7
8

WARNING: before inserting the connector (3) in the socket (4), make sure there is no
condensation or any other type of liquid.
NB: the battery charger power cable is delivered inside the bag containing this instruction
booklet.
6. Plug the battery charger cable into the mains socket.
CAUTION: keep the recovery tank open for the duration of the battery recharging cycle, to
allow gas fumes to escape.
NB: before connecting the battery charger to the mains socket, make sure the characteristics
of the mains supply correspond to those required by the battery charger. Read the battery
charger use and maintenance manual (included in the bag that contains this instruction
booklet).
7. When the recharge cycle is complete, disconnect the battery charger cable from the mains.
8. Disconnect the battery charger power cable from the socket on the battery charger itself.
9. Replace the cap (2) on the battery charger plug.
10. Grip the handle (1) on the right-hand side of the recovery tank and turn the tank as far as it will
go, until it reaches the maintenance position.
ASSEMBLING THE BRUSH (50BT VERSIONS)
ASSEMBLING THE BRUSH (60BT VERSIONS)
For packaging reasons, the brush is supplied disassembled from the machine. To assemble it on the
brush head body, proceed as follows:
1. Make sure the machine is in a safe condition (see “MACHINE SAFETY MEASURES”).
CAUTION: users are advised to always wear protective gloves, to avoid the risk of serious
injury to hands.
2. Raise the brush head body and fully depress the "BRUSH HEAD CONTROL" pedal (1) at the
rear of the machine (Fig.1).
NB:to lock the brush head in the raised position, depress the pedal (1) fully and then move it
towards the right-hand side of the machine (Fig.6).
3. With the brush head up, insert the brush in the plate housing underneath the brush head, turning
it until the three buttons engage with the notches on the plate itself (Fig.2).
4. Turn until the pin is pushed towards the coupling spring and is locked into place.
For packaging reasons, the brushes are supplied disassembled from the machine. To assemble them
on the brush head body, proceed as follows:
1. Make sure the machine is in a safe condition (see “MACHINE SAFETY MEASURES”).
CAUTION: users are advised to always wear protective gloves, to avoid the risk of serious
injury to hands.
2. Raise the brush head body and fully depress the "BRUSH HEAD CONTROL" pedal (1) at the
rear of the machine (Fig.1).
NB:to lock the brush head in the raised position, depress the pedal (1) fully and then move it
towards the right-hand side of the machine (Fig.6).
3. With the brush head in the raised position, press the brush-holder plate retainer (2) and
simultaneously rotate the brush in the direction shown in the image (Fig.2).
ATTENTION: Fig.2 shows the rotation direction of the left-hand brush, rotate in the opposite
direction for the right-hand brush.
4. When brush rotation is prevented, turn until the button on the brush is engaged in the coupling
spring on the brush-holder plate.
5. Repeat the operations completed for the right-hand front brush as well.
NB: carefully read the use and maintenance instructions of the battery charger used.
4. Go to the back of the machine and remove the cap (2) from the battery charger socket (Fig.2).
5. Connect the battery charger power cable connector (3) to the battery charger socket (4) (Fig.3).
CAUTION: before connecting the batteries to the battery charger, make sure it is suitable for
the batteries used.
ASSEMBLING THE ABRASIVE PAD (50BTO VERSIONS)
For packaging reasons, the abrasive pad comes disassembled from the machine. To assemble it on
the brush head body, proceed as follows:
1. Make sure the machine is in a safe condition (see “MACHINE SAFETY MEASURES”).
CAUTION: users are advised to always wear protective gloves, to avoid the risk of serious
injury to hands.
2. Raise the brush head body and fully depress the "BRUSH HEAD CONTROL" pedal (1) at the
rear of the machine (Fig.16).
NB:to lock the brush head in the raised position, depress the pedal (6) fully and then move it
towards the right-hand side of the machine (Fig.1).
3. With the brush head in the raised position, slide the abrasive pad into the housing under the
brush head, pressing it until it is rmly attached to it (Fig.2).
ASSEMBLING THE CYLINDRICAL BRUSHES (50BTS VERSIONS)
For packaging reasons, the brushes are supplied disassembled from the machine. To assemble them
on the brush head body, proceed as follows:
1. Make sure the machine is in a safe condition (see “MACHINE SAFETY MEASURES”).
CAUTION: users are advised to always wear protective gloves, to avoid the risk of serious
injury to hands.
2. Raise the brush head body and detach the "BRUSH HEAD CONTROL" pedal (1) at the rear of
the machine from the plate retainer (Fig.1).
3. With the brush head raised from the oor, turn the knobs (2) that hold the left lateral carter (3) in
place anti-clockwise (Fig.2).
4. Remove the left lateral carter (3) (Fig.3).
5. Insert the brush into the tunnel (Fig.4), taking care to make sure that the gearmotor's drive shaft
enters the slit in the brush itself.
6. Repeat the previously described operations for the right-hand side as well.
N.B.: In order to be installed correctly, the brushes must form an X when viewed from above in
the forward direction of movement (Fig.5).
ASSEMBLING THE SQUEEGEE BODY
For packaging reasons, the squeegee body comes disassembled from the machine. To assemble it
on the squeegee support, proceed as follows:
1. Make sure the machine is in a safe condition (see “MACHINE SAFETY MEASURES”).
2. Raise the squeegee body and turn the squeegee control lever (1) in the direction of the arrow
(Fig.1). The lever is located on the back of the machine.
CAUTION: these operations must be carried out using protective gloves to avoid any possible
contact with the edges or tips of metal objects.
3. Unscrew the knobs (2) in the squeegee body pre-assembly (Fig.2).
4. First of all, insert the left-hand pin (3) on the squeegee body in the left slit (4) in the squeegee
support (Fig.3), so that the bushing (5) adheres to the walls of the slit.
5. Repeat the same operation for the right pin.
15
2 31
1
2 4
3
12
1
112
2
1
12
1 2 3
1
23
4 5

FILLING THE SOLUTION TANK WITH WATER
Before lling the solution tank, carry out the following steps:
1. Take the machine to the usual place for lling the solution tank.
2. Make sure the machine is in a safe condition (see “MACHINE SAFETY MEASURES”).
3. Check the solution tank drainage cap (1) (on the rear right-hand side of the machine) is tight. If it
isn't, turn it clockwise (Fig.1).
4. Check the water lter cap (2) (on the rear right-hand side of the machine) is tight. If it isn't, turn it
clockwise (Fig.2).
The solution tank can be lled with water in three dierent ways:
• Removing the cap/measuring device (3) (Fig.3) and lling the solution tank by means of a rubber
tube or a bucket (Fig.4).
• Using the ller tube (4) (Fig.5), which supports the water tube on its own. In this case, remember
to remove the cap/measuring device (3) to ensure the air is properly vented.
• Using the optional system for automatic clean water top-up. This system has a oat for avoiding
any overow.
5. Fill with clean water, at a temperature not higher than 50°C and not lower than 10°C. The amount
inside the tank can be seen by means of the level tube (5) (Fig.6) on the rear left-hand side of
the machine.
DETERGENT SOLUTION
After lling the solution tank with clean water add the liquid detergent to the tank in the concentration
and manner indicated on the detergent manufacturer's label. To prevent the formation of an excessive
amount of foam that could damage the vacuum motor, use the minimum percentage of detergent
required.
CAUTION: protective gloves should always be worn before handling detergents or acidic or
alkaline solutions, to avoid serious injury to the hands.
CAUTION: always use detergents whose manufacturer's label indicates their suitability for
scrubbing machines. Do not use acid or alkaline products or solvents without this indication.
ATTENTION: acid or alkaline maintenance detergents can be used, as long as they have pH
values between 4 and 10, and do not contain: oxidising agents, chlorine or bromine,
formaldehyde, mineral solvents. The detergents used must be suitable for use with scrubbing
machines.
CAUTION: always use low-foam detergent. To avoid the production of foam, put a minimum
quantity of anti foam liquid in the recovery tank before starting to clean. Do not use pure acids.
NB: to make it easier to measure the detergent on the cap/measuring device, there are notches
indicating the detergent percentage quantities that can be used. The notches range from a
minimum of 0.1% to a maximum of 0.5%.
HOUR METER
The machine control panel contains the control display, which shows the total usage time. The numbers
before the letter “h” identify the hours, while the numbers before the letter “m” identify the tenths of an
hour (a tenth of an hour corresponds to six minutes). The ashing “:” symbol indicates that the hour
meter is counting the machine functioning time.
On the lower part of the display, you can see the battery charge level. When the batteries tted in the
machine are fully charged, the line at the bottom consists of nine illuminated indicator bars. As the
batteries gradually run down, the indicator bars are no longer illuminated. When the battery “critical
charge” threshold is reached, the last indicator bar ashes for about 20 seconds, after which the
“battery” symbol begins to ash.
BATTERY CHARGE LEVEL INDICATOR
In the case of a machine without FSS, before beginning to work it is necessary to:
1. Make sure the recovery tank is empty. If it isn't, empty it (see “EMPTYING THE RECOVERY
TANK”).
2. For versions without FSS, make sure the amount of detergent solution in the solution tank is
suitable for the type of work to be carried out. If it isn't, ll the solution tank (see "FILLING THE
SOLUTION TANK WITH WATER” and "DETERGENT SOLUTION"). Check the level tube (1) in
the rear left-hand part of the machine (Fig.1).
3. Check the rubber squeegee blades are in good working condition. If they aren't, replace them
(see “REPLACING THE SQUEEGEE BODY RUBBER BLADES”).
4. Check the brush is in good working condition. If it isn't, replace it (see “REPLACING THE BRUSH
HEAD BRUSH”).
5. Check the machine is switched o. If it isn't, turn the main switch (2) to “0” by rotating the key a
quarter turn in the direction of the arrow (Fig.2). Remove the key from the instrument panel.
6. Grip the handle (3) on the right-hand side of the recovery tank (Fig.3) and turn the tank as far as
it will go, until it reaches the maintenance position.
PREPARING TO WORK
7. Connect the main system connector (4) to the battery connector (5) (Fig.4).
ATTENTION: this process must be carried out by qualied personnel.
8. Grip the handle (3) on the right-hand side of the recovery tank and turn the tank until it reaches
the work position.
9. Make sure the electronic brake is engaged. If it isn't, turn the lever (6) in the direction of the
arrow. The traction gearmotor is located on the rear right-hand side of the machine (Fig.5).
10. Check the water tap is fully open - the water adjustment knob (7) must be turned fully in the
direction shown by the arrow (Fig.6).
11. Make sure the solution tank drainage cap (8) is closed. If it isn't, close it (Fig.7).
12. Make sure the water lter cap (9) is closed. If it isn't, close it (Fig.8).
13. Make sure the cap of the recovery tank drainage tube (10) is closed. If it isn't, close it (Fig.9).
6. Insert the vacuum tube (6) in the sleeve (7) in the squeegee body (Fig.4).
NB: the tube must be positioned behind the squeegee lifting chain.
NB: the squeegee has already been adjusted, but refer to “ADJUSTING THE SQUEEGEE
BODY RUBBER BLADES” if you need any information.
16
47
6
21
1 2
43
6
5
3
4
5
1
1
2
2
3
3
5 6
6 7
4
4
5
8 97
8 9
10
2 31
1 2 4
3 5

14. Make sure the vacuum tube (11) is correctly connected to the sleeve in the squeegee body. If it
isn't, connect it (Fig.10).
15. Make sure the vacuum motor lter (12) is correctly connected and is clean (Fig.11). If it isn't,
clean it (see “CLEANING THE RECOVERY TANK”).
16. Make sure the lter basin (13) is correctly connected and is clean (Fig.12). If it isn't, clean it
(see “CLEANING THE RECOVERY TANK ”).
17. Make sure the recovery tank cover is properly closed. If it isn't, close it.
STARTING WORK
To start working, proceed as follows:
1. Make all the checks listed in “PREPARING TO WORK”.
2. Go to the driving position, behind the machine.
3. Turn the main switch (1) to "I", making a quarter turn of the key in the direction of the arrow
(Fig.1).
4. When the display comes on, the screens appear in sequence.
N.B.: In the rst screen the nominal battery voltage programmed into the control board is
displayed on the left of the screen, and on the right, the minimum inhibit temperature appears
(Fig.2).
NB: The second screen displays the hours of work completed by the machine (Fig.3).
NB: the steps for a complete scrubbing and drying cycle are explained below.
5. Lower the brush head body and detach the "BRUSH HEAD CONTROL" pedal (2) at the rear of
the machine from the plate retainer (Fig.4).
6. Lower the squeegee body and turn the squeegee control lever (3) in the direction of the arrow
(Fig.5). The lever is located on the back of the machine.
7. When the dead man's lever (4) is pressed, the machine will begin to move. The lever is located
underneath the control handlebars (Fig.6).
NB: the gearmotor will only begin functioning, and the solenoid valve will only begin dispensing
detergent solution, when the brush head body is in its working position.
8. During the rst few metres, check that the detergent solution coming out is suitable for the task in
hand. If it isn't, adjust it after reading the section "REGULATING THE DETERGENT SOLUTION".
The appliance will now begin to work with full eciency until the battery is at or until the detergent
solution has nished.
During the rst few metres, check that there is sucient solution and that the squeegee is drying
correctly.
NB:If the dead man's lever is released during the scrubbing with drying operation, the brush
motor and the solenoid valve will be deactivated. The vacuum motor will continue working until
the squeegee control lever is rotated to bring it back to its idle position.
NB:if the squeegee body is raised during the scrubbing and drying operation, the vacuum
motor will continue working at maximum speed for a certain period of time, and then switch o.
This ensures that all the liquid in the vacuum tube is eliminated.
NB:when lling the solution tank, it is good practice to empty the recovery tank using the
special drainage tube.
SCRUBBING WITH DRYING
To perform a scrubbing and drying program, proceed as follows:
1. Make all the checks listed in “PREPARING TO WORK”.
2. Go to the driving position, behind the machine.
3. Turn the main switch (1) to "I", making a quarter turn of the key in the direction of the arrow
(Fig.1).
4. Lower the brush head body and detach the "BRUSH HEAD CONTROL" pedal (2) at the rear of
the machine from the plate retainer (Fig.2).
5. Lower the squeegee body and turn the squeegee control lever (3) in the direction of the arrow
(Fig.3). The lever is located on the back of the machine.
SCRUBBING WITHOUT DRYING
To perform a scrubbing only program, proceed as follows:
1. Make all the checks listed in “PREPARING TO WORK”.
2. Go to the driving position, behind the machine.
3. Turn the main switch (1) to "I", making a quarter turn of the key in the direction of the arrow
(Fig.1).
4. Lower the brush head body and detach the "BRUSH HEAD CONTROL" pedal (2) at the rear of
the machine from the plate retainer (Fig.2).
5. When the dead man's lever (3) is pressed, the machine will begin to move. The lever is located
underneath the control handlebars (Fig.3).
NB: the brush head body will only begin to descend to its working position when the dead
man's lever has been pressed.
NB: the gearmotor will only begin functioning, and the solenoid valve will only begin dispensing
detergent solution, when the brush head body is in its working position.
DRYING
To perform a drying program, proceed as follows:
1. Make all the checks listed in “PREPARING TO WORK”.
2. Go to the driving position, behind the machine.
3. Turn the main switch (1) to "I", making a quarter turn of the key in the direction of the arrow
(Fig.1).
4. Lower the squeegee body and turn the squeegee control lever (2) in the direction of the arrow
(Fig.2). The lever is located on the back of the machine.
5. When the dead man's lever (3) is pressed, the machine will begin to move. The lever is located
underneath the control handlebars (Fig.3).
NB: the vacuum motor will only begin to work when the squeegee body is in contact with the
oor.
6. When the dead man's lever (4) is pressed, the machine will begin to move. The lever is located
underneath the control handlebars (Fig.4).
NB: the brush head body will only begin to descend to its working position when the dead
man's lever has been pressed.
NB: the gearmotor will only begin functioning, and the solenoid valve will only begin dispensing
detergent solution, when the brush head body is in its working position.
The drying without scrubbing operation should only be
carried out if the machine was previously used to
carry out a scrubbing without drying operation.
17
1 2 3
1
1110 12
11
12 13
4
4
1
1
2
2
3
3
5
3
46
4
2
1
1
2
2
3
3
1
1
2
2
3
3

ADJUSTMENT OF THE DETERGENT SOLUTION FLOW
To adjust the ow of detergent solution during work, proceed as follows:
1. Make sure the detergent solution tap is fully open, rotating the knob (1) in the direction of
the arrow (Fig.1). As the knob is rotated, the ow of detergent in the machine water circuit is
increased.
2. By pushing the dead man's lever (2) the brush motor will start operating and the solenoid valve
will distribute detergent solution to the brush (Fig.2).
3. During the rst few meters check that the amount of solution is sucient to wet the oor, but not
excessive to exit the splash guard.
4. If the amount of chemical that comes out is not suitable, it can be controlled via the knob (1) on
the rear left-hand side of the machine (Fig.1).
NB:If you wish to stop the delivery of detergent solution completely when working, press the
button (3) on the control handlebars (Fig.3).
NB:When the button (3) on the control display is pressed, the word “H2O STOP” will appear
intermittently(Fig.4).
NB:To reactivate the delivery of the detergent solution, press the button (3) again (Fig.3).
REGULATING THE FORWARD SPEED
This machine is equipped with electronic traction control. To adjust the forward speed during work,
proceed as follows:
1. Turn the main switch (1) to "I", making a quarter turn of the key in the direction of the arrow
(Fig.1).
2. Press the dead man's levers (2) underneath the control handlebars (Fig.2).
NB:The forward speed of the machine can be adjusted by varying the pressure on the dead
man's lever (2). The more it is pressed, the more the forward speed will increase.
REVERSE
This machine is equipped with electronic traction control. To reverse, proceed as follows:
1. Raise the brush head body and fully depress the "BRUSH HEAD CONTROL" pedal (1) at the
rear of the machine (Fig.1).
NB:to lock the brush head in the raised position, depress the pedal (1) fully and then move it
towards the right-hand side of the machine (Fig.1).
NB:if the brush head body is left in contact with the oor, the gearmotor will continue
functioning but the solenoid valve will stop dispensing detergent solution on the brush.
2. Raise the squeegee body and turn the squeegee control lever (2) in the direction of the arrow
(Fig.2). The lever is located on the back of the machine.
3. Press the “REVERSE ACTIVATION - DEACTIVATION” button (3) on the control handlebars
(Fig.3).
NB:As soon as the button (3) is pressed, the word “BACK” will appear on the control display
(Fig.4).
4. Activate the dead man's levers (5) on the handlebars (Fig.4) to start moving the machine in
reverse mode.
WARNING: the reverse speed is lower than the forward speed to comply with current health
and safety standards. If the potentiometer is adjusted while reversing, the adjustment of the
forward speed will be automatically changed.
WARNING: it is impossible to reverse if the squeegee body touches the oor. In order to
reverse, lift the squeegee body from the oor using the relevant lever on the back of the
machine.
NB: to disable reverse movement, press the button (4) on the control handlebars again.
EMERGENCY BUTTON
This machine is equipped with an emergency switch. To activate it, just press the button (1) on the
back of the control handlebars (Fig.1).
WARNING: this control interrupts the electrical circuit between the batteries and the machine
system.
NB: after stopping and resolving the problem, turn the key to “0”, set the button (1) to the
standard position and turn the key to “I” to resume the work.
ECO MODE
This machine has an Eco-Mode function for reducing the noise generated by the vacuum motor, and for
reducing the energy used by the machine.
To activate or deactivate this function, just press the button (1) on the instrument panel for at least
three seconds (Fig.1).
N.B.: When the Eco-Mode function is active, the word “ECO” will ash on the control display
(Fig.2).
Just press the button (1) on the control panel to deactivate the "Eco-Mode" function (Fig.1).
If the dead man's lever (2) is released when performing a scrubbing with drying operation in Eco-
Mode (Fig.3), both the traction motor and the brush motor, along with the solenoid valve, will stop
working, while the vacuum motor will continue to function until it is raised o the oor.
NB:To recommence work, simply press the dead man's lever (2) and the traction motor will
start immediately; the brush motor; the solenoid valve.
EXTRA BRUSH HEAD PRESSURE
This machine can increase the pressure exerted on the brush during the work cycle. To do this:
1. Check that the brush head body is in contact with the ground; if not, detach the "BRUSH HEAD
CONTROL" pedal (2) at the rear of the machine from the plate retainer (Fig.1).
2. Raise the brush head pedal and engage it in the “EXTRA PRESSURE” position (Fig.2).
18
1
1
2
2
4
4
1
1
2 3
2 3
1
4
1
1
1
2
2
3
3
1
1
23
2
1
1
2
1

RECOVERY TANK OVERFLOW
The machine is equipped with a mechanical device (oat) under the recovery tank lid that, when the
recovery tank is full, shuts o the air to the vacuum motor intake to protect it; the sound of the vacuum
motor will then be deeper.
If this is the case, proceed as follows:
1. Raise the brush head body and fully depress the "BRUSH HEAD CONTROL" pedal (1) at the
rear of the machine (Fig.1).
NB:to lock the brush head in the raised position, depress the pedal (1) fully and then move it
towards the right-hand side of the machine (Fig.1).
2. Raise the squeegee body o the oor by means of the lever (2) on the back of the machine (Fig.2).
3. Bring the machine to the designated place for draining o the dirty water, and empty the recovery
tank (see “EMPTYING THE RECOVERY TANK”).
At the end of the work, and before carrying out any type of maintenance, perform the following
operations:
1. Raise the brush head body and detach the "BRUSH HEAD CONTROL" pedal (1) at the rear of
the machine from the plate retainer (Fig.1).
2. Raise the squeegee body o the oor by means of the lever (2) on the back of the machine
(Fig.2).
3. Take the appliance to the dedicated dirty water drainage area.
4. Switch o the machine by turning the main switch (3) to "0", making a quarter turn of the key in
the direction of the arrow (Fig.3). Remove the key from the instrument panel.
AT THE END OF THE WORK
5. Carry out all the procedures listed in the paragraph “RECOMMENDED PERIODIC
MAINTENANCE” (in the column “AT THE END OF THE WORK”).
6. Take the appliance to the designated machine storage place.
ATTENTION: park the machine in an enclosed place, on a at surface, and at a safe distance
from any objects that could either damage it or be damaged due to contact with the machine
itself.
7. Make sure the machine is in a safe condition (see “MACHINE SAFETY MEASURES”).
ATTENTION: if the machine is left unused for more than one whole day, remove the brush
from the brush head body, and the squeegee body from the squeegee support.
8. Grip the handle (4) on the right-hand side of the recovery tank (Fig.4) and turn the tank as far as
it will go, until it reaches the maintenance position.
9. Grip the prop (5) and turn it as far as it will go (Fig.5), until it reaches the work position.
10. Block the rotation of the prop (5) by pushing it towards the inside of the cover (Fig.6).
11. Grip the handle (4) on the right-hand side of the recovery tank and turn the tank as far as it will go,
until it reaches the work position (Fig.7).
RECOMMENDED MAINTENANCE OPERATIONS
DRAINING THE RECOVERY TANK
Proceed as follows to empty the recovery tank:
1. Take the machine to the maintenance area.
2. Make sure the machine has been secured (see the section titled “SECURING THE MACHINE”).
CAUTION: users are advised to always wear protective gloves, to avoid the risk of serious injury
to hands.
3. Release the recovery tank drainage tube (on the back of the machine) from the retainers (Fig.1).
4. Bend the end of the drainage tube in order to create a choke and prevent the content from coming
out (Fig.2), then position the tube on the discharge surface, unscrew the cap, and gradually
release the tube.
NB: the place designated for this operation must comply with current environmental protection
regulations.
5. Repeat the operations in reverse order to reassemble all the parts.
CLEANING THE DEBRIS HOPPER (50BTS VERSION)
To clean the debris hopper, proceed as follows:
1. Take the machine to the maintenance area.
2. Make sure the machine has been secured (see the section titled “SECURING THE MACHINE”).
CAUTION: users are advised to always wear protective gloves, to avoid the risk of serious injury
to hands.
3. Use the moulded handle (1) to extract the debris hopper (Fig.1) and empty it.
NOTE: the place designated for this operation must comply with current environmental
protection regulations.
4. Clean the inside with a jet of water, and use a brush to remove any residual impurities if necessary.
5. Proceed in the opposite order to reassemble all the parts.
19
5
5
6
4
4
7
21
1 2
1
2
112
2
3
3
11
TYPE OF MAINTENANCE
AT THE END OF
THE WORK
DAILY
WEEKLY
BEFORE A LONG
PERIOD OF NON-USE
TRANSPORT
EMPTYING THE RECOVERY TANK X X X
CLEANING THE DEBRIS HOPPER (50BTS VERSION) X X X
CLEANING THE SQUEEGEE BODY X X X
CLEANING THE BRUSH HEAD BRUSH (50BT VERSION) X X
CLEANING THE BRUSH HEAD BRUSHES (60BT VERSION) X X
CLEANING THE BRUSH HEAD BRUSHES (50BT VERSION) X X
CLEANING THE RECOVERY TANK X X X
EMPTYING THE SOLUTION TANK X X X X
CLEANING THE WATER SYSTEM FILTER X X
CLEANING THE VACUUM TUBE X X
CLEANING THE SOLUTION TANK X X
CLEANING THE VACUUM WAND KIT X X X

CLEANING THE SQUEEGEE BODY
The careful cleaning of the whole vacuum unit ensures better drying and cleaning of the oor as well as
a longer vacuum motor life. To clean the squeegee body, proceed as follows:
1. Take the machine to the maintenance area.
2. Make sure the machine has been secured (see the section titled “SECURING THE MACHINE”).
CAUTION: these operations must be carried out using protective gloves to avoid any possible
contact with the edges or tips of metal objects.
3. Remove the vacuum tube (1) from the vacuum nozzle on the squeegee body (Fig.1).
4. Completely unscrew the knobs (2) in the squeegee body pre-assembly (Fig.2).
5. Remove the squeegee body from the slits in the squeegee connector (Fig.3).
6. Thoroughly clean the vacuum chamber of the squeegee body, rst with a jet of water and then
with a damp cloth.
NB: the place designated for this operation must comply with current environmental protection
regulations.
7. Thoroughly clean the rear rubber blade of the squeegee body, rst with a jet of water and then
with a damp cloth.
8. Thoroughly clean the front rubber blade of the squeegee body, rst with a jet of water and then
with a damp cloth.
9. Thoroughly clean the vacuum nozzle with a jet of water, and then with a damp cloth.
10. Repeat the operations in reverse order to reassemble all the parts.
CLEANING THE BRUSH HEAD BRUSH (50BT VERSION)
Careful cleaning of the brush guarantees better cleaning of the oor, as well as a longer brush head
gearmotor lifespan. To clean the brush, proceed as follows:
1. Take the machine to the maintenance area.
CAUTION: these operations must be carried out using protective gloves to avoid any possible
contact with the edges or tips of metal objects.
2. Insert the ignition key and switch on the machine. Turn the main switch (1) to “I” by rotating the
key a quarter turn in the direction shown by the arrow (Fig.1).
3. Raise the brush head body and fully depress the "BRUSH HEAD CONTROL" pedal (2) at the
rear of the machine (Fig.2).
NB:to lock the brush head in the raised position, depress the pedal (2) fully and then move it
towards the right-hand side of the machine (Fig.2).
4. Press the “BRUSH UNCOUPLING” button (3) on the control panel for more than 3 seconds
(Fig.3).
CAUTION: do not stand near the brush head body while the brush is being uncoupled.
5. Clean the brush under a stream of running water to remove any impurities from its bristles. Check
the wear status of the bristles and replace the brushes if they are excessively consumed (the bristle
protrusion must not be less than 10mm; this distance is indicated on the brush by the yellow band).
When replacing the brush, read "REPLACING THE BRUSH HEAD BRUSH".
CLEANING THE BRUSH HEAD BRUSHES (60BT VERSIONS)
Careful cleaning of the brush guarantees better cleaning of the oor, as well as a longer brush head
gearmotor lifespan. To clean the brush, proceed as follows:
1. Take the machine to the maintenance area.
2. Make sure the machine has been secured (see the section titled “SECURING THE MACHINE”).
CAUTION: users are advised to always wear protective gloves, to avoid the risk of serious
injury to hands.
NB: the place designated for this operation must comply with current environmental protection
regulations.
3. Go to the front of the machine.
4. Press the brush-holder plate retainer (1) and simultaneously rotate the brush in the direction
shown in the image (Fig.1).
ATTENTION: Fig.1 shows the rotation direction of the left-hand brush.
5. When brush rotation is prevented, turn until the button on the brush is disengaged from the
coupling spring on the brush-holder plate.
6. Repeat the same operation for the right-hand brush.
7. Clean the brush under running water to remove any impurities from its bristles. Check the bristles
are not worn; in the event of excessive wear, replace the brush (the bristles should be at least
10mm long). When replacing the brush, read "REPLACING THE BRUSH HEAD BRUSH".
CLEANING THE CYLINDRICAL BRUSHES (50BTS VERSIONS)
Careful cleaning of the brush guarantees better cleaning of the oor, as well as a longer brush head
gearmotor lifespan. To clean the brush, proceed as follows:
1. Take the machine to the maintenance area.
2. Make sure the machine has been secured (see the section titled “SECURING THE MACHINE”).
CAUTION: users are advised to always wear protective gloves, to avoid the risk of serious
injury to hands.
NB: the place designated for this operation must comply with current environmental protection
regulations.
3. Go to the front left-hand side of the machine.
4. With the brush head raised from the oor, turn the knobs (1) that hold the left lateral carter (2) in
place anti-clockwise (Fig.1).
5. Remove the left lateral carter (2) (Fig.2).
6. Extract the brush from the tunnel (Fig.3).
7. Repeat the previously described operations for the right-hand side as well.
8. Clean the brush under running water to remove any impurities from its bristles. Check the bristles
are not worn; in the event of excessive wear, replace the brush (the bristles should be at least
10mm long). Read the paragraph “REPLACING THE CYLINDRICAL BRUSHES” for info on how
to replace the brush.
ATTENTION: Every time it is remove, swap the front brush with the rear brush, and vice versa.
To clean the recovery tank (without the optional tank cleaning kit), proceed as follows:
1. Take the machine to the maintenance area.
2. Make sure the machine has been secured (see the section titled “SECURING THE MACHINE”).
CAUTION: users are advised to always wear protective gloves, to avoid the risk of serious
injury to hands.
NB: the place designated for this operation must comply with current environmental protection
regulations.
3. Grip the handle (1) on the left-hand side of the recovery tank (Fig.1) and turn the tank cover as
far as it will go, until it reaches the maintenance position.
4. Remove the dirty water basket/lter (2) from the support (Fig.2).
5. Remove the basket cover (3) from the basket/lter (2) (Fig.3).
CLEANING THE RECOVERY TANK
6. Clean the basket/lter (2) and the basket cover (3) under a jet of water.
NB: use a spatula or brush to eliminate any dirt that is particularly dicult to remove.
7. Use a dry cloth to dry the basket/lter (2) and the basket cover (3) and place them back inside
the recovery tank.
8. Remove the lter protection cup (4), turning it in the direction of the arrow (Fig.4).
9. Remove the vacuum motor lter (5), taking care not to lose the support tie (6) inside the recovery
tank (Fig.5).
10. Rinse the cup (4) and lter (5) thoroughly under running water.
NB: use a spatula to eliminate any dirt that is particularly dicult to remove.
11. Repeat the operations in reverse order to reassemble all the parts.
20
21 3
1
2
1
1
2 31
1
2
2
3
1 2 3
12
3
31 2
12
Table of contents
Other CONQUEST Scrubber manuals