Contents –Inhoudsopgave –Contenu - Inhalt
Models.......................................................................................................................................................................................................................... I
Maxima ................................................................................................................................................................................................................... I
Contents –Inhoudsopgave –Contenu - Inhalt........................................................................................................................................b
English......................................................................................................................................................................................................................... 1
General Information........................................................................................................................................................................................ 1
Keyboard.............................................................................................................................................................................................................. 1
Very important .................................................................................................................................................................................................. 2
Use of the instrument ................................................................................................................................................................................... 2
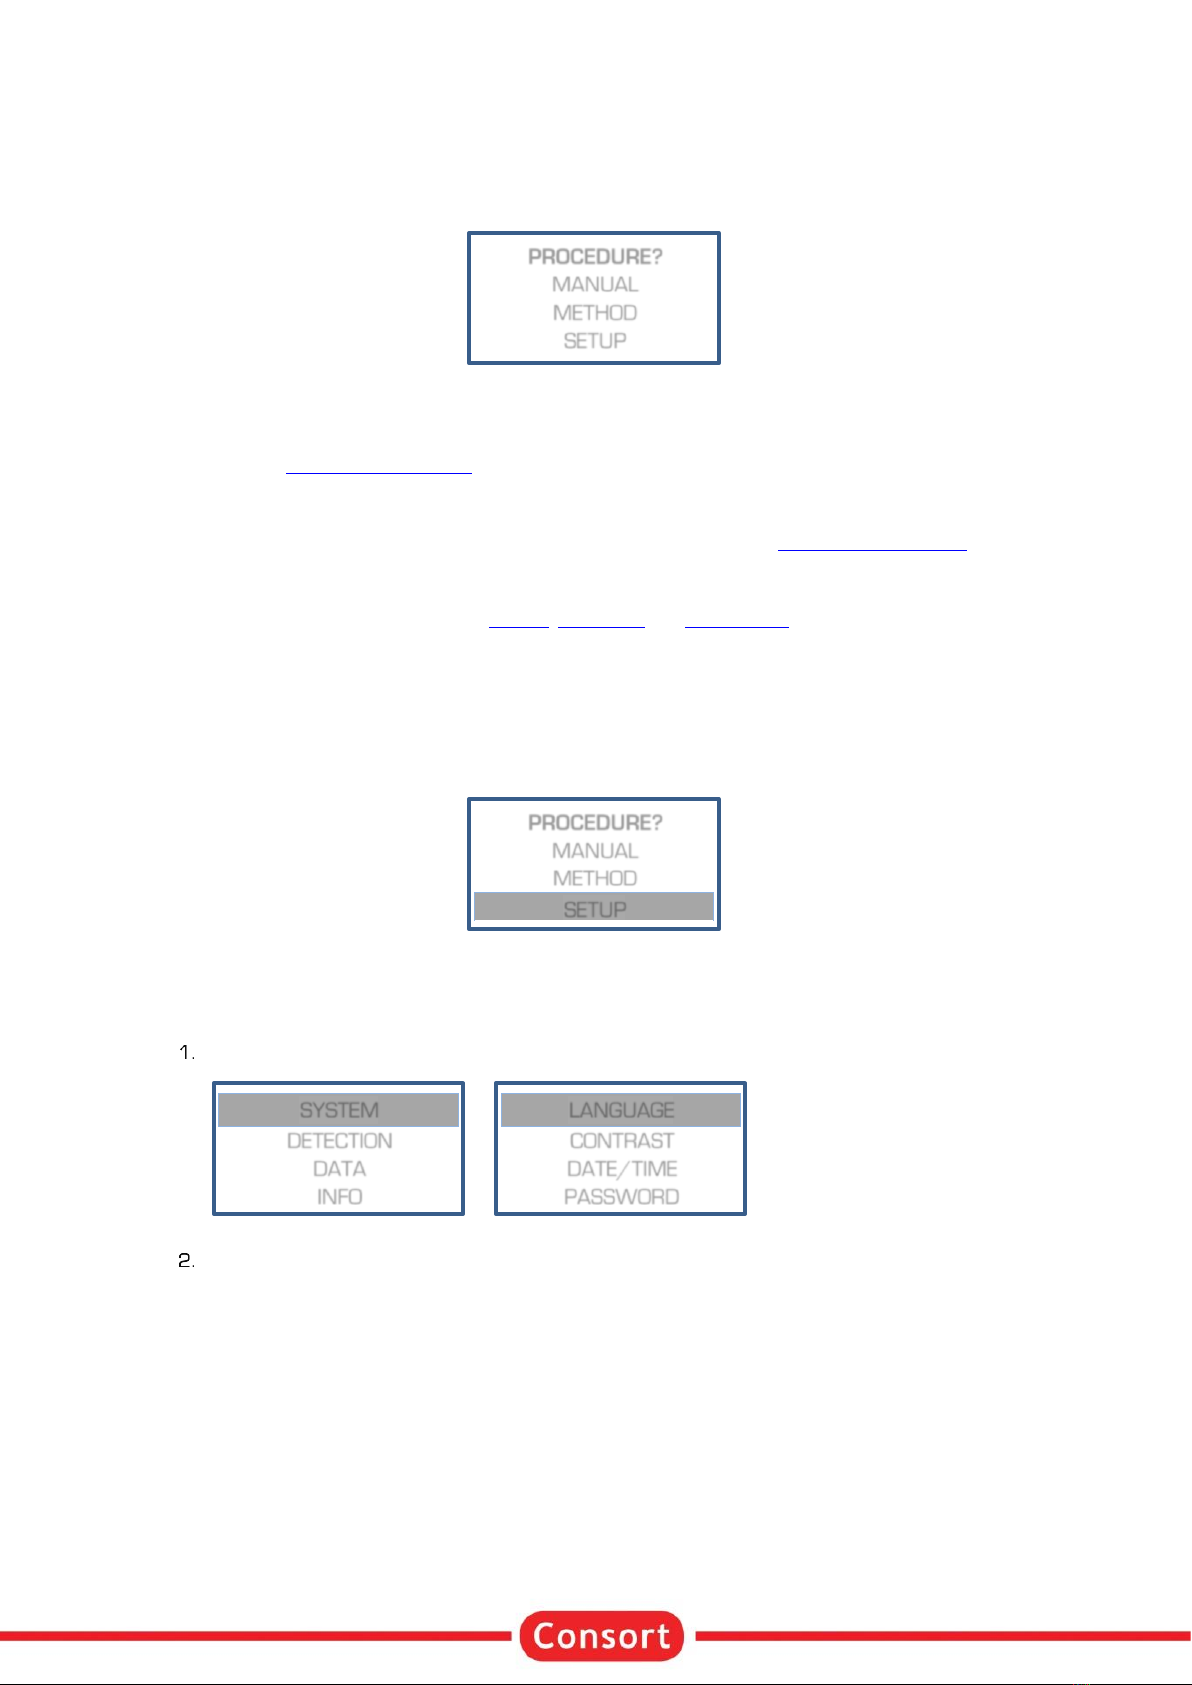
Procedure?......................................................................................................................................................................................................... 3
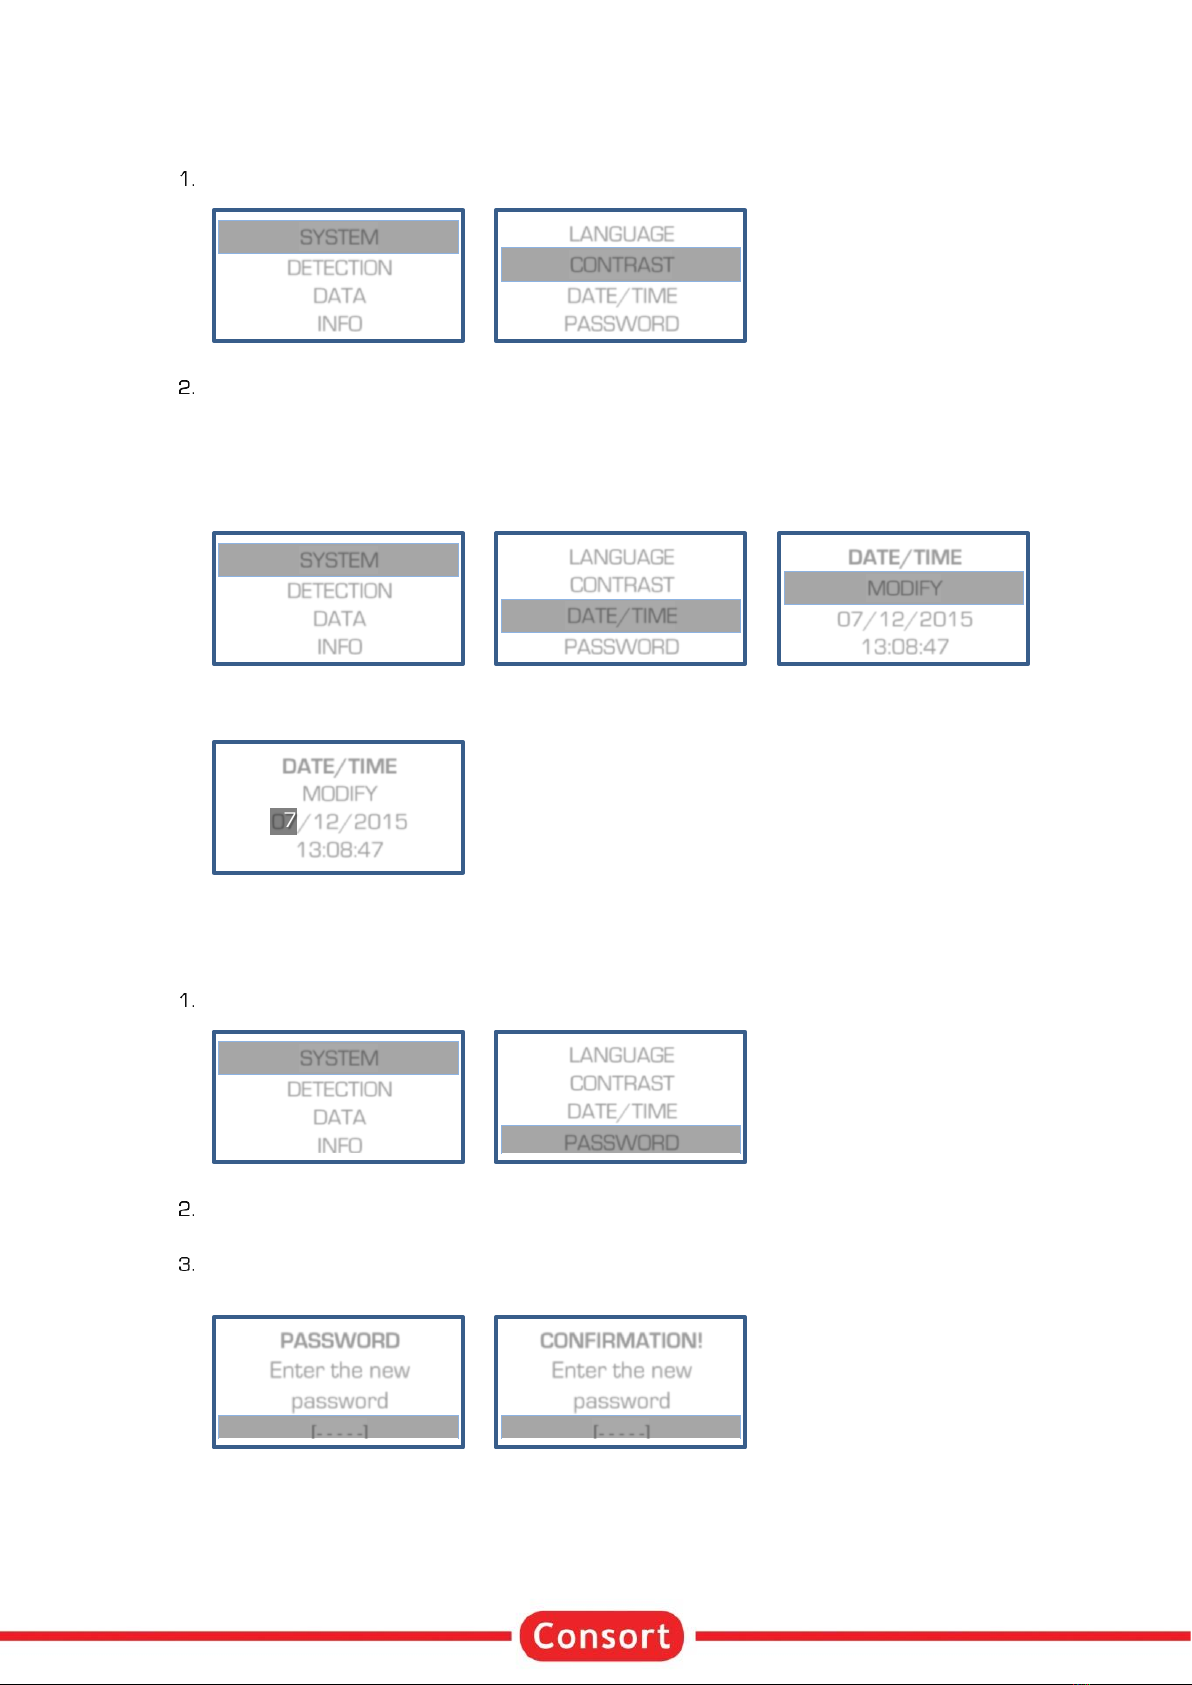
Setup...................................................................................................................................................................................................................... 3
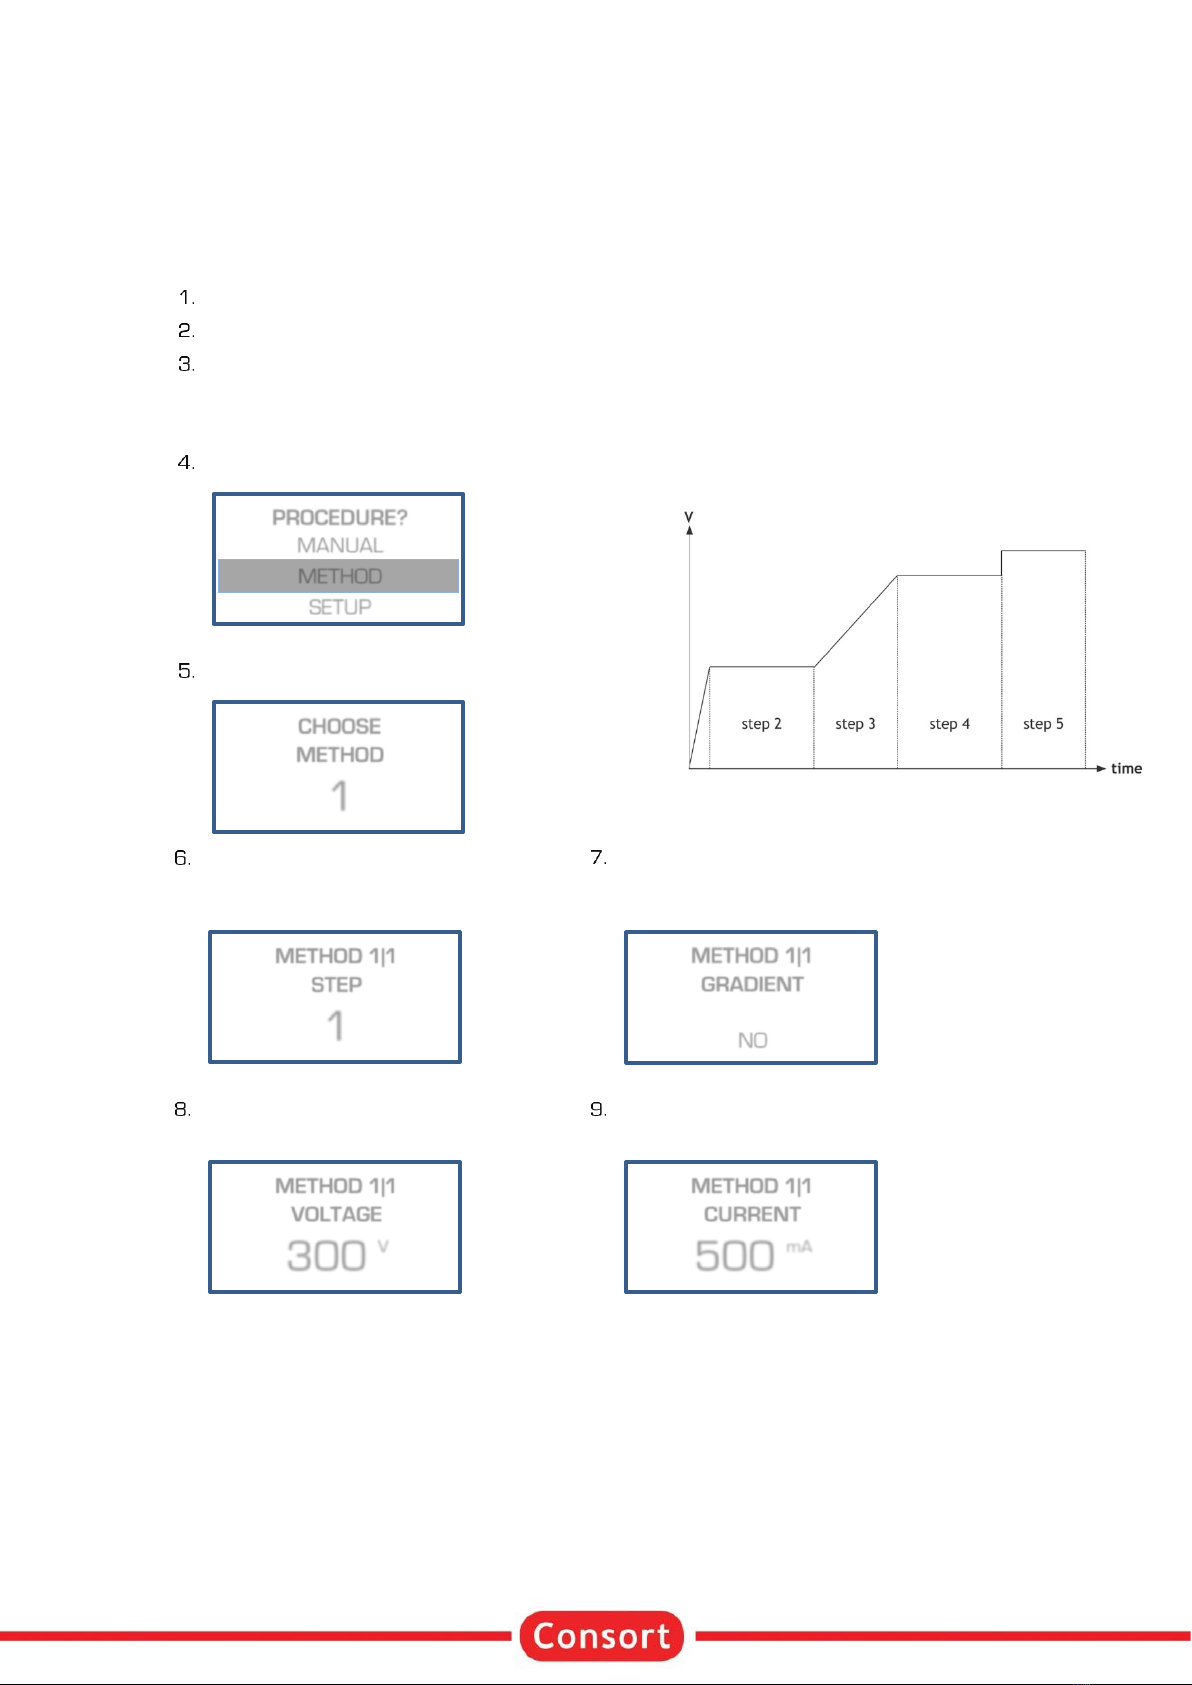
Method programming................................................................................................................................................................................... 7
Manual programming ................................................................................................................................................................................... 9
Running condition ......................................................................................................................................................................................... 10
Alarm messages...........................................................................................................................................................................................12
RESET .................................................................................................................................................................................................................12
USB Digital Port ............................................................................................................................................................................................ 13
Nederlands............................................................................................................................................................................................................ 14
Algemene informatie...................................................................................................................................................................................14
Toetsenbord .................................................................................................................................................................................................... 14
Zeer belangrijk ............................................................................................................................................................................................... 15
Gebruik van het instrument.....................................................................................................................................................................15
Procedure?...................................................................................................................................................................................................... 16
Instellen.............................................................................................................................................................................................................. 16
Methode programmatie ...........................................................................................................................................................................20
Manuele programmatie ............................................................................................................................................................................22
Verloop van een procedure .....................................................................................................................................................................23
Meldingen .........................................................................................................................................................................................................25
RESET .................................................................................................................................................................................................................25
USB Digitale Poort .......................................................................................................................................................................................26
Frequently Asked Questions.........................................................................................................................................................................27
Certificates............................................................................................................................................................................................................ 28
CE.......................................................................................................................................................................................................................... 28
WARRANTY .................................................................................................................................................................................................... 29