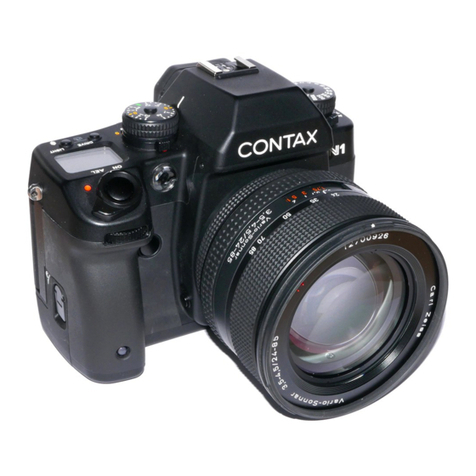
Contax 167MT User manual


Thank
you
foryourpurchase
ofaContax167MT.
This
sophisticatedauto-exposure
SLRcamerafeatures
a
multi-mode
systemwhichisdigitallycontrolled
bya high-
performance
CPU.
Designed
with
thelatestincamera
and
electronictechnology,itoffers
you
a number
of
outstanding
features
such
asmulti-mode
exposureconlrol
including
programmed
auloexposure,
spotmetering
capability,
andultra{ast
1/4000
sec.
shutterspeed.
Italso
provrdes
a large-size
display
panel
tolet
you
check
thecamera
operationand
shootinginformation
inthe
outside
oftheviewfinder.In
addition,
therearemany
featu:'es
thataredesignedto facilitate
yourpicture-taking
andallow
you
toshootin
anysituation.
Pleaseread
this
manual
carefullythrough
before
youuse
thecamera.
lt willserve
you
throughmany
years
with
proper
care.
Though
thismanualis
describedwith
a multi-mode
Planar
Tn
50mmF1.4
onthecamera,
theoperatinginstructions
arethesamewhen
othermulti-mode
CarlZeisslenses
are
used.too.
-
Wir
danken
lhnen,
daB
Siesichf0r
die
Contai
167MT
entschieden
haben.
Diese
fortschrittliche
SLR-Kamera
mit
Belichtungs"
automatik
zeichnet
sichdurch
einMehrbetriebsarten
System
aus,
das
digitalvon
einerHochleistungs-CpU
gesteuert
wird,
Dank
ihrer
Ausstattung
mit
derneueslen
Kamera-
und
Elektroniktechnologie
bietet
lhnen
die
Coitax
167MT
eine
Anzahl
von
auBergewohnlichen
Merkmalen,
beispielsweise
Mehrbetriebsarten-Belichtungssteuerung
einschlieRlich
von
Programm-Belichtungsautomatik,
Spotmessung
und
einerextrem
kurzenVerschluRzeit
von
1/4000
Sek"
DieKamera
verfrigt
auBerdem
Ubereinen
groRdimensionierten
Monitor
zurAnzeige
verschiedener
Informationen
UberKamerabetriebsart
und
Belichtung
auBerhalb
des
Suchers.
Zusdtzlich
sindeine
Vielzahl
von
praktischen
Funktionen
vorhanden,
dielhnen
das
Fotografieren
erleichtern
und
Aufnahmen
in
jeder
beliebigen
Situation
erm6glichen.
Bitte
lesen
Siediese
Bedienungsanleitung
vor
Inbetriebnahme
tjerKamera
aufmerksam
durch.
SachgemdRer
Umgangmit
lhrer
neuen
Contax
167MT
wird
sichin
vielen
Jahren
stdrungsfreien
Betriebs
auszahlen.
Die
Erkliirungen
dieser
Bedienungsanleitung
gehen
davon
aus,
daR
einMehrbetriebsarten-Objektiv
planar
T* f
1,4/50
mman
derKamera
angesetzt
ist,
doch
gelten
die
gleichen
Bedienungsverfahren
auchfUr
alleanderen
Mehrbetriebsarten-Objektive
von
Carl
Zeiss.
b

r7
7
4
\.-t g-"
ilts F
MainSwitch
ri
Lm
speeo
settins ....
:::::
::.:.::
:
:
:.:
:.
:
:.
:..
::.::::::
LoadingtheFilm
Display
in
the
ViewfinderandDisplay
Panel
.........
DriveModeSelector
Holding
the
Camera
FocusingtheLens
Rewindingthe
Film
SelectingtheExposureMode
ProgrammedAutoExposure...............
Shutter-priority
AutoExposure
Aperture-priority
AutoExposure
Overexposure/U
nderexposureWarningforAuto
EXpOSUTe
ManualExposure
MeteringSystem
iar<lngiictliesonSpoiveie;i;s ::::::::.::..
:::.....................
Spot
MeteringwiththeAELock
UsingtheExposureCompensation
Dial
AutomaticContinuous
Exposure
Compensation
...............
Using
theSelf-timer
P33lif;j!"J?"pht
:::::::::::::::::::::::::::::::::::::::::::::::::
Infrared
Compensation
Mark
Reteasesoc(etand
InterChingeibre
Camerd
aick :::::::::.
CameraCare
..........
DedicatedAccessories
,.1ilFr-
Inhalt
Bezeichnung
der
Teile
GiunoteGndeJver.rinreiiiij;
5-ili;l;'6iaiiii'n-
Belichtungsautomatik
Objektivwechsel...........
Einlegen
derBatterien................
Hauptschalter
..............
FilmrUcksoulen
............
wahl
der
eericntunsidi;6il;;i :::::.::.
:
::
:.::.....
Programm-Belichtungsautomatik
BelichtungsautomatikmitVerschluRzeitenvorwahl
...........
Belichtungsautomatikmit
Blendenvorwahl
Uberbelichtungs/Unterbelichtungs-Warnung
bei
Gebrauchder
Belichtungsautomatik
...............
Aufnahmenmit
Spotmessung..........
SpotmessungmitAE-Verriegelung
Verwendung
des
Belichtungskorrekturrings
...........
AutomatischeBelichtungskorrektur-Serie
............
GebrauchdesSelbstauslosers
Schdrfentiefe
Blitzfotografie...............
Infrarotkorrektu
r-Marke
Ausloserbuchse
undauswechselbare
KamerarUckwand
Kamerapflege...............
Technische
Daten........
Spezial-Sonderzubehor
'';*,
6
'10
16
1B
20
28
30
34
42
44
46
48
52
5B
62
66
68
72
78
82
B4
88
92
98
100
104
112
114
116
120
126
7
10
17
19
zl
29
?1
JO
43
45
47
49
52
6q
63
67
69
73
79
83
85
89
93
99
101
105
112
115
117
121
127
Q ExposureCompensationDial
(@
Compensating
Value
SettingLever
@ ExposureCompensation
Index
@ RewindReleaseButton
G)Shutter
Release
@ FilmRewindSwitch
@ Operating
Lever
@ Main
Switch
@ StrapLug
@ LensRelease
Button
O Guide
Pin
@ Self-timer
LED
@ Depth-of-field
PreviewButton
@ LightReceptor
Window
@ Dedicated
Auto-Flash
Coupling
Contacts
@ Direct
X-Contact
@ Drive
ModeSelector
@ ISO
Button
@ ModeButton
@ DisplayPanel
@ Lens
Index
@ Program
Coupling
Lever

@ Viewfinder
Eyepiece
@ Cassette
Holder
Shaft
@ SyncTerminal
@ CameraBack
Opening
Lever
@ CameraBackLock
Release
Button
@ DX
Contact
@ RS
Button
@ Battery
Compartment
Cover
Screw
@ Tripod
Socket
@ Film
CheckWindow
@ CameraBack
@ Sprocket
@ Release
Socket
@ Spool
@ Battery
Compartment
Cover
@ DataBack
Contact
@ Eyecup
@ Film
Transport
Signal

Basic
Sreps
forS-Mode
Auto Exposure
O
r
u
n
d
I
q en
dre Verfah
renftir 3
-
B
etriebm
rten
-
B
e
Ii
chtu
n
g
n u
tom
atik
2
2
Load
the
batteries.
LegenSiedieBatterienein.
Mettreles
piles
en
place.
lnsertelasoilas.
Turn
onthe
main
switch.
SchaltenSieden
Hauptschalter
ern.
Enclencherlecommutateur
principal.
Conecteelconmutador
principal
Q Set
theexposurecompensation
*J dialto"0".
DrehenSiedenBelichtungs-
korrekturring
auf
"0".
Placerle
cadrandecomoensation
d'expositionsurla
position
"0".
Ponga
elarodecompensacion
de
la
exposicionenla
posicion
"0".
t-

fffap€sde hmss
$*#rsr
Pasms
&;fsfc*sS*#rtr
fa
n Load
the
film
and
insert
itstiP
-t under
the
mark
"r".
Legen
Sie
den
Film
ein
und
ziehen
Sie
den
Filmanfang
so
weit
aus
der
Patrone,
daB
erunter
der
Marke
"
-" zl)
liegen
kommt.
Charger
le
film
etinserer
son
extr6mit6
sous
la
marque
"r".
Cargue
la
pellcula
e inserte
la
punta
debajo
dela
marca
"
-" .
fss # smcdesd'expmssfram
alff#rffiaftq{J#
enpmsrmdru
a{,tfomcf#ma
de S mepdcs
E Set
the
drive
mode
selector
to
*J "s" or"C".
Stellen
Sie
den
FilmtransPort-
Wahlschalter
auf
"S" oder
"C".
Placer
les6lecteur
demode
d'entrainement
sur
la
position
"S"
ou
"C".
Pongaelselector
del
modo
motorizado
en
la
posicion
"S" o
rrcrr.
Programmed
Auto Exposure
Programm-
B-e
Iichtu
n
g
sa
utomat
i
k
Exposition
automatique
programm6e
Exposicion
autom6tica
programada
Shutter-priority
Auto Exposure
Belichtungsautomatik
mit
Versch
IuBze
ite
nvonruah
I
Exposition
automatique
i
priorit6
d la vitesse
Exposicion
automdtica
con
prioridad
en el obturador
Aperture-priority
Auto ExPosure
Bel
ichtungsautomatik
mit
Blendenvonrahl
Exposition
automatique
d
priorit6
audiaphragme
Exposicion
autom6tica
con
prioridad
en la abertura 11

6
6
6

f Set
thelens
atits
minimum
aperture,
depress
themodebut-
S ton
andset"PROGRAM"
mode
withthe
operating
lever.
Stellen
Sie
das
Objektiv
aufden
kleinsten
Bleridenwert
ein,
drUcken
Sie
dieBetriebsartentaste
undstellen
Sie
die
Betrieb-
sart
"PROGRAM"
mitdem
Bedienungsschieber
ein.
Regler
I'objectif
A
son
ouverture
minimum,_appuyer
SUr
lebou-
ton
demode
et r6gler
le
mode
"PROGRAM"
avec
lelevier
d'actionnement.
Ajuste
elobjetivo
asu
abertura
mfnlma,
presione
elboton
de
niodo
y ajuste
elmodo
"PROGRAM"
conla
palanca
de
opera-
cion.
C Set
thelens
atits
minimum
aperture,
depress
themodebut-
() ton
and
set"Tv" mode
with
theoperating
lever'
Stellen
Sie
das
Objektiv
auf
den
kleinsten
Blendenwert
ein,
drUcken
Sie
dieBdtriebsartentaste
und
stellen
SiedieBetrieb-
sart
"Tv" mit
demBedienungsschieber
ein.
Regler
I'objectif
dson
ouverture
minimum,
appuyer.sur.le
bou-
ton
demode
et r6gler
lemode
'jTV"
avec
le
levierd'action-
nement.
Ajuste
el
objetivo
aSu
abertura
mlnima,
presione
elboton
de
niodo
y ajudte
elmodo
"Tv" conla
palanca
deoperaci6n.
r Deoress
themodebutton
andset"Av" mode
with
the
O operating
lever.
DrUcken
Sie
die
Betriebsartentaste
undstellen
SiedieBetrieb-
sart
"Av" mit
dem
Bedienungsschieber
ein.
Appuyersurlebouton
demodeet r6glerlemode"Av" avec
lelevierd'actionnement.
Presione
elmododemodo
y ajusteelmodo
"Av" conla
pa-
lanca
de
operacion.
J Focus
thelens,compose
your
picture
andshoot.
{ Stellen
SiedasObjektiv
scharf,
wdhlenSie
denBildausschnitt
und
machenSiedie
Aufnahme.
Faire
lamiseaupoint
avec
I'objectif,
composer
la
photo
et
d6clencher.
Enfoqueelobjetivo
encuadre
laimagen
ydispare.
Set
thedesired
shutter
speed
withthe
operating
leverand
shoot.
Stellen
Sie
die
gewUnschte
VerschluBzeit
mitdemBedie-
nungsschieberein
und
machenSiedie
Aufnahme.
Regler
lavitessed'obturation
d6sir6e
avec
lelevierd'action-
nement
etd6clencher.
Ajustela
velocidaddel
obturador
deseada
conla
palanca
de
operaci6n
ydispare.
Setthe
desired
aperture
with
the
aperture
ringandshoot.
Stellen
Sie
den
gewUnschten
Blendenwert
mitdemBedie-
nungsschieber
einund
machen
Sie
die
Aufnahme.
R6gler
I'ouverture
d6sir6e
avec
la
bague
d'ouverture
et
d6clencher.
Ajuste
laabertura
deseada
conelanillodeaberturas
ydispa-
re.
7
7
13r1
/t

:
L
AttachingtheStrap
Attach
theStrap
asshowninthe
illustration. o
Anbringen
des
Tragriemens
BringenSieden
Tragriemenwiein
der
Abbildung
gezeigt
an.
a
Fixationdelacourroie
Fixerlacourroiede
lamanidre
indiqu6e
dans
I'illustration.
o
Montajedela
correa
Montela
correa
comosemuestra
enlailustraci6n.
AttachingtheEyecup
Attach
theEyecupasshown
in
the
illustration. o
Anbringen
der
Augenmuschel
BringenSie
die
Augenmuschelwie
in
der
Abbildung
gezeigt
an.
o
FixationdeI'eilleton
FixerI'eilleton
de
lamanidreindiqu6edans
I'illustration. o
Montaje
delatapadelocular
Montela
taoadel
ocular
como
se
muestra
en
lailustraci6n.
Attachtheoptional
FL
typeDiopterLenses
asshown.
The
Eyecup
can
beattachedon
a Diooter
Lens.
'o
BringenSiediealsSonderzubehor
erhdltli-
chen
FL-Diopterlinsen
wie
gezeigt
an.Die
Augenmuschel
kannaneinerDiopterlinse
befestiot
werden.
-o
Mettreleslentilles
dioptriques
detype
FL
enoptionen
place
delamanidreindiqu6e.
L'eilleton
peut
6tre
fix6
surunelentille
diootrioue. a
Montelas
dioptriasdeltipo
FL
opcionales
comosemuestra.Latapadelocular
puede
montarse
conuna
lente
dioptrica.

Preparation for taking pictures
Vorbereitungen vor dem Fotografieren
:,,,,,,,,,,,,,,,,,,,,,,,,,,,,,,,,,,,,,,,,,,,,,,,,,,,,,,,,,,,,,,,,,,,,,,,,,,,,,,,,,,,,,,,,,,,,,,,,:,:::l::,:ll::::ll
PrCparationpour Ia prisede vues
l..r'::lt,:l.'' Preparativospara fotografiar
i
I
t
I
I
I
I
I'
I
I
I
I
I
I
I
L

Preparation for taking pictures
Vorbereitungen vor dem Fotografieren
,,,,,,.,.,,,;
Pr6[)drationpour la prise de vues
.,, .l],t..,. Preparativospara fotografiar

<MountingtheLens>
First,
remove
thecamera'sbody
capandlens'
rear
cap
byturningthem
counterclockwise.Then,alignthe
red
dot
onthe
lenswiththeLensIndexonthecamera,
Jit
itinand
turn
itclockwiseuntil
itlockswith
aclick.
Whenmountinganddismountingasnap-type
lens
cap,
press
inthesidetabs
< Dismounting
the Lens>
While
pressing
in
theLensReleaseButton,
turnthelens
counterclockwise
as
far
as
itwill
go
and
pull
it
outtoward
you.
After
dismountingthe
lens
fromthecamera,
protect
thelenswith
the
lens
capand
rear
cap,and
thecamera
withthe
bodycap.
o Donot
touchthelens
surfaceandcamerainsidewith
your
fingerswhen
attachinganddetaching
the
lens.
o Avoid
directsunlightwhenchangingthelenswithfilm
loadedin
thecamera i
I
I
f
,
-
to

All importantcomponentsand functions of the
Contax 167MTincludingautomatic film windingand
rewinding,
shutteroperation
and display
panel are
battery-powered.The
cameradoes not operateunless
batteries are loaded in it.
Il LoosentheBattery
CompartmentCoverScrew
onthe
camera
bottom
witha coinandremovethecover.
E Insertfour
batteries
with
the
plus
(+)and minus
(-)
endscorrectly,
asillustratedinside
theBattery
Compartment.
Thecamera
does
not
operateif
theyare
loadedwith
wrong
(+)and(-) ends.
Toreplace
thebatterycompartment
cover,fittheguide
pin
onthecamera
tothe
holein
thecover,
closeitand
lockit
with
the
fixing
screw.
The
camerausesfour1.5V AM-size
batteries.lt is
recommended
touse
high-performance
alkaline-
manganese
batleries,
becausesome
ofitsfunctions
such
ascontinuous
shootingareaffected
bythebattery
performance.
@
"airfr$\
18

.
20
Lil:.'
lnOFF
position
PositionAUS ln ON position
Position
EIN
Whenthe MainSwitch is at OFF(the
redmarkisnot
visible),thecamera
isturnedoffanddisconnected
from
power.
lfyou
are
notusingthecamera,
besuretoturn
it
offto savebattery.
ll it is setto " E ", thecamera
isturnedonandset
for
center-weighted
metering.
This
setting
tsconvenient
for
normal
photography.
lf it is setto " ol
", thecamera
isturnedonandset
for
spot
metering.
. For
details
oncenter-weighted
meteringandspot
metering,
refer
topage
78.
lf it is set to "AEL", theexposure
valuemeasuredby
spot
metering
islocked.TheAELockisusedforshooting
backlighted
subjectsorforcontinuous
shootingofmoving
subjectsata fixedexposure.
. FordetailsontheAELock,referto pages
84and86.
TheMainSwitchoftheContax
167MThasthree
positions
fortaking
pictures:
" s " forshooting
oncenter-weighted
metering,
"6t " forspot
metering,and
"AEL"
forlocking
the
exposureonspot
metering.Choose
your
desired
mode
bysetting
the
index
opposite
the
corresponding
mark.
Set
theMainSwitch
attheclick
positions
toprevent
wrongoperation.
tr
you
are
not
using
i;;ffi;;, i;il;ffi-ih;'iffi;*=+eers@4
Switchbysetting
itsothattheredmarkisnotvisible.
-----

Lecommutateur
principal
duContax
167MT
possdde
trois
positionspour
laprise
devues:
" tr " pour
la
prise
de
vues
avec
mesure
pond6r6e
centrale,
"O" pour
mesure
ponctuelle
et"AEL"
pour
verrouillage
de
I'exposition
pour
mesure
ponctuelle.
Choisir
lemode
d6sire
en
plagant
I'indice
enregarddela
marquecorrespondante.
Placer
le
commutateur
principal
dans
les
positions
crant6esoour
6viter
tout
mauvais
fonctionnement.
Si
I'appareiln'est
pas
utilis6,d6senclencher
le
commutateur
principal
enle
plagant
demanidredce
que
lamarque
rougenesoit
pas
visible.
Lorsque
lecommutateur
principal
setrouvei la
position
OFF
(la
marque
rougen'est
pas
visible),
I'appareilest
horscircuitet
I'alimentationestcoup6e.
Placer
le
commutateur
surOFF
pour
6conomiser
les
ptles
lorsqueI'appareiln'est
pas
utilise.
Lorsque
le commutateur
est surla position" E ",
I'appareil
estsous
tension
et 169l6
pour
mesure
pond6r6e
centrale.Cer6glageconvient
bien
pour
la
photographie
normate.
Lorsque
lecommutateur
est surla position
" O",
I'appareilestsous
tension
et16916
pour
lamesure
ponctuelle.
. Pourlesd6tailsconcernant
lamesure
pond6r6e
centrale
etlamesure
ponctuelle,
sereporter
en
page
79.
Lorsquelecommutateur
est surla position"AEL" la
valeurd'exposition
mesur6e
par
mesure
ponctuelle
est
verrouill6e.Le
verrouAEestutilis6
pour
la
prise
de
vues
desujets
encontre-jour
oupour
une
prise
de
vues
continuedesujetsenmouvement
d uneexposition
fixe.
. Pour
les
d6tails
concernant
le
verrouAE,
sereporteren
pages
85et87,
22

lr
li
I
I
< Batteriepriifung>
UmdieBatterienzuuberprrifen,schaltenSieden
HauptschaltereinunddrUckenSie
gleichzeitig
die
Betriebsarten-und
dieISO-Taste.
WennalleAnzeigenaufdemMonitoraufleuchten,
sinddie
Batterienin
einwandfreiem
Betriebszustand.
Blinkendie
Anzeigen,
sodeutetdiesaufein
Abnehmen
der
Batteriespannung.
Obwohl
noch
ausreichend
Batteriespannung
fUrdenBetriebderKamera
vorhanden
ist,solltendieBatteriensobaldwiemoglich
gegen
frlsche
ausgewechseltwerden.
Bei
fortschreitender
SpannungsabnahmederBatterien
blinken
die
AnzeigenaufdemMonitorin
schnellerem
Temoo.unddieKameraarbeitetnichtmehr.
< Battery
Check>
To
checkthebatteries,turnontheMain
Switch
and
press
theModeButtonand
ISO
Buttonatthesametime.
lfallindicatorsin
thedisplay
panel
turnon,thebatteries
arein
good
condition.lf theyblink,itmeansthebattery
voltagehasreduced.Thoughthebatteriesstillhave
enough
power
for
operatingthe
camera,itis
recommendedtochangethemassoonaspossible.
lfthebattery
voltagehasreduced
lurther,theindicatorsin
thedisplay
panel
will
blink
laster
and
thecamerawillno
longeroperate.

* Thiscamera
incorporates
a lithiumbackupbatteryto protect
theexposure
counler
andfilmspeed
dataeven
ifitsmain
batteries
are
removed
when
there
is
filminit.lfthebackup
battery
isworn
out,theexposure
counter
willreturnto "00" and
the
camera
willnolonger
show
thecorrect
ISOspeedand
exposure
mode
whenthe
mainbatteriesare
removed.This
battery
willlast
about
10
years
under
normal
use.
For
replacement,
contact
your
ContaxService
Station.
<Battery Precautions>
. Alwayschange
the
four
batteries
althesametime
withnew
ones
ofthesame
type
andbrand.
o Generally,
thebattery
performance
willbereducedtemporarily
atlowtemperatures
(under
about0'C).
Whenshooting
incold
weather,use
new
batteries
and
keep
the
camera
warmbeforetaking
pictures.
Thebattery
performance
aftected
bylowtemperature
willreturntonormalif
you
are
shooting
innormaltemperature.
o Belore
loadingthebatteries,
wipe
both
poles
cleanwitha dry
cloth
because
poor
contact
may
resultiftheyaresoiled
with
sweat
or grease.
. lfyou
are
going
on
a longtrip,bring
a new
setol spare
batteries
with
you.
r Do
notthrow
usedbatteries
intofireortrytodisassemblethem
because
il isdangerous.
* Diese
KameraistmiteinerLithium-Sicherungsbatterie
ausgestattet,umdie
Bildziihlwerk-
undFilmempfindlichkeitsdaten
beieingelegtem
Film
auchdann
zuerhallen,
wenn
die
Hauotbatterienausder
Kameraentfernt
werden.Wenn
diese
Sicherungsbatterie
erschopftist,schaltet
dasBildzdhlwerkauf
"00" zurUck,unddie
richtigeISO-Filmempfindlichkeitund
Belichtungsbetriebsart
werdennicht
mehr
angezeigt,
wenn
die
Hauptbatterienentfernt
werden.
BeinormalemGebrauchder
Kamerabetragtdie
LebensdauerderSicherungsbatterie
ungefiihr
10
Jahre.
Bringen
Sie
die
KamerazueinerContax-
Kundendienststelle,umdie
Sicherungsbatterieerneuern
zu
lassen.
<VorsichtsmaRregeln
liir die Batterien>
o TauschenSie
immerallevierBatterien
gleichzeitig
aus.
Mischen
Sie
nichtalteund
neueBatterienundsolche
verschiedenerTypen.
o BeiTemperaturenunter
NullnimmtdieBatterieleistung
vorUbergehendab.BeimFotografieren
inkaltemWettersollten
daher
frische
Batterien
verwendetunddie
Kameravor
den
Aufnahmenwarmgehalten
werden.Diedurchtiefe
Temperaturen
beeintrdchtigte
Batterieleistungwird
jedoch
wiederhergestellt,
wennAufnahmenspaterbei
normaler
Temperatur
gemacht
werden.
o VordemEinlegender
Batterienbeide
Polemit
einem
trockenenTuchabreiben,da
beieiner
Verschmutzung
der
Pole
mit
SchweiR
oderFettkeineinwandfreierelektrischer
Kontakt
gewdhrleistet
ist.
o Wenn
Sie
auflangereReisen
gehen,
nehmen
SieeinenSatz
frischerBatterienals
Reserve
mit.
o BatterienaufkeinenFallinein
Feuerwerfenoderzerlegen,da
Verletzungsgefahrbesteht.
26

i,ooo-G;;;=-
,.u00
0g
1- J)
l-
el,
Threetypes
of film speedsettingareavailable
on this
camera.
After the film speedis sef in each case,
be
sure to press the ISOButton to check the film speed
which hasbeen set.
<Automatic
setting>
Use
a DX-coded
film.
lfyou
installa DX-coded
film
(lSO
25-5000)withthe
Main
Switch
atOFF,
thecamera
will
automatically
setitself
forthespeedofthe
filmloadedin
it.
<Manuatsetting>
lfyou
are
using
non-DX-coded
film,
orifyou
want
to
changethe
film
speed
manually,movetheOperating
Levertothe
leftor rightwhile
pressing
theISOButtonso
that
thedesired
filmspeed
(lSO
6-6400) appears
inthe
Display
Panel.
o lfyou
loada non-DX-coded
filminthecamera,the
film
soeed
which
was
set
lorthe
previous
filmwillremain
in
thecamera
memory.
<Continuanceof the previous
fifm speedsetting>
Youcan
maintainthe
film
speed
you
have
previously
set,
regardlessofwhatever
film
you
loadinthecamera.
For
this
purpose,
take
outthe
exposed
filmwiththeMain
SwitchatON
andclose
theCamera
Backwhile
the
data
intheDisplay
Panel
remainson.
ThenopentheCamera
Backand
installa newftlm.

r
n Wh
le
pressing
the
CameraBackLockRelease
Button
nthecenter,
push
downtheCameraBack
OpenrnqLevei-
andooentheBack
Z Insert
thefllm
cassettento
thefilm
chamber
11w llf
t smoothlyrnto
posrtion
rf
you
fit
the
recessed
end
of thecassettef rst
to theshaft ocated
rn
the upper
part
of
the
frlm
cnamber
. Alwaysload
andunloadfrlm n subdued
lrght
. Take
care
not
totouch
or contam
nate
theDX
contacts
andshutter
curtan
. lfthefrlmleader
s extremelyiong pull
oul
frlm
sothat
about
three
or more
perloratons
ontheupper
sideofthe
f
lmappear
fttttil t:!
!:i
i::tr::0c
It)
Table of contents
Other Contax Digital Camera manuals

Contax
Contax TVS DIGITAL - User manual

Contax
Contax G2 User manual

Contax
Contax Tvs III User manual

Contax
Contax Contax NX User manual

Contax
Contax 645 User manual

Contax
Contax T3 User manual

Contax
Contax AX User manual

Contax
Contax T3 User manual

Contax
Contax RTS III User manual

Contax
Contax U4R User manual

Contax
Contax MAD User manual

Contax
Contax S2 User manual

Contax
Contax TVS DIGITAL - User manual

Contax
Contax TVS DIGITAL - User manual

Contax
Contax I4R User manual

Contax
Contax 159MM User manual

Contax
Contax Aria User manual

Contax
Contax TVS DIGITAL - User manual

Contax
Contax G2 User manual

Contax
Contax 137 MD Quartz User manual