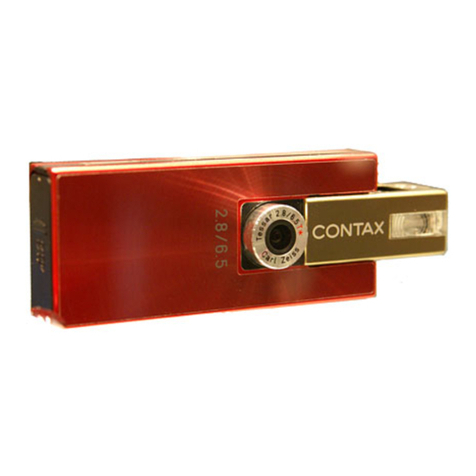
Contax MAD User manual


mad-paris.com1
Thank you for your purchase of a CONTAX T2.
This camera carries on the basic CONTAX philosophy of a "camera to produce works of art"
while featuring an electronically controlled focusing system and an exposure control function
with program AE in addition to aperture priority AE.
The result is an exceptionally easy-to-use mm lens shutter-type camera.
Before using this camera, be sure to read the Instruction Manual
carefully and be familiar with proper use.

mad-paris.com2
Names of Parts and Functions
Display in the Viewfinder
LCD Counter
Basic Picture-Taking Procedures
Step : Insert the Battery
Step : Check the Battery
Step : Load the Film
Step : Turn the Main Switch ON (AF)
Step : Set the Aperture
Step : Take the Picture
Step 6: Rewind the Film
Shooting Techniques
Focus Lock
Manual Focus
AE Lock
Exposure Compensation
Self-timer Shooting
Flash Photography
Bulb Exposure
Data Back (Sold Separately)
Camera Care & Storage
Main Specifications
3
5
6
9
11
12
13
14
15
17
18
19
20
CONTENTS
8
22
23
25
24
28
29

mad-paris.com3
Self-timer Switch
Shutter Release
Main Switch/Focus Dial
Operate as follows:
(1) Power ON/OFF Switch
OFF: " " mark
ON: "AF", "∞~." mark
(2) Focus Mode Switch
Auto Focus: "AF" mark
Manual Focus "∞~." mark
Camera Back Release Knob
Aperture Ring
Used for setting the aperture and changing
to the flash photography mode.
Taking Lens
Light Sensor
Viewfinder
Focusing window
Self-timer LED
Blinks when the self-timer is operating.
Flash
LCD Counter
Exposure Compensation Dial
Possible to set the correction width up to ±EV
in units of .EV
NAMES OF PARTS
1
2
3
4
5
6
7
8
9
10
11
12
13

mad-paris.com4
Viewfinder Eyepiece
Exposure Compensation
Display Window
Take-up Spool
Film Tip Mark
Camera Back Release Pin
Film Check Window
Possible to check whether film is
loaded or not.
Camera Back
Manual Rewind Button
Press this button when you wish to
rewind the film midway through
the roll.
Battery Compartment Cover
Tripod Socket
Strap Lug
Film Chamber
DX Contact
Film Guide
NAMES OF PARTS
14
15
16
17
18
19
21
22
23
24
26
20
25
27

mad-paris.com5
The picture frame and focusing frame (~) are displayed
constantly. Other displays appear when the camera is operated
as follows, appearing for 8 seconds and then automatically
disappearing to save battery power:
1. When the main switch is turned ON.
2. When the shutter button or focus dial are operated
while the main switch is ON.
is blinking: Charging
is lit: Charging Completed
Picture Frame
When the subject you want to shoot is located far away,
the area within this frame will appear in the photograph.
Close-range Picture Frame
When the subject you want to shoot is at a distance between
.m and .m, the area within this frame will appear
in the photograph.
Focus Frame
The Frame for focusing on the subject.
Close-range Focus Frame
Focusing Frame for close-range photography (.m~.m).
Shutter Speed
Of the shutter speed displays, ""' indicates / sec and
"'' indicates / sec. When two displays appear, it indicates
a value between those two. When LT is lit, it indicates a shutter
speed that is between slightly less than / sec and sec.
When the light is darker, the LT display will blink and
the camera will go to bulb exposure. When "" blinks,
it indicates over-exposure.
Program Mark
When the aperture is set to F. and automatically closes,
"P" will light and the program AE will be set.
Exposure Compensation Mark
When the exposure compensation dial is set to a value
other than "0", the "±" display will light.
Focus Mark
Indicates the focusing conditions.
Flash Mark
Displayed when the aperture ring is set to " " or to " ".
DISPLAY IN THE VIEWFINDER
1
2
3
4
5
6
7
8
9
7
Basic Picture-Taking Techniques

mad-paris.com8
Use a coin to open the battery compartment cover by rotating
it in the direction of the arrow.
STEP 1: INSERT THE BATTERY
Insert the battery in the correct direction as shown by
the mark in the battery compartment and then replace
the battery compartment cover.
• The camera uses a V lithium battery (CRA or DLA).
1 2

mad-paris.com9
If only the film counter is displayed and the " " (battery
warning mark) is not displayed in the LCD counter, the battery
voltage is normal.
<Battery Replacement>
If the " " mark is lit in the LCD counter, it is time to replace
the battery. Turn the main switch OFF, open the battery
compartment cover and replace the battery with a new one.
• Although it is still possible to photograph even when the " "
mark is lit, be sure to replace the battery as soon as possible.
If the battery capacity exceeds the usage limit, the LCD will
go out and the camera will cease to function.
<Battery Precautions>
• Battery performance will be reduced temporarily in low
temperatures (under °C). If you are shooting in cold weather,
keep the camera warm inside your jacket and take them out
only when they are needed. The battery performance reduced
by cold temperature will return to normal in normal conditions.
• If battery poles are soiled with sweat or grease, poor contact
may result. Wipe both poles clean before loading the batteries.
• If you are going on a long trip, bring spare batteries with you.
• Do not throw used batteries into fire and do not charge,
short, disassemble or heat them because it is dangerous.
• The camera will not function if the battery is not
properly inserted.
• A V lithium battery (CRA or DLA) cannot be recharged.
STEP 1: CHECK THE BATTERY

mad-paris.com10
STEP 2: OPEN THE CAMERA BACK AND LOAD FILM WITH THE DX MARK
Push the camera back release knob in the direction shown
by the arrow to open the camera back.
Load film with the DX mark and align the tip of the film with
the " " mark. Load the film in the film chamber at a slant from
above. Next pull the film tip to the orange-coloured " " mark
position and place it on the take-up spool. Be careful at this time
that the film does not rise up from the film guide.
1
2

mad-paris.com11
• The sensitivity of film marked with the DX mark is automatically
set. Film without the DX mark should be set to ISO.
• Be careful not to touch or soil the DX contact.
• Avoid direct sunlight when replacing film.
Securely close the camera back. When the camera back is
closed, the film will be advanced automatically while the film
counter advances to "" and stops.
• If the film counter is blinking "", the film has not been
correctly advanced. Open the camera back and reload the film.
3
STEP 2: OPEN THE CAMERA BACK AND LOAD FILM WITH THE DX MARK

mad-paris.com12
When the main switch/focus dial is turned from " " to "AF"
the camera power will go ON and the camera will be set to
the auto-focus mode. The lens cover will open automatically
and the lens will emerge so that photography is possible.
• If you are not using the camera right away, turn the main
switch/focus dial to " " (OFF) to avoid inadvertently tripping
the shutter.
• When the main switch/focus dial is turned to " ",
the lens is housed and the cover closes.
STEP 3: TURN THE MAIN SWITCH ON (AF)

mad-paris.com13
Turn the aperture ring on the lens to set the aperture. At this
time, the shutter speed will be displayed in the viewfinder
according to the aperture.
For exposure control on the CONTAX T, there is the aperture
priority AE method in which the appropriate shutter speed is
automatically controlled by setting an arbitrary aperture as wells
as the aperture priority program AE method in which there is
an additional program function when set to F..
<Exposure Control Range Chart>
As is shown in the chart, the light meter range and maximum
shutter speed change in accordance with the aperture for
program or for aperture priority.
• The "P" mark will turn on when in program AE.
• When the "" The shutter speed is blinking in the viewfinder,
it indicates overexposure. Set the aperture so that it does not
blink at "" or set to F. and set to the program mode and
photograph. If the "" continues to blink, the light conditions
have exceeded the exposure control range and you must use
film of a lower sensitivity.
• When "LT' is lit or is blinking, either use a tripod to prevent
blurring of the picture from an unsteady hold on the camera
or carry out flash photography.
• When "LT" is blinking, the camera will automatically
go to bulb exposure.
STEP 4: SET THE APERTURE

mad-paris.com14
Point the focus frame at the subject you wish to focus
on and press the shutter button down halfway.
Focusing will take place automatically and the " "
mark for focus display will light.
Press the shutter button down all the way. The shutter
will trip and the picture will be taken.
Photographic range: 0.7 m ~ 00
STEP 5: TAKE THE PICTURE
3
2
1
• When the " " mark is blinking, you are too close to the subject.
Shoot at a distance greater than . m.
• Even though the " " mark is blinking the shutter will trip.
• When the distance of the subject approximately . m or less,
the " " mark will light but the subject will not be focused.
• In order to adjust the focus for shooting, the lens barrel will
move forward and backward when the shutter is depressed.
Be careful not to touch the lens barrel when shooting.

mad-paris.com15
STEP 6: REWIND THE FILM
When you have used the entire roll of film,
automatic rewinding of the film will begin.
During film rewind, the exposure counter will display the frame
numbers in descending order. When rewind is completed,
the motor will stop and the counter will blink at "00".
After finishing film rewind, open the camera back and
remove the film.
• Bring exposed film for development as soon as possible.
• If you wish to rewind the film midway through use, press
the manual rewind button on the bottom of the camera.
(Do not press with needles or other sharply pointed objects).

16
Shooting Techniques

mad-paris.com17
FOCUS LOCK
Focus lock is used during auto-focus photography when, dR
epending on the composition of the picture, the subject you
want to focus on might go out of the focus frame.
Aim the focus frame at the subject you want to focus on and
press the shutter release halfway down. Focusing will take place
and the " " mark will light (focus-lock).
With the shutter release held halfway down, return the camera
to the composition you want to photograph and then depress
the shutter release all the way to take the picture.
• The focus is locked as long as the shutter release is held
halfway down and it is possible to change the direction
of the camera without changing the shooting distance.
• Removing your finger from the shutter release cancels
focus-lock.
• The following objects are diicult to focus on.
Use focus-lock to first focus on another object at
the same distance before shooting.
◆ When there is a strong light source such as sunlight
in the focus frame or periphery.
◆ Insubstantial subjects such as sparklers and smoke.
◆ Shiny surfaces such as car bodies and water.
◆ Non-reflecting surfaces such as hair.
◆ Subjects on the other side of glass.
◆ Extremely small objects.
2
1

mad-paris.com18
MANUAL FOCUS
Set the main-switch/focus dial in the manual focus range.
Aim the focus frame toward the subject you want to focus on
and turn the focus dial while observing the focus mark to focus
on the object.
Press the shutter release to take the picture. Allows you to
change the composition after focusing or set the distance by
visual measurement so that you won't miss taking a picture
at just the right moment.
<Shooting Distant Scenery>
When shooting distant scenery, set the focus dial to the "∞"
mark and shoot to obtain sharper photographs.
<Focus Mark>
" " mark (red). The camera is focused on an area in front
of the subject in the focus frame. (Front Mis-Focus)
" " mark (green). The camera is focused on the subject
in the focus frame. (Sharp Focus)
" " mark (red). The camera is focus on an area further
removed than the subject in the focus frame. (Rear Mis-Focus)
2
1
3
Manual Focus Range

mad-paris.com19
AE LOCK
The camera is so designed that when the shutter release is
pressed halfway down the exposure at that time is locked (AE
lock). Particularly when you want to set the exposure for subjects
removed from the centre of the screen, point the camera toward
the object you want to set the exposure to and change the back
composition while keeping the shutter release pressed halfway
down. When you trip the shutter, the exposure will agree with
the subject for which AE lock was set. Exposure and focus are
locked simultaneously. When you want to choose separate
subjects for exposure and focus settings, carry out manual focus
and align the exposure by carrying out AE lock with the shutter
release pressed halfway down. Then trip the shutter.
If you keep your finger on the shutter release after tripping
the shutter, returning the shutter release to a half depressed
state and then pressing again, you can continue to shoot with
the exposure and focus locked. When you want to measure
a new exposure, release your finger from the shutter release
before depressing it again.
Table of contents
Other Contax Digital Camera manuals

Contax
Contax TVS DIGITAL - User manual

Contax
Contax I4R User manual

Contax
Contax M1 User manual

Contax
Contax S2 User manual

Contax
Contax Contax NX User manual

Contax
Contax G2 User manual

Contax
Contax U4R User manual

Contax
Contax N1 User manual

Contax
Contax 645 User manual

Contax
Contax TVS DIGITAL - User manual

Contax
Contax TVS DIGITAL - User manual

Contax
Contax AX User manual

Contax
Contax 167MT User manual

Contax
Contax TVS DIGITAL - User manual

Contax
Contax T3 User manual

Contax
Contax 137 MD Quartz User manual

Contax
Contax RTS III User manual

Contax
Contax T3 User manual

Contax
Contax Aria User manual

Contax
Contax 159MM User manual