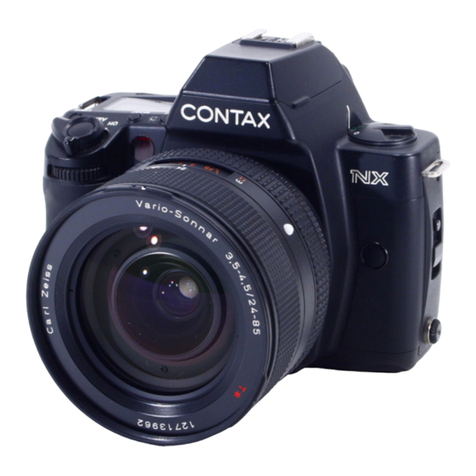
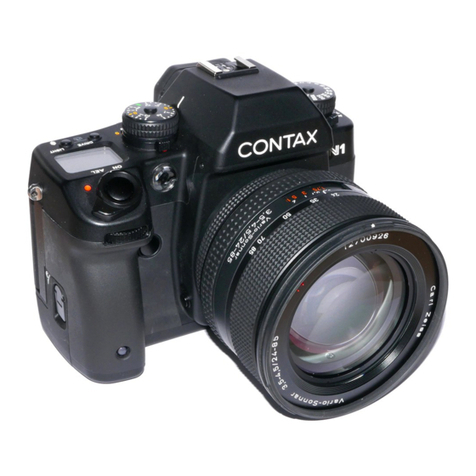
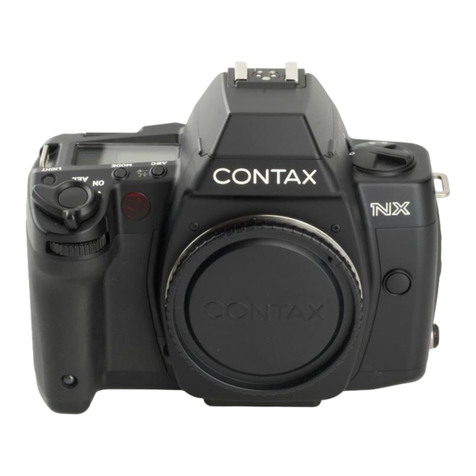
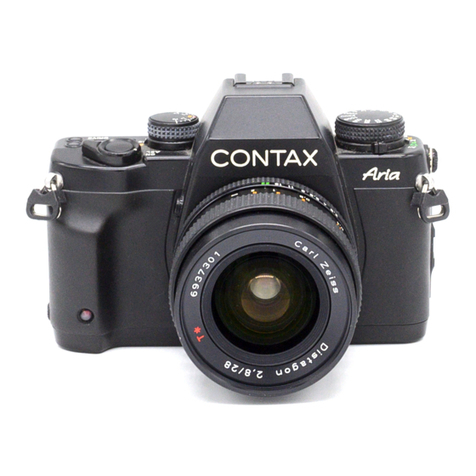
Contax AX User manual


Thank you for your purchase of the Contax AK
This camera incorporates an automatic back focusing
(ABR system which enables auto focusing with
conventional Carl Zeiss lenses for Gonta( sLR cameras.
This autofocus sLR is also a combined auto/manual
focusing camera. so you can focus the lens manually by
using the distance ring of the lens.
In addition, it offers many other advanced features as
follows. Before using the camera, please read this
instruction manual carefully through to use it conecily.
O mis isa multi-mode
sLRcamera
whichprovides
various
exposure
controlfunctions
such
asaperture-priority
auto
exposure,
shutter-speed-priority
auto
exposure,'
and
programmed
auto
exposure.
@when taking
pictures
onmanual
focusing
ortaking
macro
pictures,
youcancheck
thesharpness
ofyourpicture
onthe
focus
display.
@witn the"custom
functions",
itallows
youto setthecamera's
operating
conditions
suited
to your
ownuse.
@tn
combination
withourcoNTAX TIA flash
withautomatic
flash
setting
feature,
thefilmspeed
andapefture
value
which
youhave
setonthecamera
will
alsobesetautomatically
to the
flash
unit.
@Equipped
witha ContaxData
BackD-8(optional
accessory),
thecamera
canrecord
exposure
data
collectively
onthefirst
twoframes
(or
ononeframe)
ofthefilmordates
andexposure
data
between
theframes.
Interval
shooting
isalso
possible.
This
manual
uses
a multi-mode
Planar
T.s)mm Fl.4 (MM)tens
equippedon thecamerafor explaining
its
operating
procedures.
However,
you cana/souseit in thesamewayas described
in this
manual
whenit is equippedwithotherMultiple-mode
CartZeiss
interc
h
an
geab
le/enses.
WirdankenlhnendaBSiesichf0r die ContaxAX
Diese
Spiegelreflexkamera
ist mit einemFilmebenen-Autofokus
(Automatic
Back Focusing= ABD ausgestattet.
Dieses
neuadi
geAutofokus-System
erlau
bt dieautomatische
Fokussierung
mit den normalen,
vorhandenen
carr Zeiss-
objektiven frirGontaxsLRs. Diecontax AX eignetsichfrir
automatische
wie manuelle
FokussierunggleichermaBen.
Sie
kdnnendie Entfemung
weiterhinauch mit dem Fokussiening
des Objektivseinstellen.
DaniberhinausbietetdieGontax
AX modemste Kameratechnik
inallenBereichen.
Bittelesen
sie vordem Gebrauch
der
Kamera
dieseBedienungsanleitung
sorgrfdltig
durch, um die
vielen
Moglichkeiten
optimalzunutzen.
C oie Mehrfach-Belichtungsautomatik
dieser
spiegelreflex-
kamera
bietet
lhnen
universelle
Mdglichkeiten
zur
Belichtungssteuerung
wieProgramm-,
Blenden-
und
Zeitautomatik.
@geimmanuellen
Fokussieren
unterstutzt
eine
elektronische
Fokussieranzeige
imsucherdasprizise scharfsteilen.
@oie"lndividual-Funktionen"
erlauben
lhnen
dieVoreinstellung
_ einiger
Kamerafunktionen
nach
eigenen
Wunschen.
@ n4n
CONTAXTl-A-systemblitzgeraten
erfolgtneben
der
automatischen
synchronisation
auch
dieUbertragung
cier
Filmempfindlichkeit
und
der
vorgewihlten
Blende
von
der
Kamera
zumBlitzgerit.
@Vtit
demals
Zubehdr
erhililichen
Contax
Data
BackD-g
k6nnen
sie wahlweise
alle
Belichtungsdatengemeinsam
auf
dieersten
zwei
(oder
nur
daserste)
Negativ/Dia
oderDatum
undBelichtungsdaten
zwischen
die
Aufnahmen
aufden
Filmstrich
einbelichten.
EineIntervall-Aufnahmefunktion
ist
ebenfalls
vorgesehen.
Bitte lesen
Sievordem Gebrauch
derKamera diese
Bedienungsanleitung
sorgfdltigdurch, um ihre vielenM1glichkeitenoptimar
zu nuken.Die C,
Erkldnungen
in dieserAnleitung
erfolglen
am Beispieleiner
Kamera
mit T, $
Planar1,4/50mm
MM-ObieKiv.
Mitanderen
Carl-Zeiss-MM-ObJektiven
enopt t
die Bedienungauf diegleiche Weise.
Ce
l'at
eQ,
lor:
On
de:
\'2
Namesof Parts
BasicSteps
o Basic Operations Before Shooting
Mounting
and
DismountingtheLens ......22
LoadingtheBattery ...............24
<Battery
Checb
<BatteryReplacement>
MainSwitch.............. .............30
Displayin
theViewfinderandDisplay
Panel
.............32
DiopterAdjustment .........42
LoadingtheFilm ....................44
SettingandChecking
theFilm
Speed .....
50
ExposureModeSelectorLever/
Exposure
CheckButton .........58
DriveMode
SelectorDial........... ..............60
FocusingMode
Selector
Lever ................
62
ShutterSpeedDial/F
-Dial/F-8utton
.........;.................
64
<Shutter
SpeedDial>
<Focusing
ButtonFunction
Dial
(F-Dial)/Focusing
Button
(F-Button)>
HoldingtheCamera
RewindingtheFilm
o Focusingthe Lens
Focusing
onAutofocus
(AD .....................72
Principle
of
theAutomaticBack
Focusing
System
(ABF)
and
AFFunctions
<l.Principle
oftheABF
System
andBackFocusing
Scale> .........72
<2.ShootingRangeswiththe
ABF
System>.........74
<3.Relation
of
theFocusingButton
FunctionDial
(F-Dial)
andFocusingModes> .,.....82
<4.Relation
of
theDriveModes
(S
andCUCH)and
FocusingModes
(SAF
andCAF)>
....................
86
<S.Others> .......88
o Cautionsonautofocus
o AF
supplementary
light
o Subjects
which
are
notsuitedforautofocusing
AutofocusSetting
Dependingon
the
Shooting
Subject .................92
<1.OrdinaryAutofocusShooting> .......92
Convenient
useof
"CAF" ..............100
Focuslock
(with
theF-Dial
set
to"AFL")
........102
<2.1f
youwantto operate
theautofocusand
shutterwithdifferent
buttons> .....108
<3.Whenthe
autofocus
isused
asone-shotAF
while
operatingmainlyon
manual
focus>.....110
FocusingonManualFocus ...................112
FocusingintheMacroMode ,...............114
12
16
66
68

a Camera
Functions
andAppliedTechniques
Selecting
theExposure
Mode ...............
116
Aperture-priority
AutoExposure
[Av]
......................
120
Shutter-speed-priority
AutoExposure
[v] .............
122
ProgrammedAutoExposure
IPI .............................
126
ManualExposure
tMl
............ .................
132
Bulb
Exposure
[B] ................
134
MeteringSystem .................136
ExposureCompensation
............ ...........142
<1.
Using
the
Exposure
Compensation
Dial>
.......142
<2.Using
the
AELock> ...
148
<3.Using
the
A.B.C.Mode
(Automatic
Exposure
Compensation
for3 Consecutive
Frames)>..152
FlashPhotography ..............
160
<TakingPicturesonTTL
DirectLightMetering>
...160
<Slow-shutter
SynchronizationusingaTl-AFlash
Unit>
........ ....
168
<Daylight
Flash> ..............
170
<Using
theExposureCompensationDial>
.........170
<SecondCurtain
Synchronization> ..172
<Taking
pictures
withX-contact
Flash
UnitsOther
than
TTLFlashUnit>
........ ...............174
Multiple
Exposure ................176
Using
the
Self-timer.............. .................182
Custom
Functions ...............186
<ListofCustom
Functions> ..............
186
<Setting
the
Custom
Functions> ......
194
o Others
EyepieceShutter .................198
ReleaseSockeVExternal
Power
Socket.................
200
DetachingtheCamera
Back........ .........202
ShutterSpeed
andAperture
lndicators..................
204
DepthofField
<ApertureStop-downButton> .........208
lnfraredPhotography
.............. ..............21O
CameraCareand
Precautions ..............212
o DedicatedAccessories (Optional)
Contax
TLA360Flash........ ..216
Contax
DataBackD-8........... ...............224
Power
PackP-8 ...................228
FocusingScreens,
FWtype ..................232
FlexCase
C-5........... .....,.....24O
Soecifications
............. .........242
,&'

On.e.c. Lever
O Diopter
Adjuster
OExposure
Compensation
Dial
@"DowN"Button
ODisptay
Panel
@"uP"
Button
(D
Drive
Mode
Selector
Dial
@Focusing
Mode
SelectorLever
9shutter Release
@Main
Switch
Onf Supplementary
Light
(D
Lens
Release
Button
(D
Exposure
Check
Button
@Aperture
Stop-down
Button
(DSelf-timer
LED
(D
Dedicated-flash
Contact
(D
Direct
X-contact
@Accessory
Shoe
@shutter
SpeedDial
@
Exposure
Mode
SelectorLever
@Strap
Lug
@
Metering
Mode
SelectorLever
€DLens
Index
@screen
Release
Claw
0
a
€
€
€
G
a
€
€
@
o
@
G
@
@
@
a
@
@
@
@
(r)
@
@
T2

€D
EyepieceRing
@Viewtlnder
Eyepiece
(D
Eyepiece
ShutterLever
@
ExposureModeLockRelease
Button
@
Release
Socket
@Sync
Terminal
(D
Camera
Back
Lock
Release
Button
@Camera
Back
OpeningLever
(D
Battery
CompartmentCoverGuide
Pin
@Tripod
Socket
(D
Eyecup
@
FocusingButton
(F-Button)
(D
FocusingButtonFunctionDial
(F-Dial)
@
RewindLever
@
Rewind
LockReleaseButton
@
ExternalPower
Socket
(D
BatteryCompartment
Cover
@
Battery
Compartment
Cover
LockingKnob
@
ShutterCurtain
@
fitmMounting
Spindle
(D
OX
Contact
@
ntm
Chamber
@
Data-back
Contact
@
Sprocket
@
Camera
BackReleasePin
@
CameraBack
€D
Spool
e
a
(t
e8
4
G
o
@
c
(g
e
@
(D
(D
@
@
o
(D
@
@
(E
@
qD
@
@
@
o
t4

BASilC SfepS ffaking pictures
on autofocusing
andautoexposure)
KUTAnI eitUfl$ (Fotog
rafi
eren
mit Autofoku
su
n
d Betichtungsautomatik)
21
Loadthe battery
(seepage
24).
LegenSiedie Batterie
ein
(siehe
S.
25).
Chargez
lapile(voirpage
25).
Introduzca
lapila
(consultar
la
p6gina
25).
Tum onthe main
switch
(seepage
3O).
StellenSieden
Hauptschalterauf"ON"
(siehe
S.31).
Activezlecommutateur
principal(voir
page
31).
Ponga
el intenuptor
principalen
"ON"
(consultar
la
pdgina
31).
LoadDXfilm
and
pullout
itstip asfarasthe orange
" 1" markand placeit on
thespool.
LegenSiedenDX-Film
einundziehenSiedie
Laschebiszurorange-
farbenenMarkierung
"1"uberdie
Aufwickelspule.
Chargezlefilm DXet sor-
tezsonamorce
jusqu'i la
marqueoftrnge";
"etsur
labobine.
Introduzcauna
pelicula
DX,extraigasu punta
delantera
hastala marca
";"anaranjada,y
p6ngalasobreelcanete.
Setthefilmspeed
to "DX"
(see
page
50).
StellenSie
die
Filmempfi
ndlichkeitauf
"DX"
(siehe
S.51).
R6glezlasensibilit6du
filmd laposition
"DX" (voir
page
51).
Alustelasensibilidadde
pelicula
a "DX" (consultar
la
pdgina
51).
u
t6

Qperot-iOnS de bqSQ @rise
de vues
avecta mise
au point
et t'exposition
automatiques)
Procedimiento bdsico (Fotografias
con enfoque
y exposicion
automdticos)
Mount
thelens
andset
itsdistanceringto "*"
(see
page
92).
Setzen
Siedas Objektiv
ein
und
stellen
Sie
den
Entfemungsring
auf"-"
(siehe
S.93).
Mettez
I'objectif
en
place
et rfiglezla bague
de
distance
gg;!'-" (ygir
page
93).
Montar
elobjetivo
y
ajustar
elanillo
de
distancias
en"-"
(consultar
la
p6gina
93).
Setthe Focusing
Jrnon
Function
Dial
(F-dial)
to
"AFL"(see
page
g2).
Stellen
Sie
den F-Ring
auf"AFL"(siehe
S.g3).
Positionnez
les6lecteur
de fonctiondu bouton
de mise
au point
(s6lecteur
F)
sur'AFL"
(voir
page
93).
Ajustar
eldialde
funci6n
delbot6nde
enfoque
(Dial-F)en
"AFL"(consultar
la
pagina
93).
Setthefocusingmode
selector
lever
to "SAF"
andthedrivemodeto
"S" (seepages
60,94).
Stellen
Sieden Fokus-
sierfun
ktionsschalter
auf"SAF"undden Film-
transportring
auf"S"
(siehe
S.
61,95).
R6glez
les6lecteur
de
modede mise
au point
sur"SAF"et lemode
d'avance
du filmsur"S"
(voir
pages
61,
95).
Ajustar
lapalanca
de
selecci6n
delmodo de
enfoque
en"SAF"y el
modo de arrastreen "S"
(consultar
las
p6ginas
61,
95).
Aperture- priority auto exposure
Zeitauto
matik mit Blendenvo
rwah
I
Exposition
automatique d priorit{ au
diaphragme
Fry*c*n atffiia cxnt
g*>r*ld & fut-n
Shufter-spee
d
-
p
ri
ority auto expo
su
re
(wtth
MM type lenses
only)
Blend
enauto
matik mit Zeitvo
rwah
t
(nu
r mit MM-
Objektiven)
Exposition
automatique d priorite d Ia
vitesse(avec les
objectifs de type MM
seulement)
Exposicion
automdtica con prioridad
de velocidad del obturador
$olocon elobjetivotipoMM)
Programmed Auto Exposure
(wtth
MM type lenses
ontyl
Programmautomatik
(nurmit MM-Objektiven)
Ex
positi
on auto
m
atiqueprogram m6e
(avec
les
objectifs
de typeMM seutement)
Exposic
ion automdtica p
rogramad
a
(solocon elobjetivotipo MM)

Setthe exposuremodeselectorlever
to "Av" andthensetthe aperture
(see
page
120).
Stellen
Sie
den Belichtungsartenhebel
auf"Av" undwihlen Sie
dann
eineBlende
(siehe
S.121)
R6glez
les6lecteurdu moded'exposition
sur"Av" puisd6terminez
le
diaphragme
(voirpage
121).
Ajustarlapalanca
de selecci6n
delmodo de exposici6nen"Av",y
establecer
a continuaci6nlaabertura
(consultar
la
pdrgina
121).
Settheexposuremodeselectorlever
to "Tv"andthensetthe lens
to the
minimum
aperture
(green)
andsetthe shutterspeeddial(seepage
122).
Stellen
Sieden Belichtungsartenhebel
auf"Tv",stellen
SiedieBlende
auf
den kleinstenWert(gnin),
undwAhlen
SiedanneineVerschluBzeit
(siehe
s.123)
R6glez
les6lecteurdu moded'expositionsur"Tv" puisaffichez
le
diaphragmeminimum
(vert)(voirpage
123).
Ajustarlapalanca
de selecci6ndelmodo de exposici6n
en "Tv",y fijarel
objetivo
a suaberturaminima
(verde)(consultar
la
pdgina
123).
Settheexposuremodeselector
leverto "P" andthensetthe lensto the
minimum
aperture
(green)
(seepage
126).
StellenSiedenBelichtungsartenhebelauf
"P" und
danndieBlende
auf
denkleinstenWert(grtin).(siehe
S. 127)
R6glez
les6lecteur
du moded'exposition
sur"P" puisaffichezle
diaphragme
minimum
(vert)(voir
page
127).
Ajustar
lapalanca
de selecci6n
del modode exposici6n
"P", y ajustela
abertura
delobjectivo
a laminima
(verde)(consultar
laplgina 127).

10
Aimthe horizontalsplit-image
spot intheviewfinderatthe subject,
andthen
depresstheshutter
releasehalfway
(see
page
94).
ZielenSiemit dem Horizontaler
Schnittbildindikator
inderSuchermitte
auf
dasObjekt,aufdasdieSchdrfe
gelegt
werdensoll,unddrtickenSieden
Ausldserleichtherunter.
(siehe
S.95)
Cadrez
lesujetdanslazonedu stigmomdtre
horizontalet enfoncezle
d6clencheur
d moiti6(voirpage
95).
Dirigirlapuntode imagendividida
horizontaldelvisor haciaelsujeto
y
pulsar
eldisparador
hasta
mitadde recorrido
(consultar
la
pagina
95).
Makesure
the conect focus marktums on andtakeyourpicture
by
depressing
the shutter
release
allthe way.
AchtenSiedarauf,
daBdasSymbol"o" fUr
korrekteFokussierungerscheint,
dannkonnenSieauslosen.
Contr6lez
que lebonsymbole
de miseau pointapparaisse
et prenez
votre
photoen enfongant
compldtement
led6clencheur.
Compruebe
queel indicadorde enfoque
correctoseenciende
y hagala
fotografia
pulsando
eldisparador
hastaelfinal.
t9

Attach the Strap
(standard
accessory)
Attachthestrapasshowninthe
illustration. *
Anbringen des Tragriemens
(Standardzubehdr)
Bringen Sie den Tragriemen wie in
der Abbildung gezeigtan.
*
Fixation
de la courroie
(accessoire
standard)
Fixezla
courroiecommeindiqu6
dansI'illustration.
*
Uni6nde la correa
(accesorio
estandar)
Una
la
coreacomosemuestra
en
la'ilustracion.
Attaching the Eyecup F-4
(standard
accessory)
O Remove
theeyepiecering
byturningit
asshown.
CD
Attacn
theEyecupto theeyepieceand
fixtheeyepiece
ring
againinplace
by
screwing
itin. *
Anbringender AugenmuschelF-4
(Standardzubehor)
O Drehen
SiedenOkularringwiegezeigt,
umihn
zuentfernen.
@Bringen
Sie
die
Augenmuschel
am
Okular
anundschrauben
Sieden
Okularring
wieder
ein.
*
Fixation
de I'oeilletonF-4
(accessoire
standard)
O Retirez
labaguedeI'oeilleton
enla
tournant
comme
indique.
(O
Fixez
I'oculaire
surI'oeilleton
etfixezla
bague
de I'oeilletondenouveau
en
place
enlavissant.
*
Uni6ndel marco delocular F-4
(accesorio
est6ndard)
(DExtraiga
elanillodelocular
girdndolo
comosemuestra.
@ Una
elmarco
delocular
enelocular
y
fije
elanillodelocularensu lugar
enrosc6ndolo.
O
Op
20

I
I
I
Basic Operations Before Shooting
Vorbereitungen uor dem Fotografieren
Opdration
de base auant d'effectuer les prisesde uues
Operaci6n bdsics antes de dispcffar
2l

<An
Dret
Obje
ab.I
von
Ube
Obje
Uhrz
ernr€
<Ab
Haltr
gedr
oen
hera
wreo
OAr
di
ln
oVr
m
Sr
<Mounting the Lens>
First,remove
the
camera'sbodycapand
thelens'
rear
cap
by
turning
them
counterclockwise.Then,
align
the
red
dot
onthelenswith
the
lensindex
onthe
camera,
fit
it
in
andturnit
clockwise
until
itlocks
with
aclick.
<Dismounting the Lens>
While
pressing
thelensrelease
button,turn
thelens
counterclockwise
as
far
asitwill
goand
pull
itouttoward
you.
After
dismounting
thelens
fromthe
camera,
protect
thelens
withthe
rear
cap,
and
the
camera
with
thebody
cao.
o Donot
touch
thelens
surfaceand
camera
inside
with
your
finger
when
attaching
anddetachingthelens.
o Avoid
direct
sunlightwhen
changingthelenswithfilm
loadedin
the
camera.
22

Alle
inkl
afOl
funl
Bat
I
Kar
Mar
der
oen
L
Mar
\,
Frlh
wte(
inU
',4
v
3
2
1
All
ofthemajor
functios
ofthis
camera
including
the
shutter,
film
winding
and
rewinding
arebattery-operated.
The
camera
doesnot
operatewithout
battery.
1 Erectthe
battery
compartment
coverlocking
knob
on
r thebottomofthe
camera,
set
themark
"o" tothe
mark
"G " and
remove
thebattery
compartment
cover.
r) Insert
the
6V
lithium
battery
(2CR5)
withtheplus
"+"
k and
minus
"-" endscorrectly,
asillustrated
insidethe
battery
compadment.
Q Fitthe
camera's
battery
compartment
cover
guide
rJ pin
tothebatterycomparlment
cover
fixing
hole
and
setthe
coveragain.Then,
fixthemark
"o" onthelocking
knobinthemark
"e " and
closethe
cover
24

EE
nmeb replace
battery
Zeitzumfuttqiwrwhsel
Pile
dremolaer
Esnqesariosustituirlapila
<Battery Check>
After
thebatteryisloaded,
operatethecamerafirst,
the
batteryvoltage
isnormal
ifthemark" ! " lbattery
warning
mark)
does
not
appearinthe
display
panel.
<Battery Replagement>
When
themark
" l] " turns
onin
the
display
panel,
itis
recommended
to replace
thebattery.
Setthe main
switch
to "OFF",
openthe battery
compartment
cover
and
replace
thebatterywitha newone.
o Though
youcantakepictures
evenafterthe mark" ll "
hasturned
on,itisrecommended
to replace
the
battery
assoonaspossible.
lfthebattery
cap_acityhas
dropped
below
the
effectivelimit,
themark" ! " in
the
display
panel
will
blink
orgooutandthe
camerawillno
longer
operate.
o Somebatteries
may
tendto decrease
theirvoltage
temporarily
andthe mark" ].,1
" may
turn_onwhen
they
areloaded
inthecamera.lfthemark" ! " appears
soonafter
thenewbatteryisloaded,
turnoffthe main
switch
andthen
turnit
onagain.lfthemark" ! " goes
out,youcanusethisbattery.
<[
Nr
Ke
ist
(8,
er!
<E
W
M(
W€
6ff
tat
au
a
u
tF
frE
26

<Battery Precautions>
o Generally,
battery
performance
isreduced
bycold
temperatures.
When
shootingincold weather,it is
advisableto keep
thecamerawarmina bagor an
outfitfor protection
against
cold.The battery
performance
reduced
by lowtemperatures
willreturn
to normal
whentaking
pictures
atanordinary
temperature.
o Before
loading
the battery,wipebothpoles
cleanwith
adryclothbecause
poorcontactmayresultiftheyare
soiled
withsweatorgrease.
o lfyou
are
going
ona longtrip,
bring
a new
spare
batterywithyou.
o Donotthrow usedbatteryintofireor try to chargeor
disassemble
thembecauseit isdangerous.
o The
6Vlithium
battery
(2CR5)
cannot
bechargedby
any
means.
o Battery
should
bekeptaway
fromchildren.
<Batteriehinweise>
o Wenn
dieBatterie
lingere Zett
niedrigen
Temperaturen
(unter
0")ausgesetzt
wird,ldiBtihreLeistungnach.
Bei
Kiilte
bewahren
Sie
dieKamera
am bestenunterder
Kleidung
auf,solange
Sie
nichtfotografieren.Die
Batterieleistung
normalisiert
sichwiedernach
Erwirmungaufnormale
Temperaturen.
o Wenn
dieBatteriepole
verschmutzt
oderoxidiertsind,
kann
esKontaktschwierigkeiten
geben.
Wischen
Sie
diePole
vor
demEinlegenmit
einem
trockenenTuch
ab.
o Nehmen
SieeineErsatzbatterie
mit,wenn
Sie
ldnger
unterwegs
seinwerden.
o Batterien
sindgef#ihrlich
undk6nnen
explodieren.
LeereBatterien
drirfen
nichtinsFeuer
geworfen
geladen,
kurzgeschlossen
oderauseinandergenommen
werden.
o Die
6-Volt-Lithium-Batterie
istnichtwieder
aufladbar.
o Halten
SiedieBatterie
auBerReichweitevonKindern.
28

OFFposition
OFF=
€usgeschaltet
Position"OFF (arrdt)
PosicionOFF Position ON (marche)
PosicionON
RedMark
Roterpunkt
Marque rouge
Marca roja
V
el
M
o
ol
W
Str
Kz
Sc
Ni,
Au
ol
Nc
Ha
vel
AE
De
aer
WE
WE
Ein
145
.,N
Positionde verrouillage
AE (AEL)
Posici6n AEL
(Enclavamiento
AE)
The
main
switchturnsthe
camera
onoroff
andselectsor
release
theAE
Lock.
o The
main
switchshould
belocked
ata click
oosition
when
shootingto prevent
itfrom
shifting
bymistake.
OFF: Red mark not visible
When
thered
markisnotvisible,
themain
switchis
setat
OFF,turning
offthe
camera.
lf
you
are
not
usingthe
camera,turn
offthemain
switch
toprevent
the
shutter
from
trippinginadvedently.
"ON" mark
The
cameraisturned
on.
Usually,
setthemain
switchtoON.
"AEL" mark
The
AElockis
usefulfor
shootingin
backlightor
continuous
shootingofa moving
subject
atafixed
exposure.
For
details
on
AE
lock,
see
page
'148.
30
o@

The
display
in
theviev'rfinderand
display
panel
willturn
oninthefollowing
cases,then
turn
offautomaticallyafter
1
6seconds.
(l,;When
themain
switch
isturned
on.
:-2rwith
themain
switchon,
o Whentheexposurecheckbuttonor
the
shutter
releaseis
depressed
halfway,the
display
panel
will
turn
on.
o ltalso
turns
on
whentheaperturestop-down
button
or
therewindlever
is
operated.
lf
you
switchabutton,dial,etc.
whilethe
displayis
shown,
the
display
willremain
onfor
another16
seconds.
<Display in the Viewfinder>
DisplayintheVieMinderisaninformation
intensivefinder
which
displaystheexposureindicatorssuchasaperture
andshutterspeedand,inaddition,the
focusingmark,
back
focusing
scale,etc.'
H
orizontalS
plit
-
im
age spot
H
orizontalerSc
hnittbiI
d
indikator
Zonea stiqmomdtre
horizontal
Punto de imagendivididahorizontal
Matte Screen
Mattscheibenfeld
Verreddpoli
Pantallamate
Microprism Collar
Mikroprismenring
Boquedemicroprisme
Collar
microorismatico
(The illustration shorazsall information available in the viewfinder for
reference. lt does not show an actual example of display.)
Dir
tn'
da
Kel
(1:)
/;\
a
Wir
Rin
Kar
ers
der
<Sr
Die
Infc
ribe
Ble
Fok
(Zur
Abt
Mor
U5:
td tJ,
32

$ ExposureGounter
Theexposurecountershowsthenumberofframesin
position
forexposure.
Besidesthecounterfunction,italso
provides
the
following
functions:
o Displayoftheremainingtime
(10
sec.-00)
whilethe
self-timerisoperating;
o Display
of
the
operationorder
inthe"A.B.C."
mode
(automatic
exposurecompensation
forthree
consecutive
frames).
o Display
oftheendofthe
film.
€ MeteringMark
Thismarkindicates
themeteringmodeandAElock.
Center-weightedmeteringmode:The
" EI " markis
displayed.
Spotmeteringmode:The
" E{l" mark
isdisplayed.
Center-weighted
metering
and
AElockedmode:
The"EI"markblinks.
Spot
meteringandAElocked
mode:
The
"o" markblinks.
@
Exposure
Gompensation
Mark
Whenthe
exposurecompensation
dial
issetanywhere
other
than
"0",
the"compensating
value"willblink.
G'Flash
Mark
Whenusing
theTLAflash
system
fortakingflash
pictures,
theflashmark"f " willturn
onas
soonas
the
flashisfully
charged.
lf
your
subjectis
correctly
exposed,
itwill
blink
twoseconds
after
the
flashhas
fired.
OBack Focusing
Scale
BackFocusing
Scale
shows
themoving
amountofthe
movable
body(seepage
72).
@Focusing
Mark
FocusingMark
shows
the
focusing
state.
"O"(sharp
focus):The
subjectis
insharp
focus.
">" (rear
focus): Thefocus
is
on
thefarther
distance
thanthe
subject.
"<" (front
focus): Thefocusisontheshorterdistance
thanthe
subject.
"> <" (focusing
impossible)
OAperture Value
Inthe
aperture-priority
autoexposure
(Av)and
manual
exposure
(M)
modes,
the
aperlure
youhave
selected
is
displayed
inthe
vieMinder.
Intheshutterspeed-
priority
[v)and programmed
auto
exposure
(P)
modes,
thedisplayed
aperture
istheaperlureselected
bythe
camerain
accordancewith
theshutter
speed
you
have
selected.
@Exposure
Mark
Inthe
auto
exposuremode
("Av",
"Tv",
or"P"),
the
over
"4" orunder
"v" mark
indicating
deviation
from
the
exposure
control
range
willbedisplayed.
Inthe"M" or
"X"modg,the
correct
" i " over
"A", orunder
"v"
markwill
bedisplayed.
(9Shutter Speed
The
cameradisplays
the
shutter
speedsfrom1/6000
sec.to 32sec.
"6000"
means1/6000
sec.and
"200"
means
1/200
sec.,and
"32""means
32sec.
Ot
t
I
E
a
a
' Ott
E
a
E
C
E
E
t!
E
$
ge
\,
d
@e
t/1
d
B
B
34

<DisplayPanel>
(The
illustrationshows allinformationavailablein the displaypanel
for reference.lt does not representan actual exampleof display.)
O Multiple ExposureMark
Displays
whenthe
cameraisinthemultiple
exposure
mode.
@EX
Mark
When
DXfilmisloadedin
thecamera,this
markwill
be
displayed
togetherwiththe number
of exposures
that
canbetaken
withit.
OISO/DX lndicator
When
thedisplayingthefilmspeedor inthefilmspeed
settingmode,
thisindicatorwill
bedisplayed.
o When
autosetmode
withDX
code,always
"DX"is
displayed.
@
Exposure Gounter/Film Speed
Thismarkshows
the"number
ofexposures".When
the
"UP"buttonor "DOWN"
buttonispressed,
itwill
switchto showthe"filmspeed".
WhenDXfilmisloadedinthecamera,itwillshowthe
"filmspeed"thatthecamera
hasread
withthe DX
codeaswellasthe"numberof exposures".
In
addition,ithasthefollowingfunctions:
o Displayoftheremaining
timewhile
the
self-timer
is
operating.
o Display
ofthetime(sec.)
thathas
etapsed
on bulb
exposure.
r Display
oftheoperation
orderintheA. B.C. mode.
o Display
ofthemultiple
exposure
settings.
o Display
ofsetcondition
forcustomfunctions.
o Display
ofthe
end
ofthe
film.
Oritm Mark
Thismark
isdisplayed
whenthereisfilminthecamera.
@Battery Warning Mark
Indicates
thetimeto replace
thebattery.
<L
Zut
den
nicl
Or
2
g
@e
E
s
A
FFE
38
Table of contents
Other Contax Digital Camera manuals

Contax
Contax Tvs III User manual

Contax
Contax TVS DIGITAL - User manual

Contax
Contax Contax NX User manual

Contax
Contax G2 User manual

Contax
Contax M1 User manual

Contax
Contax I4R User manual

Contax
Contax TVS DIGITAL - User manual

Contax
Contax N1 User manual

Contax
Contax Contax NX User manual

Contax
Contax TVS DIGITAL - User manual