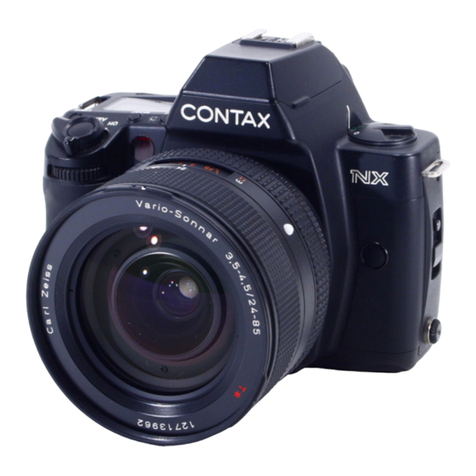
Contax S2 User manual

www.orphancameras.com

Thank
you
forpurchasing
a Contax
52. Contax
52 isa
manual
wind/rewind
manual
camera
which
employs
a
mechanical
shutter
withavery
fast1|4OOO
sec.
along
withbuilt-in
TTLexposure
metering.
ltis
also
designed,
sothat
even
if
thebatteries
fail
while
taking
photographs,
itisstill
possible
totake
pictures
manually.
Please
readthis
manual
carefully
before
to use
to
ensure
many
years
ofuse
from
your
camera
and
to
extend
camera
lifeasmuchaspossible.
Theinstructions
given
inthis
manual
are
based
on
the
Planar
T*
50mm
f
1.4lensas
standard.
The
method
of
operation
is
also
the
same
whenother
Carl
Zeiss
lenses
are
mounted.
Besten
Dank
furdenKaufeiner
Contax
52.
DieContax
52 isteine
Kamera
mitTTL-
Belichtungsmessung,
manuellem
Filmtransport
und
rein
mechanischem
VerschluB
mit1/4000s
alskurzester
VerschluBzeit.
Durch
die
- abgesehen
vonder
Belichtungsmessung
- voll
mechanische
Konstruktion
bleibt
diese
Kamera
selbst
bei
Ausfall
derBatterien
funktionsfihig.
LesenSie
vordemFotografieren
die
Bedienungsanleitung
sorgfdltig
durch.
Dann
wirdSie
die
Kamera
langeJahre
zuverldssig
begleiten.
Die
Hinweise
indieser
Anleitung
beziehen
sich
auf
eine
Kamera
mit
Planar
1,4/50mm-Standardobjektiv.
Mit
anderen
Carl-Zeiss-
Objektiven
erfolgt
die
Bedienung
auf
die
gleiche
Weise.
\

o Name
of
Parts ........
I
. Basic
steps ...12
o Attaching
theStrap/attaching
theEye
CupA/isibility
CorrectionLens.... ......1
6
. Basic
Operation
.. ........17
Loading
the
batteries ........1
I
<Loading
the
batteries>
.. ...1
8
<Battery
checb ..20
Lensmounting
andremoval.... .......22
<Mounting
the
lens> ...22
<Removing
thelens> ........22
Loading
thefilm ..24
<Film
advance
lever> ........30
<Shutter
release
button
<Shutter
release
button
ring
settings> ...30
<Exposure
counter> ...32
Film
speedsetting ......34
VieMinderindications .......36
Aperture
setting ..38
Shutter
speed
setting ........40
Focusing... ...44
<Focusing
with
the
horizontal
split
microprism>...44
<Focusing
with
themicrprism
collarormatte
screen> ..44
How
tohold
thecamera. ...48
Exposure
setting
.... ....50
<Meter
coupling
range> ....56
Rewinding
thefilm. ....60
Various
photo
techniques
. .......62
Depth
of
field .......
64
<Depth
of
field
scale> ........
66
Self-timer
photography .....68
Muftiple
exposures. ....70
Flash
photography .....74
<Synchronization
with
thecamera> .......74
<Flash
sync
speed> ...74
<Flash
aperturesetting>
. ..76
Cabferelease
socket ........78
"B"
(Bulb)photography .....80
lnfrared
photography ........82
Optional
Accessories ........
84
. Camera
Care .......92
o Shutter
precautions ....92
. Camera
storage ...92
. Battery
precautions ....
93
. Main
specifications ...1
00

O Shutter
speed
index
@ Shutter
dial
O Releasebutton/cable
release
socket
@ Winding
lever
O Release
button
ring
@ Exposure
counter
O Multiple
exposure
lever
@ Strap
lug
g Lens
releasebutton
@ Self-timer
lever
O Aperture
Stop-downbutton
@ Accessoryshoe
(p Interlock
connection
point
for
exclusive
flash
@ DirectXconnection
point
(D Lensindex
@ Rewinding
crank
(p Rewindingknob
(p Film
speed
dial
(p Synchro
terminal
@ Screen
release
claw
www.orphancameras.com

O VerschluBzeiten O S6lecteur
devitesse
d'obturation
@ VerschluBzeitenring @ Vitessesd'obturation
O Ausldser/DrahtausldseranschluBO Boutondud6clencheur/prise
@ Filmtransporthebel pour
d6clencheur
souple
O Ausldserknopfring @ Levier
d'avance
du
film
@ Bildzdhlwerk O Baguedubouton
du
O Mehrtachbelichtungsschalter d6clencheur
@ Trageriemendse @ Compteur
devues
9 OOleftiv-Freigabeknopf O Levier
d'expositions
multiples
@ Selbstausloserhebel @ Oeiller
pour
bandoulidre
O Abblendtaste g Boutondelib6rationde I'objectif
@ ZuOenOrschuh @ Levierduretardateur
@ Systemblitzkontakt O Touchedefermeturedu
(D Mittenkontakt diaphJagme
@ Bajonettindex @ Patin
porte-accessoire
(D R0ckspulkurbel (D Contactde
flash
@ RUckspulknopf (D Contact
direct
X
@ ISO-Einstellring (D lndexdemontaged'objectif
@ X-Synchro-Buchse (D Levierderebobinage
dufilm
@ Sucherscheiben-Freigabeklaue O Boutonderebobinagedu
film
@ Bagueder6glage
de
sensibilit6
du
film
Borne
desynchronisation
GriffederelAchementd'6cran
o
@
o
@
o
@
o
@
0
@
o
@
(D
(!)
(D
@
@
@
@
@
@
@
Dialde
velocidadesde
obturaci6n
Dialdeobturaci6n
Disparador
delobturador
/ rosca
para
disparador
por
cable
Palancade avancede la
pellcula
Seguro
deldisparador
Contadordeexposiciones
Palanca
deexposici6n
multiple
Anilla
para
la
correa
Palanca
deextracci6n
del
objetivo
Palancadelautodisparador
Bot6ndecomprobaci6n
dela
profundidad
decampo
Zapataparaaccesorios
Contacto
flash/c6mara
Contacto
X directo
Marca
indice
delobjetivo
Maniveladerebobinadodela
pelfcula
Palancaderebobinadodela
pelicula
Dialdesensibilidades
dela
pelicula
Terminaldesincronizaci6n
Grapadesustituci6n
dela
pantalla

@
@
@
@
@
@
Film
speeddiallockrelease
button
Film
confirmationwindow
Film
speedindex
Filmfixation
axle
Film
chamber
Battery
chamber/battery
chamber
cover
Tripod
Socket
Back
cover
Finder
eyepiece
Shutter
curtain
Spool
Sprocket
Film
rewinding
button
@
@
@
@
o
@
@
www.orphancameras.com

(|) Filmempfindlichkeitsring-
Ldsetaste
@ Filmkontrollfenster
@ lSo-lndexmarke
@ Filmruckspulachse
@ Filmpatronenfach
@ Batteriefach/Batteriefach
@ Stativgewinde
@ Ruckwand
@ Sucherokular
@ VerschluBvorhang
(N) Autwickelspule
@ Zahnrad
@ Filmrrickspultaste
@ Boutondelib6ration
delabague
desensibilit6
du
film
@ Fen6tredev6rificationdu
film
@ Index
desensibilit6
du
film
@ Axerembobinage
@ Chambre
@ Compartiment
des
piles
et
couvercle
@ Filetage
pourpied
@ Dosduboitier
@ Oculaire
de
vis6e
@ RideaudeI'obturateur
(D Bobine
@ Couronne
dent6e
@ Boutonderebobinagedu
film
@ Bot6ndedesbloqueo
del
dialde
sensibilidades
de
la
pelicula
@ Ventanilladecomprobaci6n
de
la
pelicula
@ Indice
de
sensibilidades
dela
pelfcula
@ Ejedeajuste
delapelicula
(D Alojamientodelapelicula
@ Alojamientodelas
pilas
/ tapa
del
alojamiento
delas
pilas
@ Rosca
para
tripode
@ Respaldo
@ Oculardelvisor
@ Cortinilladel
obturador
O Bobina
receptora
@ Ruedadentada
@ Bot6nderebobinado
dela
pelicula

Basic Proced
ures for shootingMllichtigsteBedien
ungsh
inwei
se in Ktirze
lGuide rapide pour prise de vile/tndicdciones rdpidal para tomar fotografias
1 Loading
the
battery.
(See
page
18.) 2
1 Batterieeinlegen.
(Seite
19) 2
1 Mise
enplace
des
piles.
(Page
19) 2
1 Colocaciondelas
pilas.
(P6gina
1q 2
Attach
thelens.
(Seepage
22.)
Objektivansetzen.
(Seite
23)
Fixation
deI'objectif.
(Page
23)
Montaje
delobjetivo.
(P6gina
23)
3 Insert
afilm.
(See
page
24.)
3 Filmeinlegen.
(Seite
25)
3 Chargement
du
film.
(Page
25)
3 Cargadelapelicula.
(Pdgina
25)

4 Set
the
film
sensitivity.
(See
page
34.)
4 Empfindlichkeitseinstellung.
(Seite
35)
4 R6glage
de
la
sensibilit6
du
film.
(Page
35)
4 Ajustedelasensibilidad
dela
pellcula.(Pagina
35)
5 Wind
withthe
winding
lever.
(See 6
page
30.)
5 Filmtransport.
(Seite
31) 6
5 Avancedu
film.
(Page
31) 6
5 Avancede
la
pelicula.
(P6gina
31) 6
Decide
thecomposition.(See
Page
36.)
Bildkomposition.
(Seite
37)
Composition
delaphoto.(Page
37)
Composicion
delafotografia.
(Pdgina
37)

7
o
7
a
7
a
Setthe aperture.
(Seepage38.)
lf necessary,
press
thefocusing
buttonandcheckthefocusing
result.
Blendeneinstellung.
(Seite
39)
Verwendung
derAbblendtaste
bei
Bedarf
.
R6glage
d'ouverture.
(Page
39)
Utilisation
du boutondefermeture
du
deaphrogne
sinecessaire.
Ajuste
de laapeftura
delobjetivo.
(Pagina
39)
En
casodeque
fuera
necesario,
utiliceel boton
de comorobaci6n
de la
profundidad
de campopara
controlar
lamisma.
Set
theshutterspeed.
(See
page
40)
VerschluBzeiteneinstellung.
(Seite
41)
R6glagedelavitesse
d'obturation.
(Page
41)
Ajustedelavelocidad
de
obturacion.
(Pagina
41
)
Adjustthefocus.
(See
page
44.)
Fokussieren.
(Seite
45)
Miseau
point.(Page
45)
Enfoque
de
la
imagen.
(PAgina
45)
14

10
10
10
Checktheexposure.
(See
page
50.)
Belichtungskontrolle.
(Seite
51
)
V6rificationdeI'exposition.
(Page
51)
Comprobaci6n
dela
exposicion.
(Pdgina
51)
11 Takethepicture.(See
page
48.)
11 Fotografieren.
(Seite
49)
11 Prisede
la
photo.
(Page49)
11 Tomandouna
fotografia.
(Pdgina
4e)
12 Rewindthe
film.
(See
page
60.)
12 Zurickspulen
des
Films.
(Seite
61)
12 Rebobinagedu
film.
(Page
61)
12 Rebobinado
de
la
pelicula.(P6gina
61)
10
15

Attaching the Strap
Attach
as
showninthe
illustration.
Anbringen des Trageriemens
BefestigenSieden
Trageriemenwie
abgebildet.
Fixation de la bandouliire
Fixerla
bandoulidrecomme
illustr6.
Colocacion de la correa
Colocar
lacorreaseg0nse
muestra
en
la
figura.
Attaching the Eye Cup/
Visibility Correction Lens
Attachasshown
intheillustration.
AttachtheseparatelysoldFLtype
visibilitycorrection
lens
asshown
inthe
illustration.Theeyecupcanbeattached
from
topofthevisibility
correction
lens.
Anbringen von Augenmuschel
und Korrekturlinse
Befestigen
SiedieOkularkorrekturlinse
wieabgebildet.Eine
FL-
Dioptrienkorrekturlinsekannebenfalls
wie
abgebildet
eingesetztwerden.Zuletzt
kanndieAugenmuscheldarrlberbefestigt
werden.
Mise en place de l'oculaire de
vi
s6e/de I'obj ectif di
opt rique
FixerI'objectifdioptriquecomme
illustr6.
Enoutre,
fixerles
objectifsdioptriques
du
typeFLoptionnelscomme
illustr6.
L'oculaire
devis6e
peut
aussi
6trefix6
ou-dessusd'unobjectifdioptrique.
lnstalacion del ocular / ocular
dioptrico
Montar
elocularI oculardioptrico
tal
comosemuestra
enlafigura.Elocular
dioptricoopcional
tipoFLtambi6nse
montasegunseindica
enlafigura.
Ademds,
elocular
puede
tambi6n
montarsesobreeloculardioptrico.
16

Theexposuremeter for thiscameraispowered by two
LR-44
type l.5V alkaline
batteriesor SR-44type 1.55V
silver oxide batteries.
(1) Openthebatterycompartment
coveronthebottom
ofthe
camerabyunscrewingit
counterclockwise
with
acoin,etc.,andremove
it.
(2) lnsert
both
batteriesinto
the
compartment
the(+)
facing
upin
accordance
with
the(+)
(-)
markings
on
the
compartment
holder,
thenreplace
the
compartment
cover
andtighten
firmly
in
place.

<Battery check>
Match
uptheblack
mark
onring
oftheshutterrelease
button
with
themarkonthe
camerabody
and
press
the
shutter
release
buttonhalfway.Batteryvoltage
isnormal
whentheshutter
speed
indications
intheviewfinder
flickers
more
thanonceto indicate
theshutterspeedset
withtheshutterspeed
dial.
Low battery
indication:Whentheshutterspeed
indication
inside
the
viewfinder
flickers
onceasecondor
less,batteryvoltageislow.Although
theexposure
meter
will
stilloperate
for
sometimeinthiscondition,
batteries
shouldbereplacedassoon
aspossible
toavoid
exposure
failure.
When
battery
voltageisfully
depleted,batteriesmustbe
replaced
tooperatethe
exposuremeter
andthe
camera'selectronicindications.
. Replace
batterieswhen
theyarelow;
otherwise
the
exposuremeterwillnot
function
andtheLEDs
in
the
viewfinderwillnotlight
up.
To operatethe camerawithout theexposuremeter:
. This
camera
will
stilloperatewithout
theexposure
meter.
Just
make
suretosetthe
apertureand
shutterspeedaccordingtotheinstructions
forthe
type
of
film
you
areusing.

<Mounting the lens>
Removetherearlensand
bodycaps
byturning
them
counter-clockwise,
thenalignthered
dot
onthecamera
bodymount
withthereddotonthelens
mount.
Insert
thelensintothebodyofthecamera
asfaras it
willthenturnthelensclockwiseuntil
itlocksinplace
with
aclick.
<Removing the lens>
To removethelens,
grasp
both
thecamera
body
and
thelensfirmly.Next,
press
thelens
release
buttonand
turnthelens
counter-clockwiseas
farasitwill
go,
and
remove
thelensfrom
the
camera.
IMPORTANT: After
removing
thelens,
besurethatthe
rear
cap
onthelens
andthe
bodycap
arereplaced.
Both
thelens
andcameracanbeeasilydamagedifdust
isallowedtoget
inside.
. Also,whenmounting
orremoving
thelens,
be
carefulnottotouch
the
mount
portion
ofthelens
or
theinside
ofthecamera
with
your
fingers.
. Whenmounting
orremoving
a lenswith
filmloaded
in
thecamera,avoiddirect
sunlight.

This
camerausesstandard35mm
film
cassettes.
When
removing
the
filmfromits
package,
be
careful
not
to
expose
it
todirect
sunlight.
(1) Openthe
camerabackby
lifting
uponthe
film
rewind
knob
untilthebackcover
pops
open.
IMPORTANT:T\eshutterinside
your camerais a
precisionpart of thecameraand is madeofa very
delicate
materialwhichcanbe scratched
or damaged
easily. Whenloading film in the camera, be extra careful
that
you donot touchtheshuttercurtainwith
your
fingersor hit it with the film leader.Also, be especially
carefulthat
you do not press
theshutterreleasebutton
whilethefilmleaderispositioned
overtheshutter
curtain.
(2) Insert
the
film
cassette
intothefilm
comparlment
and
lock
thecassette
in
place
byreturning
the
rewindknobto
its
original
position.
(Gently
turnthe
knob
clockwise
tomake
itthefilmfit
properly.)
24

(3) Draw
the
film
leader
across
thebackand
insert
it
intoany
oneof
the
grooves
in
the
filmtake-up
spool. (4) Turn
the
spoolslowly
with
your
fingersand
feedthe
filmuntil
both
thetopand
bottomsprockets
engage
the
film
perforations.
www.orphancameras.com

(5) After
checking
that
thefilm
hasmeshed
properly
with
the
sprockets
andthat
the
slotin
thefilm
cassette
is
positioned
asshown
in
thefigure,
close
the
back
cover.
rr
@ffi
(6) Next
fold
out
thefilm
rewind
crank
and
turnit
slowry
in
the
direction
ofthe
arrow
totake
upany
slack
in
thefilm.
(7) windthe
film
byalternately
advancing
the
film
wind
lever
and
pressing
the
shutterrelease
button
until
the
exposure
counter
registers
"1
."You
canensure
that
thefilmis
moving
properly
through
the
camera
by
checking
to
seethat
thefilm
rewind
knob
rotates
in
the
direction
ofthe
arrow
each
time
thefilm
advance
lever
is
advanced.
o
X
www.orphancameras.com

<Film advance lever>
Thefilm
advances
one
frame
andsets
the
shutter
to
release
eachtime
the
lever
is
turned.
Duringfilm
loading,
thefilm
can
be
wound
swiftly
and
smoothly
byonly
returning
thelever
partially
to its
cocked
position.
<Shutter release button>
The
shutter
button
has
the
following
functions
depending
onhow
youpress
it.
Tocheck
theexposure:Press
thebuttonhalfway
toturn
onthe
exposuremeter
and
light
theLEDsin
the
viewfinder.
Totake
the
picture:
Press
thebutton
alltheway.
<Shutter release button ring settings>
Normally,
please
usewith
the
blackmark
ontherelease
buttonring
adjusted
totheindex
ofthebody.lfadjusting
thered
mark
ontherelease
buttonring
totheindex
mark,
therelease
button
cannot
bedepressed.
30

<Exposure counter>
The
exposure
counter
changesby
"1"
each
timethe
film
advance
lever
is
turned,
regardlesswhetheror not
filmis
loaded.
Whenthecameraback
is
opened,
thecounter
automatically
resetsto "S." The
counter
startsat"S"
with
and
runs
from
"1"
to"36"
with
even
numbers
printed
and
odd
numbers
indicatedbydots
(2..4..6....36").
Theintermitted
numbers
"12",
"20","24"
and
"36"
appear
in
orange
to indicate
thelastexposure
fordifferent-sized
filmrolls.
. Thefilmtype
can
bechecked
inthe
film
check
window
onthebackofthecamera.
32
Table of contents
Other Contax Digital Camera manuals

Contax
Contax TVS DIGITAL - User manual

Contax
Contax 159MM User manual

Contax
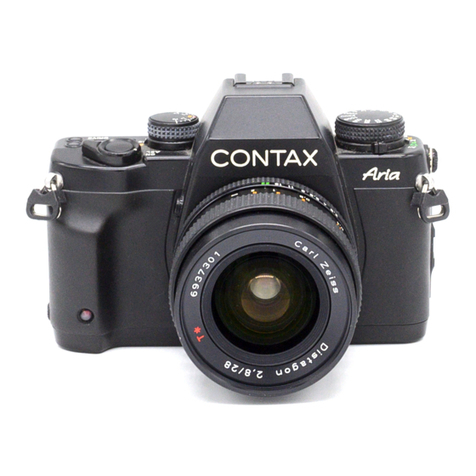
Contax Contax NX User manual

Contax
Contax G2 User manual

Contax
Contax RTS III User manual

Contax
Contax Tvs III User manual

Contax
Contax M1 User manual

Contax
Contax Aria User manual

Contax
Contax MAD User manual

Contax
Contax 645 User manual