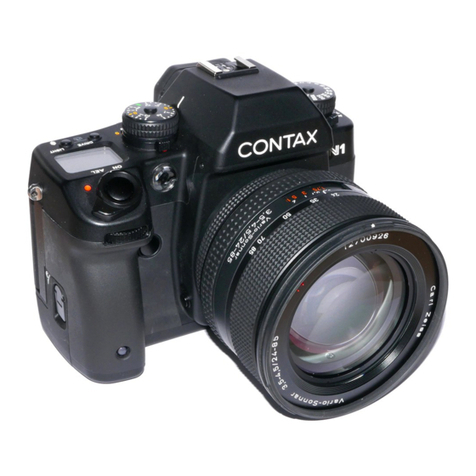
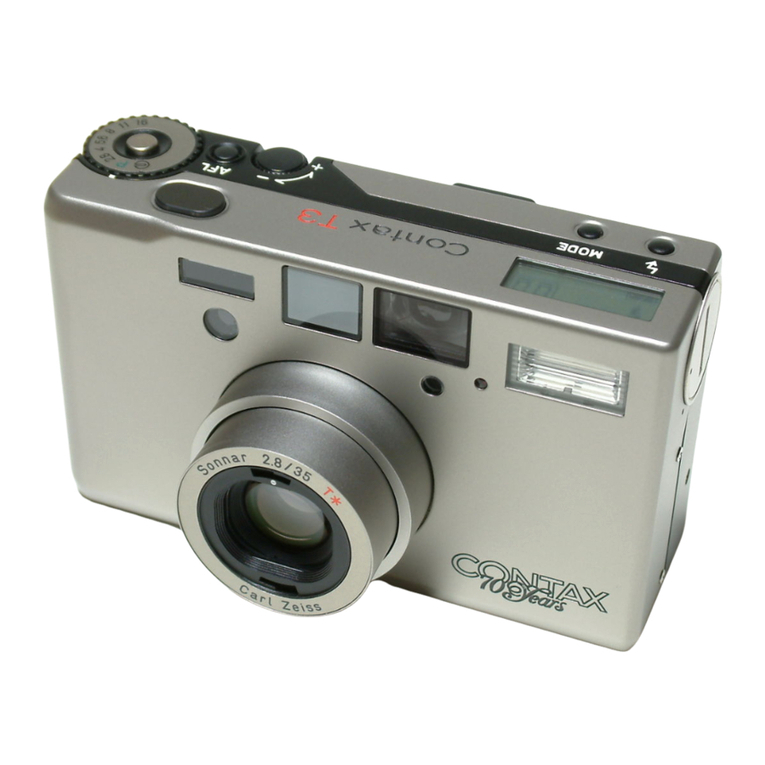
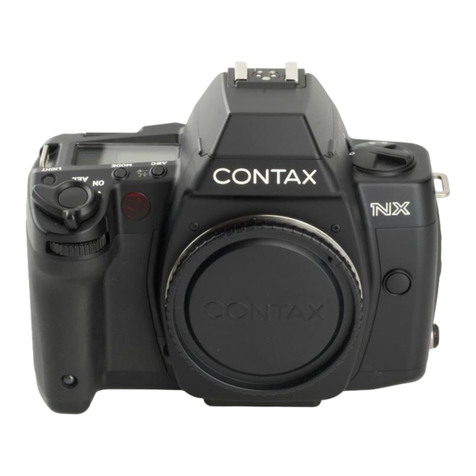
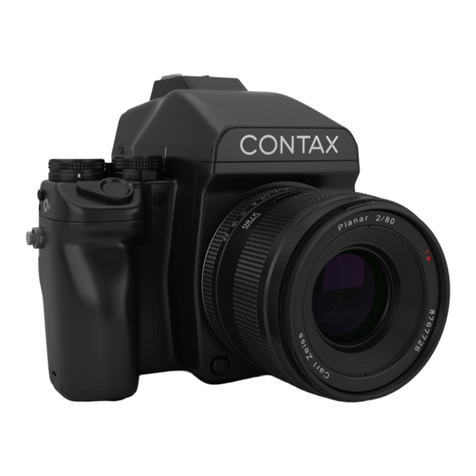
Contax M1 User manual

CONTAX
Nl
lnstruction
manual
. Bedienungsanleitung @
www.orphancameras.com

EiJtilj:jij V
nry
We
greatly appreciate your purchase of this Contax Nl camera. The
Contax Nl is an autofocus single lens reflex camera based on the Contax'
fundamental principle of "building cameras for creating works of art".
Automatic or manual focus can be selected according to the subject and
setting so that the user can achieve the desired results with accuracy.
The
Contax
N1is
equippedwithmanyfeatures
thatwillmaximizecreative
photographicpossibilities.
Read
these
instructions
carefullybeforeusingthe
cameratoensure
proper
use
and
a long
servicelife.
Someofthenotable
featuresinclude:
O A S-frame
autofocusdetectionsitepattern
thatisspreadwiderthroughout
theviewfinder.
Theuser
canselecta singlesiteorhave
thesitesdetect
focus
automatically.
@ n nign
speedshutterwithanautomaticshutter
speed
range
of32secondsto
1/8000second,withflash
sync
at1/250
second.
@ Focus
Auto-Bracket
Control,
for
automatic
shiftingofthefocusing
distance
duringasequenceofexposures.
@ Useofhigh-performance
Carl
ZeissT* lensesandvarious
accessoriesfor
expandingtherange
ofphotographicpossibilities.
\,

<Attaching the strap>
tl Attach the protector to the
I SUSpenStOn
flng.
ll Attachthetriangular
ring
tothe
L SUSpenStOn
flng.
e Pass
thestrap
through
the
tU protector
and
triangular
ring
and
attach
itasshown
onthediagram.

CONTENTS
Attaching
theStrap
1. Inserting
thebattery
and
checking
thebattery
power " 12
2. Mounting
and
removirg
lenses
""" 14
3. Adjusting
thediopter
"" " 15
Using
the
program
autoexposure
mode
"" 24
1. Selecting
the
focus
frames ""' 27
2. Focusing
intheautofocus
mode "" 29
3. Focusing
manually """ 34
1. Types
ofmetering
modes
and
their
features "' 40
1. Taking
photos
withtheaperture
priority
mode "Av"
(aperture
priority
auto
exposure)
mode " 43
2. Taking
photos
with
shutter
speed
priority
settings "Tv"(shutter
priority
auto
exposure)
mode' " 44
Taking
photos
using
a
Contax
TLA
flash "" 61
Using
thecommand
dial
as
the
exposure
compensation
dial
"""""' 72
1. Listofcustom
functions
Basic
information
on
photography
""'78
Troubleshooting """ 79
LCD
viewfinder
FE-1 "" 85
Contax
Databack
D-10 """"'86
Contax
Power
pack
P-8
' """" 89
1.
2.
3.

Namesof Parts
4. Main
switch
5. Shutter
releasebutton
6. Holding
the
camera
""
7. Loadingfilm'
ffi
ffi
ffi
i#
4. Taking
photos
withthe
focus
shifted
inthreedifferent
steps
(Focus
ABCmode) """' 36
2. Metering
range
3. Taking
photos
inthe
program
auto
mode "P"
(program
auto
exposure)
mode "":"' "" 45
4. Taking
photos
withtheexposure
set
manually
"M"
(manual
exposure)
mode
""""' 46
5. Using
the
bulb
exposure
mode
"""' 47
2. Taking
photos
usinga
Contax
TLA360
flash
Using
the
command
dial
asthe
shutter
dial
' "" 72
2. Setting
thecustom
functions
Shutter
speed
and
aperture
valuedisplay
Contax
Cableswitch
LAtype """"' 91
Contax
Mountadapter
NAM-1
"""" 92
Focusingscreens
FX
type ""' 93
Display
Panel
and
Viewfinder
Display
8. Removing
film ""'21
9. Setting
the
film
speed
manually
""' 22
10. Switching
thedrive
mode "" 23
6. Taking
photos
with
exposure
compensation """" 48
7. Taking
Multiple
exposure """ 55
8. Using
theselftimer """' 57
9. Checking
thedepthof
field "" 58
10. Cable
switchsocket ""' 59
11. Replacingthecamera
back " 59
3. Taking
photos
using
other
flasheswiththeX contact
4. Camera
Care
and
Precautions
16
17
17
18
54.
65.
96.
7. Contax
Flexible
case
C-8

Exposurecompensation
dial
(page
48)
Diopteradjustment
dial
(page
15)
Exposure
compensation
dial
lockreleasebutton
(page
48)
Exposure
ABClever
(page
50)
Drivebutton
(page
23)
Display
panel(page
8)
Lightbutton
(page
10)
Strap
lug
(page
3)
Mainswitch
(page
16)
Shutter
release
button
(page
17)
Battery
compartment
releaseknob
(page
12)
Selftimer
LED
(page
57)
Command
dial
(pages
22,23
and72)
Exposure
check
button
(page
10)
Accessory
shoe
(page
61)
Dedicated
flash
contact
(page
61)
Direct
X contact
(page
70)
Shutterspeed
dial
(page
44)
Shutter
dial
lockrelease
button
(page
72)
Exposure
modelever
(page
22,43
and
76)
Lens
mark
(page
14)
Lensrelease
button
(page
14)
Meteringlever
(page
39)
Screen
releaseclaw
(page
94)
Mount
(page
14)
Aperturestop-down
button
(page
58)
6
AFsupplementary
light
(page
29)
www.orphancameras.com

Eyecup
(page
15)
Viewfinder
eyepiece
(page
9)
Eyepiece
shutter
(page
57)
Exposuremodelock
release
button
(page
22,43
and
76)
Film
check
window
Cameraback
release
knob
(page
18)
Camera
back
(page
59)
Syncterminal
(page
70)
Cableswitchsocket
(page
91)
Shuttercurtains
(page
18)
Film
fixing
shaft
(page
18)
Filmchamber
(page
18)
DXcontacts
(page
18)
Manualselect
lever
(page
28)
Autoselectlever
(page27)
Focus
dial
(page
29)
Focusbutton
(page
35)
Battery
compartment
(page
12)
Rewindlockrelease
button
(page
21)
Tripod
Socket
Rewindlever
(page
21)
External
power
socket
(page
89)
LCD
viewfinder
contacts
(page
85)
Spool
(page
20)
Cameraback
release
pin
(page
59)
Camera
back
(page
59)
Filmtipmark
(page
19)
7
Data
backcontacts
(page
86)

<Display
panel>
Exposurecounter
(page
19)
Self
timer
remaining
time
(page
57)
Exposure
ABCand
Focus
ABC
shooting
order
(pages
50and36)
Multipleexposure
numbersetting
(page
55)
Remainingexposures
inmultiple
exposure
mode
(page
55)
Bulbexposure
time(page
47)
Film
loadingindicators
. Nofilm
(page
19)
. Filmadvance
error
(page
19)
. Film
advance
normal
(page
19)
. Film
advancing
(display
increments)
. Endof
film
(page
21)
. Film
rewinding
(display
decrements)
. Endofrewind
(page
21)
Multipleexposure
mode
(page
55)
Drive
mode
(page
23)
. Self
timer
mode
(page
57)
(10
seconds/2
seconds)
. Single
frameshooting
mode
(page
23)
. Continuous
shooting
mode
(page
23)
Remaining
battery
power
(page
13)
Focus
frame
selection
indicators
. Autoselect
mode
(page
29)
. Manual
select
mode
(page
29)
Exposurecompensation
value
(page
72)
. 1/3EV
increments
. 112EY
increments
Aperture
value
(page
43)
Shutter
speed
(page
44)
Filmspeed
(page
22)
. DX:
Forautomatic
setting
(page
20)
. fSO:For
manualsetting
(page
22)
Custom
functions
(page
74)
lffi]
r Irrlorl..looI +
IIIIITITITIII-
---i. -. -;-. --a

<Viewfinderdisplay>
Spot
metering
range
(Area
approx.3 mmindiameteratcenterof
viewfinder)
(page
a0)
Focusframe(page27)
. Auto
select
mode(page27)
. Manual
select
mode
(page
28)
Flashmark
(page
61)
Metering
mode
(page
a0)
. Evaluativemetering
. Center-weighted
average
light
metering
. Spot
metering
Focusindicators
(pages
29and35)
"O"
lit: Infocus
"D"
lit: Focusisbehind
the
subject
"(" lit: Focusisinfront
ofsubject
AElock
(page
53)
ExposureABC
mode
(page
50)
FocusABC
mode
(page
36) Shutter
speed
(page
44)
Exposure
counter
(page
18)
Self
timer
remainingtime
(page
57) Aperture
value
(page
43)
Exposure
ABCandFocusABCshootingorder
(pages
36and50) Manuatexposure
(page
46)
Multipleexposure
numbersetting
(page
55)
Remainingexposures
inmultiple
exposure
mode
(page
55)
Filmloading
indicators
(page
19) Exposurecompensation
(page
48)
Exposuremeter
(page
39)
Exposurecompensation
value
(pages
48and72)
. 1/3EVincrements
.112EV
increments
Meteringdifference
(page
39)

The
Contax
N1'sviewfinderserves
asthemain
informationsource
forfocus,
exposure
and
filmstatus.
The
viewfinderdisplay
turnson
whentheoperations
below
are
performed,
then
automatically
turns
offafter16
seconds
tosavepower.
e Whenthemainswitch
isturnedon.
@ Wnentheexposure
check
button
is
pressed
orshutterbutton
ishalf-pressed
whilethemainswitch
is
turned
on.
lfsomeaction
istaken,such
aschanging
aperture,
shutter
speedorany
dial
is
used
whilethe
viewfinderdisplay
islit,thedisplay
time
is
extended
another
1
6seconds.
. Thetimedisplay
(power
holdtime)canbechanged.
(Page
74)
The viewfinder display turns off in the following cases:
. During
shooting.
. Whentheendof
thefilmisreached.
. Whilethefilm
isrewinding.
. Whenrewinding
is
completed.
. lntheallimprint
mode.
. Whenthere
isa filmadvanceerror.
. Whenthebattery
isspent.
. Whentheexposure
modelever
issetto ISOor CF.
Thedisplay
panel
can
beilluminated
whenviewingconditions
require.
The
lightturnsonand
offeach
timethe
'LIGHT'
button
is
pressed.
. lfotherdialsorbuttonsareoperated
whilethedisplay
panel
islit,theduration
of
illuminationisautomatically
extended.
The
display
panel
lightturnsoff
assoonas
the
shutter
isreleased.
10
<Display
panel
illumination>
TI
a]
tf
ta
P

I
I
I
BASIGOPERATIONS
PRIORTO
SHOOTING
'-.. f - :"
This
section
describes
procedures
thatshouldbe
taken
prior
tophotographing
and
includesbasicoperationsof
thiscamera.
lf
you
already
have
basic
knowledgeon handling
acameraand
wishtostart
taking
photographs
immediately,
proceed
to"SIMPLE
SHOOTING
PROCEDURE"on
page
24.
Pii
11
Xi

e
@
@
<lnserting the battery>
Turnthemainswitch
offbefore
inserting
the
battery.
{ Lift the battery compartment
I releaseknobandturn it in the
directionof the arrow until it stops.
l| Presson the center,
slide inthe
C direction of the arrow to remove
the battery compartment.
/l Line up the edge of the battery
'f compartment
with theedgemark
on the camera's
body,then slide in
the directionof thearrowto attach.
Q Inserta 6V lithiumbattery
(2CR5)
U into the battery compartment.
Ensurethatthe battery
contactsand
those in the battery compartment
match.
Edgemark
12

@[, Turn the battery compartment
rf releaseknob clockwise to fasten.
. Lowertherelease
knobintoits
original
position.
. The
"E" battery
markappears
inthe
display
panel.
. Even
whenusinga newbattery,during
continuous
shootingoratlowtemperatures
thevoltagemaydecrease
momentarilyand
the
"E" markmay
light.lf
this
happens,
turnthe
main
switch
offthenbackon
2 or3
times.
lfthe
"E" marklights,
thereis
enoughbattery
power.
<Checkingthe batterypower>
The
"E" marksmeanthe
following:
Checkthebattery
power
withthe main
switch
turnedon.
m
\l.z
-G- (ftashins)
,/l\
\1,/
-il- (ftashing)
,/l\
Thereissufficientbattery
power.
Battery
power
islowandwillneed
replacementsoon.
Replacewitha newbattery.
Camera
will
not
operate.
EA
r3

<Mounting lenses>
,l Remove
thecamera's
body cap
I andthe lensrear
cap.
!l Lineup the mount markon the
C lenswith the lensmarkon the
camera,
insertthe lens,thenturn it
clockwiseuntila click is heardand
the lensis firmly engaged.
<Removing lenses>
Pressthe lensreleasebuttonand
turn the lenscounterclockwise
all
the way until it stops,then pull it
forward to remove it.
. Becareful
nottotouch
thelenssurfaceor
theinsideof
thebody
whenmountingand
removing
lenses.
. When
replacingthelens
whilefilmis
loaded
inthecamera,
doso
in
theshade,
avoiding
direct
sunlight.
Lens
release
button
r4

Eyepiece
flng
<Attaching
adiopter
lens>
This camerais equippedwith a built-
in dioptercorrectionmechanism.
Turnthediopteradjustment
dialand
adjustfor your vision.
The
adjustment
rangeis -3D to +1
D
(Diopter).
. lfthe
dioptercannot
besufficiently
adjusted
using
thecamera's
dioptercorrection
mechanism,
use
aseparately
sold
FM
type
diopter
lens.
range
rs
as
-3D to+1D
-6D to-2D
-1D to
+3D
<Attaching
adiopter lens>
Remove
the
camera'seyepiecering
and
screw
in
the
diopterlens.
The
diopter
adjustment
follows:
Diopterlens Ad
Built
in
FM -3
FM +2
L5
Eye
cup

<When off>
Themainswitch is used
to turn the
power on and off and to activate the
AEL(AElock)mode.
. Set
themainswitchat
theclick
position
to
prevent
accidental
operation.
OFF:
Whentheredmarkis
notvisible
Thecamera's
power
is
off.
ON:
The
camera's
power
ison.
AEL:
Usethis
when
you
wantto lockthe
exposure
(AE
lock).Automatic
exposure
lockisused
to maintaina set
exposureeven
whencomposition
or
lightingconditionschange.
ltis
often
used
when
photographing
backlit
subjects
or
when
a particular
brightness
valueischosenasthemain
subject
withinthe
frame.
ltis
also
used
whena
subject
thatisconstantly
lit
moves
througha background
withvaried
brightness
values.
(For
details,see
page
53.)
lr
r
c
<Whenon>
r6
<Whenin the AEL (AE lock) mode>

Full
pressure
The shutter releasebutton operates
in two steps.
When the shutter button is half-
pressed,
theviewfinder
displayturns
on andthe autofocusand metering
functions areactivated. When
pressed further (full pressure),the
shutter is releasedand the photo is
taken.
.Beforeloading
film,
practicepressing
the
shutterrelease
buttonto
get
usedto
the
half-
pressure
position.
.To
prevent
camerashake,
useasmoothmotionwhen
pressing
the
shutter
release
button.
e Tuct<in
your
elbows
and
stabilize
thecamera.
? ttotO
your
breath
when
pressing
the
shutter
button.
@ feep your
armsandhands
relaxed
andpress
theshutter
button
gently.
Itisimportant
to holdthe camerafirmly in ordef to achieve
sharp
photographs. Unsharp photographs are often due to camera shake
caused
by the photographer's
abruptmotionwhen takinga picture.
Practiceworking
withthe
cameraandmaking
both
vertical
and
horizontal
compositions.Find
positions
that
arecomfortablefor
you. Propping
yourself
or
the
camera
againsta buildingortree
canoftenbeeffective.
.When
taking
photographs
in
dark
places
orin
othercaseswherethe
shutterspeedis
slow,use
atripodto
avoidcamerashake.
T7

(1) { Open
thecamera
backby lifting
I the camera
backopenknob and
turning it inthe directionof the
arrow.
Set
therelease
knobback
inits
original
position
afteropening
thecameraback.
. Thefirsttime
you
use
thecamerabesure
to
removethe
protective
sheet
insidethe
camera
beforeloading
film.
. Be
careful
nottotouch
theDXanddata
backcontacts.
lftheybecomedirtyclean
themoff
with
asoftcloth.
. Loadandremove
filmoutofdirectsunlight.
fl Insertthe film at an angle
as
C shown on the diagram.
Shutter curtain
The
shutter
curtain
is
a precisionpad. Be
extremely
careful
nottotouch
it
orpoke
it
withthe
tip
of
thefilmor
your
finger.In
particular,
never
press
theshutter
release
button
whenthetipofthe
filmis
positioned
over
the
shutter
cudain.
r8

Q Pullingonthetip ofthefilm,
lU drawout the film to the position
of theorange" I " mark,then set it
overthe spool.
Make
sure
thefilmisflush
(not
bulging
out),
asshown
inthe
diagram.
@o @x
. lfthe
drawnoutsectionofthefilmistoo
long,donottrytocontinueloadingthefilm.
Windit
backup
intothefilm
cafiridgeto
adjustthe
length.
/l Securely close the camera back,
- turn the mainswitch on and
press the shutter releasebutton.
Thefilmis
automaticallyadvancedto
thefirstframe
andthefilmcounteris
setto
"01".
. lf
"00"
still
flashesonthefilm
counter,
the
filmhasnot
been
properly
loaded.
Open
thecamera
backand
reloadthefilm.
r9

FilmwithDXcode
<Ghecking
thefilm speed>
Displaypanel
<Automatic setting of the ISO
film speed>
When"DX" is displayedon the
displaypanel,
thecamera
readsthe
DX
codeandsetsthefilm speed
automatically.
The
automatic
film
speedsettings
rangefromISO25to5000.
. WhenfilmwithnoDX
code
isloaded,
the
filmspeedisautomaticallysettoISO
100.
. lf
"DX"
isnotdisplayedonthedisplay
panel,
besure
to
set
theISOmanually.
(Seepage
22.)
<Checking the film speed>
To checkthe ISO
of thefilm loaded
in thecamera,settheexposure
modeleverto "lSO".
"DX"
or
"lSO"
and
the
speed
ofthefilm
loadedinthe
cameraappearon
the
display
panel.
. To
setadifferent
ISOfrom
that
indicatedfor
thefilm
(for
example,
for
pushprocessing),
see
"Setting
the
film
speed
manually"
on
page
22.
DX .x)-f
a
)-l,^a
Filmspeed
20
Other Contax Digital Camera manuals

Contax
Contax 159MM User manual

Contax
Contax Aria User manual

Contax
Contax RTS III User manual

Contax
Contax MAD User manual

Contax
Contax U4R User manual

Contax
Contax T3 User manual

Contax
Contax Contax NX User manual

Contax
Contax S2 User manual

Contax
Contax G2 User manual
Contax
Contax TVS DIGITAL - User manual

Contax
Contax 167MT User manual

Contax
Contax G2 User manual

Contax
Contax Tvs III User manual

Contax
Contax TVS DIGITAL - User manual
Contax
Contax I4R User manual

Contax
Contax N1 User manual

Contax
Contax Contax NX User manual

Contax
Contax 137 MD Quartz User manual

Contax
Contax AX User manual

Contax
Contax T3 User manual