manuals.online logo
Brands
  1. Home
  2. •
  3. Brands
  4. •
  5. Contractors Wardrobe
  6. •
  7. Indoor Furnishing
  8. •
  9. Contractors Wardrobe Oak Fantasy Vanity Flair User manual

Contractors Wardrobe Oak Fantasy Vanity Flair User manual

Installation Instructions
Model
Oak Fantasy
®
Vanity Flair
Contractors Wardrobe®
DESIGNERS • MANUFACTURERS • TOLL FREE: (800) CW-DOORS • (800) 293-6677 • www.cwdoor.com
26121 Avenue Hall • Valencia, CA 91355 • (661) 257-1177 • FAX: (661) 257-4907
NO. QTY PART # PART DESCRIPTION
#1 3 Mirrored Glass Panels
#2 2 C1000 Magnetic Oak Catch
#3 2 S0240 Strike Washer
#4 2 S0087 #6 x 1/2″Screws
#5 2 B1010 Masonite
#6 4 H6010 Pivot Hinges
#7 24 S0055 #8 x 1/2″Truss Screws
#8 2 A6000MF Brackets
#9 8 S0084 #6 x 3/8″Screws
#10 2 S0180 Anchors
#11 8 S0095 #8 x 1-1/2″PH SMS Screws
67
67
8
9
9
9
9
11
11
11
11
5
43
6
7
6
7
2
1
1
1
Illustrated Parts
Breakdown (IPB)
Oak Fantasy Vanity Flair 0209 3/5/09 2:39 PM Page 1
Congratulations on purchasing your new CW ®Oak
Fantasy®Vanity Flair. Now that you have opened the
package, we want you to verify that you have all the
necessary hardware supplied with your doors.
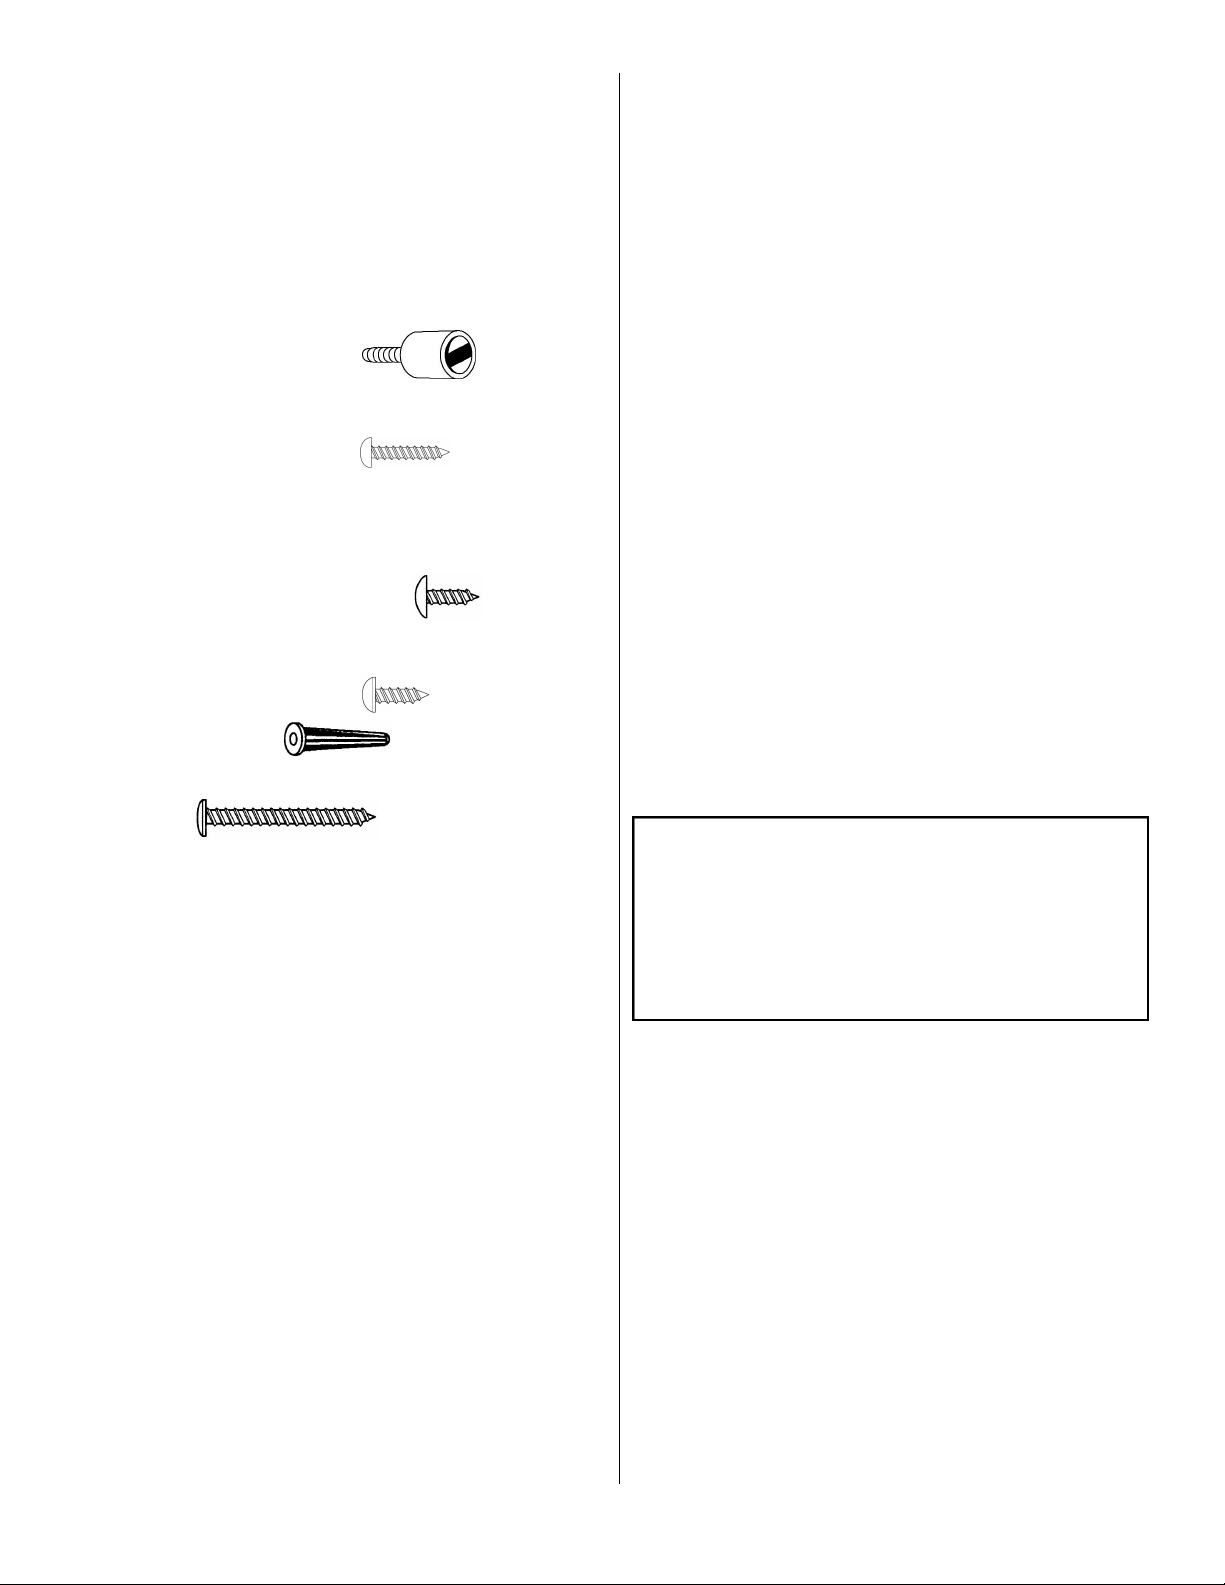
PARTS CHECK LIST:
NO. QTY DESCRIPTION
(#1) 3 Mirrored Glass Panels
(#2) 2 Magnetic Oak Catch
Installed in Panel
(#3) 2 Strike Washer
(#4) 2 #6 x 1/2″Screws
(#5) 2 Masonite
(#6) 4 Pivot Hinges
(#7) 24 #8 x 1/2″Truss Screws
(#8) 2 Brackets
(#9) 8 #6 x 3/8″Screws
(#10) 2 Anchors
(#11) 8 #8 x 1-1/2″PH SMS Screws
If you find that any parts are damaged or missing, refer to
the parts list and IPB Drawing and contact
Contractors Wardrobe®’s Customer Service Department
at (661) 257-1177.
TOOL CHECK LIST
You will need:
• Phillips Screwdriver
• Tape Measure
• Hammer
• Pencil
• 3/8″Drill Motor and 3/16″and 1/8″Drill Bits
• Square or Level
Oak Fantasy®Vanity Flair - 0309
STEP 2 Mounting the Vanity Flair
Place the Mirrored Glass Panels (#1) against
the wall where you want to install it. Open the
left wing and mark the wall through all the holes
in the Bracket (#8). Next, open the right wing
and mark the wall through all the holes in the
Bracket (#8). Next, move the Mirrored Glass
Panels (#1) out of the way. Carefully drill a 1/8″
hole in the wall where you marked the holes
through the Bracket (#8). If you did not drill into
a wooden stud, you will need to use wall
anchors. After you drill all of the holes and
install the anchors, if necessary, move the
Mirrored Glass Panels (#1) back into place.
Next, insert the #8 x 1-1/2″PH SMS Screws
(#11) through the holes in each Bracket (#8).
STEP 3 Installing the Strike Washer
Place #6 x 1/2″Screw (#4) inside the Strike
Washer (#3) and place onto Magnetic Oak
Catch (#2). Close door with screw facing wall.
This will mark where your #6 x 1/2″Screw (#4)
and Strike Washer (#3) will go. Open wing and
remove from Magnetic Oak Catch (#2). Install
#6 x 1/2″Screw (#4) and Strike Washer (#3)
where your mark is on the wall. Repeat this step
for the second wing. Your Oak Fantasy®Vanity
Flair is complete.
INSTALLING THE OAK FANTASY®VANITY FLAIR
STEP 1 Measure for Center of Opening
Place Mirrored Glass Panels (#1) onto back
splash. Using Tape Measure, measure left and
right sides to find center of opening (You may
need a second person to help hold the Mirrored
Glass Panels (#1) in place, while measuring the
opening to find the center).
Thank you for purchasing a CW®Wardrobe Door. This
is only part of a large line of wardrobe doors and high
quality bath enclosure products. If you like this product,
please contact Contractors Wardrobe®for more
information about our many beautiful bath enclosures
available in a vast array of colors and finishes to suit
your designing needs.
2
Oak Fantasy Vanity Flair 0209 3/5/09 2:39 PM Page 2

Other Contractors Wardrobe Indoor Furnishing manuals

Contractors Wardrobe uDivide User manual

Contractors Wardrobe

Contractors Wardrobe uDivide User manual

Contractors Wardrobe Trim Line  3-Way Vanity User manual

Contractors Wardrobe

Contractors Wardrobe Trim Line 3-Way Vanity User manual

Contractors Wardrobe Style Lite Vanity Flair User manual

Contractors Wardrobe

Contractors Wardrobe Style Lite Vanity Flair User manual

Contractors Wardrobe Trim Line Vanity Flair User manual

Contractors Wardrobe

Contractors Wardrobe Trim Line Vanity Flair User manual

Contractors Wardrobe Aristocrat Vanity Flair User manual

Contractors Wardrobe

Contractors Wardrobe Aristocrat Vanity Flair User manual

Popular Indoor Furnishing manuals by other brands

Regency LWMS3015 Assembly instructions

Regency

Regency LWMS3015 Assembly instructions

Furniture of America CM7751C Assembly instructions

Furniture of America

Furniture of America CM7751C Assembly instructions

Safavieh Furniture Estella CNS5731 manual

Safavieh Furniture

Safavieh Furniture Estella CNS5731 manual

PLACES OF STYLE Ovalfuss Assembly instruction

PLACES OF STYLE

PLACES OF STYLE Ovalfuss Assembly instruction

Trasman 1138 Bo1 Assembly manual

Trasman

Trasman 1138 Bo1 Assembly manual

Costway JV10856 manual

Costway

Costway JV10856 manual

moss DESIGN Caisson Credenza Assembly instructions

moss DESIGN

moss DESIGN Caisson Credenza Assembly instructions

Aquaglide FULL DECK 15.0 owner's manual

Aquaglide

Aquaglide FULL DECK 15.0 owner's manual

AREBOS AR-HE-SW30 user manual

AREBOS

AREBOS AR-HE-SW30 user manual

Till-Hilft Fulda 87005.330 Assembly instructions

Till-Hilft

Till-Hilft Fulda 87005.330 Assembly instructions

Twoey Outside 2010 quick start guide

Twoey Outside

Twoey Outside 2010 quick start guide

Hettich Easys 200 operating instructions

Hettich

Hettich Easys 200 operating instructions

The bedboss RELAX 404 Series owner's manual

The bedboss

The bedboss RELAX 404 Series owner's manual

Oeseder Möbelindustrie Bern 991 720 Assembly instructions

Oeseder Möbelindustrie

Oeseder Möbelindustrie Bern 991 720 Assembly instructions

Costway HW68469 user manual

Costway

Costway HW68469 user manual

Next ALIX A27743 Assembly instructions

Next

Next ALIX A27743 Assembly instructions

BROSA Hans Assembly guide

BROSA

BROSA Hans Assembly guide

Prodigg MINIKA PBA015T-FUR installation manual

Prodigg

Prodigg MINIKA PBA015T-FUR installation manual

manuals.online logo
manuals.online logoBrands
  • About & Mission
  • Contact us
  • Privacy Policy
  • Terms and Conditions

Copyright 2025 Manuals.Online. All Rights Reserved.