14
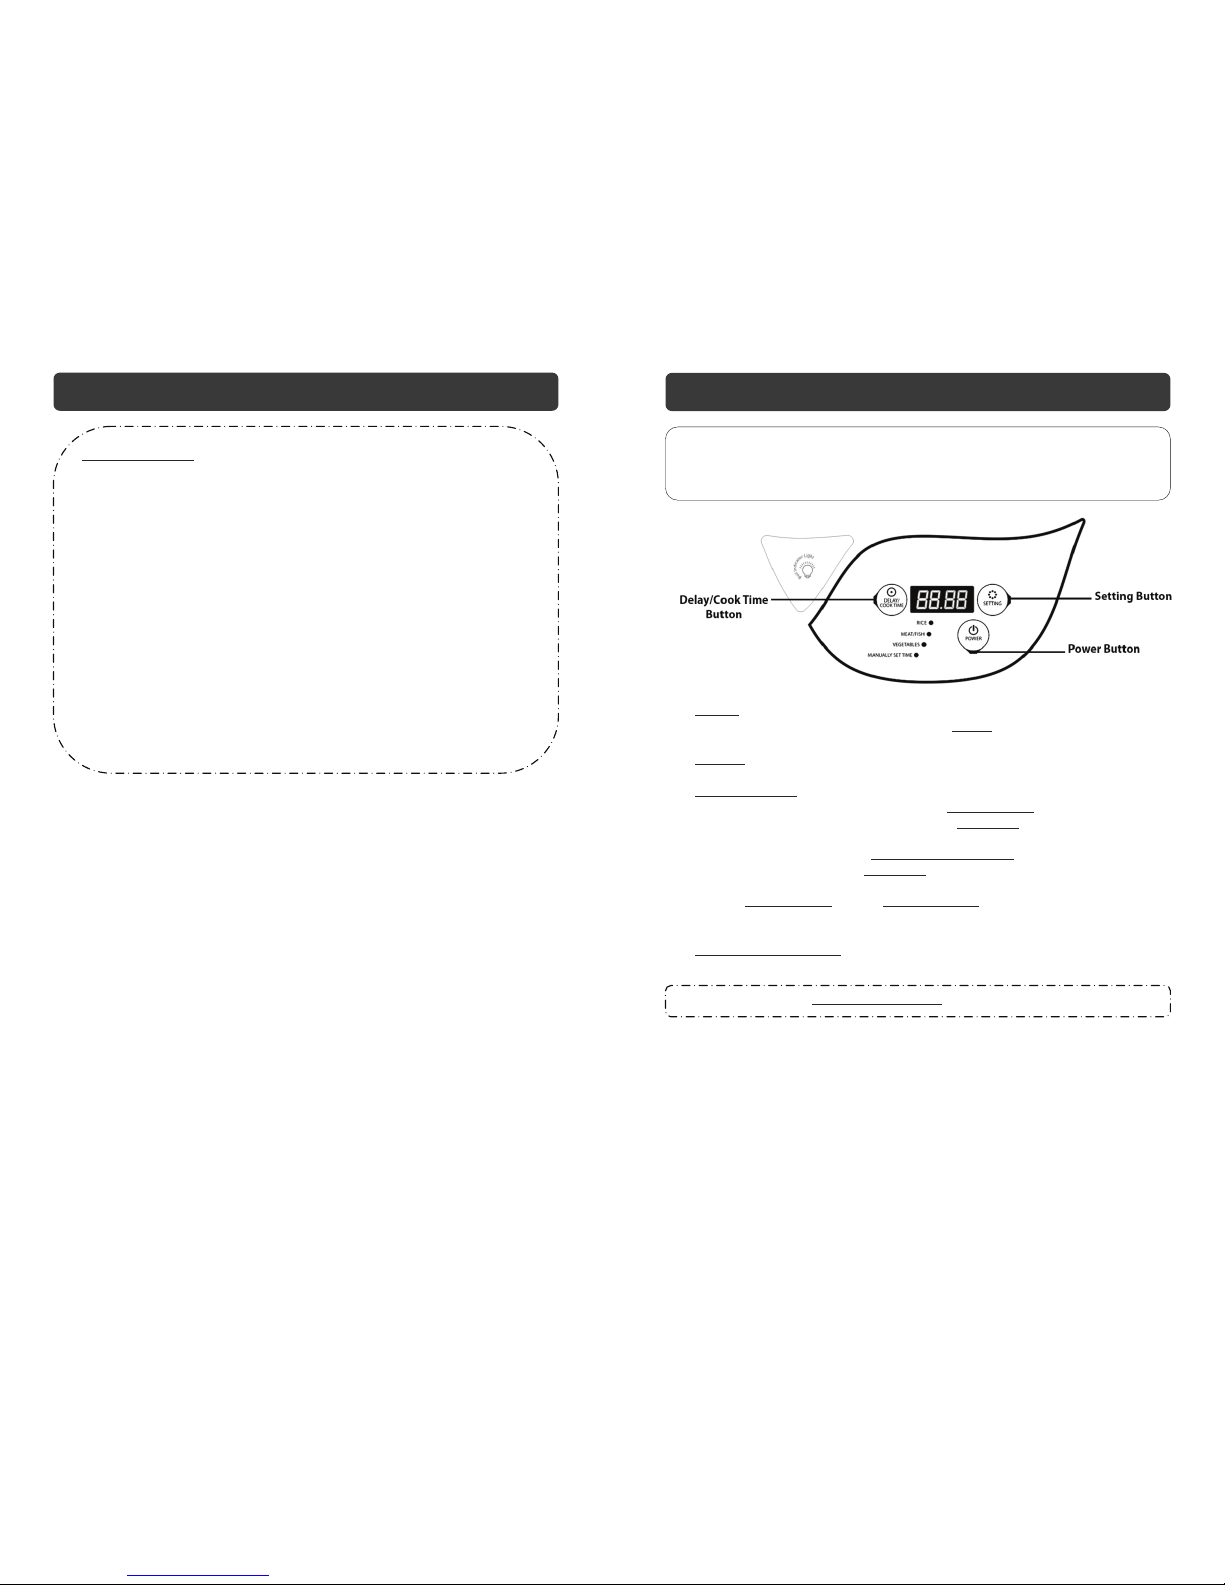
OPERATING INSTRUCTIONS
Vegetable Function:
1. Plug the power cord into a standard 120V electrical outlet. You will hear a beep and the red
indicator light within the POWER button will begin blinking, indicating that the cooker is in
"Stand-by" mode.
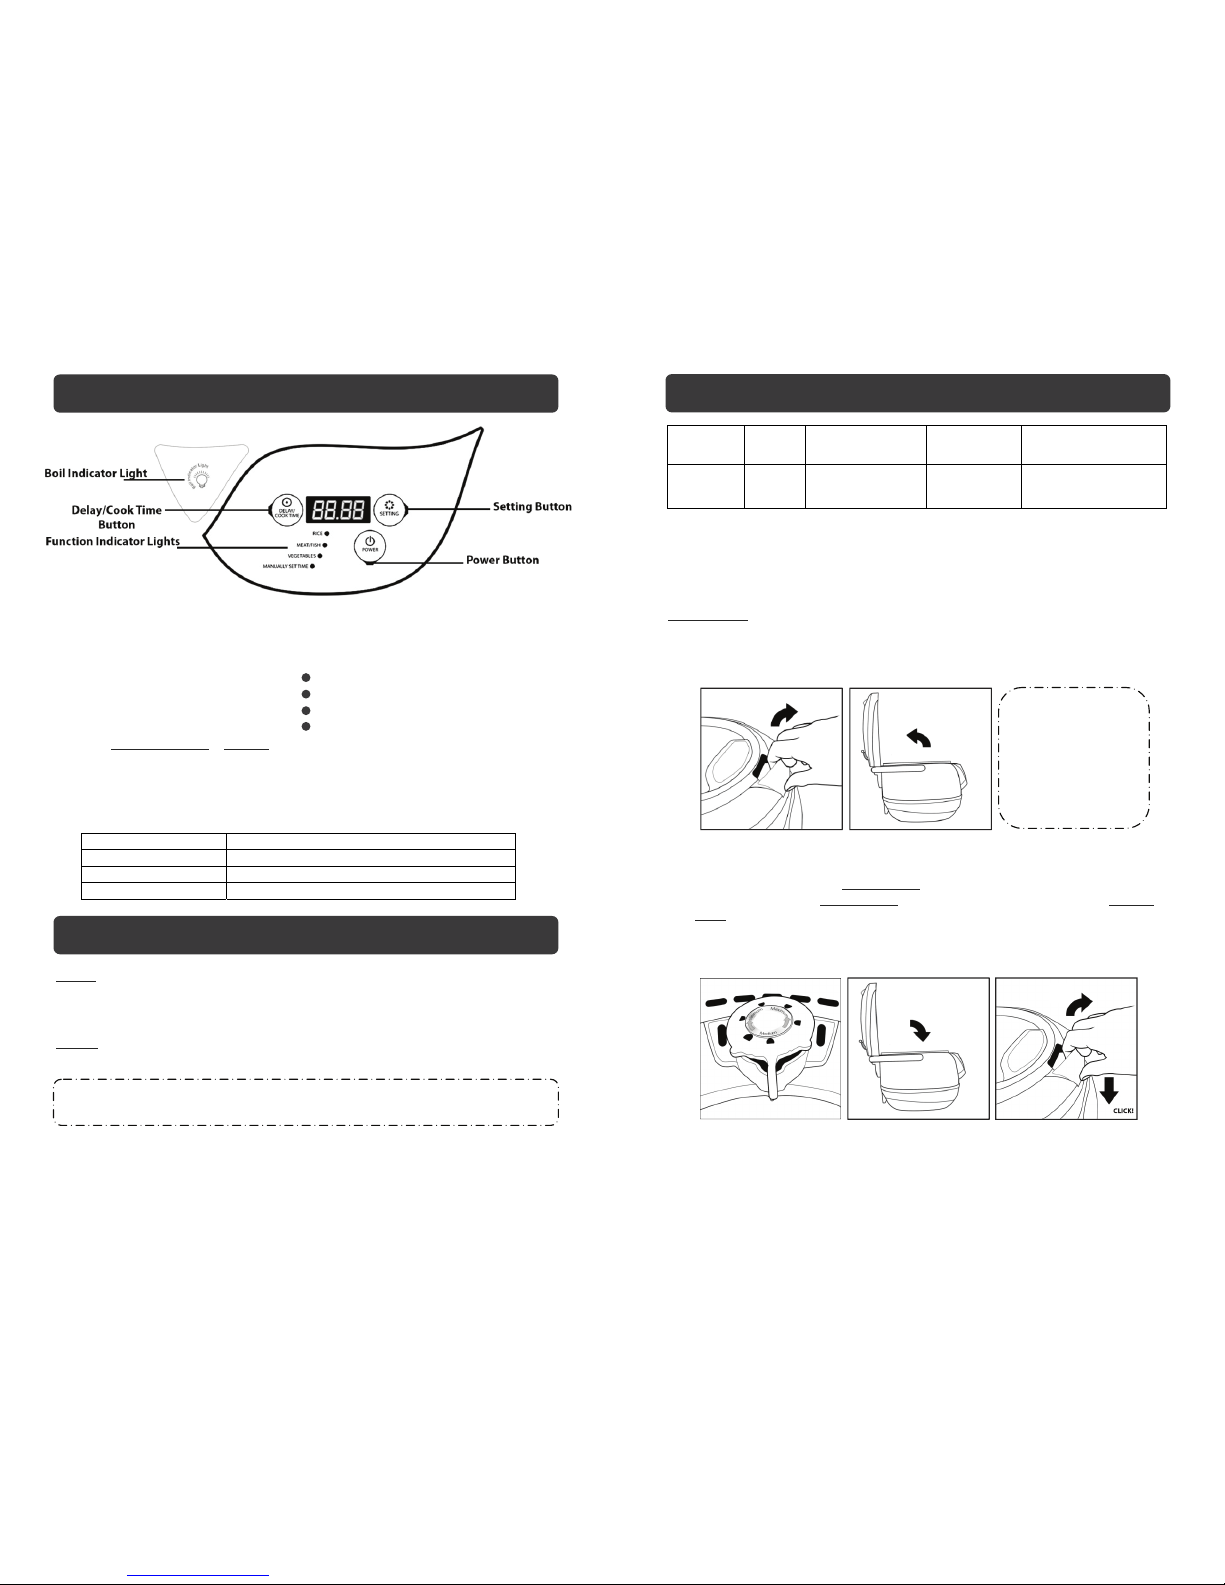
2. Prepare desired food and place into cooking pot, adjust the RELEASE VALVE to the
"Middle/Medium" position and close the lid.
3. Press the POWER button once. The Rice function is the default cooking function and the
display screen will show "A---".
4. Press the SETTING button four times to select the Vegetable function. The blue indicator light
next to the word Vegetable will begin blinking.
Note: This function offers three pre-programmed timing options– 5, 8, and 10 minutes—for
preparing your favorite dishes.
5. The display screen will show "C0:05", indicating that a pre-set cooking time of 5 minutes will
commence. Pressing the SETTING button a fifth time will change the display to show "C0:08",
indicating that a pre-set cooking time of 8 minutes will commence. Pressing the SETTING
button a sixth time will change the display to show "C0:10", indicating that a pre-set cooking
time of 10 minutes will commence. Choose the desired cooking time accordingly.
¾NOTE:If you wish to manually add more time to any of the preset times, simply press the
DELAY/COOK TIME button. Cooking time will increase by 1 minute if pressed once and by 10
minutes if held down. The unit can be set to cook for up to 4 hours.
6. Once you have reached your desired cook time, there is no need to push any other button, the
selected cooking time will flash 10 times and the display screen will then show "-" scrolling
vertically on the left hand side of the display indicating that the unit is in "heating" mode.
7. The unit will automatically begin the heating process and the Boil Indicator Light will illuminate
blue.
8. Once the unit begins the cooking process, it will display a static "P" on the left hand side of the
display screen and the Boil Indicator Light will turn off.
9. Once cooking is complete, the cooker will enter "Keep Warm" and "bb:00" will appear on the
display.
¾NOTE: Food can be kept warm up to 4-hours. Additional time may cause a change in flavor,
appearance and cause food to spoil.
10. After cooking is finished, push the POWER button once. The blue display will shut off and the
red POWER light will begin blinking to indicate it is now in "Stand-by" mode. Remove the
contents of the inner pot and serve. Unplug the unit.
Manually Set Time Function:
1. Plug the power cord into a standard 120V electrical outlet. You will hear a beep and the red
indicator light within the POWER button will begin blinking, indicating that the cooker is in
"Stand-by" mode.
2. Prepare desired food and place into cooking pot, adjust the RELEASE VALVE to the
"Middle/Medium" position and close the lid.
3. Press the POWER button once. The Rice function is the default cooking function and the
display screen will show "A---".
4. Press the SETTING button seven times to select the Manually Set Time function. (The blue
indicator light next to the words Manually Set Time will begin blinking.
5. The display screen will show "0:00".
15
OPERATING INSTRUCTIONS
6. Press the DELAY/COOK TIME button to set your desired cook time. Cooking time will increase
by 1 minute if pressed once and by 10 minutes if held down. The unit can be set to cook for up
to 4 hours.
7. Once you have reached your desired cook time, there is no need to push any other button, the
selected cooking time will flash 10 times and the display screen will then show "-" scrolling
vertically on the left hand side of the display indicating that the unit is in "heating" mode.
8. The unit will automatically begin the heating process and the Boil Indicator Light will illuminate
blue.
9. Once the unit begins the cooking process, it will display a static "P" on the left hand side of the
display screen and the Boil Indicator Light will turn off.
10. Once cooking is complete, the cooker will enter "Keep Warm" and "bb:00" will appear on the
display.
¾NOTE: Food can be kept warm up to 4-hours. Additional time may cause a change in flavor,
appearance and cause food to spoil.
11. After cooking is finished, push the POWER button once. The blue display will shut off and the
red POWER light will begin blinking to indicate it is now in "Stand-by" mode. Remove the
contents of the inner pot and serve. Unplug the unit.
HOW TO USE THE D
DE
EL
LA
AY
Y
T
TI
IM
ME
ER
R
F
FU
UN
NC
CT
TI
IO
ON
N:
:
If you wish to program your cooker to automatically cook prepared food at a later time, you can set
the cooker to delay the start of cooking by up to 24-hours. This setting is used in combination with
the Pre-set Function Buttons as well as the Manually Set Time function.
1. Plug the power cord into a standard 120V electrical outlet. You will hear a beep and the red
indicator light within the power button will begin blinking, indicating that the cooker is in
"Stand-by" mode.
2. Prepare desired food and place into cooking pot, adjust the RELEASE VALVE to the
"Middle/Medium" position and close the lid.
3. DO NOT PRESS THE POWER BUTTON WHEN USING THE DELAY TIMER FUNCTION.
4. Press the DELAY/COOK TIME button once, the display screen will show 0:30.
5. Continue to press the DELAY/COOK TIME button until you've reached the desired delay time,
pressing it once for each additional 30 minutes or hold for rapid increase up to 24-hours. The
maximum Delay period is 24-hours in half-hour increments. Pressing the DELAY/COOK TIME
button again after reaching the 24-hour setting will automatically reset the delay timer to zero.
(The time displayed on the screen shows how long the user wants the unit to wait before the
cooking process begins.)
Ex: If you wish to program the cooker to automatically turn on in 3-hours, press the
DELAY/COOK TIME button once, then press the DELAY/COOK TIME button 5 more times until
the display screen shows 3.00.
6. After choosing the desired delay time, choose to cook one of two ways by either using one of
the Pre-set Function buttons or by using the Manually Set Time function.
Option 1: Select one of the three (Rice, Meat/Fish, or Vegetables) Pre-set Function buttons by
pressing the SETTING button and proceed to follow the instructions on pages 12 -14 from
"Rice Function" through "Vegetable Function."
Option 2: Select the Manually Set Time function by pressing the SETTING button seven times
until the blue indicator next to Manually Set Time begins blinking. Then proceed to follow the