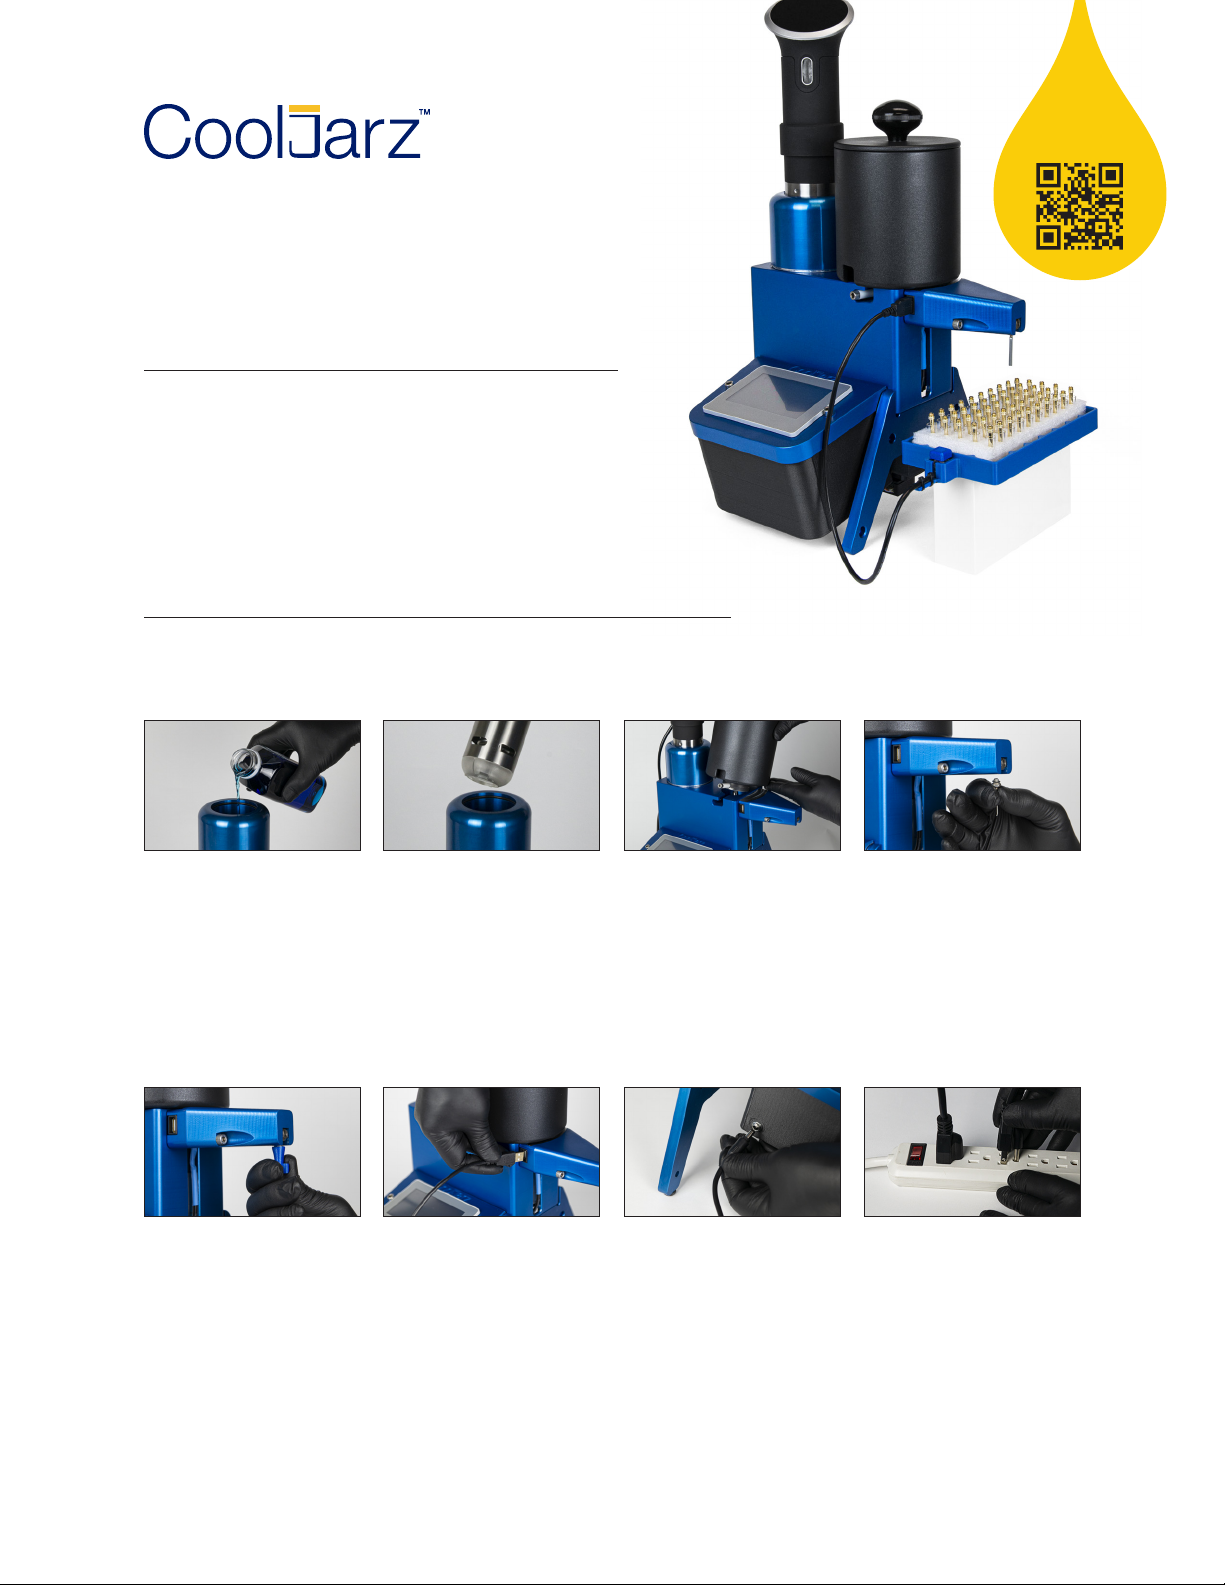
A10 System Setup:
1. Power up A10 system by
activating button on power
surge strip.
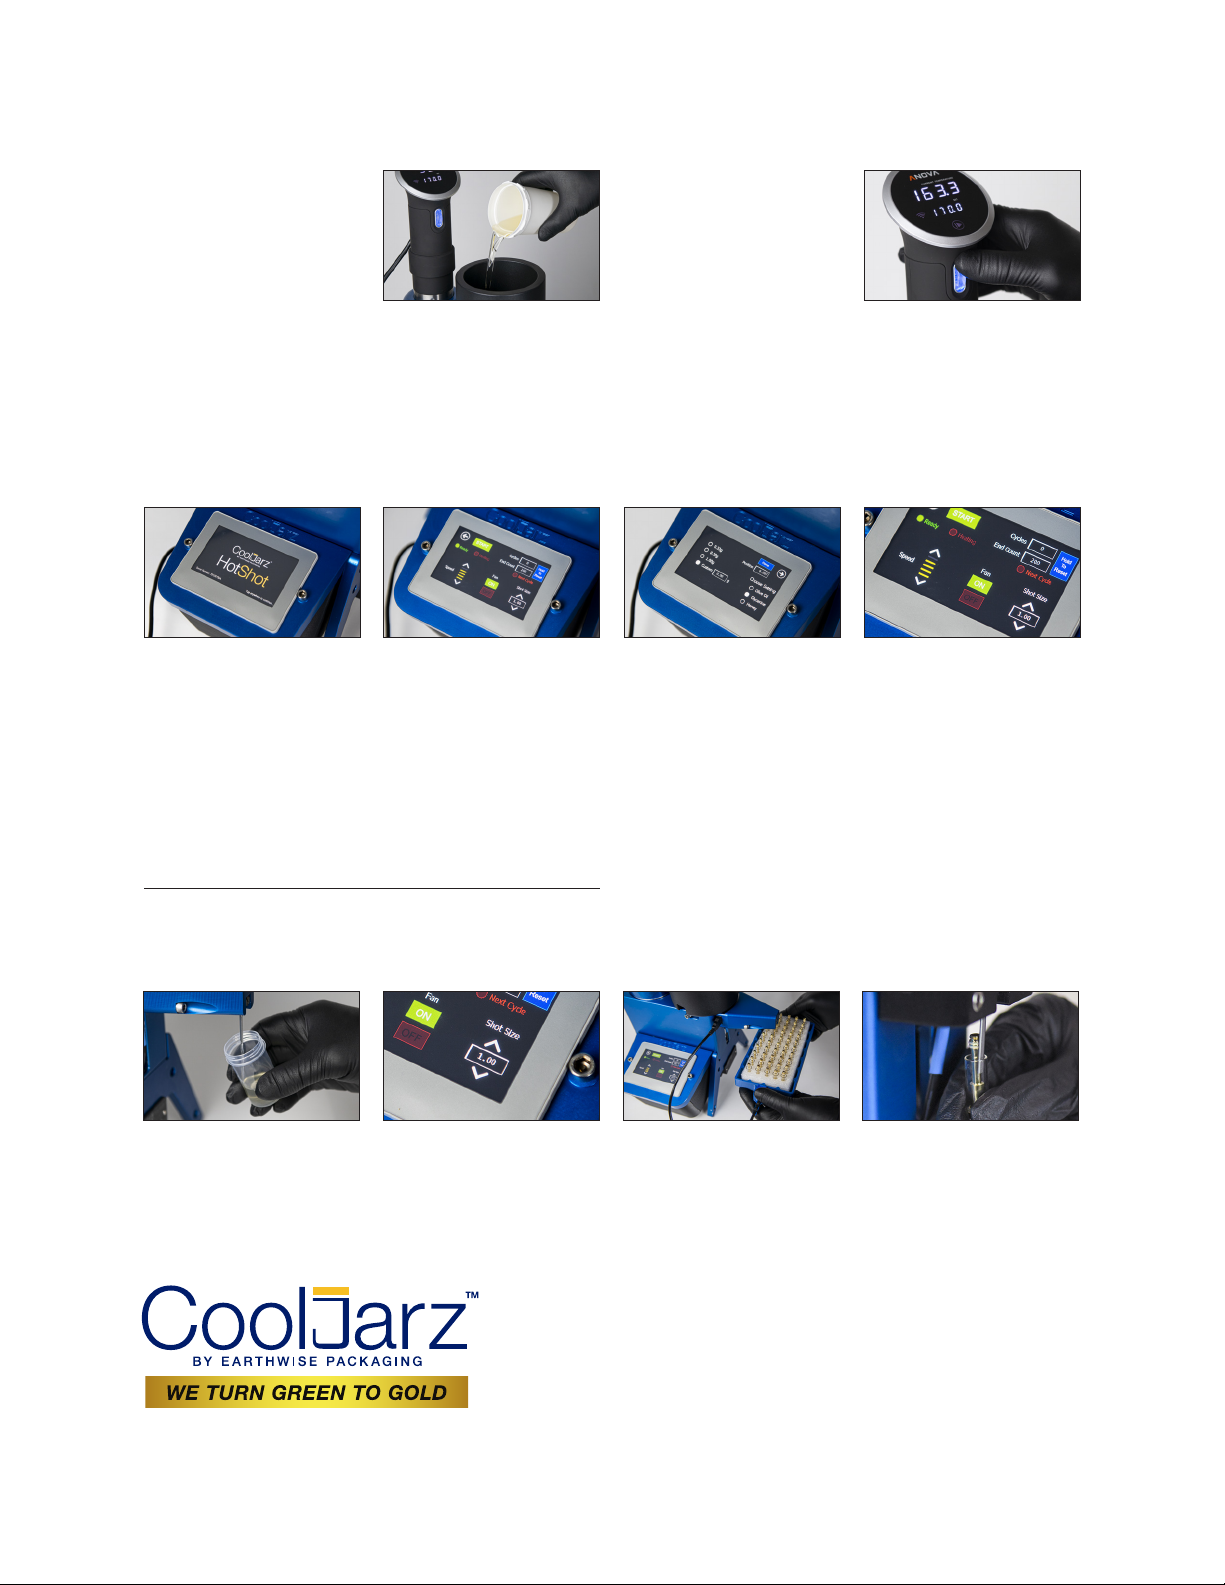
2. Power up Anova® heating
element by pressing red button on
front of display panel. Button will
turn white when activated. Note:
Press and hold same button for few
seconds to switch from Fahrenheit
to Celsius temperature readings.
Press and hold again to switch back.
Select scale you prefer
3. Pour up to 1,000 grams of
pre-heated oil into black non-stick
coated A10 oil tank. Cover with lid.
4. Model 1500 — Adjust desired oil
temperature with thumb wheel on
front of Anova® heating element
display. Adjustments are available in
half-degree increments. Note: Upon
initial startup, adjust heat to 170-
degrees Fahrenheit to fully heat
system and activate on-board heat
switch. Once system is fully heated,
adjust thumb switch to set desired
operating temperature at no less
than 160-degrees minimum
Fahrenheit. IMPORTANT: When
system is fully heated, actual oil
temperature will be 20 to 30
degrees lower than Anova® setting.
We recommend you use heat gun to
determine actual oil temperature,
then adjust Anova® as necessary to
achieve desired oil temperature
5. Model 750 — Adjust desired oil
temperature with thumb wheel on
front of Anova® heating element
display. Adjustments are available in
half-degree increments. Note: Model
750 is designed for processing
low-viscosity oils at temps ranging
from 95 to 115 degrees. Actual
oil temperature will be 20 to 30
degrees lower than Anova® setting.
A10 System Operation:
1. Prime/purge injection system by
holding container under needle and
pressing selected fill switch several
times until desired oil increments are
achieved. Return test oil to main
tank so no waste.
4. Model 750 — Fill carts one at a
time. Remove cart from foam block,
position under needle, press foot
pedal to inject pre-measured fill,
then return cart to foam block.
5. Fine-tune fills by adjusting
VISCOSITY, SPEED and SHOT SIZE
settings to achieve optimum fill rate.
2. Test cart volume fills by first
weighing an empty cart, then
weighing again after fill. Use
up-and-down arrows on
touchscreen to adjust desired
volume. Adjustments can be made
in .01 gram increments.
3. Model 1500 — To fill carts using
SpeedTray™, cut vendor-supplied
100-cart foam block in half, place
50-cart block in SpeedTray™,
position needle in corner cart, and
inject pre-measured fill using on-
board switch. Repeat for balance of
carts in tray. To use foot- activated
fill switch, position needle in cart in
100-cart foam block, fill half the
carts, reverse block, then fill
remaining carts. Note: No need to
remove carts from block. If you
choose to fill fewer carts so you can
cap quickly, simply cut foam block
into desired fill quantities
6. Once system is activated, main
A10 system touchscreen will light up
to show CoolJarz™ logo, model
serial number, etc. Panel will not
display operational controls until A10
system and oil are fully heated.
Note: If attempts are made to
operate system prior to full heating,
a “WAITING FOR HEATER”
message will be displayed
7. Once operational controls are
displayed on touchscreen, A10
system is ready for use. Use
touchscreen for all inputs.
8. Model 1500 — Select VISCOSITY
from one of three options: olive oil,
glycerin and honey. Select option that
best describes the estimated viscosity
of your batch at fill temperature.
9. Model 750 — Select VISCOSITY
from one of two options: olive oil
and glycerin. Select option that best
describes the estimated viscosity of
your batch at fill temperature.
10. Select SHOT SIZE from one of
three options: .33 grams, .5 grams
and 1 gram. A custom setting is also
available. Note: See “System
Operation” instructions below to test
and adjust volume fills. Adjustments
can be made in .01 gram increments
11. Select SPEED using up/down
arrows on 5-bar graph. Each bar
represents a 20% increase or
decrease in fill speed.
12. Select END COUNT to input the
number of fills you wish to perform.
Once desired fill count is reached,
the A10 HotShot will stop the flow of
oil. To reset, press HOLD TO RESET
for 5 seconds to zero out reading.
CoolJarz™
is
a
division
of
Earthwise
Packaging,
Inc.
|
714-602-2169
|
[email protected] |
12
Goddard
W
ay
,
Irvine,
CA
92618
Visit hotshot.cooljarz.com for full demo video plus factory-direct pricing!