TonerRefillKits ReChargX RX126 User manual

TonerRellKits.com RechargX™ RX126 v2.01
Mon - Fri 8am - 5pm ET © 1995-2011 ReChargX™, EmptyX, TonerRellKits and TonerRellKits.com, the TonerRellKits logo, the 2013.12.12
800.527.3712 or 352.343.7533 ReChargX™ and EmptyX logos are trademarks owned by TonerRellkits, LLC. All rights reserved. Page 1 of 7
ReChargX™ RX126 Instructions
For use in the Dell GC502, J9833 and the Samsung ML-1610D2
and SCX-4521D3 toner cartridges
The Dell GC502, J9833 and the Samsung
ML-1610D2, SCX-4521D3 are the toner
cartridges most frequently found in the
Dell 1100, 1110, the Samsung ML-1610,
SCX-45211 and all other machines using
the same underlying “engine” (gure1).
This toner cartridge is quite easy to rell using
our ReChargX™ RX126 Premium Print Toner
Rell Kit.
Within these ReChargX™ RX126 Premium
Print Toner Rell Kit instructions, we will be
adding new toner and replacing the reset fuse.
Step 1: Locate the Imaging Drum
The imaging drum can be found on the underside
of the toner cartridge, simply ip the cartridge
over so that the blue/green imaging drum
(shown by the arrows in gure 2) is facing up
and the base of the handle is toward your body.
Step 2: Cover the Imaging Drum
This step is recommended since the imaging
drum is completely exposed and easy to damage
by scratching or contaminating with ngerprints,
affecting it’s ability to create a quality image.
Take a sheet of paper and tape it to the bottom
of the cartridge as shown in gure 3.
Figure 1: The Samsung ML-1610D2 toner cartridge
é é
Figure 2: Locate the imaging drum
Figure 3: Tape a piece of paper to the bottom of the
toner cartridge

TonerRellKits.com RechargX™ RX126 v2.01
Mon - Fri 8am - 5pm ET © 1995-2011 ReChargX™, EmptyX, TonerRellKits and TonerRellKits.com, the TonerRellKits logo, the 2013.12.12
800.527.3712 or 352.343.7533 ReChargX™ and EmptyX logos are trademarks owned by TonerRellkits, LLC. All rights reserved. Page 2 of 7
Fold the paper down and over the leading edge
of the cartridge, then turn the cartridge over
and tape the piece of paper to the top of the
cartridge, as well (gure 4).
Step 3: Orient the Toner Cartridge
Stand the cartridge up, so the right hand side of
the cartridge is facing up (gure 5).
Step 4: Remove the Screws Holding the
End Cap in Place
In order to remove the cartridge end cap, you
must rst remove the two screws holding the end
cap in place, shown by the arrows in gure 5.
Use a small phillips-head screw driver to remove
the screws (gure 6).
Figure 4: Tape the piece of paper to the top of the toner
cartridge
è
è
Figure 5: Orient the toner cartridge so the right side is
facing up
Figure 6: Remove the screws holding the cartridge end
cap in place

TonerRellKits.com RechargX™ RX126 v2.01
Mon - Fri 8am - 5pm ET © 1995-2011 ReChargX™, EmptyX, TonerRellKits and TonerRellKits.com, the TonerRellKits logo, the 2013.12.12
800.527.3712 or 352.343.7533 ReChargX™ and EmptyX logos are trademarks owned by TonerRellkits, LLC. All rights reserved. Page 3 of 7
Step 5: Remove the End Cap
To remove the end cap most easily, lay the
cartridge down on the table so the top of the
cartridge is facing up.
Next, use a small at blade screwdriver to gently
pry the end cap away from the body of the toner
cartridge (gure 7).
Step 6: Remove the End Cap Completely
When the end cap has been wedged away from
the body of the cartridge, wiggle the end cap
while pulling it off of the cartridge to remove it
completely (gure 8).
Step 7: Locate the Toner Hopper Plug
Once again orient the toner cartridge so that the
right side is facing up.
With the right hand side of the cartridge facing
up, the toner hopper plug can be found just near
the hinge of the handle as shown by the arrow
in gure 9.
Figure 7: Gently pry the end cap away from the
cartridge body
Figure 8: Remove the end cap completely
í
Figure 9: Locate the toner hopper plug

TonerRellKits.com RechargX™ RX126 v2.01
Mon - Fri 8am - 5pm ET © 1995-2011 ReChargX™, EmptyX, TonerRellKits and TonerRellKits.com, the TonerRellKits logo, the 2013.12.12
800.527.3712 or 352.343.7533 ReChargX™ and EmptyX logos are trademarks owned by TonerRellkits, LLC. All rights reserved. Page 4 of 7
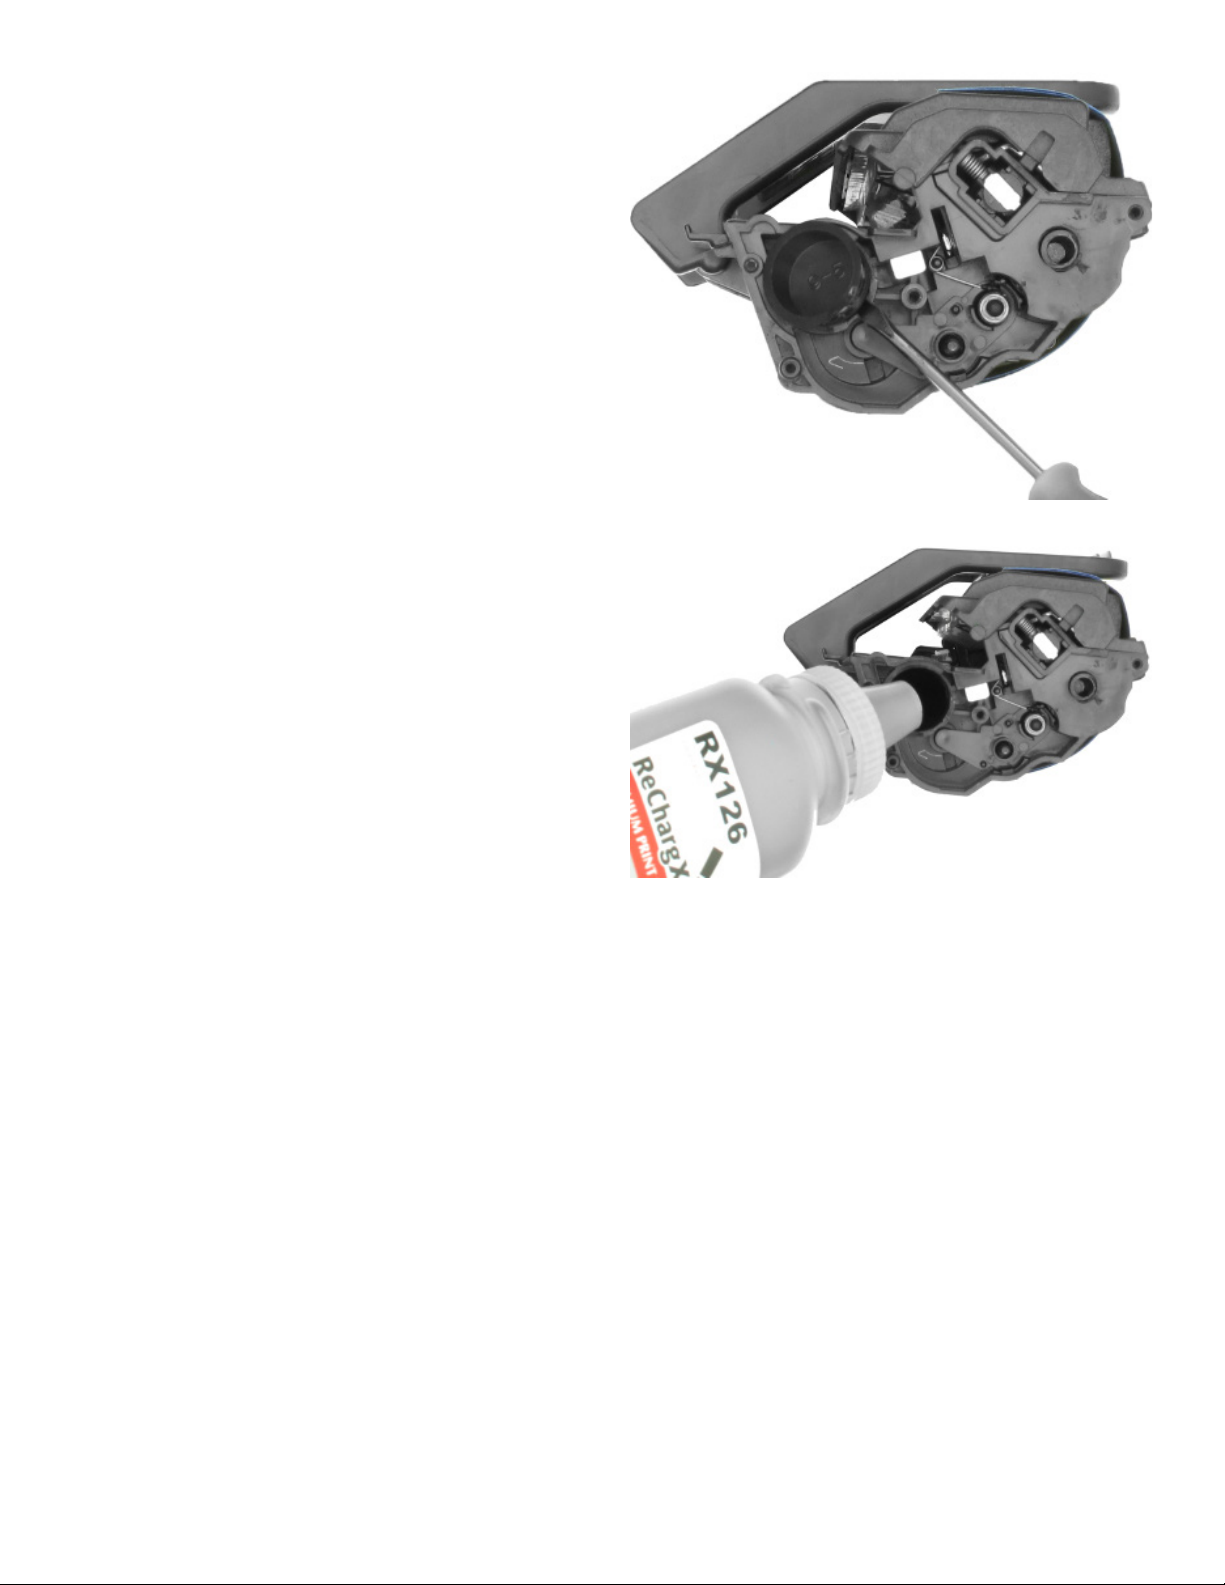
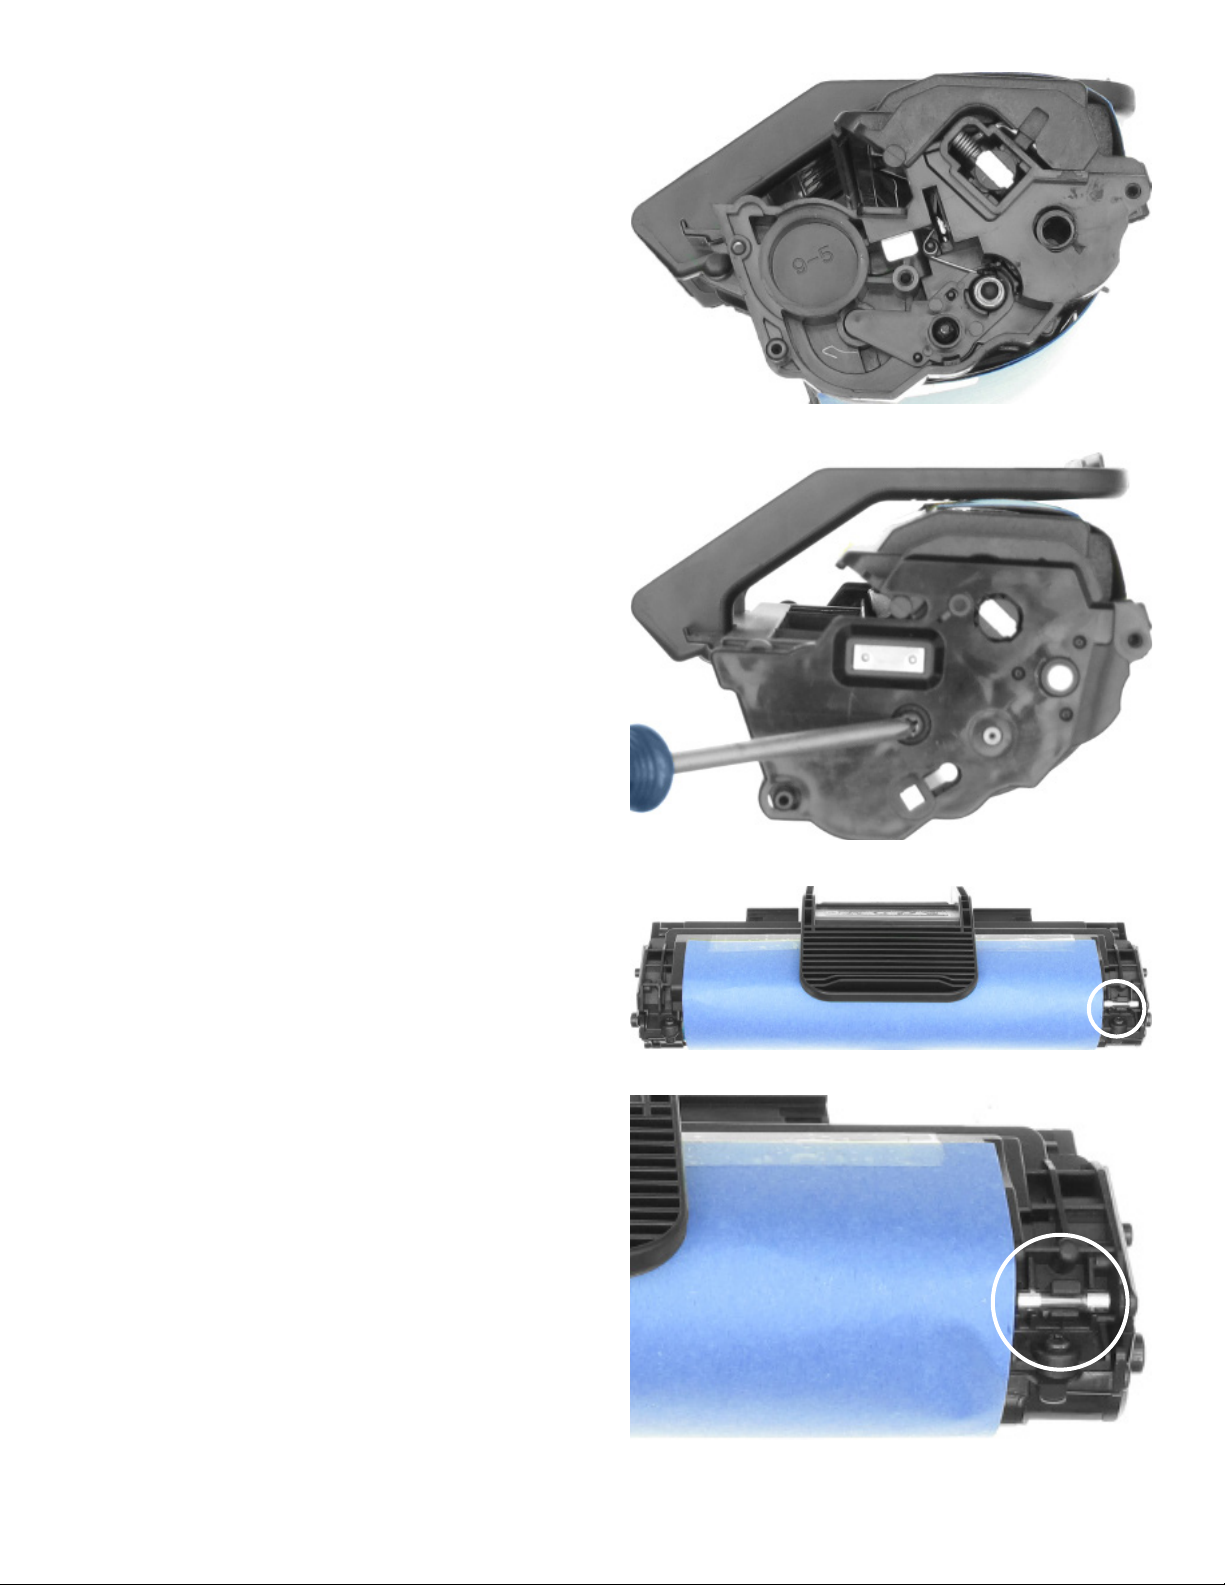
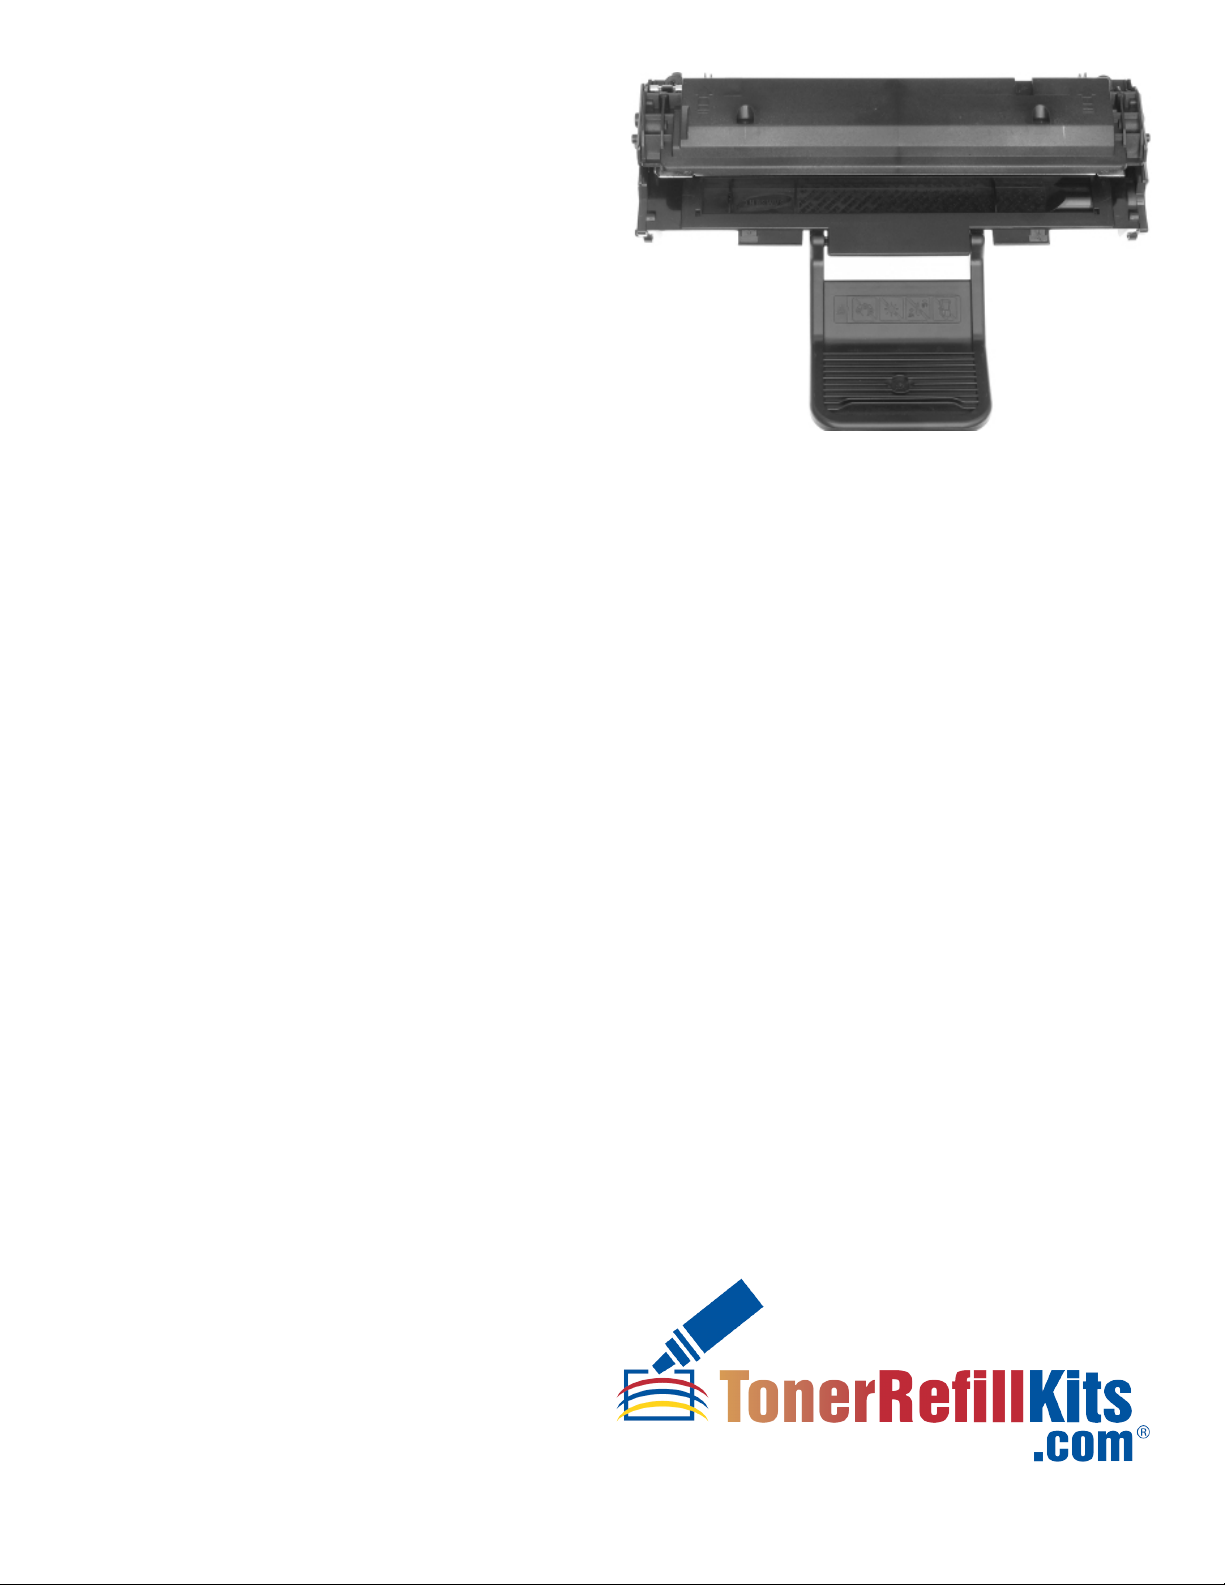
Step 8: Remove the Toner Hopper Plug
We recommend using the tip of a small at-blade
screwdriver to wedge up and under the plug.
Keep working your way around the lip of the
plug, wedging up on it, slowly moving the plug
up and out of the hole (gure 10).
We normally move around the plug until we
have it almost all of the way up and out of the
hole, then either use the screwdriver against the
plastic rim of the hole, using it as a fulcrum to
wedge the plug up and out until it is freed from
the hole, grab it with a pair of pliers, or if loose
enough, it can be pulled out with your ngers.
Step 9: Add ReChargX™ RX126 Premium
Print Toner to the Toner Hopper
Now we will ll the toner hopper with the
ReChargX™ RX126 Premium Print toner
.
To ensure the toner ows freely from the bottle
during lling, make certain the cap is screwed
tightly on the bottle, then gently rock/shake the
bottle to free up the toner that may have settled
during shipping.
Next, remove the original cap from the bottle and
replace it with the plastic dispenser spout from
the ReChargX RX126 Toner Rell Kit.
To make the adding of the toner to the toner
hopper as easy and dust-free as possible, tilt the
end of the cartridge with the hole in it up at a
45 degree angle and slowly angle the dispenser
spout on the bottle of toner to meet up with the
hole, as shown in gure 11. Tilting the bottle
up a little more will start the toner owing into
the toner hopper.
NOTE: If at any point the toner stops owing,
simply stand the bottle upright to loosen the
toner and start the pouring process over again
(resist temptation to squeeze the bottle as it will
make a spill or mess more likely).
Fill the hopper until it appears to be full or until
it appears toner no longer ows easily into the
hopper (any toner left in the bottle can easily
be added in the future after you have done a
considerable amount of printing).
Figure 10: Remove the toner hopper plug
Figure 11: Fill the toner hopper

TonerRellKits.com RechargX™ RX126 v2.01
Mon - Fri 8am - 5pm ET © 1995-2011 ReChargX™, EmptyX, TonerRellKits and TonerRellKits.com, the TonerRellKits logo, the 2013.12.12
800.527.3712 or 352.343.7533 ReChargX™ and EmptyX logos are trademarks owned by TonerRellkits, LLC. All rights reserved. Page 5 of 7
Step 10: Install the New Toner Hopper Plug
When you have nished pouring the ReChargX™
toner into the hopper, insert the replacement
plug, found in your ReChargX™ RX126 Rell Kit,
into the hole and push it down rmly until it snaps
into place and sits ush against the side of the
toner hopper (gure 12).
Step 12: Reinstall the End Cap
Wiggle the end cap down into place, making
certain it sits ush against the side of the
cartridge before reinstalling the screws in the
next step. Reinstall the two small philips-head
screws into the holes marked by the arrows
(gure 13).
Step 13: Orient the Toner Cartridge
Orient the toner cartridge so that the imaging drum
is closest to your body and the handle’s pivot point
or joint is facing away from you (gure 14).
Step 14: Locate the Reset Fuse
In this orientation the reset fuse will be found
along the right side of the toner cartridge, as
shown by the white circles in gures 14 and 15.
Figure 12: Install the new toner hopper plug
î
î
Figure 13: Reinstall the end cap
Figure 14: Orient the toner cartridge
Figure 15: Locate the reset fuse

TonerRellKits.com RechargX™ RX126 v2.01
Mon - Fri 8am - 5pm ET © 1995-2011 ReChargX™, EmptyX, TonerRellKits and TonerRellKits.com, the TonerRellKits logo, the 2013.12.12
800.527.3712 or 352.343.7533 ReChargX™ and EmptyX logos are trademarks owned by TonerRellkits, LLC. All rights reserved. Page 6 of 7
Step 15: Remove the Old Reset Fuse
Using a small at blade screwdriver gently pry
the old reset fuse up and out of its location
(gure 16).
Step 16: Install the new Reset Fuse
With the old fuse removed install the new reset
fuse by simply snapping it into place (gure 17).
Step 17: Removing the Piece of Paper
With the cartridge relled, remove the paper
from both sides of the imaging drum, as shown
in gure 14.
This piece of paper can now be discarded.
Figure 16: Remove the old reset fuse
Figure 17: Install the new reset chip
Figure 14: Remove the paper from the toner cartridge

TonerRellKits.com RechargX™ RX126 v2.01
Mon - Fri 8am - 5pm ET © 1995-2011 ReChargX™, EmptyX, TonerRellKits and TonerRellKits.com, the TonerRellKits logo, the 2013.12.12
800.527.3712 or 352.343.7533 ReChargX™ and EmptyX logos are trademarks owned by TonerRellkits, LLC. All rights reserved. Page 7 of 7
Congratulations – You’re Finished!
Congratulations! You have successfully relled
your Dell GC502, J9833, Samsung ML-1610D2
or SCX-4521D3 toner cartridge.
Enjoy your savings. You’ve just saved $35.04
by relling your toner cartridge!
-End of ReChargX™ RX126 Instructions-
Customer Service / Technical Support
To further help your ReChargX™ RX126 Toner
Rell procedure, we are always ready, willing
and happy to answer any of your questions or
comments via technical support.
Please contact us at 352.343.7533 or
800.527.3712 M - F 8am - 5pm ET.
Additionally, you may also chat with us using
Live Help on our website (M - F 8am - 5pm ET)
or submit a technical support ticket at:
www.TonerRellKits.com/Tech_Support.php
Table of contents
Other TonerRefillKits Printer Accessories manuals

TonerRefillKits
TonerRefillKits ReChargX RX077 User manual

TonerRefillKits
TonerRefillKits ReChargX RX180 User manual

TonerRefillKits
TonerRefillKits ReChargX RX217 User manual

TonerRefillKits
TonerRefillKits brother ReChargX RX350 User manual

TonerRefillKits
TonerRefillKits ReChargX RX161 User manual

TonerRefillKits
TonerRefillKits ReChargX RX076 User manual

TonerRefillKits
TonerRefillKits ReChargX RX463X User manual

TonerRefillKits
TonerRefillKits ReChargX RX201A User manual

TonerRefillKits
TonerRefillKits ReChargX RX139 User manual

TonerRefillKits
TonerRefillKits ReChargX RX167 User manual