Cooper Tools Cleco LIVEWIRE 47BA B Series User manual

Instruction Manual
P1906BA/EN
2009-01
47BA…B…DC
Cordless EC tool
For additional product information visit our website at http://www.cooperpowertools.com

2 P1906BA/EN 2009-01 06a_ Deckblatt en.fm, 09.02.2009
For this Instruction Manual
This Instruction Manual is a – translation of the original Instruction Manual – and intended for all
persons who work with this tool but do not do any programming work.
The Instruction Manual
• provides important notes for safe and effective use.
• describes the function and operation of the cordless EC tool.
• serves as a reference work for technical data, service intervals
and spare part orders.
• provides information on options.
For more information on the operation of the 47BA see
• system handbook controller m-Pro-400S/SE
• instruction manual accupack 935377, no. P1970E
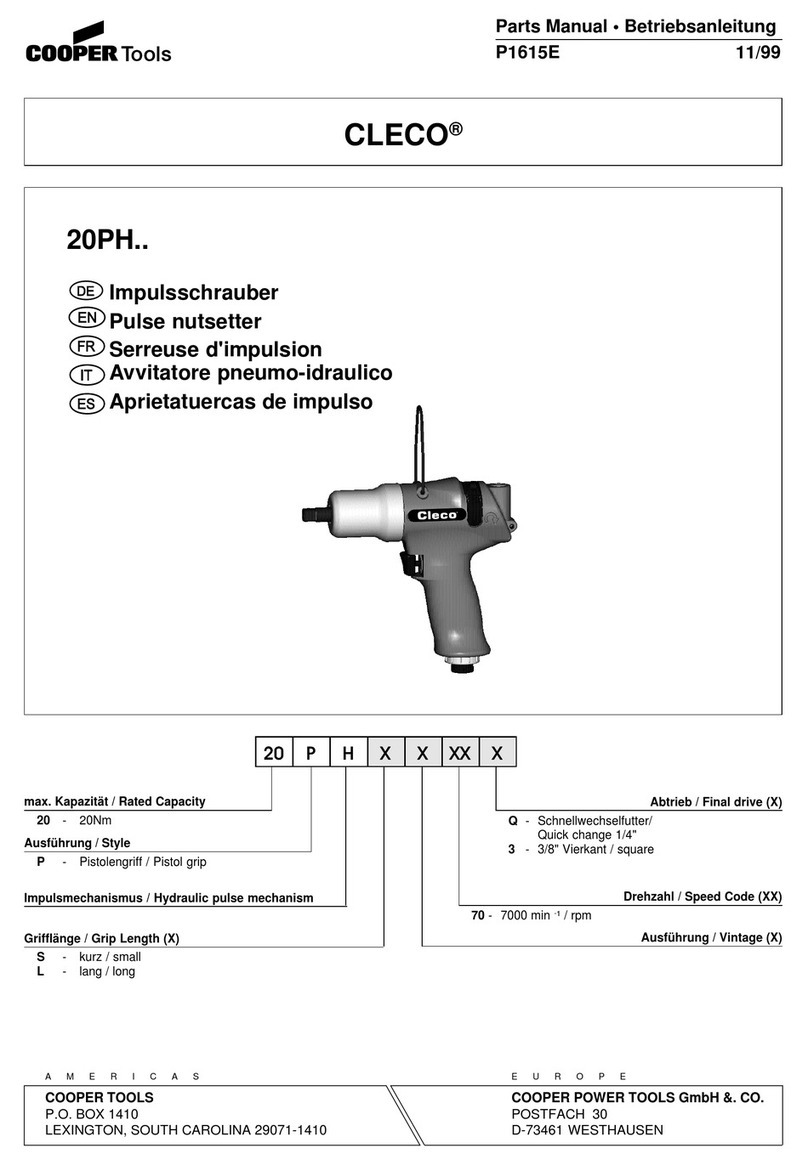
Nomenclature
47 B A W … B … … DC
Special style DC
Series Attachment
47 AM3 – Square 3/8“
AH4 – Square 1/2“
Power Max. Torque
B– Battery 15 – 15 Nm
21 – 21 Nm
28 – 28 Nm
35 – 35 Nm
50 – 50 Nm
70 – 70 Nm
Tool Style Battery
A– Angle B– 26 V
Feature 1 (Data Transmission) Feature 2 (Scanner)
W– WLAN: WEP, WPA S – Barcode Scanner
– None

06a_ Deckblatt en.fm, 06.02.2009 P1906BA/EN 2009-01 3
Identification text:
Identification graphic:
Copyright protection
Cooper Tools reserves the right to modify, supplement or improve the document or the product
without prior announcement. This document may not be reproduced in any way, shape or form,
in full or parts thereof, or copied to another natural or machine readable language or to a data
carrier, whether electronic, mechanical, optical or otherwise without the express permission of
Cooper Tools.
47BA represents all models of the cordless EC tool as described here.
PS represents all models of power supply as described here:
Accupack / Power Module
➔refers to required actions.
• refers to lists.
cursive refers menu items, i. e.: Diagnostics
<…> refers elements, that have to be selected or deselected, such as buttons or control
boxes, i.e.: <F5>
Courier refers names of paths and files are written in Courier font
i.e.: setup.exe
\ refers selection of an item from the menu i.e.: file \ print
refers a movement in one direction.
refers function and force.

4 P1906BA/EN 2009-01 06a_ Deckblatt en.fm, 06.02.2009

P1906BA-EN_2009-01_47BA_B_DCIVZ.fm, 06.02.2009 P1906BA/EN 2009-01 5
Contents
1 Safety 7
1.1 Warnings and notes .............................................................................. 7
1.2 Basic requirements for safe working practices ..................................... 8
1.3 Operator training................................................................................... 8
1.4 Personal protective equipment ............................................................. 8
1.5 Designated use..................................................................................... 9
1.6 Codes and standards............................................................................ 9
1.7 Noise and vibration ............................................................................... 9
2 Scope of supply, transport, handling and storage 10
2.1 Items supplied..................................................................................... 10
2.2 Transport ............................................................................................ 10
2.3 Handling Instructions .......................................................................... 10
2.4 Storage ............................................................................................... 10
3 Product description 11
3.1 General description............................................................................. 11
3.2 Operation and functional elements ..................................................... 12
4 Accessories 17
5 Before initial operation 18
5.1 Using reaction bar............................................................................... 18
5.2 Setting up tool holder.......................................................................... 18
5.3 Ambient conditions ............................................................................. 18
5.4 Charging the battery ........................................................................... 18
5.5 Changing the WLAN chip ................................................................... 19
6 First Operation 19
6.1 Carrying out the rundown ................................................................... 19
6.2 Operating status ................................................................................. 19
7LCDdisplay 21
7.1 Result display ..................................................................................... 21
7.2 Status display...................................................................................... 22
7.3 Operating menu .................................................................................. 25
7.4 System error messages ..................................................................... 32

6 P1906BA/EN 2009-01 P1906BA-EN_2009-01_47BA_B_DCIVZ.fm, 06.02.2009
8 Maintenance 37
8.1 Cleaning instructions .......................................................................... 37
8.2 Service schedule ................................................................................ 37
9 Troubleshooting 39
10 Spare parts 43
10.1 Tool holder .......................................................................................... 44
11 Technical data 47
11.1 Dimensions in mm .............................................................................. 47
11.2 Dimensions of tool holder (Optional) .................................................. 49
11.3 Performance Data............................................................................... 50
11.4 Electrical data ..................................................................................... 50
12 Service 53
12.1 Recalibration....................................................................................... 53
13 Disposal 53

91b_1_5 en bedingt.fm, 06.02.2009 P1906BA/EN 2009-01 7
Safety 1
1Safety
1.1 Warnings and notes
Warning notes are identified by a signal word and a pictogram:
• The signal word describes the severity and the probability of the impending danger.
• The pictogram describes the type of danger.
WARNING!
Indicates a potentially hazardous situation
which, if not avoided, could result in death or serious injury.
CAUTION!
Indicates a potentially hazardous situation which, if not avoided, may result in minor or
moderate injury or property and environmental damage. If this warning is not observed, injuries,
property or environmental damage may occur.
Class 2 laser product
Class 2 laser scanners use a laser diode that produces a low-power visible light beam that is
comparable to a very bright source of light, such as the sun.
Do not look into the laser beam when the laser is on.
Doing so can cause damage to the eyes.
NOTE
General notes
include application tips and useful information but no hazard warnings.
LASER RADIATION
DO NOT LOOK INTO THE BEAM
CLASS 2 LASER
IN ACCORDANCE WITH
EN 60825-1:1994
P < 1mW;
λ= 630 nm

8 P1906BA/EN 2009-01 91b_1_5 en bedingt.fm, 06.02.2009
Safety
1
1.2 Basic requirements for safe working practices
You should read all instructions.
Nonobservance of the instructions below may result in electrical shock, burns and serious
injuries.
1.3 Operator training
All operators must be trained and experienced before operating the 47BA.
The 47BA may be repaired by authorized technicians only.
1.4 Personal protective equipment
When working
• Wear the protective goggles to protect against spurting metal splinters.
Danger of injury by being wrapped up in and caught by machinery
• Wear a hairnet.
• Wear close-fitting clothing.
• Do not wear jewelry.
CAUTION! Work area
➔ Ensure there is enough space in the work area.
➔ Keep the work area clean.
Electrical safety
➔ Protect the 47BA from rain and moisture. Use only in the inner zone (IP40).
➔ Follow the safety instructions printed on the battery and charger.
➔ Use 47BA only with power supply (PS) by Cooper Tools.
Safety of persons
➔ Ensure a secure standing position. Maintain balance.
➔ Make sure that the PS is securely installed before operating the 47BA.
➔ Hold the 47BA tightly in the hand –
be prepared for high short-term reaction torques.
➔ Use always reaction bar in higher torque applications such as above 50 Ft-lbs (68 Nm) or in
closed quarter areas, where injury to fingers could occur.
➔ Deposit 47BA only in the designated tool holder, see 10.1 Tool holder, page 44 – prevent
accidental operation.
➔ Do not open the battery. Contact with acid will cause injury.
➔ Do not look into the laser beam of tools with built-in barcode scanners.
➔ Follow generally valid and local safety and accident prevention rules.
Safe working with and around fastening tools
➔ Inspect sockets for visible damage and cracks.
Replace damaged sockets immediately.
➔ Disconnect the 47BA from the PS before replacing the sockets.
➔ Only use sockets for machine-controlled fastening tools.
➔ Make sure that the sockets are securely inserted.
91b_1_5 en bedingt.fm, 06.02.2009 P1906BA/EN 2009-01 9
Safety 1
1.5 Designated use
The 47BA is designed exclusively for fastening and releasing threaded fasteners.
The communication with the controller is allowed only over the following interface ports:
• Do not use it in areas where there is a risk of explosion.
• Do not open it or modify it structurally.
• Only use with accessory parts which are approved by the manufacturer
(see 4 Accessories, page 17).
• Do not use as a hammer or for re-bending.
1.6 Codes and standards
It is mandatory that national, state and local codes and standards be followed.
1.6.1 EMC
Industrial environment EMC limit class A.
The tool complies with the following EMC standards:
DIN EN 61000-6-4 Emitted interference
DIN EN 61000-6-2 Interference immunity
1.6.2 Data transmission
WLAN
EN 50371:2002
EN 301489-17 V1.2.1
EN 300328 V1.6.1
1.6.3 Barcode scanner
• 21CFR1040.10 and 1040.11
except for deviations in accordance with Laser Notice 50 of July 26, 2001.
• EN60825-1:1994+ A1:2002 +A2:2001
• IEC60825-1:1993+A1:1997+A2:2001
1.7 Noise and vibration
Noise level< 60 dB(A) free speed (without load) according to DIN EN ISO 15744.
Vibration values < 2.5 m/s² according to DIN EN ISO 20643.
Types Communications
All IrDA interface port of the tool holder, order no. 935290
47BAW... WLAN standard IEEE 802.11b

10 P1906BA/EN 2009-01 91b_1_5 en bedingt.fm, 06.02.2009
Scope of supply, transport, handling and storage
2
2 Scope of supply, transport, handling and storage
2.1 Items supplied
Check shipment for transit damage and ensure that all items have been supplied:
147BA
1Markingfoil
1 This instruction manual
1 Declaration of Conformity
1 Factory test certificate for transducers
2.2 Transport
Transport and store the 47BA in the original packaging. The packaging is recyclable.
2.3 Handling Instructions
2.4 Storage
For short-term storage and for protection against damage:
➔ Place the 47BA in the tool holder.
For storage longer than 100 hours:
➔ Disconnect battery from the 47BA.
The battery is discharged by the electronics integrated in the tool.
NOTE
The electronic assembly groups of the cordless EC tool may be destroyed or damaged before
use as a result of electrostatic discharge (ESD), which leads to immediate or later failure.
➔ To prevent damage, mount assembly groups only in an ESD
protective environment. Recommendation for an ESD work
station: Electroconductive desktop, antistatic wristband, suit-
able furniture, clothing, shoes, floor cover and grounding of all
components.
Object Time period Storage temperature
47BA without PS No guideline -25 °C to +40 °C (-13 to 104 °F)
Grafik: CANESPA

91b_1_5 en bedingt.fm, 06.02.2009 P1906BA/EN 2009-01 11
Product description 3
3 Product description
3.1 General description
• Sturdy, brushless motor with resolver.
Shutoff is torque/angle-controlled.
• LCD display with information on status, torque and angle.
• Green OK and red NOK LED display provides information
on the current fastening result.
• LED lighting makes it possible to find the screw point quickly.
• Clockwise/counterclockwise rotation
• Low vibration level
• Servo and fastening electronics are integrated in the 47BA.
• Fastening parameters are set with the controller or to a computer.
• Data is transmitted between the controller and tool via
- infrared (IrDA)
Parameters and rundown results are transmitted to the control or to a computer simply by
placing the 47BA in the tool holder.
- WLAN (IEEE 802.11b)
• Optionally, the tools are equipped with a 1D Linear barcode scanner.
• Built-in acoustic signal. The signal is activated after barcodes are scanned. It can also be
activated after NOK rundowns for a programmable time.

12 P1906BA/EN 2009-01 91b_1_5 en bedingt.fm, 06.02.2009
Product description
3
3.2 Operation and functional elements
This chapter describes operational and functional elements and their tasks in the order of their
respective item nos.
8
9
7
2
2
2
54
1 <F2>
2
6
3
2
Item Designation
1 Function keys <F1>, <F2>
2 LED display
3 Start button
4 Reverse switch
5 IrDA (infrared interface port)
6 Set torque – stick-on marking foil
7 LED lights for fast location of the fastening position
8Power supply (PS); accupack shown
9 LCD display with information on torque, angle and status
10 Barcode scanner
11 Wireless module
12 WLAN chip
11
10
1 <F1>
12

91b_1_5 en bedingt.fm, 06.02.2009 P1906BA/EN 2009-01 13
Product description 3
3.2.1 Function keys
Left function key <F1>
• Confirm error message
➔ Press once.
Programmable: Depending on how the key is programmed, actions can be carried out by
pressing it briefly.
•Exitmenu
➔ Press for two seconds.
Right function key <F1>
• Activate menu
➔ Press until the display shows the Main menu (for additional information, refer to 7.3 Operating
menu, page 25).
• Select functions, if menu is activated
➔ Press for two seconds. Alternatively, the start button can be pressed.
3.2.2 LED display
The LED display shows the respective operating status and the result of the last fastening
sequence (see 6.2 Operating status, page 19):
Software update
During Software Update, the actual programming process is indicated by rapid flashing alternat-
ing at irregular intervals between red and green.
LEDs Operating status Result
after screwing cycle
Steady light Green Active OK
Steady light Red Active NOK
Flashing light Green –
low frequency
Energy saver mode
Off Sleep
If Linking is selected on the controller:
Flashing light Green –
high frequency
Active / Settings: Linking Linking OK
Flashing light Red Active / Settings: Linking Linking NOK
NOTE
Do not interrupt programming by removing the PS during this phase.

14 P1906BA/EN 2009-01 91b_1_5 en bedingt.fm, 06.02.2009
Product description
3
3.2.3 Start button
The start button has according to settings 3 different functions:
• It activates the LED lighting.
➔ Press the start button halfway down and hold it.
• It starts the motor, the LED light goes out.
➔ Press the start button all the way down.
• It activates the barcode scanner—only for types of the 47BA...S series.
➔ Press the start button all the way down.
3.2.4 Reverse switch
The reverse switch changes the rotation direction of the 47BA:
Clockwise rotation – for screwing in screws
Press reverse switch as far as it will go.
When the start button is pressed Active appears on the LCD display.
Counterclockwise rotation – for loosening or screwing out screws
Press reverse switch as far as it will go.
When the start button is pressed Left appears on the LCD display.
3.2.5 IrDA interface port
The 47BA communicates with the controller or a computer (TMEB-COM) via the IrDA interface
port. For secure data transmission and for programming the 47BA, place the 47BA in the tool
holder with IrDA interface port, Order no. 935290/93599. Data transmission is possible in the
Active, Energy saver mode and Standby operating modes, but not possible in Sleep
(see 6.2 Operating status, page 19).
3.2.6 Radio interface port
Tools are equipped with an wireless interface port in addition to the IrDA interface port.
The tool uses the radio interface port for continuous communication with the controller. This inter-
face port is used to transmit both the parameters and the rundown results. Data transmission is
possible in the Active, Energy saver mode and Standby operating modes, but not possible in
Sleep (see 6.2 Operating status, page 19). Programming and setting up the radio interface port
are described in the programming manual of the controller.
NOTE
If the data transmission has been interrupted, the 47BA reports Synch error on the LCD display.
Replace the 47BA in the tool holder. The complete data transmission is acknowledged on the
display with Remain 512.
Type Communication necessary counterpart
47BAW… WLAN Standard IEEE 802.11b Access Point according to Standard
IEEE 802.11b

91b_1_5 en bedingt.fm, 06.02.2009 P1906BA/EN 2009-01 15
Product description 3
3.2.7 Identification – set torque
To identify the set torque on the 47BA, glue the corresponding marking foil to the right and the left
of the LCD display.
3.2.8 LED lighting
LED lighting make it possible to quickly find the screw point.
3 different activation methods are possible. Define the method by programming
the controller correspondingly:
• Activation by pressing the start button halfway down (3.2.3 Start button, page 14).
• Time-controlled beginning at start
• You also have the option of disabling it.
The lighting distance is up to 4.7" (120 mm).
3.2.9 Power supply
See Instruction manual Accupack.
3.2.10 LCD display
See 7 LCD display, page 21
NOTE
After the tool is switched on, it can take up to 25 seconds until the communication via WLAN is
active.
Order No.
935759
Order No.
935330

16 P1906BA/EN 2009-01 91b_1_5 en bedingt.fm, 06.02.2009
Product description
3
3.2.11 Barcode scanner
For tools of the 47BA...S series, the built-in barcode scanner is a class 2 laser scanner with a
wavelength of 650 nm.
The barcode scanner reads one-dimensional linear barcodes:
Depending on how the controller is programmed, there are two different operating modes:
Barcode as release for further rundowns
➔ Press the start button on the tool; this activates the barcode scanner.
The successful scan is acknowledged by an acoustic signal.
➔ Press the start button on the tool again; this starts the rundown.
If is necessary to read another barcode, proceed as follows.
Barcode not necessary as release for further rundowns
➔ From the Scanner tool menu, select Read barcode.
➔ Press the start button on the tool; this activates the barcode scanner.
The successful scan is acknowledged by an acoustic signal.
➔ Press the start button on the tool again; this starts the rundown.
Alternative: Assign the Read barcode function to the left function key <F1> on the tool.
➔ Press the left function key <F1> on the tool once.
➔ Press the start button on the tool again; this activates the barcode scanner.
Programming the barcode scanner is described in the programming manual of the controller.
3.2.12 WLAN chip
To enable easy replacement of the tools during production, an interchangeable memory module
(WLAN chip) is installed. When the tool is switched on, the network settings are read from the
WLAN chip and used to establish the WLAN connection. During a tool change, the WLAN chip
from the tool being replaced must be transferred to the new tool to be used.
CAUTION!
Eye injury from class 2 laser beam
➔ Do not look into the laser beam window when the laser is on.
➔ Repair any damage immediately.
Damage of the optical components can cause laser radiation.
➔ Modifications to the barcode scanner and procedures not outlined in these operating
instructions are strictly prohibited.
➔ Take defective devices out of operation immediately.
Scanning operation Acoustic signal
• Successful 50 ms long
•Faulty
• Not within 3 seconds
•Canceled by pressing the start button
3 times in rapid succession
NOTE
The WLAN chip may only be used with the battery inserted.
LASER RADIATION
DO NOT LOOK INTO THE BEAM
CLASS 2 LASER
IN ACCORDANCE WITH
EN 60825-1:1994
P < 1mW;
λ= 630 nm

91b_1_5 en bedingt.fm, 06.02.2009 P1906BA/EN 2009-01 17
Accessories 4
The following data are stored on the WLAN chip:
The MAC address is defined by Cooper Tools and cannot be changed. The other data can be
changed via infrared connection of the tool to the controller.
4 Accessories
• MAC address • Use of the DHCP server
• Network name (SSID) • IP address
• Encryption • Subnet mask
• Network key • Gateway
Accupack, Li-ion, 26 V
Order no. 9353777
Battery charger, Li-ion 26 V (110 – 230 VAC)
Order no. 935391 – 1-fold
Order no. 935302 – 4-fold
With IrDA interface, RS232 connection cable
Order no. 935290 – up to 47BA…50…
Order no. 935999 – from 47BA…70…
Without IrDA interface, RS232 connection cable
Order no. 935395 – up to 47BA…50…
Order no. 935998 – from 47BA…70…
RS232 Extension cable (IrDA)
Order no. 935154 – 3 m (9.84")
Order no. 935155 – 6 m (19.7")
Order no. 935157 – 10 m (32.8")
Protective sleeve
Order no. 941408 – angle attachment up to 28 Nm
Order no. 941409 – angle attachment up to 35 Nm / 50 Nm
Protective sleeve
Order no. 941410 – Scanner

18 P1906BA/EN 2009-01 91b_1_5 en bedingt.fm, 06.02.2009
Before initial operation
5
5 Before initial operation
The 47BA has been configured by Cooper Tools. A setting for your specific screw joint needs
must only be made with the controller or a computer by a qualified person. For more information,
refer to the controller programming manual.
5.1 Using reaction bar
5.2 Setting up tool holder
➔ Mount the tool holder on a stable base.
For tool holder with IrDA interface port:
➔ Select the location in such a way that no outside light shines onto the tool holder.
This can inhibit data transmission.
➔ Lay the connection cable in such a way that there is no danger that persons can trip.
5.3 Ambient conditions
5.4 Charging the battery
Battery is only partly charged when delivered.
➔ Charge fully before first use. See Instruction manual accupack.
CAUTION!
Crushing hazard.
Use always reaction bar in higher torque applications such as
above 50 Ft-lbs or in closed quarter areas.
Ambient temperature 0 °C (32 °F) to maximum +40° C (+104° F)
Humidity 0 to 80 %, not with dew
Working height up to 1000 m above sea level

91b_1_5 en bedingt.fm, 06.02.2009 P1906BA/EN 2009-01 19
First Operation 6
5.5 Changing the WLAN chip
Fig. 5-1:
6 First Operation
6.1 Carrying out the rundown
Make sure that the battery is securely installed before operating the 47BA. The 47BA is now
ready for use. After you press and release the start button, the LCD display reads Ready.
Types with wireless transmission continuously communicate with the controller. The tool auto-
matically receives the parameters and, when the rundown is complete, automatically sends the
rundown results to the control system. Programming and setting up the wireless interface port
are described in the programming manual of the controller.
Types without wireless transmission must be placed in the tool holder when the rundown is com-
plete. The rundown results are transmitted and shown under the Run screen menu item.
6.2 Operating status
The operating modes change in the following order.
The following functions are available depending on the display:
Removing the WLAN chip
➔ Remove the battery.
➔ Unscrew the screws (M4, DIN 912).
➔ Carefully pull the WLAN chip out of the
handle and replace it.
Inserting the WLAN chip
➔ Carefully insert the WLAN chip accord-
ing to the illustration.
➔ Tighten the screws (M4, DIN 912).
➔ Insert the battery.
Operating
status
LED
display
LCD display Function
Active Steady light:
Red – Rundown NOK
Green – Rundown OK
On Screws
Data transmission
Automatic switch to the following after 1 minute idle time:

20 P1906BA/EN 2009-01 91b_1_5 en bedingt.fm, 06.02.2009
First Operation
6
Energy
saver mode
Flashing light Green Off Data transmission
Automatic switch to the following after further 10 minutes:
Sleep Off Off Data transmission not
possible
Manual switch from Sleep to Active:
Press down start button and hold down for approx. 1 second.
To switch off the 47BA manually, pull out the battery.
Operating
status
LED
display
LCD display Function
This manual suits for next models
11
Table of contents
Other Cooper Tools Power Tools manuals

Cooper Tools
Cooper Tools Cleco 88 Series Installation and operating instructions

Cooper Tools
Cooper Tools Cleco 5 SAD Series Installation and operating instructions

Cooper Tools
Cooper Tools 35 Series Installation and operating instructions

Cooper Tools
Cooper Tools Cleco 30PTH Series User manual

Cooper Tools
Cooper Tools CLECO 20PH Series User manual

Cooper Tools
Cooper Tools Cleco 45MTC Series Installation and operating instructions

Cooper Tools
Cooper Tools Cleco 250PTHF226 User manual