2 P1615E 11/99
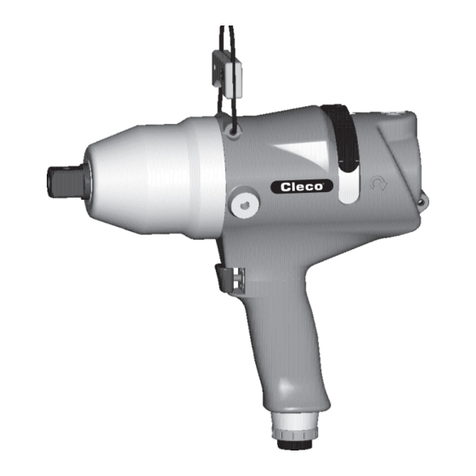
20PH CLECO
SYMBOLE
Warnung!
Dieses Zeichen warnt vor einer
möglicherweise gefährlichen
Situation. Wird diese Warnung
nicht beachtet, können schwer-
ste Verletzungen auftreten.
Achtung!
Achtung!
DiesesZeichenbezeichneteine
möglicherweise schädliche Si-
tuation. Wird dieser Hinweis
nichtbeachtet,könnendasPro-
dukt oder Teile davon beschä-
digt werden.
Hinweis!
Die Zahl im Quadrat ist ein Ser-
vice-Hinweis. Hier werden zu-
sätzliche Informationen für die
richtige Demontage und Monta-
ge gegeben.Die Hinweise wer-
den unter 10. Hinweise erklärt.
SYMBOLS
Warning!
This symbol identifies the po-
tential for a hazardous situa-
tion.
If this warning is not followed, a
serious injury could occur.
Caution!
Caution!
This symbol identifies the po-
tential for a damaging situa-
tion. If a caution note is not
followed, the product or parts of
the product could be damaged.
Note!
The number in a square indi-
cates a service note. Additional
information is provided for dis-
assembly and assembly in sec-
tion 10.
DieseBetriebsanleitung vordemAuspacken
und vor Inbetriebnahme des Werkzeugs le-
sen und genau beachten! Der Schrauber
darfnurvonPersonenbenutzt,gewartetund
instandgesetzt werden, die mit den
Sicherheitshinweisen und der Betriebsanlei-
tung vertraut sind. Die örtlichen
Sicherheitsvorschriften bezüglich Installati-
on, Betrieb und Wartung sind stets zu befol-
gen.
SICHERHEIT
Nehmen Sie den Schrauber erst in Betrieb,
wenn Sie die Sicherheitshinweise und Be-
dienungsanleitungen gelesen und voll ver-
standen haben.
Read and carefully observe these operating
instructions before unpacking and operating
the tool! The tool must be operated, main-
tained and repaired exclusively by persons
familiar with the operating instructions. Local
safety regulations regarding installation, op-
eration and maintenance must be followed.
SAFETY
Onlyoperate thistoolaftersafetyinstructions
and this service manual are fully understood.
Lisez et observez ce manuel d'instructions
avant déballage et mise en marche de l'outil.
Cet outil ne doit être utilisé, entretenu et
réparéque par du personnel qui est familier
aveccesinstructionsdeservice.Lesconsignes
de sécuritéen vigueur dans le pays de
l'utilisateur doivent être obligatoirement
respectées par toute personne chargée de
l'installation, le fonctionnement et la
maintenance de l'outil.
SÉCURITÉ
Lire d'abord attentivement les consignes de
sécuritéet le mode d'emploi spécifique àce
type d'outil et uniquement faire fonctionner
l'outillorsquesonutilisationaétéparfaitement
comprise.
SYMBOLES
Signal de danger!
Ce signe vous met en garde
contieunesituationdangereuse.
Des blessures graves peuvent
s'ensuivre,si cet avertissement
n'est pas respecté.
Attention!
Attention!
Ce signe qualifie une situation
pouvant potentiellement
provoquerunendommagement.
Le produit ou ses composants
peuvent être détériorés, si les
consignes ne sont pas
respectées.
Annotations
Le chiffre encadréindique une
annotationdeservice.Icionvous
donne de plus amples
informations sur le montage et
le démontage correct. Ces
annotations sont expliquées
dans chapitre 10.
Inhaltsverzeichnis
1. Technische Daten 4
2. Produktbeschreibung 5
3. Drehmomenteinstellung 5
4. Inspektion und Wartung 5
5. Was tun, wenn.. 5
6. Reparaturanleitung 6
6.1 Demontage des Triebwerks 6
6.2 Demontage des Einschaltventils 6
6.3 Montage des Motors 6
6.4 Demontage der Impuls-Einheit 6
6.5 Montage der Impuls-Einheit 6
6.6 Ölbefüllung 7
6.7 Öl-Nachbefüllung 7
7. Ersatzteil-Zeichnung
+ Ersatzteil-Bestelliste 20 - 25
8. Montagehinweise 26
9. Vorrichtungs-Bestelliste 29
10. Hinweise 30
Contenu
1. Données techniques 4
2. Product Description 8
3. Torque Adjustment 8
4. Inspection and Maintenance 8
5. What to Do If... 8
6. Repair Instructions 9
6.1 Removing the Power Unit 9
6.2 Trigger Valve Disassembly 9
6.3 Motor Assembly 9
6.4 Pulse Unit Disassembly 9
6.5 Assembly of the Pulse Unit 9
6.6 Oil Filling 10
6.7 Top up Oil 10
7. Vue éclatée
+ Liste de pièces de rechange 20 - 25
8. Instructions de montage 26
9. Liste de commande des dispositifs 29
10. Remarques 30
Contents
1. Technical data 4
2. Product Description 8
3. Torque Adjustment 8
4. Inspection and Maintenance 8
5. What to Do If... 8
6. Repair Instructions 9
6.1 Removing the Power Unit 9
6.2 Trigger Valve Disassembly 9
6.3 Motor Assembly 9
6.4 Pulse Unit Disassembly 9
6.5 Assembly of the Pulse Unit 9
6.6 Oil Filling 10
6.7 Top up Oil 10
7. Spare parts exploded view +
Spare Parts List 20 - 25
8. Assembly instructions 26
9. Fixtures order list 29
10. Notes 30

