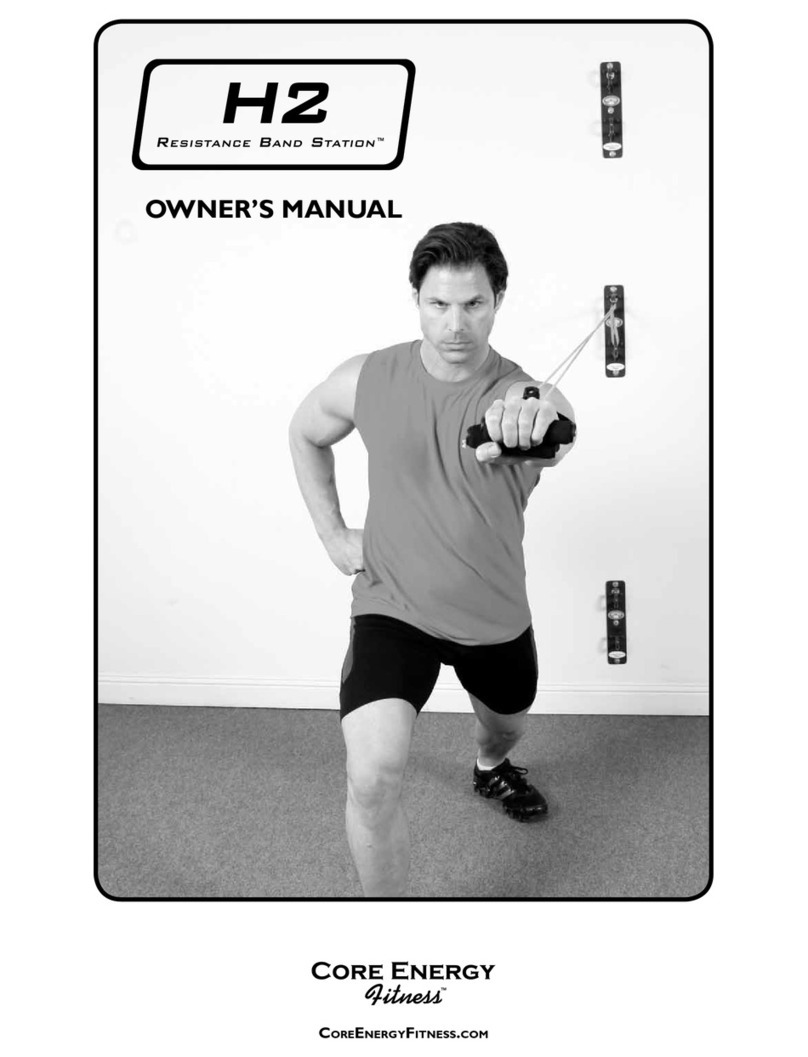
CORE ENERGY FITNESS RBS3 User manual

CoreenergyFitness.Com
OWNER’S MANUAL

TABLE OF CONTENTS
INTRODUCTION ............................................................................................................................................................ 2
RBS3 Resistance Band Station ............................................................................................................................................... 2
Ten Anchoring Points ............................................................................................................................................................... 2
The RBS3 Difference ............................................................................................................................................................... 2
Hammer Head Safety Hook ................................................................................................................................................... 3
Modular Design ......................................................................................................................................................................... 3
IMPORTANT SAFETY INSTRUCTIONS ............................................................................................... 4
Warning Labels .......................................................................................................................................................................... 4
SPECIFICATIONS, TOOLS & INSTALLATION ............................................................................... 5
Specications ............................................................................................................................................................................. 5
RBS3 Arc ..................................................................................................................................................................................... 5
Tools ............................................................................................................................................................................................ 6
Installation .................................................................................................................................................................................. 6
SAFETY – ANCHORING & THREADING BANDS ...................................................................... 8
Basic Loop .................................................................................................................................................................................. 8
Wrapping .................................................................................................................................................................................... 8
Threading – Adjusting Length and Tension .......................................................................................................................... 8
Sample Threading and Wrapping Techniques ...................................................................................................................... 9
GETTING STARTED – EXERCISES ........................................................................................................... 10
01 – Chest Press ..................................................................................................................................................................... 10
02 – Fly ...................................................................................................................................................................................... 10
03 – Front Raise ...................................................................................................................................................................... 11
04 – Lateral Raise ................................................................................................................................................................... 11
05 – Tricep Press ..................................................................................................................................................................... 12
06 – Bicep Curl ....................................................................................................................................................................... 12
07 – Straight-Arm Press ........................................................................................................................................................ 13
08 – Standing Row ................................................................................................................................................................. 13
09 – Lunge ................................................................................................................................................................................ 14
10 – Trunk Rotation ............................................................................................................................................................... 14
CUSTOMER SERVICE .............................................................................................................................................. 15
WARRANTY ....................................................................................................................................................................... 15
RBS3 Resistance Band Station Limited Warranty ............................................................................................................ 15
Exclusive Remedies ................................................................................................................................................................ 16
1

INTRODUCTION
RBS3 Resistance Band Station
The RBS3 Resistance Band Station is a wall mounted, modular resistance band training station that was
developed to give sports, tness and rehabilitative professionals the ability to utilize all types of resistance
bands to their full potential.
Ten Anchoring Points
With ten different anchoring points in a single
column, from ankle height to above the head,
the RBS3 allows users to perform hundreds
of resistance band exercises. When used in
conjunction with destabilized devices such
as stability pads or balls, the RBS3 opens
the door to a wide range of core, stability
and rehabilitative exercises.
The RBS3 Difference
• Wall mounted space saving design
• Hundreds of exercises
• Ten hooking angles
• 32 hooking options
• Up to 12 users with four-station
modular conguration
• Works with all resistance bands
• Heavy-duty construction
The RBS3 Resistance Band Station
is Patent Pending.
For the rst time in the history of tness, RBS3 users will be able to realize the important benets of
resistance band training. If you have never experienced a comprehensive resistance band program, you are
in for a big surprise. Resistance band training is one of the most effective methods for increasing functional
strength, joint stability and core strength. And, it’s fun.
2

Hammer Head Safety Hook
The RBS3 features the Hammer
Head Safety Hook. With its t-bar
barrier tip, the hook allows bands to
be pulled from every angle without
slipping off of the hook. Users can
exercise with condence that their
bands are securely anchored.
The hooks rounded shape was designed for smooth transitions and
ease of use. The neck of the hook is reinforced for added strength
to accommodate “extra heavy” resistance bands.
The RBS3 can be used with all types of resistance bands. Personal trainers can use medium to heavy
bands for core crunching trunk rotations, chops and presses. Therapists can take advantage of the ten
anchoring angles to design new therapeutic exercise protocols that, heretofore, were not possible. With
the RBS3, it’s as simple as looping a band over a “Hammer Head Safety Hook” and pulling. Finally, the
days of attaching bands to everything and anything are over.
Modular Design
The RBS3 is a four-component modular system that
can be congured to accommodate up to 12 users.
In its basic conguration of a vertical stack (pictured),
the RBS3 is designed for three users, one per side.
By mounting each of the four components in separate
locations, the RBS3 can accommodate up to twelve
users exercising simultaneously.
No other piece of gym equipment offers
the versatility, effectiveness and value
of the RBS3 Resistance Band Station.
3

IMPORTANT SAFETY INSTRUCTIONS
Warning: The RBS3 Resistance Band Station is designed for use with rubber or latex resistance
bands. Do not fasten resistance bands to the Hammer Head Safety Hooks with metal clip hooks
or other hooks made of hard materials. This has the potential to damage the coating on the
hooks and cause premature wear. Do not use the RBS3 as an anchor for suspension type exercise
devices. Do not perform pull-ups on the RBS3.
• Read all instructions before using the RBS3.
• Consult your doctor before embarking on a tness program.
• Do not allow children or persons unfamiliar with tness equipment or exercise in general, near the
equipment. Do not leave children unsupervised around the equipment.
• Use the equipment only for its intended purpose as described in this manual. Failure to do so has the
potential to void the warranty.
• Always inspect the equipment for damage before each use. Do not use the equipment if it is damaged.
If damaged contact Core Energy Fitness at CoreEnergyFitness.com
Warning Labels
The following warning labels are afxed to the RBS3 in multiple locations. Please read each label carefully.
4

SPECIFICATIONS, TOOLS & INSTALLATION
Specications
The RBS3 consists of four components – three
lower units and one upper unit (also known as
the RBS3 Arc). There are a total of 32 Hammer
Head Safety Hooks congured to allow three
users at a time – one for each side of the
lower unit.
The lower units are 17 inches tall, 17.5 inches
wide and weigh 22 pounds. Including the hooks,
the lower unit extends 10 inches from the wall
(at the middle hook).
RBS3 Arc
The upper unit or RBS3 Arc is 28 inches wide
with a faceplate that measures four inches in
height and weighs 17 pounds. Including the
hooks, the upper unit extends 18 inches from
the wall (at the middle hook). The mounting
plates are 6 inches wide and ten inches tall.
The design, testing and labeling of the RBS3 Resistance Band Station and the RBS1 Resistance
Band Station were based on standards provided by: ASTM F 1749-09 Standard Specication for
Fitness Equipment and Fitness Safety Signage and Labels; F2276-09 Standard Specication for
Fitness Equipment; and F2571-09 Standard Test Methods for Evaluating Design and Performance
Characteristics of Fitness Equipment.
5

Tools
To install the RBS3, you will need the following tools:
• Stud Finder
• Leveler and Tape Measure
• Socket Wrench (¾ inch to ½ inch drive size)
• ½ inch Socket (6-point hex bit or 12-point)
• 2 inch Socket Extension (¾ inch or ½ inch drive size)
• Power Drill (with drill bit sufcient to drill starter holes as described in #6 on Page 7)
• Allen Wrench (supplied)
• 26 – 2½ inch Lag Screws (supplied)
• 26 – Washers for use with the Lag Screws (supplied)
• 21 – Cover Plate Hex Button Screws (supplied)
• 21 – O-rings used with Cover Plate Screws (supplied)
Installation
The RBS3 is mounted to load bearing wall studs using 2½ inch lag screws (supplied). Each bottom
component is mounted with six lag screws, three on each side. The RBS3 Arc is mounted with eight lag
screws, four on each side. The mounting holes on each side of the individual components are sixteen inches
apart for mounting on two weight-bearing wall studs. To install, please follow the following instructions:
1. Location. Identify the location to mount the RBS3. The recommended height for the RBS3 Arc is
seven feet (measured from the hook to the oor). The user has the option of mounting the RBS3 Arc
at any desired height. The key is having hooks above the head to perform downward pulling exercises.
You will need wall space measuring a minimum of 28 inches wide and 7.5 feet high. Make sure there
is enough oor clearance for users to perform exercises from all three sides of the unit.
2. Studs. Locate the wall studs with a stud nder. Mark the center line of the studs.
3. Cover Plates. Remove the cover plates on each side of the lower units and the center cover plate
on the RBS3 Arc using the Allen wrench (hex key). The mounting holes will be revealed.
6
Cover
Plate
Screw
Cover
Plate
Mounting
Holes Cover Plate

4. Lower units. There are three lower units (bottom, middle and top).
A. Mount the bottom lower unit with the bottom hook at ankle height or about six to eight
inches from the oor. Hold the lower unit in the desired position against the wall and in-line
with the center line of the studs. Mark the location of all six mounting holes.
Note: The individual RBS3 components can be mounted at any desired height
depending on the size of the users or needs of the facility.
B. Mount the middle lower unit with the middle hook at approximately waist height for a
person six feet tall. Hold the lower unit in the desired position against the wall and in-line with
the center line of the studs. Mark the location of all six mounting holes.
C. Mount the top lower unit with the middle hook at approximately shoulder height for a
person six-feet tall. Hold the lower unit in the desired position against the wall and in-line with
the center line of the studs. Mark the location of all six mounting holes.
D. Mount the upper unit (RBS3 Arc) with the hooks at seven feet. Hold the upper unit in the
desired position against the wall and in-line with the center line of the studs. Mark the location
of all eight mounting holes.
5. With all 26 mounting holes marked, conrm that the mounting holes are level for each
of the four components.
6. Create starter holes through the drywall and penetrating the wall studs approximately 3/8 inch.
7. Using a socket wrench, mount the upper unit rst followed by the upper lower unit, middle
lower unit and bottom lower unit.
8. After all units are mounted, attach cover plates with button screws and Allen wrench.
7
Upper Unit (RBS3 Arc)
Mount with the hooks at 7 feet
Top Lower Unit:
Mount with the middle hook at approximately
shoulder height for a person 6 feet tall
Middle Lower Unit:
Mount with the middle hook at approximately
waist height for a person 6 feet tall
Bottom Lower Unit:
Mount with the bottom hook at ankle height
or about 6 to 8 inches from oor

SAFETY – ANCHORING & THREADING BANDS
With a total of 32 Hammer Head Safety Hooks spread over four components, the RBS3 provides
numerous options for anchoring resistance bands. The ability to anchor bands securely gives users the
freedom to move condently when performing exercises that include broad vigorous movements.
The hooks can also be used to “thread” bands to adjust their length and tension. This added level of
control brings a whole new level of versatility to resistance band training.
Basic Loop
For most exercises, especially those without lots of dynamic
movements, it is sufcient to simply loop the band over the hook.
If the exercise you are performing is dynamic or calls for upward
lateral pulls, we strongly recommend “wrapping” the bands around
the hook. See below.
Wrapping
To increase the safety of anchoring
bands, the user has the option of
wrapping the band around the hook.
This will form a closed loop around
the hook providing a secure and
safe anchor.
Wrapping is recommended when
performing dynamic exercises or
exercises that require upward pulls.
Threading – Adjusting Length & Tension
To adjust the length and tension of a band, the user can “thread”
a band using multiple hooks. In the photo, the user has anchored
the handle on one hook and threaded the band on a lower hook.
When threading a band, it is important to follow a threading path
that provides the greatest safety. In general, it is safer to thread
in a top down or lateral pattern.
For added safety, the user also has the option of wrapping the band
on the lower hook.
8

Sample Threading and Wrapping Techniques
9

10
02 – Fly
02 – START
GETTING STARTED - EXERCISES
The RBS3’s anchoring system provides the platform to perform hundreds of exercises. To get you
started, below are ten Level 1 exercises. In the future we will be adding numerous dynamic exercises to
our Web site, including exercises on unstable surfaces, e.g., stability balls and pads. For more exercises,
please visit CoreEnergyFitness.com
01 – Chest Press
01 – START 01 – FINISH
02 – FINISH

11
04 – Lateral Raise
03 – Front Raise
04 – FINISH04 – START
03 – START 03 – FINISH

12
GETTING STARTED - EXERCISES
06 – Bicep Curl
05 – Tricep Press
05 – FINISH05 – START
06 – START 06 – FINISH

13
08 – Standing Row
07 – Straight-Arm Press
07 – FINISH07 – START
08 – START 08 – FINISH

14
GETTING STARTED - EXERCISES
10 – Trunk Rotation
09 – Lunge
09 – FINISH09 – START
10 – FINISH10 – START

15
CUSTOMER SERVICE
If you have any questions regarding use of the equipment, installation or other products, please visit our
Web site at CoreEnergyFitness.com or call 310-527-2138.
Customer service is open Monday through Friday from 9:00 a.m. to 5:00 p.m. PST.
WARRANTY
Please read these warranty terms and conditions carefully before using your Core Energy Fitness RBS3
Resistance Band Station. By using the equipment you are consenting to be bound by the following
warranty terms and conditions
RBS3 Resistance Band Station Limited Warranty
Core Energy Fitness warrants the RBS3 Resistance Band Station to be free from defects in workmanship
and material, under normal use and service conditions, for a period of one year from the date of purchase.
The warranty periods commence on the invoice date of the original purchase.
WARRANTY CLAIMS. All claims require serial number and any
information supporting existence of the alleged defect.
This warranty applies only against defects discovered within the warranty period and extends only to the
original purchaser of the product. Core Energy’s obligation under this warranty is limited to replacing
or repairing, at Core Energy Fitness’ option, the product through one of its authorized service centers
or representatives. All repairs or replacement components for which warranty claims are made must be
pre-authorized by Core Energy Fitness. To make a claim under this warranty, the buyer must notify Core
Energy Fitness within 30 days after the date of discovery of any defect and make the affected product
available for inspection by a Core Energy Fitness service representative. If the product is shipped to Core
Energy Fitness or one of its authorized service centers or representatives, freight charges to and from
the service center will be the customer’s responsibility. This warranty does not extend to any damage to a
product caused by or attributable to freight damage, abuse, misuse, improper or abnormal usage or repairs
not provided by Core Energy Fitness or an authorized service center. Parts repaired or replaced under
terms of this warranty will be warranted for the remainder of the original warranty period only.
Core Energy Fitness is not responsible or liable for indirect, special or consequential damages arising out of
or in connection with the use or performance of the product; damages with respect to any economic loss,
loss of property, loss of revenues or prots, loss of enjoyment or use, or costs of removal or installation;
or other consequential damages of whatsoever nature. Some states do not allow the exclusion or
limitation of incidental or consequential damages. Accordingly, the above limitation may not apply to you.
The warranty extended hereunder is in lieu of any and all other warranties, and any implied warranties of
merchantability or tness for a particular purpose are limited in their scope and duration to the terms set
forth herein. Some states do not allow limitations on how long an implied warranty lasts. Accordingly, the
above limitation may not apply to you.

Exclusive Remedies
For any product described above that fails to conform to its warranty, Core Energy Fitness Systems, LLC
will provide, at its option, one of the following: (1) repair; (2) replacement; or (3) refund of the purchase
price. THESE SHALL BE THE SOLE AND EXCLUSIVE REMEDIES OF THE BUYER FOR ANY BREACH
OF WARRANTY.
16

Resistance Band Training:
RBS3 Resistance Band Station
RBS1 Resistance Band Station
Dynamic Stretching:
Dynamic Stretch Pole
Dynamic Anchor Strap
CoreenergyFitness.Com
CORE ENERGY FITNESS SYSTEMS, LLC
1156 WEST 135TH STREET
GARDENA, CA 90257
310-527-2138
©2010 CORE ENERGY FITNESS. ALL RIGHTS RESERVED. CORE ENERGY FITNESS, RBS1, RBS3, RESISTANCE BAND STATION, DYNAMIC STRETCH POLE,
DYNAMIC ANCHOR STRAP AND HAMMER HEAD SAFETY HOOK ARE REGISTERED TRADEMARKS OF CORE ENERGY FITNESS SYSTEMS, LLC.
THE RBS3 RESISTANCE BAND STATION AND THE RBS1 RESISTANCE BAND STATION ARE PATENT PENDING. THE DYNAMIC ANCHOR STRAP IS PATENT PENDING.
NO PART OF THIS MANUAL MAY BE REPRODUCED OR UTILIZED IN ANY FORM, BY ANY MEANS (I.E., ELECTRONIC, MECHANICAL OR OTHERWISE)
WITHOUT THE EXPRESS WRITTEN CONSENT OF CORE ENERGY FITNESS SYSTEMS, LLC. RBS3.08.2010.V1
Table of contents
Other CORE ENERGY FITNESS Fitness Equipment manuals