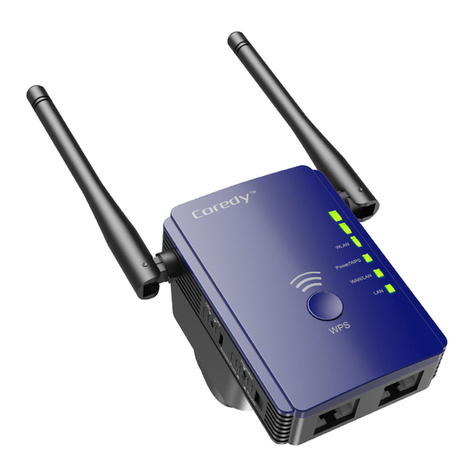
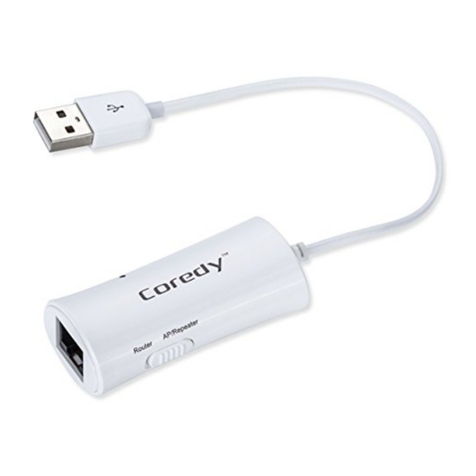
Coredy CX-E120 Specification sheet

Coredy CX-E120
Mini Range Extender/Aessess Point/Router
GET STARTED

Preparing....................................................................
Setup Process............................................................
Web-Browser Method..............................................
WPS - Method.........................................................
Overview.....................................................................
Using as a Extender...................................................
When to Use Your Extender.....................................
How the Extender Works.........................................
Power on the Extender.............................................
Connect to an Existing WiFi Network.......................
Method 1: Connect with a web browser...............
Method 2: Connect with WPS..............................
Connect an Ethernet-Enabled Device......................
Using as a Access Point............................................
Cable Your AP...........................................................
Using as a Router.......................................................
Change the Extender Settings..................................
To change the admin password...............................
To set up the time of Extender..................................
Save/Reload your Extender setting.........................
Update the Router Firmware....................................
Hide extender's wireless network.............................
TROUBLESHOOTING.................................................
1
1
1
2
3
6
6
6
7
8
8
11
13
14
15
17
21
21
21
22
23
24
25
User Manual
Quick Installation Guide

01
Preparing:
Below setup guide just for REPEATER Mode. If you need
set up by AP and Router mode, please refer to User
Manual. More details about troubleshoots please go to
User Manual.
1. Route works normal.
2. Switch the side button of repeater into “ON” & “Repeater”
3. Electrical Outlet close to router.
Web-Browser Method:
1. Plug it into an electrical outlet ( closest to your primary
router/WiFi access point )
2. Use your Smart-Phone to connect with the repeater (find
"Coredy CX-E120_2.4G" and connect with it, if
password request try PIN number of the rear panel)
3. Visit http://ap.setup/ or the IP address 192.168.10.1
from a web browser.
4. Log-in to the Admin Page by using "admin" in a
lower-case for both username and password, and then
click "repeater wizard" in the next window.
5. Choose your Router's/AP's network in the next window
and select it.
6. Enter your Router's/AP's WIFI password in the
Setup Process
Quick Installation Guide

02
WPS - Method:
You can also use the WPS function as an alternative Set-up
method, if you have a WPS button available on your primary
router.
Hold the WPS button of your Primary Router/WiFi AP till the
WPS LED starts blinking.
Press and hold the WPS 3 seconds on the Rear Panel.
Once WPS light starts blinking on it as well, please wait for a
minute for The primary router/AP and the Extender Coredy
CX-E120 to pair up and then connect to the "Coredy
CX-E120_2.4G _EXT or Coredy CX-E120_5G _EXT" SSID
in your Smart Phone using your primary router's WIFI
password.
Password/WIFI Key/Security key column and click on
"Apply"
7. In the next window, you'll see the reboot process with a
Bar. When the Bar reaches 100%, (Leave the device for
1 minute to let it reboot itself).
8. Open the list of available networks again using your
smartphone. Find out the New SSID "Coredy
CX-E120_2.4G _EXT or Coredy CX-E120_5G _EXT"
and connect with it using the same password as of your
primary router/AP.
9. If the internet works, unplug Coredy CX-E120 and plug
it halfway between your Router and the Device intended
for the internet usage/dead zones in your home where
you were getting low to no WIFI signals.

03
Package Contents:
Front Panel
The Coredy CX-E120 WiFi Range Extender is a network
device with multifunction, which can be using for increasing
the distance of a WiFi network by boosting the existing WiFi
signal and enhancing the overall signal quality over long
distances. An extender repeats the signals from an existing
WiFi router or access point.
The Coredy CX-E120 WiFi Range Extender also can be
used as an Access Point or Router.
Coredy CX-E120 Mini WiFi Range Extender x 1
Quick Installation Guide x 1
User Manual x 1
RJ-45 Networking Cable x 1
Reset Pin x 1
Overview
WPS Button
Mode Selector Switch
WiFi LED 1
WiFi LED 2
WiFi LED 3
WPS LED
WAN/ LAN LED
LAN LED
POWER LED
4 x External Antennas
Wi-Fi
WPS
WAN/LAN
LAN
POWER
WPS
Repeater
Router
AP
LAN
WAN/LAN
User Manual

04
Rear Panel
Before you install your extender, familiarize yourself with its
LEDs, buttons, and port.
Some computer required to type the password (pin number
on the label) during the initial login.
Lit amber. The router is starting.
Off. Power is not supplied to the router.
LED Descriptions
Power LED
Lit amber. The router is starting.
Blinking fast. The port is sending or receiving traffic.
Off. No Ethernet cable is connected.
WAN/LAN LED
LAN WAN/LAN
RESET
WiFi
WPS
WAN/LAN
LAN
POWER

05
Blinking. Press and hold the WPS 3 seconds on the Rear
Panel lets you use WPS to join the WiFi network without
typing the WiFi password. The WPS LED blinks amber
during this process.
Off. No Ethernet cable is connected.
WPS LED
Lit amber. The extender has detected an Ethernet cable
connection to the AP or other device.
Blinking fast. The port is sending or receiving traffic.
Off. No Ethernet cable is connected.
LAN LED
Wi-Fi LED 1 – LED 3
Wi-Fi fadio is operating
Best connection
Good connection
Poor connection
No connection
(This LED indicates the connection
between the extender and the router
or access point )
Mode
LEDs Description
Aeccess Point
Router
Repeater
ON
Bliking OFF OFF
ON OFF OFF
ON OFF
ON
ON
ON ON
ON ON
Wi-Fi fadio is operating
ON ON ON
12 3

06
When to Use Your Extender
We recommend that you connect through the extender
network only when the WiFi device is in a “dead zone”
where connection from the existing network is poor or
nonexistent. Data traffic routed through the extender is
inherently slower than traffic routed directly from the
network.
How the Extender Works
The extender works like a bridge between a WiFi router (or
a WiFi access point) and a WiFi device outside the range
of the WiFi router. The extender performs two main jobs:
The extender connects to a working WiFi network.
When the extender connects over WiFi to an existing
network, it functions as a network client, similar to how a
WiFi device connects to a network.
Using as a Extender
The extender acts as an access point for WiFi devices.
The extender broadcasts its own WiFi network that WiFi
devices can join. In its role as an access point, the
extender performs tasks that WiFi routers do, such as
broadcasting its network name (SSID).
The extender must do each of these jobs so that both
ends of the bridge are in place.

07
Turn the Power On/Off button to “On” and Mode
Switch Button to “Repeater” on the side of the
extender, plug the extender into an electrical outlet,
place your extender in the same room as your WiFi
router.
Proximity to the WiFi router is required only during the
initial setup process.
Power on the Extender
1
Boosts the range of your
existing WiFi and creates
a stronger signal in hard
to reach areas.
WiFi Range Extender
sometimes your router
does not provide the WiFi
coverage you need
Existing WiFi

08
To extend the range of your WiFi network, you must
connect the extender to your existing WiFi network.
You can do this in one of two ways:
Method 1. Connect with a web browser.
Method 2. Connect with WPS. For more
information, see Method 2: Connect with WPS.
For more on page 11.
Wi-Fi
WPS
WAN/LAN
LAN
POWER
WPS
Repeater
Router
AP
LAN
WAN/LAN
WiFi
WPS
WAN/LAN
1
2
3
Repeater
Router AP
Connect to an Existing WiFi Network
2
1. Use a WiFi network manager on a computer or mobile
device (recommended) to find and connect to the
extender WiFi network “Coredy CX-E120_2.4G”.
Method 1: Connect with a web browser

09
2. Launch a web browser, enter http://192.168.10.1/ or
http://ap.setup/ in the address field of the web browser,
when prompted, enter admin for the user name and
admin for the password, both in lowercase letters.
3. Click the Repeater in the Mode Wizard field.
4. Click the Select button to choose a WiFi network to extend
Wireless Repeater Mode
SSID
Your Target Network Name
David
Connect to Your Target Network Name
Hide Password
WiFi Key
Apply
Important: Enter exactly the samepassword/key as your target Router
6
11
WPA2-PSK
WPA2-PSK
Channel Security Signal Select
Coredy CX-E120_2.4G_EXT
2.4G SSID
Coredy CX-E120_5G_EXT
5G SSID
Refresh
Password of WiFi Network
WiFi
WPS
WAN/LAN
LAN
POWER

10
WLAN WAN LAN1 LAN2 LAN3 LAN4 WPS
WiFi
WPS
WAN/LAN
LAN
POWER
WPS
5. In the Key (Network password) field, type the existing WiFi
network password (also called the passphrase or security
key) and click the Apply button, wait 1 minute to reboot the
extender.
Note: Click the Refresh button if the wireless Network list
couldn't loads completely or successfully.
7. Unplug the extender and move it to a new location that is
about halfway between your router and the area with a
poor router WiFi signal.
6. Find and connect to the new extended WiFi network on
your computer or WiFi device.
The extender creates a new extended WiFi network. The
extender’s new WiFi network name is “Coredy
CX-E120_2.4G_EXT”, use the same WiFi password that
you use for your WiFi router.
Note: If the extender doesn’t connect to the router, the
WLAN LED 1 keeps blinking and the extender’s new WiFi
network name doesn’t change to “Coredy
CX-E120_2.4G_EXT” .
If the WLAN LED 1 keeps blinking and the extender’s new
WiFi network name change to “Coredy
CX-E120_2.4G_EXT” , you might type the incorrect
password during on step 5.

11
9. If only the WLAN LED 1 light amber , plug the extender into
an outlet closer to the router and try again.
Keep moving the extender to outlets closer to the router
until the WLAN LED 1 , LED 2 and LED 3 light amber
simultaneously.
Note: Place the extender in an elevated location and
minimizing the number walls and ceilings between the
router and your other devices.
8. Use the WLAN LED 1 – LED 3 to help you choose a spot
where the extender-to-router connection is optimal.
The location that you choose must be within the range of
your existing WiFi router network.
Wi-Fi Protected Setup (WPS) lets you join a secure
WiFi network without typing the network name and
password.
Note: WPS does not support WEP network security. If
you are using WEP security, follow the instructions in
Method 1: Connect with a web browser on page 8.
Method 2: Connect with WPS

12
1. Press the WPS button on the front panel of the extender.
The WPS LED blinks.
2. Within two minutes, press the WPS button on your router
or access point.
When the extender connects to your existing WiFi network
successful, the extender's new WiFi network name will
change to “Coredy CX-E120_2.4G_EXT", and the WLAN
LED1 - LED 3 will light amber (check the WLAN LED
Descriptions on Page 2), confirm it on your computer or
WiFi device.
If the extender could not connect to your existing WiFi
network, try again. If it still does not work, see Method 1:
Connect with a web browser on page 8.
3. Unplug the extender and move it to a new location that is
about halfway between your router and the area with a
poor router WiFi signal.
4. Use the WLAN LED 1 – LED 3 to help you choose a spot
where the extender-to-router connection is optimal.
5. If only the WLAN LED 1 light amber , plug the extender into
an outlet closer to the router and try again.
Keep moving the extender to outlets closer to the router
until the WLAN LED 1 , LED 2 and LED 3 light amber
simultaneously.
The location that you choose must be within the range of
your existing WiFi router network.
WLAN WAN LAN1 LAN2 LAN3 LAN4 WPS
WiFi
WPS
WAN/LAN
LAN
POWER
WPS

13
Connect an Ethernet-Enabled Device
After the extender is connected to your existing WiFi
network, you can connect a wired device to the extender
using an Ethernet cable. That device can then access your
existing network through the WiFi connection.
WLAN WAN LAN1 LAN2 LAN3 LAN4 WPS
WiFi
WPS
WAN/LAN
LAN
POWER
6. Find and connect to the new extended WiFi network on
your computer or WiFi device.
The extender creates a new extended WiFi network. The
extender’s new WiFi network name is “Coredy
CX-E120_2.4G_EXT”, use the same WiFi password that
you use for your WiFi router.
Note: Place the extender in an elevated location and
minimizing the number walls and ceilings between the
router and your other devices.
Note: If the extender doesn’t connect to the router, the
WLAN LED 1 keeps blinking and the extender’s new WiFi
network name doesn’t change to “Coredy
CX-E120_2.4G_EXT” .

14
Using as a Access Point
The Coredy CX-E120 WiFi Range Extender also can be
used as an Access Point, An access point receives data by
wired Ethernet (such as hotel’s wired Ethernet), and
converts to a 2.4Gig Hz wireless signal. It sends and
receives wireless traffic to and from nearby wireless clients.
WiFi
WPS
WAN/LAN
LAN
POWER
WiFi
WPS
WAN/LAN
LAN
POWER

15
Cable Your AP
The following image shows how to cable your AP:
1. Power on the AP, turn the Power On/Off button to “On”
and Mode Switch Button to “Access Point” on the side of
the AP, plug the AP into an electrical outlet.
2. Connect the AP to your wired Ethernet port with the
Ethernet cable came with your AP.
3. Use a WiFi network manager on a computer or mobile
device (recommended) to find and connect to the AP
WiFi network “Coredy CX-E120_2.4G”.
WiFi
WPS
WAN/LAN
LAN
POWER
WAN Port LAN Port WAN/LAN Port
Ethernet cable
Internet
DSL or Cable
WiFi
WPS
WAN/LAN
LAN
POWER
LAN4 LAN3 LAN2 LAN1 WAN

16
4. Launch a web browser, enter http://192.168.10.1/ or
http://ap.setup/ in the address field of the web browser,
when prompted, enter admin for the user name and
admin for the password, both in lowercase letters.
5. Click the AP in the Mode Wizard field.
6. Select the Security Type as WAP/WPA2 PSK
(recommended) and type the password of the WiFi
Network in the Key field.
7. Click Apply button, the AP will take 1 minute to reboot.
8. Find and connect to the new converted WiFi network on
your computer or WiFi device.
The AP creates a new extended WiFi network. The AP’s
new WiFi network name is “Coredy CX-E120_2.4G”,
use the WiFi password that you set.
AP Wizard
2.4G SSID Coredy CX-E120_2.4G
Coredy CX-E120_5G
5G SSID
Security Type
WiFi Key
WAP/WPA2 PSK
Hide Characters
Apply Cancel
Password of WiFi Network

17
Using as a Router
The Coredy CX-E120 WiFi Range Extender also can be
used as a Router.
1. Prepare your modem unplug your modem's power. If it
has a battery backup, remove the battery.
2. Connect your modem, plug in your modem, Put the
battery back in. Then cable the modem to the blue WAN
port on the router.
3. Power on the router, turn the Power On/Off button to
“On” and Mode Switch Button to “Router” on the side of
the router, plug the router into an electrical outlet.
4. Connect a computer, you can use an Ethernet cable or
connect with WiFi.
Modem
Power adapter
WAN Port
Ethernet cable
Ethernet cable
Internet
DSL or Cable
WiFi
WPS
WAN/LAN
LAN
POWER

18
We recommend that using a smart phone to connect with
WiFi, the default WiFi network name is “Coredy
CX-E120_2.4G”.
5. Launch a web browser, enter http://192.168.10.1/ or
http://ap.setup/ in the address field of the web browser,
when prompted, enter admin for the user name and
admin for the password, both in lowercase letters.
6. Click the Router in the Mode Wizard field.
7. Configuring the internet connection, Before start
connect to the internet, you might need the following
information to set up your router, if you cannot locate this
information, ask your internet service provider (ISP) to
provide it.
The ISP configuration information for your DSL account
DSL user name and password
Dynamic IP or static IP address settings (special
deployment by ISP, this setting is rare)
WiFi
WPS
WAN/LAN
LAN
POWER
Table of contents
Other Coredy Wireless Access Point manuals