manuals.online logo
Brands
  1. Home
  2. •
  3. Brands
  4. •
  5. Cosco
  6. •
  7. Indoor Furnishing
  8. •
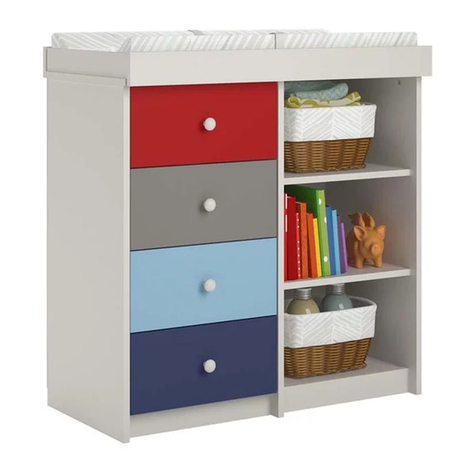
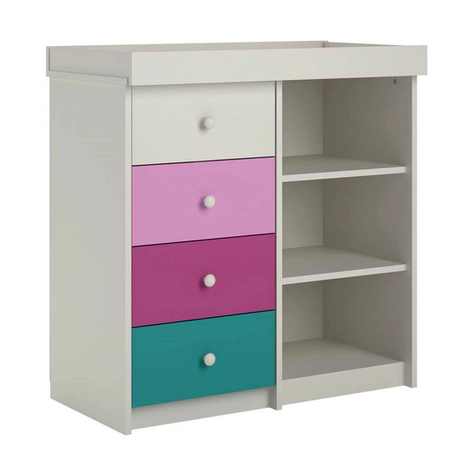
  9. Cosco 5869321PCOM User manual

Cosco 5869321PCOM User manual

WARNING ADVERTENCIA AVERTISSEMENT
Unit can tip over causing severe injury
or death.
Anchor unit to stud or wall.
DO NOT allow children to climb on unit.
Put heavy items on lower shelves or drawers.
Read and follow all assembly instructions.
Este mueble puede caerse por encima
causando daño serio o la muerte
Anolar el mueble a un espárrago muro.
NO dejar que los niños suben por encima del mueble.
Poner los articulos mas pesados en los tableros o cajones inferiores.
Leer y sequir todos de los instucciones para el montaje.
L'unité peut basculer et causer des
blessures graves ou la mort.
Fixez l'unité au mur ou à un montant.
Ne laissez PAS les enfants grimper sur le meuble
Déposez les pièces lourdes sur les tablettes ou tiroirs
du bas.
Lire et suivre toutes les instructions d'assemblage.
STOP
ALTO
ARRÊT
DO NOT RETURN PRODUCT TO THE STORE
NO REGRESAS ESTA PRODUCTO A LA TIENDA
NE RETOURNEZ PAS LE PRODUIT AU MAGASIN
Individual stores do not stock parts.
Las tiendas no tiene partes.
Les magasins individuels ne gardent pas de pièces.
If a part is missing or damaged, please visit our website or call our toll-free customer
service line. We will gladly ship your replacement parts FREE of charge.
Si las partes están perdidas o dañadas Por favor visite nuestra página de Internet o
llame a nuestra línea de teléfono gratis de Servicio al Cliente. Nosotros le enviaremos
sus repuestos sin cargo adicional, serán totalmente gratis.
Si une pièce est manquante ou endommagée, veuillez visiter notre site web ou appelez
sans frais notre Service à la clientèle. Nous expédierons avec plaisir vos pièces de
rechange GRATUITEMENT.
Need Parts or
Assistance? Nesacitas partes o
Asistancia? Besoin de Pièces ou
d'assistance?
WWW.COSCOKIDSFURNITURE.COM/PARTS
or call toll free:
o llame a nuestra línea gratis:
ou appelez sans frais: 1-800-489-3351
For prompt, reliable service; please have your assembly manual ready.
Para servicio mas rapido y reliable por favor tenga esta manual listo.
Pour un service rapide et fiable, s'il vous plaît ayez votre livret d'assembage en
main.
-KEEP FOR REFERENCE- -GUARDAR PARA REFERENCIA- -GARDEZ POUR RÉFÉRENCE-
B345869321PCOM1
5869321PCOM
Please Recycle
Recicle Por Favor
Réutilisez SVP
COSCO®
B345869321PCOM1
4 /38
?? www.coscokidsfurniture.com ??
PARTS - PIEZAS - PIECES
Parts List
DESCRIPTION
PART NUMBER
QTY
ITEM
LEFT PANEL358693210101A
RIGHT PANEL
358693210201B
PARTITION
358693210301
C
TOP358693210401
D
BOTTOM
358690000501E
FIXED SHELF
358693210601F
FRONT APRON358693210702G
BACK APRON
358690000801H
FRONT RAIL
358690151601P
BACK RAIL
358690151701
Q
SIDE RAIL
358690151802R
BASE BOTTOM
358690151901
S
BACK PANEL
K5869321001T
Parts shown are the base cabinet of your model. Drawers shown on next page. Please note, some parts are labeled with a sticker and some
parts have a letter stamped on a raw edge.
Piezas mostradas son la base del gabinete de su modelo. Cajones que se muestra en la siguiente página. Tenga en cuenta las mismas
partes se etiquetan con una etiqueta engomada y algunas partes tienen una carta impresa en un borde crudo.
Pièces indiquées sont le placard de votre modèle. Tiroirs montrés sur la page suivante. Veuillez noter que les mêmes pièces sont pourvus
d'une étiquette et certaines régions ont une lettre estampillée sur le bord brut.
Spanish & French parts list on page 6.
Lista de piezas españolas y francesas en la página 6.
Liste des pièces espagnoles et françaises à la page 6.
This piece is paperboard construction. It is not made from wood but is required for the
assembly of your unit.
Esto pedazo son la construcción del cartón. Ello no son hecho de madera, pero se requlere
para la asamblea de su unidad.
Cette pièce est de construction en carton. Elle n'est pas fabriquée de bois, mais nécessaire
pour l'assemblage de votre meuble.
A
B
C
D
E
F
G
G
H
P
QR
R
S
T
B345869321PCOM1
5 /38
?? www.coscokidsfurniture.com ??
PARTS - PIEZAS - PIECES
Parts List
DESCRIPTION
PART NUMBER
QTY
ITEM
LEFT DRAWER SIDE
358690150902I
RIGHT DRAWER SIDE
358690151002J
DRAWER BACK
358690151102K
DRAWER BRACE355380001202
L
TOP DRAWER FRONT
358690151301M
BOTTOM DRAWER FRONT
358690151401N
DRAWER BOTTOM
358690151502
O
Top Drawer
Cajón Superior
Tiroir du Haut
Bottom Drawer
Cajón Inferior
Tiroir du Bas
Parts shown below are for the top and bottom drawers. please note, some parts are labeled with a sticker and some parts have a letter
stamped on a raw edge.
Piezas que se muestran a continuación son para la parte superior y parte inferior cajones. Nota: algunas partes están marcados con
una etiqueta y algunas partes tienen una letra impresa en un borde.
Les pièces ci-dessous sont pour le haut et le bas tiroirs. Veuillez noter que certaines parties sont étiquetés avec un autocollant et
certaines régions ont une lettre estampillée sur le bord brut.
II
JJ
KK
LL
M N
OO
B345869321PCOM1
6 /38
?? www.coscokidsfurniture.com ??
Parts List
DESCRIPTION
PART NUMBER
QTY
ITEM
PANEL IZQUIERDA / PANNEAU DE GAUCHE
358693210101A
PANEL DERECHO / PANNEAU DE DROIT
358693210201B
PARTICIÓN / PARTITION
358693210301
C
PARTE SUPERIOR / PANNEAU SUPERIEUR
358693210401D
FONDO / FOND
358690000501
E
ESTANTE FIJO / STABLETTE FIXE
358693210601F
FALDÓN DELANTERO / TABLIER AVANT
358693210702
G
DELANTAL DE NUEVO / TABLIER RETOUR358690000801
H
LADO DEL CAJÓN IZQUIERA / CÔTE DE TIROIR GAUCHE
358690150902I
LADO DEL CAJÓN DERECHO / CÔTE DE TIROIR DROIT
358690151002J
CAJÓN DE ATRÁS / ARRIÈRE DE TIROIR
358690151102
K
SOPORTE DE CAJÓN / RENFORT DE TIROIR
355380001202L
FRENTE DEL CAJÓN SUPERIOR / FACADE DU TIROIR SUPÉRIEUR
358690151301M
FRENTE DEL CAJÓN INFERIOR / FONDO DE TIROIR
358690151401N
PARTE INFERIOR DEL CAJÓN / FONDO DE TIROIR INFERIEUR
358690151502
O
DELANTERO RIEL / RAIL AVANT
358690151601P
CARRIL DE NUEVO / RAIL RETOUR
358690151701
Q
CARRIL LATERAL / SIDE RAIL358690151802
R
INFERIOR BASE / BASE DE FOND
358690151901
S
PANEL TRASERO / PANNEAU ARRIERE
K5869321001T
B345869321PCOM1
7 /38
?? www.coscokidsfurniture.com ??
PARTS - PIEZAS - PIECES
x
96
#A21520
compression dowel
clavija de compresion
goujon de compression
x
12
#A56540
slide
corredera
glissiere coulissante
x
24
#A51990
knob
perilla
bouton
x
31
#A84050
safety bracket kit
juego del soporte de seguridad
ensemble de courroie sécurite
3a
3b
3c 3d
x
42
#A54270
metal plate
placa de metal
plaque métallique
x
cam bolt
#A22510
perno de leva
boulon de came
621
x
#A22570
cam lock
cerradura de leva
serrure de came
521
x
14 4
#A54220
drawer bracket
soporte de caón
support de tiroir
x
#A21500
steel dowel
pasador de acero
goujon de acier
82
x
#A21660
wood dowel
clavija de madera
goujon de bois
77
x
#A53600
angle bracket
support de l'angle
anaquel del ángulo
10 6
x
#A12120
7/16" pan head
cabeza redondo 7/16"
tête ronde 7/16"
11 40
x
12 12
#A11070
1/4" euro screw
tormillo euro 1/4"
euro vis 1/4" tête plate 1-3/4"
cabeza plano 1-3/4"
1-3/4" flat head
x
#A13410
13 9
x
15 32
#A21110
nail
clavo
clou
x
16 12
#A11600
1-1/4" flat head
cabeza plano 1-1/4"
tête plate 1-1/4"
x
#A17400
8-32 x 7/8" bolt
tornillo 7/8"
vis 7/8"
17 4
COSCOR
x
18 1
#A93350
cosco label
etiqueta de COSCO
étiquette de Cosco
B345869321PCOM1
8 /38
?? www.coscokidsfurniture.com ??
2
3½ turn to fully
lock.
½ se vuelven a
totalmente
cerradura.
½ tour pour
verrouiller
complètement.
4
Tighten to fully seat. Do not over
tighten.
Apriétese a totalmente asiento. No
haga encima de apriétese.
Serrez pour mettre le siège bien en
place. Ne pas trop serrer.
Proper orientation of cam.
La orientación apropiada de leva.
Bonne orientation de la came.
1
This illustration shows how the CAM fastening system works.
Esta ilustración muestra el sistema de fijación de leva y como funciona.
Cette illustration montre le système de fixation CAME et son fonctionnement.
Lock
Apretar
Serrer
Titus
Titus
Titus
1
B345869321PCOM1
9 /38
?? www.coscokidsfurniture.com ??
Finished Edge
Borde Acabado
Bord Fini
Proper orientation of CAM LOCK
Posición correcta de la cerradura de leva.
Bonne orientation de la SERRURE DE CAME
x
31
3a
3b
x
52
x
65
x
71
Important: When using a power drill or power screwdriver for screwing, please be aware to slow down and stop when screw is
tight. Failure to do so may result in stripping the screw.
Importante: Cuando se utiliza un taladro eléctrico o corriente desarmador para atornillar, tenga en cuenta a despacio y se
detendrá cuando el tornillo está apretado. No hacerlo puede resultar en despojar el tornillo.
Important : Lorsque vous utilisez une perceuse électrique ou un tournevis électrique pour le vissage, sachez pour ralentir et
arrêter lorsque la vis est serrée. Faute de quoi vous risquez dans la vis se déshabillant.
3a
3b
5
6
6
7
A
Be sure to use the holes shown.
Asegúrese de utilizar los orificios mostrados.
N'oubliez pas d'utiliser les trous indiqués.
2
B345869321PCOM1
10 /38
?? www.coscokidsfurniture.com ??
x
52
x
65
x
717
6
5
6
Proper orientation of CAM LOCK
Posición correcta de la cerradura de leva.
Bonne orientation de la SERRURE DE CAME
Finished Edge
Borde Acabado
Bord Fini
Be sure to use the holes shown.
Asegúrese de utilizar los orificios mostrados.
N'oubliez pas d'utiliser les trous indiqués.
B
3
B345869321PCOM1
11 /38
?? www.coscokidsfurniture.com ??
x
12
Extend each slide as shown. Press the black plastic lever upward and seperate the two parts of the slide.
Ampliar la diapositiva como se muestra. Presione hacia arriba la palanca negra de plástico y separar las dos partes de la diapositiva.
Étendre la lame comme illustré. Appuyez sur le levier en plastique noir vers le haut et séparer les deux parties de la diapositive.
Use these three holes when attaching slide.
Utilice estos tres agujeros al colocar la diapositiva.
Utilisez ces trois trous pour la fixation de glissière.
Plastic Lever
Palanca de Plástica
Levier en Plastique
Use these three holes when attaching inner slide.
Utilice estos tres agujeros al colocar la diapositiva.
Utilisez ces trois trous pour la fixation de glissière.
1
This inner slide will be attached to the drawer sides.
Esta corredera interior se adjuntará a los lados del cajón.
Cette diapositive intérieure sera attachée aux côtés de tiroir.
This outer side will attach to your side panels.
Este lado hacia fuera adjuntará a los paneles laterales.
Ce côté à se joindre à vos panneaux latéraux.
4
B345869321PCOM1
12 /38
?? www.coscokidsfurniture.com ??
Finished Edge
Borde Acabado
Bord Fini
x
12
x
12 6
1
1
1
12
12
12
12
12
12
12
A
Use these three holes when attaching slide.
Utilice estos tres agujeros al colocar la diapositiva.
Utilisez ces trois trous pour la fixation de glissière.
front
frente
avant
front
frente
avant
1
(From step 3)
(De paso 3)
(Partir de l'étape 3)
5
B345869321PCOM1
13 /38
?? www.coscokidsfurniture.com ??
x
12
x
12 6
Use these three holes when attaching slide.
Utilice estos tres agujeros al colocar la diapositiva.
Utilisez ces trois trous pour la fixation de glissière. front
frente
avant
front
frente
avant
Finished Edge
Borde Acabado
Bord Fini
12
12
12
12
12
12
12
1
1
1
B
1
(From step 3)
(De paso 3)
(Partir de l'étape 3)
6
B345869321PCOM1
14 /38
?? www.coscokidsfurniture.com ??
x
66
6
Finished Edge
Borde Acabado
Bord Fini
Finished Edge
Borde Acabado
Bord Fini
Finished Edge
Borde Acabado
Bord Fini
Unfinished Surface
Superficie Acabado
Surface Non Fini
D
7
B345869321PCOM1
15 /38
?? www.coscokidsfurniture.com ??
x
10 3
x
11 6
Attach three angle brackets (10) to one of the top
aprons (G) as shown.
Adjuntar tres escuadras (10) a uno de los mejores
delantales (G) como se muestra.
Fixez trois équerres (10) à l'un des meilleurs tabliers
(G) comme indiqué.
Angle brackets (10) will
be flush with the
unfinished edge as
shown.
Los corchetes
angulares (10) estarán
a ras con el borde sin
terminar, como se
muestra.
Les chevrons (10) sera
aligné avec le bord non
fini comme indiqué.
10
11
Please note, the front apron (G) will have an
extra hole in this location.
Nota: el faldón delantero (G) tendrá un
agujero exra en esta ubicación.
Veuillez noter que le tablier avant (G) aura
un trou exra dans cet endroit.
Attach front apron (G) to top (D) as
shown.
Adjuntar faldón delantero (G) al
principio (D) como se muestra.
Fixez tablier avant (G) vers le haut (D)
comme indiqué.
G
G
D
unfinished edge
borde inacabado
bord non fini
8
B345869321PCOM1
16 /38
?? www.coscokidsfurniture.com ??
x
10 3
x
11 6
x
54
Please note, the front apron (G) will have an extra hole in this location.
Nota: el faldón delantero (G) tendrá un agujero exra en esta ubicación.
Veuillez noter que le tablier avant (G) aura un trou exra dans cet endroit.
Proper orientation of CAM LOCK
Posición correcta de la cerradura de leva.
Bonne orientation de la SERRURE DE CAME
5
5
End View
Vista Final
Vau Finale
Finished Edge
Borde Acabado
Bord Fini
G E
10
11
11
Attached the second front apron (G) with three angle brackets (10)
and six screws (6) as shown.
Se adjunta el segundo faldón delantero (G) con tres escuadras (10)
y seis tornillos (6) como se muestra.
Le second tablier avant (G) attaché avec trois crochets (10) et six
vis (6) comme indiqué.
Note, do not fully tighten the three screws in the
front apron (G) at this time.
Nota, no apriete completamente los tres tornillos
en el faldón delantero (G) en este momento.
Remarque, ne serrez pas complètement les trois
vis dans le tablier avant (G) à ce moment.
x
72
7
7
9
B345869321PCOM1
17 /38
?? www.coscokidsfurniture.com ??
x
56
Proper orientation of CAM LOCK
Posición correcta de la cerradura de leva.
Bonne orientation de la SERRURE DE CAME
x
73
7
7
7
5
5
5
C
F
10
B345869321PCOM1
18 /38
?? www.coscokidsfurniture.com ??
x
13 2
13
Finished Edge
Borde Acabado
Bord Fini
F
C
11
B345869321PCOM1
19 /38
?? www.coscokidsfurniture.com ??
UNLOCK LOCK
APRETAR
DESAPRETAR
OUVRIR SERRER
Press the fixed shelf compont (from step
10) onto the left panel (A) as shown. Turn
the cam locks (5) clockwise to lock in place.
Attached the bottom shelf component (from
step 8) in the same manner.
Pulsar la compont estante fijo (del paso 10)
en el panel de la izquierda (A) como se
muestra. Gire los cierres de leva (5) hacia
la derecha para bloquear en su lugar. Se
adjunta el componente estante inferior (del
paso 8) de la misma manera.
Appuyez sur le plateau compont fixe (de
l'étape 10) sur le panneau de gauche (A)
comme montré. Tournez les serrures à
came (5) dans le sens horaire pour
verrouiller en place. L'abattant de fond
(provenant de l'étape 8) de la même
manière indépendante.
F
C
A
E
G
Finished Edge
Borde Acabado
Bord Fini
12
B345869321PCOM1
20 /38
?? www.coscokidsfurniture.com ??
5
5
x
52
x
82
8
8
Proper orientation of CAM LOCK
Posición correcta de la cerradura de leva.
Bonne orientation de la SERRURE DE CAME
H

Other Cosco Indoor Furnishing manuals

Cosco 5891501PCOM User manual

Cosco

Cosco 5891501PCOM User manual

Cosco 5926216COM User manual

Cosco

Cosco 5926216COM User manual

Cosco 5850015PCOM User manual

Cosco

Cosco 5850015PCOM User manual

Cosco 5891500PCOM User manual

Cosco

Cosco 5891500PCOM User manual

Cosco 5887218PCOM User manual

Cosco

Cosco 5887218PCOM User manual

Cosco 7446059P User manual

Cosco

Cosco 7446059P User manual

Cosco 5888501PCOM User manual

Cosco

Cosco 5888501PCOM User manual
Cosco 7461315P User manual

Cosco

Cosco 7461315P User manual

Cosco 5884218PCOM User manual

Cosco

Cosco 5884218PCOM User manual

Cosco 5890500PCOM User manual

Cosco

Cosco 5890500PCOM User manual

Cosco 5885218PCOM User manual

Cosco

Cosco 5885218PCOM User manual

Cosco 5925216COM User manual

Cosco

Cosco 5925216COM User manual

Cosco 5953321COM User manual

Cosco

Cosco 5953321COM User manual

Cosco 5849207PCOM User manual

Cosco

Cosco 5849207PCOM User manual

Cosco 5954216COM User manual

Cosco

Cosco 5954216COM User manual

Cosco 5848207PCOM User manual

Cosco

Cosco 5848207PCOM User manual

Cosco 5848015PCOM User manual

Cosco

Cosco 5848015PCOM User manual

Cosco 5870321PCOM User manual

Cosco

Cosco 5870321PCOM User manual

Cosco 5889501PCOM User manual

Cosco

Cosco 5889501PCOM User manual

Cosco 5871321PCOM User manual

Cosco

Cosco 5871321PCOM User manual
Cosco 5923216COM User manual

Cosco

Cosco 5923216COM User manual

Cosco 5850207PCOM User manual

Cosco

Cosco 5850207PCOM User manual

Cosco 5953216COM User manual

Cosco

Cosco 5953216COM User manual
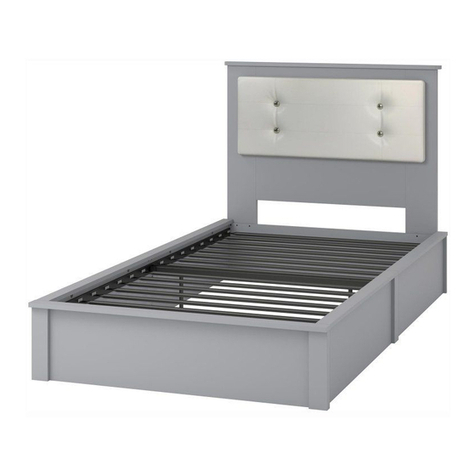
Cosco 5889500PCOM User manual

Cosco

Cosco 5889500PCOM User manual

Popular Indoor Furnishing manuals by other brands

Furniture of America Lana CM3153ST-2PK Assembly instructions

Furniture of America

Furniture of America Lana CM3153ST-2PK Assembly instructions

Baxton Studio Georgia 9766 Assembly instructions

Baxton Studio

Baxton Studio Georgia 9766 Assembly instructions

9to5 seating Neo Lite Assembly instructions

9to5 seating

9to5 seating Neo Lite Assembly instructions

Argos Thornbury 343759 Assembly instructions

Argos

Argos Thornbury 343759 Assembly instructions

Pinolino Lumi 14 00 32 Assembly plan

Pinolino

Pinolino Lumi 14 00 32 Assembly plan

OFM 122 Assembly instructions

OFM

OFM 122 Assembly instructions

LivingXL X2266 Assembly and safety instructions

LivingXL

LivingXL X2266 Assembly and safety instructions

Forte Surfino SFNR711L Assembling Instruction

Forte

Forte Surfino SFNR711L Assembling Instruction

moll Joker Assembly instructions

moll

moll Joker Assembly instructions

Otto 12269126 Assembly instructions

Otto

Otto 12269126 Assembly instructions

Ryvyr LENA V-LENA-32PS installation instructions

Ryvyr

Ryvyr LENA V-LENA-32PS installation instructions

Mayline Medina Series Assembly instructions

Mayline

Mayline Medina Series Assembly instructions

Home Decorators Collection Windlowe 15101-VS61C-AT Assembly instructions

Home Decorators Collection

Home Decorators Collection Windlowe 15101-VS61C-AT Assembly instructions

Bouclair 9399430 Assembly instructions

Bouclair

Bouclair 9399430 Assembly instructions

Costway GIANTEX HW66874 user manual

Costway

Costway GIANTEX HW66874 user manual

Neutral Posture Cozi Series Assembly guide

Neutral Posture

Neutral Posture Cozi Series Assembly guide

Furniture of America CM3577T Assembly instructions

Furniture of America

Furniture of America CM3577T Assembly instructions

Wilding Wallbeds Sierra Instruction booklet

Wilding Wallbeds

Wilding Wallbeds Sierra Instruction booklet

manuals.online logo
manuals.online logoBrands
  • About & Mission
  • Contact us
  • Privacy Policy
  • Terms and Conditions

Copyright 2025 Manuals.Online. All Rights Reserved.