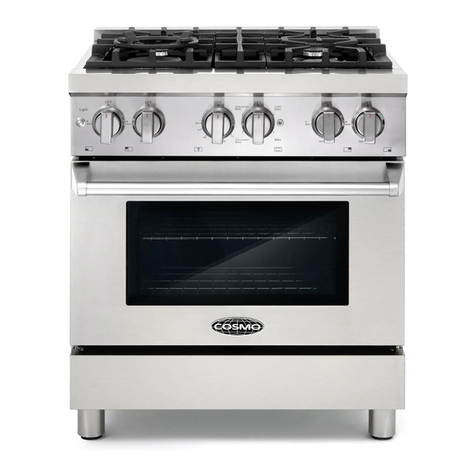
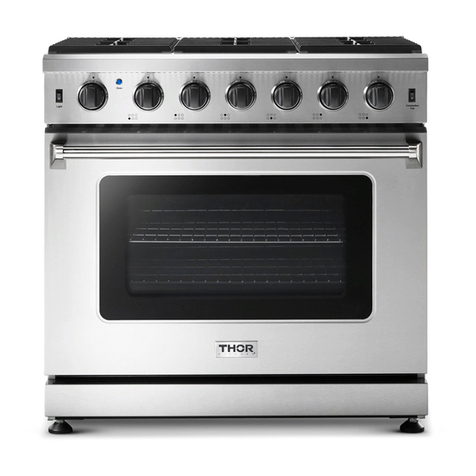
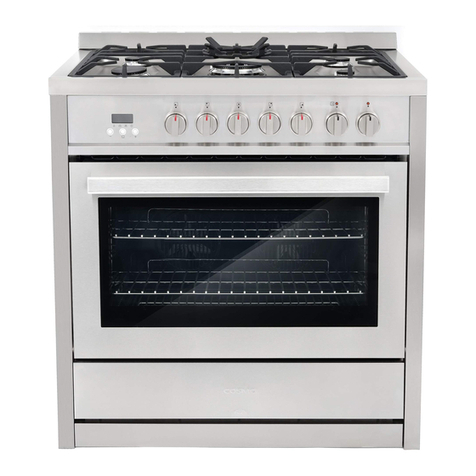
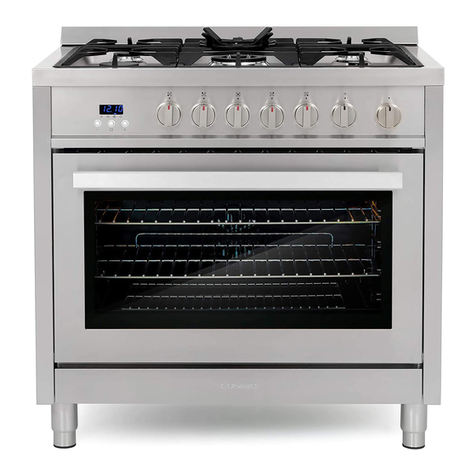
Cosmo F965 User manual

DUAL FUEL RANGE
F965
F965NF
INSTALLATION MANUAL
READ AND SAVE THESE INSTRUCTIONS.
FOR RESIDENTIAL USE ONLY.
PLEASE LEAVE THIS GUIDE WITH THE HOMEOWNER.
PLEASE KEEP THIS GUIDE FOR FUTURE REFERENCE.
IMPORTANT:
INSTALLER:
HOMEOWNER:
36-IN FREESTANDING RANGE
Rev.22.08


1
THANK YOU FOR YOUR PURCHASE
Thank you for your purchase. We know that you have many brands and
products to choose from and we are honored to know that you have decided
to take one of our products into your home and hope that you enjoy it.
COSMO Appliances are designed according to the strictest safety and
performance standard for the North American market. We follow the most
advanced manufacturing philosophy. Each appliance leaves the factory after
thorough quality inspection and testing. Our distributors and our service
partners are ready to answer any questions you may have regarding how to
install, use and case for your products. We hope that this manual will help you
learn to use the product in the safest and most effective manner.
Before using this product, please read through this manual carefully. Keep
this user manual in a safe place for future reference. Please ensure that other
persons using this product are familiar with these instructions as well.
If you have any questions or concerns, please contact the dealer from whom you
purchased the product, or contact our Customer Support at:
1-888-784-3108
Reach us online at:
www.cosmoappliances.com

2
TABLE OF CONTENTS
RANGE SAFETY.................................................................................................... 3
Anti-tip Device ........................................................................................................... 4
INSTALLATION REQUIREMENTS ........................................................................ 6
Tools and Parts .......................................................................................................... 6
Location Requirements ............................................................................................ 8
Product Dimensions ................................................................................................ 10
Clearances..................................................................................................................11
Venting Requirements............................................................................................. 12
Electrical Requirements........................................................................................... 13
Gas Supply Requirements ...................................................................................... 17
INSTALLATION INSTRUCTIONS........................................................................20
Unpack Range .........................................................................................................20
Install Anti-tip Device .............................................................................................. 21
Install Backsplash.................................................................................................... 24
Electrical Connection.............................................................................................. 24
Gas Connection....................................................................................................... 32
Complete Connection ............................................................................................ 35
Adjust Flame Height .......................................................................................... 36
Level Range .............................................................................................................. 38
GAS CONVERSION............................................................................................40
Convert Gas Pressure Regulator ...........................................................................41
Convert Surface Burners ........................................................................................ 42
Complete Gas Conversion.....................................................................................44

3
RANGE SAFETY
WARNING
Fire Hazard
If the information in this manual is not followed exactly, a fire or explosion
may result causing property damage, personal injury or death.
WARNING
Never Operate the Top Surface Cooking Section of this Appliance
Unattended.
DO NOT ATTEMPT TO EXTINGUISH AN OIL/GREASE FIRE WITH WATER
-Do not store or use gasoline or other flammable vapors and liquids in
the vicinity of this or any other appliance.
-WHAT TO DO IF YOU SMELL GAS
•Do not try to light any appliance.
•Do not touch any electrical switch.
•Do not use any phone in your building.
•Clear the room, building, or area of all occupants.
•Immediately call your gas supplier from a neighbor's phone. Follow
the gas supplier's instructions.
•If you cannot reach your gas supplier, call the fire department.
-Installation and service must be performed by a qualified installer,
service agency or the gas supplier.
•Failure to follow this warning statement could result in fire, explosion, or
burn hazard that could cause property damage, personal injury, or
death.
•If a fire should occur, keep away from the appliance and immediately
call your fire department.

4
WARNING
Tip Over Hazard
Making sure the anti-tip bracket is installed:
WARNING: Gas leaks cannot always be detected by smell.
Gas suppliers recommend that you use a gas detector approved by UL or
CSA.
For more information, contact your gas supplier.
WARNING: Do not install a ventilation system that blows air downward
toward this cooking appliance. This type of ventilation system may cause
ignition and combustion problems with this cooking appliance resulting in
personal injury or unintended operation.
Anti-Tip
Bracket
Range
Foot
•A child or adult can tip the range and be killed.
•Install anti-tip bracket to floor or wall per installation instructions.
•Slide range back so rear range foot is engaged in the slot of the anti-tip
bracket.
•Re-engage the anti-tip bracket if range is moved.
•Do not operate the range without anti-tip bracket installed and
engaged.
•Failure to follow these instructions can result in death or serious burns to
children and adults.
•Slide range forward.
•Look for the anti-tip bracket securely attached
to floor and wall.
•Slide range back so rear range foot is under
anti-tip bracket.

5
Your safety and the safety of others are very important.
We have provided many important safety messages in this manual and on
your appliance. Always read and obey all safety messages.
This is the safety alert symbol.
This symbol alerts you to potential hazards that can
kill or hurt you and others.
All safety messages will follow the safety alert symbol
and either the word "DANGER," "WARNING" or
"CAUTION." These words mean:
You can be killed or seriously
injured if you don't immediately
follow instructions.
DANGER
You can be killed or seriously
injured if you don't follow
instructions.
WARNING
A potentially hazardous situation
which, if not avoided, could result
in minor or moderate injury.
CAUTION
All safety messages will tell you what the potential hazard is, tell you how
to reduce the chance of injury, and tell you what can happen if the
instructions are not followed.
In the State of Massachusetts, the following installation instructions apply:
California Proposition 65 Warning
WARNING:
Cancer and Reproductive Harm - www.P65Warnings.ca.gov.
•Installations and repairs must be performed by a qualified or licensed
contractor, plumber, or gasfitter qualified or licensed by the State of
Massachusetts.
•If using a ball valve, it shall be a T-handle type.
•A flexible gas connector, when used, must not exceed 3 feet.

6
Backsplash with screws Anti-tip bracket with screws Anti-tip wall anchor hooks with
screws (F965 only)
Gas pressure regulator Gas pipe adapter with washers Power cord with strain relief
(Pre-installed for F965NF)
INSTALLATION REQUIREMENTS
TOOLS AND PARTS
Gather the required tools and parts before starting installation. Read and
follow the instructions provided with any tools listed here.
Tools Needed
Parts Supplied
•Tape measure
•Flat-blade screwdriver
•Phillips screwdriver
•Level
•Drill
•Wrench or pliers
•Pipe wrench
•15/16" (2.4 cm) combination
wrench
•1/8" (3.2 mm) drill bit (for wood
floors)
•Pipe-joint compound resistant to
Propane gas
•Marker or pencil
•3/16" (4.8 mm) carbide-tipped
masonry drill bit (for
concrete/ceramic floors)
•Noncorrosive leak-detection
solution
For Propane/Natural Gas
Conversions
•1/2" (1.3 cm) combination wrench
•1/4" (6 mm) nut drive
•9/32" (7 mm) nut drive
•Masking tape

7
Parts Needed
Scan to find
available LP kits
Gas supply line kit
(supply line and 2 adapters)
Optional Parts
To purchase these or any other accessories, please visit
www.cosmoappliances.com or reference the contact information at the end
of this manual.
•LP conversion kits

8
LOCATION REQUIREMENTS
IMPORTANT: Observe all governing codes and ordinances. Do not obstruct
flow of combustion and ventilation air.
Rating Plate
•It is the installer's responsibility to comply with installation clearances
specified on the model/serial rating plate. The model/serial rating plate is
located behind the oven door on the oven frame.
•The range should be located for convenient use in the kitchen.
•Recessed installations must provide complete enclosure of the sides and
rear of the range.
•To eliminate the risk of burns or fire by reaching over heated surface
units, cabinet storage space located above the surface units should be
avoided. If cabinet storage is to be provided, the risk can be reduced by
installing a range hood or microwave hood combination that projects
horizontally a minimum of 5" (12.7 cm) beyond the bottom of the cabinets.
•All openings in the wall or floor where range is to be installed must be
sealed.
•Do not seal the range to the side cabinets.
•Cabinet opening dimensions that are shown must be used.
•Grounded electrical supply is required. See "Electrical Requirements"
section.
•Proper gas supply connection must be available. See "Gas Supply
Requirements" section.
•Contact a qualified floor covering installer to check that the floor covering
can withstand at least 200°F (93°C).
•Use an insulated pad or 1/4" (0.64 cm) plywood under range if installing
range over carpeting.

9
Mobile Home - Additional Installation Requirements
•The installation of this range must conform to the Manufactured Home
Construction and Safety Standard, Title 24 CFR, Part 3280 (formerly the
Federal Standard for Mobile Home Construction and Safety, Title 24, HUD
Part 280). When such standard is not applicable, use the Standard for
Manufactured Home Installations, ANSI A225.1/NFPA 501A or with local
codes.
In Canada, the installation of this range must conform with the current
standards CAN/CSA-A240-latest edition, or with local codes.
Mobile Home Installations Require:
•When this range is installed in a mobile home, it must be secured to the
floor during transit. Any method of securing the range is adequate as
long as it conforms to the standards listed above.
•Four-wire power supply cord or cable must be used in a mobile home
installation. The appliance wiring will need to be revised. See "Electrical
Connection" section.

10
PRODUCT DIMENSIONS
This manual covers several models. Your model may appear different from
the models depicted. Dimensions given are maximum dimensions across all
models.
1.77 in
(45 mm)
Vent height
27.0 in
(686 mm)
With handle
42.3 in
(1075 mm)
Door fully open
25.0 in
(635 mm)
35.4 in
(900 mm)
35.4 in
(900 mm)
To cooktop
1.77 in
(45 mm)
Vent height
27.0 in
(686 mm)
With handle
42.3 in
(1075 mm)
Door fully open
35.4 in
(900 mm)
35.4 in
(900 mm)
To cooktop
25.0 in
(635 mm)
F965
F965NF

11
CLEARANCES
IMPORTANT: Some cabinet and building materials are not designed to
withstand the heat produced by the oven for baking and self-cleaning. Check
with your builder or cabinet supplier to make sure that the materials used will
not discolor, delaminate or sustain other damage.
GIVEN DIMENSIONS ARE MINIMUM CLEARANCES.
NOTE:
Lower
Cabinet
Depth
13 in
(33 cm)
Maximum
36 in
(91.4 cm)
18 in
(45.7 cm)
30 in
(76.2 cm) 6 in
(15.2 cm)
to right
wall
6 in
(15.2 cm)
to left
wall
Overhead
Cabinet
Depth
35.6 in
(90.5 cm)
(63.5 cm)
25 in
•30" (76.2 cm) minimum clearance between cooking surface and bottom
of the overhead cabinet.
•18" (45.7 cm) minimum clearance from upper cabinet to countertop on
either side of unit.

12
VENTING REQUIREMENTS
IMPORTANT: This range must be exhausted outdoors unless you are using
ductless venting. Observe all governing codes and ordinances. Do not
obstruct flow of combustion and ventilation air.
Makeup Air
Local building codes may require the use of makeup air systems when using
ventilation systems greater than specified CFM of air movement. The specified
CFM varies from locale to locale. Consult your HVAC professional for specific
requirements in your area.
•Do not terminate the vent system in an attic or other enclosed area.
•Use an approved vent cap for proper performance. If an alternate wall or
roof cap is used, be certain the cap size is not reduced and that it has a
backdraft damper.
•Vent system must terminate to the outside unless you are using a ductless
vent kit.
•Rigid metal vent is recommended. For best performance, do not use
plastic or metal foil vent.
•If a joist or stud must be cut, then a supporting frame must be
constructed.
•The size of the vent should be uniform.
•The vent system must have a damper.
•Seal all joints in the vent system.
•Use caulking to seal exterior wall or roof opening around the cap.
•Determine which venting method is best for your application.

13
ELECTRICAL REQUIREMENTS
WARNING
Electrical Shock Hazard
The electrical power to the oven branch circuit must be shut off while line
connections are being made.
Do not use an extension cord with this appliance.
Electrical ground is required on this appliance. The free end of the green
wire (the ground wire) must be connected to a suitable ground. This wire
must remain grounded to the oven.
If cold water pipe is interrupted by plastic, non-metallic gaskets, union
connections or other insulating materials, DO NOT use for grounding.
DO NOT ground to a gas pipe.
DO NOT have a fuse in the NEUTRAL or GROUNDING circuit. A fuse in the
NEUTRAL or GROUNDING circuit could result in an electrical shock.
Check with a qualified electrician if you are in doubt as to whether the
appliance is properly grounded.
Failure to do so could result in death or serious injury.
WARNING: Improper connection of the equipment-grounding conductor can
result in a risk of electric shock. Check with a qualified electrician or service
technician if you are in doubt as to whether the appliance is properly
grounded. Do no modify the power supply cord plug. If it will not fit the outlet,
have a proper outlet installed by a qualified electrician.
Electrical Ratings: AC 120 V / 240 V, 60 Hz, 14.2 A
Power Source: Single-Phase

14
ELECTRICAL SPECIFICATIONS
COMPONENT WATTAGE
Upper Inner Heating Element 3158W
Upper Outer Heating Element 2395W
Rear Heating Elements 2 x 1250W
Lower Heating Element 1960W
Oven Lights 2 x 25W
Convection Fan Motors 2 x 16W
Cooling Fan Motor 23W
ELECTRICAL REQUIREMENTS - U.S.A. ONLY
If codes permit and a separate ground wire is used, it is recommended that a
qualified electrical installer determine that the ground path is adequate and
wire gauge is in accordance with local codes.
Do not use an extension cord.
Be sure that the electrical connection and wire size are adequate and in
conformance with the National Electrical Code, ANSI/ NFPA No. 70-latest
edition and all local codes and ordinances.
A copy of the above code standards can be obtained from:
National Fire Protection Association
1 Batterymarch Park
Quincy, MA 02169
Electrical Connection
•To properly install your range, you must determine the type of electrical
connection you will be using and follow the instructions provided for it
here.
•Range must be connected to the proper electrical voltage and frequency
as specified on the model/serial number rating plate. All models are dual
rated, and designed to be connected to either 208/240V AC, 60Hz, 3-
wire or 4-wire, single-phase power supply.
•Use a 3-wire, UL listed, 40 or 50 A power supply cord (pigtail). If local
codes do not permit ground through the neutral, use a 4-wire power
supply cord rated at 250 V, 40 or 50 A and investigated for use with
ranges.

15
IMPORTANT: Local Codes may vary; installation of electrical connections and
grounding must comply with all applicable local codes.
If local codes permit grounding through the electrical supply neutral, connect
both the white neutral wire and the green ground wire from the oven to the
white neutral electrical supply wire.
ELECTRICAL REQUIREMENTS - CANADA ONLY
WARNING
Electrical Shock Hazard
Electrically ground range.
Failure to do so can result in death, fire or electrical shock.
Electrical Grounding Instructions
This appliance is equipped with a four-prong grounding plug for your
protection against shock hazard and should be plugged directly into a
properly grounded receptacle. Do not cut or remove the grounding prong
from this plug.
•A circuit breaker is recommended.
•Allow 3 ft - 6 ft (0.9 m - 1.8 m) of slack in the line so that the range can be
moved if servicing is ever necessary.
•A UL listed conduit connector must be provided at each end of the power
supply cable (at the range and at the junction box).
•The electrical supply should be a 3-wire or 4-wire, single-phase AC. Install
a suitable conduit box (not furnished). An appropriately sized, U-listed
conduit connector must be used to correctly attach the conduit to the
junction box.
•Wire sizes and connections must conform with the rating of the range.

16
If codes permit and a separate ground wire is used, it is recommended that a
qualified electrical installer determine that the ground path is adequate and
wire gauge are in accordance with local codes.
Be sure that the electrical connection and wire size are adequate and in
conformance with CSA Standard C22.1, Canadian Electrical Code, Part 1 -
latest edition, and all local codes and ordinances.
A copy of the above code standards can be obtained from:
Canadian Standards Association
178 Rexdale Blvd.
Toronto, ON M9W 1R3 CANADA
Electrical Connection
Check local codes and consult gas supplier. Check existing electrical supply
and gas supply. It is recommended that all electrical connections be made by
a licensed, qualified electrical installer.
Check with a qualified electrical installer if you are not sure the range is
properly grounded.
A time-delay fuse or circuit breaker is recommended.
This range is equipped with a CSA International Certified
Power Cord intended to be plugged into a standard 14-50R
wall receptacle. Be sure the wall receptacle is within reach of
range's final location.
Do not use an extension cord.
If an external electrical source is utilized, a statement that the appliance,
when installed, must be electrically grounded in accordance with local codes
or, in the absence of local codes, with the National Electrical Code, NFPA 70 or
the Canadian Electric Code, CSA C22.1-02.

17
GAS SUPPLY REQUIREMENTS
WARNING
Failure to do so can result in death, explosion or fire.
Observe all governing codes and ordinances.
IMPORTANT: This installation must conform with all local codes and
ordinances. In the absence of local codes, installation must conform with
American National Standard, National Fuel Gas Code ANSI Z223.1 - latest
edition or CAN/CGA B149 - latest edition.
IMPORTANT: Leak testing of the range must be conducted according to the
manufacturer's instructions.
TYPE OF GAS
Natural Gas:
This range is design-certified by CSA International for use with natural gas or,
after proper conversion, for use with LP gas.
•licensed heating personnel
•authorized gas company personnel
•authorized service personnel
•This range is factory-set for use with Natural gas. The model/serial rating
plate located on the right side oven door trim has information on the
types of gas that can be used. If the types of gas listed do not include the
type of gas available, check with the local gas supplier.
Explosion Hazard
Use a new CSA International approved gas supply line.
Install a shut-off valve.
Securely tighten all gas connections.
If connected to LP, have a qualified person make sure gas pressure does
not exceed the maximum pressure listed in this section.
Examples of a qualified person include:

18
LP Gas Conversion:
Conversion must be performed by a qualified service technician. The qualified
agency performing this work assumes the gas conversion responsibility.
No attempt shall be made to convert the appliance from the gas specified on
the model/serial rating plate for use with a different gas without consulting
the serving gas supplier. See "GAS CONVERSION" section.
GAS SUPPLY LINE
Provide a gas supply line of 3/4" (1.9 cm) rigid pipe to the range location. A
smaller size pipe on longer runs may result in insufficient gas supply. Pipe-joint
compounds that resist the action of LP gas must be used. With LP gas, piping
or tubing size can be 1/2" (1.3 cm) minimum. Usually, LP gas suppliers
determine the size and materials used in the system.
Flexible metal appliance connector:
Rigid pipe connection:
The rigid pipe connection requires a combination of pipe fittings to obtain an
in-line connection to the range. The rigid pipe must be level with the range
connection. All strains must be removed from the supply and fuel lines so
range will be level and in line.
•If local codes permit, a new CSA design-certified, 4 - 5 ft (122 - 152.4 cm)
long, 1/2" (1.3 cm) or 3/4" (1.9 cm) I.D., flexible metal appliance connector
may be used for connecting range to the gas supply line.
•A 1/2" (1.3 cm) male pipe thread is needed for connection to the female
pipe threads of the inlet to the appliance pressure regulator.
•Do not kink or damage the flexible metal tubing when moving the range.
This manual suits for next models
1
Table of contents
Other Cosmo Range manuals

Cosmo
Cosmo COS-EPGR486G User manual
Cosmo
Cosmo F965NF User manual
Cosmo
Cosmo COS-305AGC User manual

Cosmo
Cosmo COS-305AGC User manual
Cosmo
Cosmo GRP Series User manual
Cosmo
Cosmo COS-965AGC User manual
Cosmo
Cosmo COS-ERC305WKTD User manual
Cosmo
Cosmo COS-GRC305KTD User manual

Cosmo
Cosmo COS-965AGC User manual
Cosmo
Cosmo COS-244AGC User manual

Cosmo
Cosmo COS-965AGC User manual

Cosmo
Cosmo COS-244AGC User manual

Cosmo
Cosmo COS-305AERC User manual

Cosmo
Cosmo COS-965AGC User manual
Cosmo
Cosmo HYXION 36 Manual
Cosmo
Cosmo GRP Series User manual

Cosmo
Cosmo cos-965ag User manual

Cosmo
Cosmo COS-GRP304 User manual
Cosmo
Cosmo COS-965AGFC User manual
Cosmo
Cosmo COS-DFR304 Instruction Manual
