manuals.online logo
Brands
  1. Home
  2. •
  3. Brands
  4. •
  5. Costway
  6. •
  7. Indoor Furnishing
  8. •
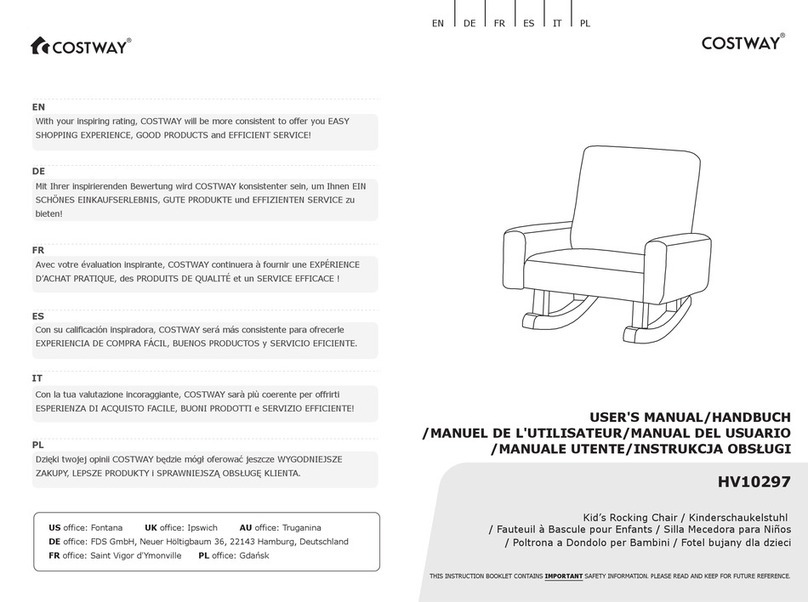
  9. Costway HY10039 User manual

Costway HY10039 User manual

Other Costway Indoor Furnishing manuals
Costway JZ10042WH User manual

Costway

Costway JZ10042WH User manual

Costway HW61311 User manual

Costway

Costway HW61311 User manual

Costway CB10293 User manual

Costway

Costway CB10293 User manual

Costway PATIOJOY HW55021 User manual

Costway

Costway PATIOJOY HW55021 User manual

Costway HU10394 User manual

Costway

Costway HU10394 User manual

Costway NP10952-A User manual

Costway

Costway NP10952-A User manual

Costway JV10680US-WH User manual

Costway

Costway JV10680US-WH User manual

Costway NP10278 User manual

Costway

Costway NP10278 User manual

Costway HU10413 User manual

Costway

Costway HU10413 User manual

Costway HW67595 User manual

Costway

Costway HW67595 User manual

Costway HW64554 User manual

Costway

Costway HW64554 User manual

Costway JV11237 User manual

Costway

Costway JV11237 User manual

Costway CB10403 User manual

Costway

Costway CB10403 User manual

Costway HW56101 User manual

Costway

Costway HW56101 User manual

Costway TA10048 User manual

Costway

Costway TA10048 User manual

Costway HW66530 User manual

Costway

Costway HW66530 User manual

Costway HW54022 User manual

Costway

Costway HW54022 User manual

Costway OP70690 User manual

Costway

Costway OP70690 User manual

Costway HW65873 User manual

Costway

Costway HW65873 User manual

Costway Christmas Tree User manual

Costway

Costway Christmas Tree User manual

Costway JV10008 User manual

Costway

Costway JV10008 User manual

Costway HW63971NA User manual

Costway

Costway HW63971NA User manual

Costway HW64630 User manual

Costway

Costway HW64630 User manual

Costway NP10206 User manual

Costway

Costway NP10206 User manual

Popular Indoor Furnishing manuals by other brands

Regency LWMS3015 Assembly instructions

Regency

Regency LWMS3015 Assembly instructions

Furniture of America CM7751C Assembly instructions

Furniture of America

Furniture of America CM7751C Assembly instructions

Safavieh Furniture Estella CNS5731 manual

Safavieh Furniture

Safavieh Furniture Estella CNS5731 manual

PLACES OF STYLE Ovalfuss Assembly instruction

PLACES OF STYLE

PLACES OF STYLE Ovalfuss Assembly instruction

Trasman 1138 Bo1 Assembly manual

Trasman

Trasman 1138 Bo1 Assembly manual

moss DESIGN Caisson Credenza Assembly instructions

moss DESIGN

moss DESIGN Caisson Credenza Assembly instructions

Aquaglide FULL DECK 15.0 owner's manual

Aquaglide

Aquaglide FULL DECK 15.0 owner's manual

AREBOS AR-HE-SW30 user manual

AREBOS

AREBOS AR-HE-SW30 user manual

Till-Hilft Fulda 87005.330 Assembly instructions

Till-Hilft

Till-Hilft Fulda 87005.330 Assembly instructions

Twoey Outside 2010 quick start guide

Twoey Outside

Twoey Outside 2010 quick start guide

Hettich Easys 200 operating instructions

Hettich

Hettich Easys 200 operating instructions

The bedboss RELAX 404 Series owner's manual

The bedboss

The bedboss RELAX 404 Series owner's manual

Oeseder Möbelindustrie Bern 991 720 Assembly instructions

Oeseder Möbelindustrie

Oeseder Möbelindustrie Bern 991 720 Assembly instructions

Next ALIX A27743 Assembly instructions

Next

Next ALIX A27743 Assembly instructions

BROSA Hans Assembly guide

BROSA

BROSA Hans Assembly guide

Prodigg MINIKA PBA015T-FUR installation manual

Prodigg

Prodigg MINIKA PBA015T-FUR installation manual

Whittier Wood Furniture McKenzie 3504AFGACa quick start guide

Whittier Wood Furniture

Whittier Wood Furniture McKenzie 3504AFGACa quick start guide

Habitat Ipanema Bar 846/9760 manual

Habitat

Habitat Ipanema Bar 846/9760 manual

manuals.online logo
manuals.online logoBrands
  • About & Mission
  • Contact us
  • Privacy Policy
  • Terms and Conditions

Copyright 2025 Manuals.Online. All Rights Reserved.

THIS INSTRUCTION BOOKLET CONTAINS IMPORTANT SAFETY INFORMATION. PLEASE READ AND KEEP FOR FUTURE REFERENCE.
EN DEFR ES IT PL
USER'S MANUAL/HANDBUCH
/MANUEL DE L'UTILISATEUR/MANUAL DEL USUARIO
/MANUALE UTENTE/INSTRUKCJA OBSŁUGI
Kids Desk / Kinderschreibtisch / Bureau pour Enfant /
Escritorio para Niños / Scrivania /
Biurko dla dzieci
HY10039
ABC
D E F
G H I
Desk top*1 Lifting column*2 Base*2
Tischplatte Tischbein*2 Tischfuß*2
Panneau de bureau x 1 Support réglable x 2 Base x 2
Tablero de escritorio x1 Soporte ajustable x2 Base x2
Piano x1 Supporto x2 Base x2
Blat biurka x 1 Kolumna podnosząca x 2 Podstawa x 2
Beam*1 Left side bracket*1 Right side bracket*1
Träger*1 Linke Seitenhalterung*1 Rechte Seitenhalterung*1
Barre x 1 Support gauche x 1 Support droit x 1
Barra x1 Soporte lateral izquierdo x1 Soporte lateral derecho x1
Trave x1 Staffa laterale sinistra x1 Staffa laterale destra x1
Górna poprzeczka x 1 Lewy wspornik boczny x 1 Prawy wspornik boczny x 1
Kick tube*1 Drive shaft*1 M6 screws*22
Fußstütze*1 Antriebswelle*1 Schrauben*22
Repose-pied x 1 Arbre d’entraînement x 1 Vis M6 x 22
Reposapiés x1 Eje de transmisión x1 Tornillo M6 x22
Poggiapiedi x1 Albero di trasmissione x M6 Vite x22
Dolna poprzeczka x 1 Pręt synchronizacyjny x 1 Śruba M6 x 22
02
01
JK L
M N
M8 screws*4 R-type latch*2
Hand shake*1 5# wrench*1
Handgriff*1 Innensechskantschlüssel*1
Manivelle x 1 Clé x 1
Manivela x1 Llave #5 x1
Manovella x1 Chiave x1
Korba x 1 Klucz imbusowy x 1
Plastic gasket*2
Schrauben*4 R-Typ-Verriegelung*2 Kunststoffunterlegscheibe*2
Vis M8 x 4 Loquet x 2 Rondelle plastique x 2
Tornillo M8 x4 Pestillo x2 Arandela de plástico x2
M8 Vite x4 Chiavistello x2 Rondella di plastica x2
Śruba M8 x 4 Zawleczka w kształcie
litery „R” x 2 Plastikowa podkładka x 2
I
B
C
03
Fix two (C) bases with (I) M6 screws on the (B) lifting column.
Befestigen Sie zwei (C) Tischfüße mit (I) M6-Schrauben
am (B) Tischbein.
Fixez deux bases (C) avec des vis M6 (I) sur le support
réglable (B).
Fije las dos bases (C) con los tornillos M6 (I) en los
soportes ajustables (B).
Fissare due basi (C) con le viti M6 (I) sui supporti (B).
Zamocuj podstawy (C) na kolumnach podnoszących (B).
W tym celu użyj śrub M6 (I).
EN
Notice: Do not adjust the lifting column height
before installation is complete.(Fine tuning)
EN /
Hinweis: Stellen Sie die Höhe des Tischbeins erst
nach Abschluss der Montage ein. (Feineinstellung)
DE /
Remarque : Ne réglez pas la hauteur du support réglable
(B) tant que le montage n’est pas terminé. (Réglage fin)
FR /
Nota: No ajuste la altura del soporte ajustable (B)
antes de completar el montaje. (Ajuste fino)
ES /
Nota: Non regolare l'altezza del supporto prima del
completamento dell'installazione. (Regolazione fine)
IT /
Uwaga: Nie reguluj wysokości kolumn
podnoszących przed zakończeniem instalacji.
PL /
DE
FR
ES
IT
PL
04
02
Use the (J) M8 screws for the (G) kick tube to fix it on
the lifting column.
Fixez le repose-pied (G) aux supports réglables (B) à
l’aide des vis M6 (J).
Verwenden Sie die (J) M8-Schrauben für die (G)
Fußstütze, um sie am Tischbein zu befestigen.
Fije el reposapiés (G) a los soportes ajustables (B) con
los tornillos M8 (J).
Utilizzare le viti M8 (J) per il poggiapiedi (G) per
fissarlo sul supporto.
Zamocuj dolną poprzeczkę (G) na kolumnach
podnoszących (B). W tym celu użyj śrub M8 (J).
J
G
EN
DE
FR
ES
IT
PL
05
Note: The screws is not tightened.EN /
Hinweis: Die Schrauben sind nicht fest angezogen.DE /
Remarque : Ne serrez pas les vis.FR /
Nota: No apriete los tornillos.ES /
Nota: Non stringere troppo le viti.IT /
Uwaga: Śruby należy dokręcić dopiero pod koniec montażu.
PL /
06
03
Fix the (D) beam with (I) M6 screws as shown.
Befestigen Sie den (D) Träger mit (I) M6-Schrauben wie
abgebildet.
Fixez la barre (D) avec des vis M6 (I) comme indiqué.
Fije la barra (D) con los tornillos M6 (I) como se muestra.
Fissare la trave (D) con le viti M6 (I) come mostrato.
Zamocuj górną poprzeczkę (D) przy użyciu śrub M6 (I).
ID
EN
DE
FR
ES
IT
PL
07
04
Fix the Ⓔleft and Ⓕright side brackets with ⒾM6
screws to fix on both sides of the lifting column.
Befestigen Sie die (E) linken und (F) rechten Seitenhalterungen
mit (I) M6-Schrauben an beiden Seiten des Tischbeins.
Fixez les supports (E et F) aux côtés des supports réglables (B)
à l’aide des vis M6 (J).
Fije los soportes laterales izquierdo y derecho (E y F) en ambos
lados de los soportes ajustables (B) con los tornillos M6 (I).
Fissare le staffe laterali sinistra e destra (E e F) con le viti M6
(I) da fissare su entrambi i lati del supporto.
Zamocuj lewy (E) i prawy (F) wspornik boczny po obu stronach
kolumn podnoszących (B). W tym celu użyj śrub M6 (I).
F
I
E
EN
DE
FR
ES
IT
PL
08
As shown in the figure, first pass the Ⓗdrive shaft
through the hexagonal holes on the lifting column, then
take the Ⓛplastic gasket into the drive shaft and then
pass through anotherlifting column, and finally deduct the
ⓀR-type latch.
Führen Sie, wie in der Abbildung gezeigt, zuerst die (H)
Antriebswelle durch die Sechskantlöcher am Tischbein,
dann die (L) Kunststoffunterlegscheibe in die
Antriebswelle und dann durch ein anderes Tischbein, und
ziehen Sie schließlich die (K) R-Typ-Verriegelung ab.
05
H
K
L
EN
DE
09
Comme indiqué sur la figure, faites d’abord passer l'arbre
d'entraînement par les trous hexagonaux de support
réglable (B), puis mettez la rondelle en plastique (L) dans
l'arbre d'entraînement et passez ensuite par un autre
support réglable (B), et enfin verrouillez avec le loquet
(K).
Como se muestra en la figura, primero pase el eje de
transmisión (H) a través de los orificios hexagonales del
soporte ajustable (B), luego coloque la arandela de
plástico (L) en el eje de transmisión y luego pase por el
otro soporte ajustable (B), y finalmente bloquee con el
pestillo (K).
FR
ES
Come mostrato in figura, far passare prima l'albero di
trasmissione (H) attraverso i fori esagonali sul supporto,
poi portare la rondella di plastica (L) nell'albero di
trasmissione e poi passare attraverso un altro supporto e
infine bloccare il chiavistello (K).
IT
Przełóż pręt synchronizacyjny (H) przez otwór w jednej z
kolumn podnoszących (B). Następnie nałóż plastikowe
podkładki (L) na pręt synchronizacyjny (H) i przełóż pręt
przez otwór w drugiej kolumnie podnoszącej (B). Zamocuj
przy użyciu zawleczek w kształcie litery „R” (K).
PL
10