Counterline Integrale Manual

Operation &
Maintenance Manual
Integrale Manhattan Da Vinci
Issue 04August 2012
Address: Counterline Ltd, 12 Randles Road, Knowsley Business Park, Merseyside, L34 9HZ
Telephone: +44 (0)151 548 2211
Fax: +44 (0)151 549 2179
Website: www.counterline.co.uk
idesign CHILLED DROP-IN DISPLAYS

Contents
Page 1 Operation & Maintenance Manual - Idesign Chilled Drop-In Displays
1. OPERATION
1.0 Switching Your Chilled Display Unit On
1.1 Fault On Switching On
1.2 Temperature Control
1.3 Defrost Cycles
1.4 Display Lighting
1.5 Loading With Food
1.6 Replacing Fluorescent Lights And Starters
1.7 Replacement Of Sneeze Screen Glass
1.8 Display Deck Adjustment
1.9 Shelving
1.10 Shelving (Multi-Tier Display Only)
1.11 Multi-Tier Displays
1.12 Power Board Plug Positions
2. CLEANING
2.0 Cleaning Safety Note
2.1 Stainless Steel
2.2 Cleaning Fluorescent Lights
2.3 Cleaning Glass
2.4 Cleaning Chilled DiSplay Main Tank
2.5 Condensing Unit Finned Coil
2.6 Automatic Evaporating Drip Tray
2.7 Rear Air Guides (Multi-Tier Units Only)
3. TROUBLE-SHOOTING
3.0 Ice Build Up On The Coil
3.1 Self Help Guide
Page 3
Page 3
Page 4
Page 4
Page 4
Page 5
Page 5
Page 6
Page 7
Page 7
Page 8
Page 8
Page 9
Page 10
Page 10
Page 10
Page 10
Page 11
Page 12
Page 13
Page 14
Page 15
Page 16

Important Information
Page 2 Operation & Maintenance Manual - Idesign Chilled Drop-In Displays
IMPORTANT
Counterline Ltd cannot be held responsible for any
accidents or injuries sustained through misuse or
improper operation / maintenance of its products. Please
follow our guidelines set out within this handbook for safe
working practice. At the design stage, please ensure that
the counter understructure can take the weight of the
display(s), and that adequate provision has been made for
lifting and positioning the display, to avoid risk of damage
or injury.
SAFETY INFORMATION
It is essential that this Idesign unit is provided with an
electrical supply by a qualied electrician and installed by
a competent person.
The presence of liquids on the display and risk of spillage
must be taken into account in designing the electrical
installation around the unit. For additional safety we
strongly recommend the tting of a 30ma trip RCD
protection device to the electrical supply. Under no
circumstances should electrical cables or points be
installed below the evaporator tray area, as water may
overow and cause a hazard.
Idesign display units are heavy. We strongly recommend
the use of mechanical lifting equipment when handling the
units and positioning them in counters. If no such lifting
equipment is available then sufcient personnel must be
available to handle each unit without contravening
Company or site Health and Safety Policies.
Before commencing any cleaning or maintenance
operation the Idesign unit must be isolated from the mains
supply by either removing the supply plug from its socket
or switching off at the local isolator.
NB: Switching off using the power switch on the
control panel does not fully isolate the unit. These
instructions must be implemented in conjunction
with your own Company’s Health and Safety
instructions.
WARRANTY
All Counterline products are guaranteed against faulty
materials and workmanship for 12 months from the date
of invoice provided that they have been installed,
operated, cleaned and maintained in accordance with
these instructions.
This guarantee specically excludes damage caused by
misuse, scratched or broken glass, quartz heat lights,
uorescent lights and electronic starters.
WARNING
ELECTRICAL SUPPLY
The following denotes the correct electrical supply
required, dependant on unit size:
Chilled Display Multi-Tier
2/1 2, 3, & 4 tier 2.7 kw 13 amp supply
3/1 2 & 3 tier 2.8 kw 13 amp supply
3/1 4 tier 3.0 kw 13 amp supply
4/1 2, 3 & 4 tier 3.0 kw 13 amp supply
Chilled Display Wells, Decks and Deli’s
2/1 1.7 kw 13 amp supply
3/1 2.0 kw 13 amp supply
4/1 2.2 kw 13 amp supply
5/1 2.3 kw 13 amp supply
6/1 2.4 kw 13 amp supply

Operation
Page 3 Operation & Maintenance Manual - Idesign Chilled Drop-In Displays
OPERATION
These instructions will guide you through the testing, operation, cleaning and maintenance of your Idesign chilled display.
Idesign chilled drop in food display units are designed for simple operation and will give many years of trouble free service
provided that these instructions are adhered to.
It is essential that you read the instructions carefully and follow all of the cleaning and maintenance
instructions. Failure to do so can result in premature failure that will not be covered by warranty.
1.0 - SWITCHING YOUR CHILLED DISPLAY UNIT ON
Info / Set point button
Manual defrost / decrease button
Manual activation/ increase button
Stand-by button
INDICATIONSCONTROLLER SET UP
BUTTONS
The digital controller controls both the circulating air temperature and the defrost cycles. It is pre-set to an average air tem-
perature of 0°C, which should maintain food below 5 °C in an ambient temperature below 25 °C.
At this stage there is no need to alter this or any other setting of the digital controller.
1.1 - FAULT ON SWITCHING ON
If after the operation of the main power switch on the control panel it does not illuminate:
1. Check that your Idesign unit has been connected to a mains supply by your installer, and that this supply is live.
2. Isolate the unit and check the supply fuse.
3. Take care to ensure that you replace a fuse with one of the same rating. If you can nd no fault call your installer for
help.
1.2 - TEMPERATURE CONTROL
In the Idesign system of chilled food display, the food temperature is maintained at or below 5°C by a stream of re-circulated
cold air. The air blows across the display deck, coming from grilles or holes on the operators side and returning to the fans
via a grille at the customer’s side. It is essential that neither of these grilles be obstructed in any way, as the airow
and efciency of the refrigeration system will be restricted.
The top of the displayed food must also be 50mm lower than the edge of the well or the glass surround if tted. This system
is very effective in a draught free environment with an ambient temperature of no more than 25°C
Where ambient temperatures above 25°C or draughty conditions exist, the display will not maintain food temperatures at
required levels.

Page 4 Operation & Maintenance Manual - Idesign Chilled Drop-In Displays
Operation
Your digital controller will be pre set at the factory to give a food display temperature of 2-5°C in typical operating condi-
tions. Under normal conditions the controller displays the actual temperature of the cold air around the food.
If you need to alter the pre set temperature proceed as follows:
Gantry digital controller (See diagram below)
1. Press Button for a least half a second, to display the set point value.
2. By keeping the button pressed, use button or to set the desired value.
3. When button is released, the new value is stored.
It is important that only small adjustments of say 1 or 2°C are made to the controller at any one time. The unit should then
be allowed to operate for at least one normal working day and food core temperatures monitored before any further adjust-
ments are made.
1.3 - DEFROST CYCLES
All chilled Idesign displays have an automatic defrost cycle, which operates every two hours. The air circulation fans con-
tinue to run and any ice-build up on the main cooling coil melts.
When this process is taking place and for a short time afterwards the Digital Controller (DIT) will indicate the last temperature
displayed before defrost started.
The micro processor controller will record where it was in the cycle when the unit was last turned off, so it is possible for the
unit to enter a defrost cycle within a few minutes of switching on. This is quite normal.
On a gantry controller, if required, a manual defrost can be started by pressing button for ve seconds.
1.4 - DISPLAY LIGHTING
On a gantry control display lights are switched on by pressing button with the light symbol on it. If the lights do not
come on, consult the self help page on section 3 of this manual.

Operation
Page 5 Operation & Maintenance Manual - Idesign Chilled Drop-In Displays
1.5 - LOADING WITH FOOD
• Idesign chilled display units are designed to merchandise food that is already at a temperature of 3-5 °C.
• They are not designed to cool food from ambient temperature.
• It is essential that all food and beverages have therefore been chilled to this temperature before being placed in the
display.
• Idesign chilled displays rely on the ow of cooling air from louvres at the front and rear of the display area (and the per-
forated rear panels of multideck displays).
• These louvres must not be obstructed by placing items too close to them, otherwise the display will not be able to func-
tion correctly and food will not be held at a safe temperature.
• Shelves must not be overstocked as this will prevent chilled air moving freely. There should always be a gap of at least
12mm between each product.
1.6 - REPLACING FLUORESCENT LIGHTS & STARTERS
• The lights tted are standard 25mm slimline uorescent tubes (colour ref: White 35), and a competent maintenance
engineer (who need not be a qualied electrician) can change them.
• If a tube is not illuminating properly or ickering it is usually worth changing the starter rst to see if this solves the
problem.
• To remove a starter rst isolate the supply then simply grip the top between nger and thumb whilst turning anti-clock-
wise, the starter will then pull out. Replacement is the reverse; gently push the starter into the hole left by the old one
whilst turning clockwise at the same time. If this doesn’t solve the problem you must replace the tube.
• To remove the old tube, rstly isolate the supply and allow it to cool and then turn it through 90 degrees when viewed
from its end. It doesn’t matter which way you turn it. If you then pull gently away from the tting it will come clear of its
connectors.
• To replace it with a new tube rst remove the protective packaging and then locate the two connector pins at each end
of the tube into the slots in the connector blocks. Gently press the tube into place and then turn through 90 degrees.
• In all cases when a uorescent tube is changed it is recommended that the reector is cleaned with methylated spirits
on a pad of tissue to remove any dirt or grease. This is done most easily after removing the old tube and before insert-
ing the new one. If the light still doesn’t work you must call your installer or our service department for help.

Page 6 Operation & Maintenance Manual - Idesign Chilled Drop-In Displays
Operation
1.7- REPLACEMENT OF SNEEZE SCREEN GLASS IF FITTED
Most Idesign units feature curved toughened glass sneeze screens mounted on top of two oval support posts. If this glass
becomes chipped or scratched it must be replaced at the earliest possible opportunity as its resistance to breakage by
impact or changes in temperature is considerably reduced.
Normally replacement glass can be shipped to you by overnight carrier and the operation to change the glass carried out by
any competent maintenance technician or the company that initially supplied your Idesign unit.
P.P.E should be warm when handling glass i.e eye protection and gloves. If it is necessary to change
the glass on a deli please contact our service department for help.
Integrale Glass
1. Isolate the unit from the electrical power.
2. With an assistant to steady the glass, unscrew the two stainless steel allen screws, one in the top of each oval post us-
ing the key provided in the tting kit.
3. Remove the screws, stainless steel ovals and the black plastic mouldings.
4. With an assistant lift both ends of the glass slowly clear of the unit and place it upside down on a at surface protected
by a cloth.
5. Remove the damaged glass from the area and lay the new piece of glass, unwrapped, upside down on the cloth.
6. Again using an assistant and with one of you holding each end of the glass, lower the new glass into position onto the
top of the oval posts (ensuring that the lower black plastic moulding is still in place)
7. Ensure that the holes in the glass line up with the threaded holes in the top of the posts.
8. Replace the upper black plastic moulding, stainless steel ovals and screws.
9. Tighten the screws using the key provided in the tting kit. Do not over tighten as this may cause breakage of the glass.
Manhattan Glass
1. Isolate the unit from the electrical power.
2. With an assistant to steady the glass, unscrew the four off pig-nose xings at either end of the glass using the pig-nose
spanner provided in the xing kit.
3. Remove screws and black plastic mouldings.
4. With an assistant lift both ends of the glass slowly clear of the unit and place it upside down on a at surface protected
by a cloth.
5. Again using an assistant, and with one of you holding each end of the glass, lower the new glass into position and rex
with the four-off pig-nose xings.
6. Tighten the screws using the key provided in the tting kit. Do not over tighten as this may cause breakage of the glass.
Da Vinci Glass
1. Isolate the unit from the electrical power.
2. Prise off top cover off both gantry posts.
3. With an assistant, unscrew both stainless steel allen screws, one in the top in each oval post, using the allen key pro-
vided in the tting kit.
4. Remove screws and black plastic mouldings.
5. With an assistant lift both ends of the glass slowly clear of the unit and place it upside down on a at surface protected
by a cloth.
6. Remove the damaged glass from the area and lay the new piece of glass, unwrapped, upside down on the cloth.
7. Again using an assistant and with one of you holding each end of the glass, lower the new glass into position onto the
top of the oval posts (ensuring that the lower black plastic moulding is still in place)
8. Ensure that the holes in the glass line up with the threaded holes in the top of the posts.
9. Replace the upper black plastic moulding, stainless steel ovals and screws.
10. Tighten the screws using the key provided in the tting kit. Do not over tighten as this may cause breakage of the glass.

Page 7 Operation & Maintenance Manual - Idesign Chilled Drop-In Displays
Operation
1.8 - DISPLAY DECK ADJUSTMENT
The main display area is adjustable to present the food on either a level or an inclined surface. To adjust the angle:
1. Carefully lift out the display deck sections and set to one side. You will see a number of small clips located in slots in
the stainless steel panel below the main air outlet grille.
2. Manoeuvre the clips out of their slots and replace in a higher or lower slot as required.
3. Ensure that there are two clips under each section of display deck and that all clips are on the same horizontal level.
4. Replace the display deck.
LIFT OUT DECK
ZOOM
INSERT PIN INTO
LOCATION HOLES
HOOK IN
REPLACE DECK ON TOP OF
PINS TO ANGLE DISPLAY
1 2 3
4
1.9- SHELVING
• The glass shelves if tted, are located in stainless steel channels and clamped in place by a grub screw from under-
neath.
• The shelves are designed to be positioned so that the front edges are in a vertical line above one another, but position-
ing in the deli units is not critical and this may be varied to suit individual applications.
• High capacity air curtain shelves just sit on the support brackets and can be just lifted out.
• Should it be necessary to remove or adjust the shelf position the grub screws can be loosened with the allen key pro-
vided in the service kit.
• The screws should only be tightened gently as too much pressure can break the glass.
LIFT UNDER SHELF USE ALLEN KEY TO UNSCREW
GRUB SCREW ANTI CLOCKWISE
CAREFULLY SLIDE OUT
GLASS
1 2 3

Page 8 Operation & Maintenance Manual - Idesign Chilled Drop-In Displays
Operation
1.10 - SHELVING (MULTI-TIER DISPLAYS ONLY
Multi tier shelving is supported on stainless steel brackets that are hooked on the back of the unit. To remove the glass,
carefully lift each piece of glass off the support bracket and set aside.
You can now adjust the height of the shelves simply by inserting the brackets at the rear of the unit in alternative locating
holes.
Ensure that before replacing the glass shelves the brackets are rmly secured and locked in
position.
It is essential that safety glasses are worn when removing any pieces of glass.
1.11- MULTI-TIER DISPLAYS
• This system offers chilled food display at countertop level and also on two, three or four shelves above.
• The food temperature is maintained at or below 5 deg C by a stream of re-circulated cold air.
• The air normally blows down from a slot at the top front edge of the display, returning to the fans and cooling coil
through a horizontal grille at the customer’s side of the countertop.
• Some air is directed across each of the shelves from small holes at the back of each shelf.
• Idesign multi-tier displays are available with and without doors for rear loading, usually the doors will be specied on a
display built into a front counter, solid xed rear panels are used where display units are built up against walls.
• If doors are tted they are held in the closed position by magnets and will stay open at an angle of about 120 degrees.
• To maintain the temperature in the display you should only open one door at a time for the shortest period possible.
ONLY OPEN ONE DOOR AT A TIME

Operation
Page 9 Operation & Maintenance Manual - Idesign Chilled Drop-In Displays
Inline Power plug (EL000140)
Inline Power plug (EL000140)
Inline Power plug (EL000140)
Inline Power plug (EL000140)
Inline Power plug (EL000140)
Inline Power plug (EL000140)
16amp Male plug
Display lights
Electric defrost element
Deck fans
Evap tray
Airflow kit
Comfort heated (if fitted)
Compressor
16amp Female plug Power supply
1
2
3
4
5
6
1
2
3
4
5
6
Inline Power plug (EL000140)
Inline Power plug (EL000140)
Inline Power plug (EL000140)
Inline Power plug (EL000140)
Inline Power plug (EL000140)
Inline Power plug (EL000140)
16amp Male plug
Display lights
Electric defrost element
Deck fans
Evap tray
Airflow kit
Comfort heated (if fitted)
Compressor
16amp Female plug Power supply
1
2
3
4
5
6
1
2
3
4
5
6
1.12 - POWERBOARD PLUG POSITIONS

Page 10 Operation & Maintenance Manual - Idesign Chilled Drop-In Displays
Cleaning
2.0 - CLEANING SAFETY NOTE
Before commencing any cleaning operation the Idesign unit must be isolated from the mains supply by either removing the
supply plug from its socket or switching off at the local isolator.
NB: Switching off using the power switch on the control panel does not fully isolate the unit.
Under no circumstances must a pressure washer or hosepipe be used in the vicinity of this unit.
2.1 - STAINLESS STEEL
• Stainless steel should be cleaned daily using a suitable proprietary stainless steel polish applied in accordance with the
manufacturer’s instructions.
• A list of recommended cleaning products is available from our service department.
• Do not use harsh abrasives or cleaning pads such as Scotchbrite
2.2 - FLUORESCENT LIGHTS
• The light output from uorescent display lights will be maintained if they are carefully cleaned monthly when cold using
a pad of tissue slightly moistened with methylated spirits. Nothing else should be used.
• At the same time the reectors should be wiped clean with a similar pad.
• Replacement uorescent lights are not covered by warranty.
2.3 - CLEANING GLASS
• Glass shelves and sneeze screens should be cleaned daily or as required using a proprietary glass cleaner and clean
cloth. Care should be taken to select a cleaner with minimum odour to avoid food tainting.
• Your unit may be provided with the optional full height curved glass sneeze screen and fully glazed ends.
• The ends are located into black plastic guide channels and xed in place with special ush stainless steel screws.
• Normally the ends can be cleaned in situ, but occasionally they should be removed to allow for more thorough cleaning.
• The xing screws can be removed and replaced with the special tool provided in the xing kit.
• When removing them take note of the position of the spacing washers and replace them in exactly the same order.
• When replaced, the xing screws should not be over tightened or the glass may be damaged.
• The front glass is supported along its lower edge in a full-length hinge, so that the glass can be opened forwards to-
wards the customer side for access to clean its inner face.
• To open the glass, stand in front of the counter, take hold of both ends of the glass at the top and pull it upwards and
towards you.
• The glass has a restraining device built into its hinge. This is just a restraining device and is not designed to support the
full weight of the glass. When cleaning ensure that you hold the glass with one hand and refrain from putting any ad-
ditional weight on the glass or hinge.
• After cleaning, the glass is returned to its normal position.
TILTING THE GLASS FORWARD
TILT GLASS
FORWARD
REMOVING THE GLASS ENDS
USE SPANNER PROVIDED
IN TOOL KIT
1. UNSCREW
2. LIFT GLASS
(Example is an Integrale
Chilled Display Deli)

Cleaning
Page 11 Operation & Maintenance Manual - Idesign Chilled Drop-In Displays
2.4 - CLEANING CHILLED DISPLAY
MAIN TANK
This operation must be carried out at least monthly with
the display disconnected from the electrical supply.
Lift out the main display deck sections and set aside.
This will expose two separate metal plates, one of which
supports the air circulation fans and the second is a bafe
plate guiding the air through the main cooling coil. These
plates are secured by nger-tightened screws, which are
removed without tools.
Once the screws have been removed the fan mounting
plate can be lifted out taking care not to strain the wiring,
the coil cover plate can then be removed and the main
cooling coil exposed. Remove any food debris using a
soft cloth and detergent.
Wipe the fan blades using a damp cloth and detergent.
Finally spray the interior of the tank and the nned cooling
coil generously with a sanitising solution such as Dettox.
Avoid using excess water if your unit is not connected to a
plumbed drain, as this may cause the automatic
evaporating drip tray to over ow. Re-assembly is the
reverse of the above.
When cleaning the unit you must inspect the main
cooling coil. You should nd the coil covered with a thin
layer of frost or ice. Anything up to about 2mm thick
is quite normal but anything in excess of this seriously
impairs its efciency.
If there is a build up of ice refer to section 3.0.

Cleaning
Page 12 Operation & Maintenance Manual - Idesign Chilled Drop-In Displays
2.5 - CONDENSING UNIT FINNED
COIL
This must be cleaned monthly
Located under the display is the condensing unit. This can
be accessed for cleaning by either removing a grille in the
fascia panelling of the counter or by removing the panel
itself.
The exact method of access will depend on the counter
construction. If you cannot work out how to get access
you must contact your installer for assistance.
The size of the condensing unit will vary with the type
of display but in general it is about 400 mm square and
comprises a grid of very ne black metal ns. These ns
become choked with dust and airborne particles. They
should be cleaned using a soft brush to loosen the dust
and a vacuum cleaner to remove it. The ns are very deli-
cate and considerable care is required.
If you are in any doubt as to your ability to carry out this
operation safely call your installer and arrange for them to
do it for you. If this operation is neglected or carried out
without sufcient care, a new condensing unit may be re-
quired, and the cost of its replacement will not be covered
by warranty.
A
1. LIFT UPWARD
1
2
2. PULL OUTWARD
C
USE A SOFT BRUSH TO REMOVE
DIRT AND DUST FROM FINNED
COIL
BCONDENSER WILL BE SITUATED IN EITHER
OF THE SHOWN POSITIONS
FINNED COIL

Cleaning
Page 13 Operation & Maintenance Manual - Idesign Chilled Drop-In Displays
2.6- AUTOMATIC EVAP TRAY
• This must be cleaned at least every three months.
• To clean the drip tray the supply to the unit must be totally isolated from the main supply by turning off the counter main
switch.
• Allow the drip tray to cool down before touching it.
• The automatic evaporating drip tray is located under the right hand end of the display when viewed from the rear.
• It can be accessed for cleaning by either removing a grille in the rear panelling of the counter or by removing the panel
itself. On a drop-in it is located in the cradle.
• The drip tray is a stainless steel tank about 500mm long and 100mm high, resting in it is a heating element, which is
connected via a short lead to a plug.
• Remove the plug from its socket and carefully lift out the drip tray and element together. There is likely to be some wa-
ter in the tray, which you should discard.
• Inside the tray and on the element will be a build up of deposits similar to the scale inside a kettle. As much of this as
possible must be removed by a combination of scraping, Scotchbrite and kettle cleaner. It is not necessary to achieve
perfection, just remove the majority.
• Be careful not to distort the element when cleaning it.
WARNING
OPEN REAR ACCESS PANEL
ONCE THE REAR ACCESS
PANEL HAS BEEN REMOVED
YOU WILL SEE THE
FOLLOWING
CAREFULLY UNPLUG THE
EVAP TRAY AND REMOVE
FROM THE UNIT
EVAP TRAY
CLEAN AND REPLACE
IN REVERSE ORDER
A
B
C
TAKE CARE WHEN REMOVING THE
EVAP-TRAY. ENSURE THE UNIT IS
SWITCHED OFF AND THE EVAP-TRAY
HAS COOLED SUFFICIENTLY.

Cleaning
Page 14 Operation & Maintenance Manual - Idesign Chilled Drop-In Displays
2.7 - REAR AIR GUIDES (MULTI-TIER UNITS ONLY)
• Idesign multi-tier displays use vertical perforated panels behind the shelves to guide the chilled air around the unit.
• In xed back units they are polished stainless steel, in units with rear doors they are clear plastic.
• The air guides are located into slots in the rear doors or rear framework.
• In xed back units it is necessary to rst remove the glass shelves (see instructions 1.9) to gain access to the air guides.
• In units with rear doors access is obtained by simply opening the doors.
• At weekly intervals these should be removed by lifting upwards and away from the doors or framework, and then wiped
on both sides with a soft damp cloth.
Under no circumstances should any abrasive be used, as it will scratch the surface of the plastic or
stainless steel.
To reassemble, locate the projecting tongues on the guides into the slots in the doors or framework and then gently ease the
guides downwards into position.
UNITS WITH DOORS TO THE REAR
OPEN REAR DOOR

Trouble-shooting
Page 15 Operation & Maintenance Manual - Idesign Chilled Drop-In Displays
3.0 - BUILD UP OF ICE ON THE COIL
In conditions of high humidity it is possible for ice to accumulate on the coil, and not be fully cleared by the defrost system.
This problem is usually only likely to occur on units operating 24hours a day in conditions of high humidity. The result will be
a failure to maintain temperature, as airow through the coil is restricted.
If during cleaning an excessive build up of ice is observed, turn the unit off overnight with the main deck and airow bafe
plates removed.
Isolate the display unit completely from the mains electricity supply. Turning off the power switch on the dis-
play is not sufcient.
If the build up was very heavy and the unit is tted with an automatic evaporating drip tray it will be neces-
sary to guide the water resulting from the melting of the ice into a bucket rather than the evaporating drip tray
otherwise it will overow.
Remove the evaporator drip tray and locate a funnel or bucket under the plastic waste pipe located above it.
See cleaning instructions for removal of the drip tray.
When all the ice has melted re-assemble the tank and deck components, re-t the evaporator drip tray, then switch the
power back on and check the operation of the unit.
If you are in any doubts of your ability to carry out the above procedure please contact our service department for assis-
tance.
Please note that a visit by a service engineer to clear the coil of ice will not be covered by warranty unless it is
established that it was caused by a component failure.
If the build up repeats itself try turning the unit off every night.
If this does not solve the problem call our service department on 0151 548 2211 to check the operation of the
defrost system.

Trouble-Shooting
Page 16 Operation & Maintenance Manual - Idesign Chilled Drop-In Displays
PROBLEM ACTION
Nothing is working
• Ensure the power lead is properly plugged into a
socket outlet.
• If unsure that socket outlet is live, plug in another
appliance to conrm power is available.
• Check fuse in plug top and on control panel.
• Make sure power/ main switch is on.
Only the lights are working
• Check that the other switches/ control knobs are
turned on.
• Check that the electronic temperature controller is
illuminated.
Condensing unit has gone off It will switch off at a regular intervals as governed by
the controller and come back on automatically
The controller displays ‘DEF’
To prevent the display icing up, an automatic defrost
cycle is pre-programmed into the controller. DEF will
appear every 2 hours during defrost and recovery. This
is to maintain the efciency of the display.
Steam is seen from louvered door The automatic condensate waste tray is operating
normally.
The temperature of the produce
is too high
• Check setting of temperature controller
• Ensure airways are not blocked
• Ensure fans are operating
• Ensure the doors are closed
• Move display case from draughts/ air
• conditioning vents
• The condensing unit coil maybe blocked.
See section 2.5 - page 12.
• The evaporator coil maybe iced up.
See section 3.0 - page 15
If your problem is not listed or persists please contact our service department for help.
IMPORTANT: Please ensure you have your serial number before calling. This can be located in the center of
the gantry controller fascia plate.
3.1- SELF HELP GUIDE FOR IDESIGN CHILLED DROP-IN DISPLAYS
Address: Counterline Ltd, 12 Randles Road, Knowsley Business Park, Merseyside, L34 9HZ
Telephone: +44 (0)151 548 2211
Fax: +44 (0)151 549 2179
Website: www.counterline.co.uk
This manual suits for next models
2
Table of contents
Popular Commercial Food Equipment manuals by other brands

EPS
EPS CG-40 Operation manual
Lotus
Lotus LIBR.ISTR.CWK110E Installation and operating instructions
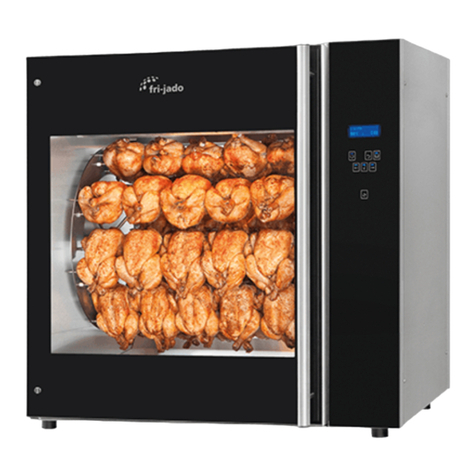
Fri-Jado
Fri-Jado TDR 5 M quick start guide

Feli
Feli NTM-610 instruction manual
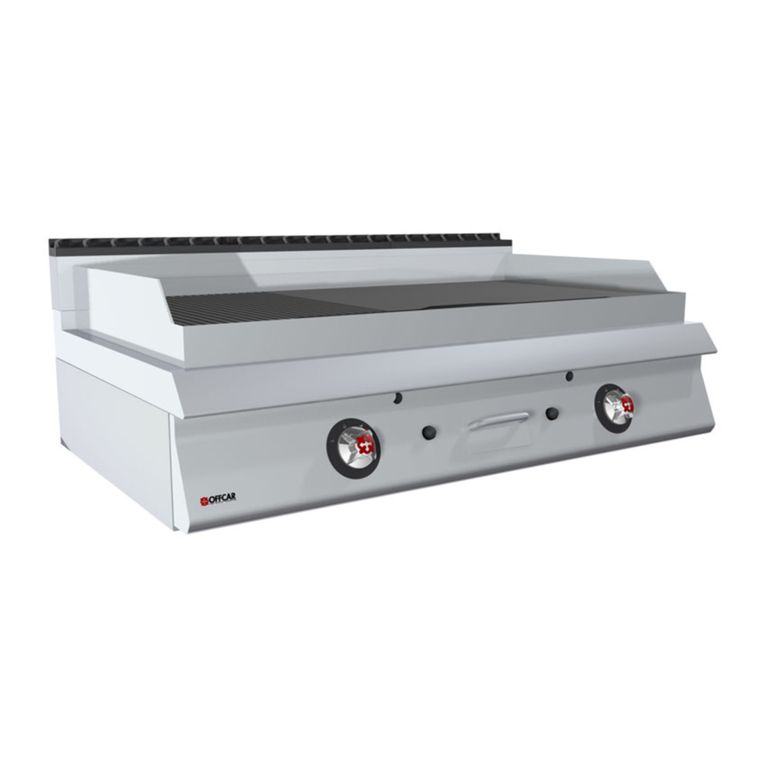
OFFCAR
OFFCAR STILE 700 Series Instructions use and maintenance handbook
Rational
Rational iCombi Pro 20-1/1 Original installation manual
Scholl
Scholl BH/HO/IN 800 CNS Instructions for use
First Choice
First Choice Lincat Lynx 400 LBM Installation, operating and servicing instruction
Silver King
Silver King SKFCB84H-EDUS2 Technical manual

saro
saro FKT 935 operating instructions

Cuppone
Cuppone BERNINI BRN 280 Installation
ATS
ATS US-2000 V5 Service manual
