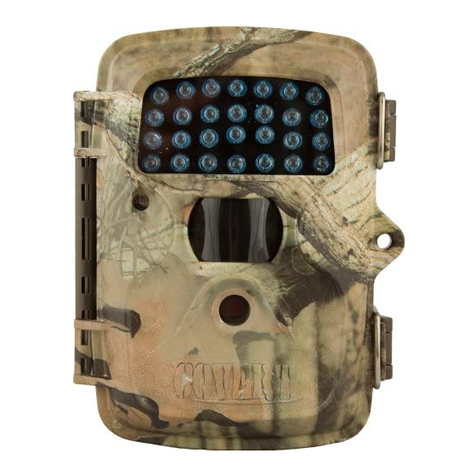
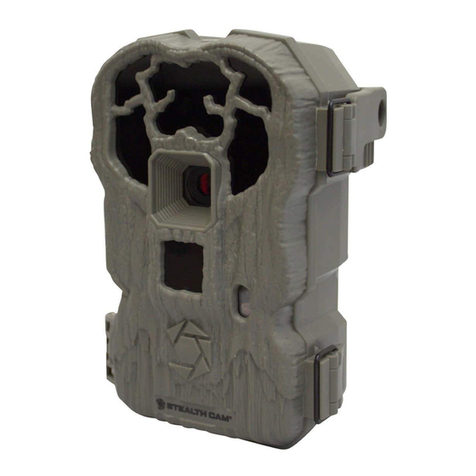
Covert Scouting Cameras MP9 User manual

MP9
Covert Scouting Cameras Instruction Manual

Table of Contents
What You Will Need to Setup the Camera......................3
Installing the Batteries..............................................3
Installing the SD Card ................................................3
Quick Setup .............................................................4
Camera Information Diagram ....................................4
Button and Switch Functions.....................................5
Understanding the Settings Screen Info.......................5
Customizing the Camera Settings ................................5
•
Screen 1: Time..............................................5
•
Screen 2: Month and Day .................................6
•
Screen 3: Year and Photo Mode..........................6
•
Screen 4: Delay .............................................6
•
Screen 5: Camera ID........................................ 6
•
Screen 6: Sensor Level ....................................7
•
Screen 7: Default ...........................................7
•
Screen 8: Format............................................7
Tricks and Tips on Field Setup.....................................8
Covert Scouting Cameras Warranty.............................9
•
Covert Warranty Policy and Procedure ................. 9
•
Covert International Warranty Policy and Procedure…10

P3
Congratulations on your purchase of the MP9 Covert Scouting Camera! We
truly value your business and will strive to provide you top quality customer
service should you ever need help with any of our products. Check out our
other products on our website at
www.covertscoutingcameras.com
COVERT SCOUTING CAMERAS
1451 Bowling Green Rd.
Russellville, KY 42276
Technical Support Customer Service
www.feradyne.com/contact Toll Free: (270) 743-1515
What You Will Need to Setup the Camera
●
4 AA Batteries
●
1 8GB SD Card (up to32GB)
Installing theBatteries
The MP9 functions on 4 AA batteries. Install the batteries by sliding them
into each of the 4 battery sleeves. Depress the spring with the negative
terminal and snap into place. Pay
attention to the battery diagram molded into
each sleeve to ensure you are
placing them properly into the unit. The
negative terminal (flat end) will always contact the spring.
Installing theSDCard
Prior to powering up your camera, install a Covert SD card in the slot on the
side ofthecamera. Push the card into the card slot until itclicks and release.

To remove, repeat that process, and the card will pop out enough to remove.
You can use any size SD card up to 32GB. See next page for SD card
Orientation.
Quick Setup
1.
Install the batteries and SD Card
2.
Switch the camera toAIM
3.
Go through the prompted settings screens
4.
Mount the camera
5.
Switchthe cameratoON–therewill bea10second countdown followed
by a blank screen.
Camera InformationDiagram
Three Position ON/OF
SD
Card
Camera Lens
PIR Sensor
IR Flash
Caution LED
P4

P5
●
OFFPosition–ThecamerawillremainOFF aslongastheswitchisinthis
position.
●
AIM Position
–While inthe AIM position, you will beable toview the main
screen, and change your cameras settings.
●
ONPosition
–The camera will beON and functioning inthe settings that
you have selected.
•
When going from either the OFF or AIM position to ON, there will be a
10second countdown followed byablank screen, it issupposed todothis.
●
Arrow Keys
–Use either ofthe arrow keys to change the setting for your
camera.
●
OK Button
–Click OK to access the menu and click again to move through
each setting.
On the main screen you will see your time setting and camera mode. Please
read through the following camera settings for more information.
Customizing the Camera Settings
The camera has a very basic settings set upscreen that will allow you to
customize the camera to your needs.
•
Screen 1: Time
Click OK then using the arrow keys set the hour. Click OK again and set the
minutes. Once you have set the camera to the current time click OK and you
will move to the next screen.
Understanding the Settings Screen Info
Button Function
On/Off Three Position Switch
Button and Switch Functions

P6
•
Screen 2: Month and Day
Select the current month with the arrow keys and click OK. This will take you
tothe right and allow you toset the Day. When you are finished setting the
current date, click OK, and this will move you to the next screen.
•
Screen 3: Year and Photo Mode
Onthis screen click OK and usethe arrow key toselect the current year.
Once finished click OK, and you have now set the date and time for your
camera which will beused in the time stamp for your images.
After you click OK to set the year, you will be taken to the camera icon on the
bottom of the screen. Using the arrow keys, select one of three camera
modes:
1.
Photo: the camera will take still images.
2.
Video: the camera will take a 10 second video
3.
3 Image Burst: the camera will take 3 image bursts
When you have selected the mode which you prefer, click OK, and you will
move to the nextscreen.
•
Screen 4: Delay
On this screen usethe arrow keys to select the delay mode, from the first
trigger, which you would like the camera to function in.
Your options for delay range from 3 seconds to 3 minutes.
When you have your preferred delay selected, click OK, and move tothe next
screen.
•
Screen 5: Camera ID
Here you can select your camera ID. Using the arrow keys set an ID between 1
and 99, then click OK, to move to the next screen.

P7
•
Screen 6: Sensor Level
Your MP9 Camera has two sensor levels, low and high. Using the arrow keys,
select your preferred sensor level, and click OK.
•
Screen 7: Default
This screen allows you toreset your cameras settings totheirfactorydefault
mode. You havetwooptionsY(yes)andN(no). Ifyouwouldliketokeepthe
settings you have customized for your camera, select N and click OK. If you
would like toreset the camera settings, select Y and click OK. Once you have
selected Y or N, you will move to the next screen.
•
Screen 8: Format
Formatting yourSDcardclearseverything offthecard. (Itwilldeleteany
picturesthatarestored onthecard!) Werecommendformatting yourSDcard
every timebefore usingyourcamera. EvenifyouhaveanewSDcard, you
should always format the card before you use it in the camera.
Toformat, usethearrow keys toselect Y(yes),andwait. Yourscreen will
read,SUC,toletyouknow that theformattingwas successful. Oncethe
formatting issuccessful, click OK,andthis willtakeyoubacktothemain
screen.
Ifyou choose not toformat, select N (no), and you will move back tothe main
screen.
Congratulations! You have successfully set up your Covert Scouting Cameras
MP9 and it is ready for the woods.

P8
Tricks and Tips on Field Setup
●
For the best results, mount the camera approximately 3 (three) feet off the
ground facing straight forward aslevel aspossible. Keep in mind that you
may need to adjust for uneven terrain.
●
Toenhance theflash,werecommend positioning thecamera inanareawith
abackdrop toreflectthe maximum amount oflight. Forinstance, place the
camera 20-30’ from a field edge facing the woods. Forthe inside oftimber,
positioning the camera facing a thicket approximately 20-30’ away.
●
Clearbrushawayfromthefront ofthecameratoavoid false movement
triggers.
●
When covering agame trail, face the camera looking down the trail instead
of directly at it.
●
Trytosetthecamera facing NorthorSouthtoavoid overexposurefromthe
suninthemorningortheevening whengamemovement isatitspeak.
●
Use oneofthe Covert mounting systems tomount the camera uphigher
pointingdown onthemfor abetterlook. Thesealsowork greatwhenyou
do not have a straight tree toattach to. You can findour line of
mounting systems at:
www.covertscoutingcameras.com
When turning the camera from AIM to the ON position, there will be a 10
second countdown followed by the screen going blank. It is supposed to do
this.
Quick Tip
Format the SD card and then Default the camera. This will set the camera
back to the manufacturer’s settings.
Quick Tip

P9
Important Note
Contact Covert support at either (270) 743-1515 or visit
www.feradyne.com/contact for troubleshooting prior to contacting the retail
store from which you purchased the product. We will be happy to take care
of you!
Covert Scouting Cameras Warranty
Covert Scouting cameras warranties this product for a period of 2 (two) years
from the date of purchase. This warranty only covers manufacturer’s defects
and does not cover damage caused by misuse or abuse of the product. This
warranty includes two-year repair or replacement service on the product from
the date of purchase. If you have problems with this product, please do not
contact the store you purchased it from. Contact Covert Scouting Cameras
customer service toll free at (270) 743-1515 or visit
www.feradyne.com/contact. You can also visit our website at
www.covertscoutingcameras.com. We will get back to you within 24 hours.
Proof of purchase will be required for replacement.
Covert Warranty Policyand Procedure
To receive repair or replacement by Covert Scouting Cameras two-year
warranty, we ask you to do the following:
All returns must have a Return Authorization (RA#) prior to sending in the
camera.
1.
E-mail or call our customer service department
a. www.feradyne.com/contact
b. (270) 743-1515
c. Please explain to the technician what issues you are having with your
camera
2.
Ifyou are asked to return your camera to Covert Scouting Cameras, you

P10
will be responsible for the cost of shipping to Covert Scouting Cameras. In
return, Covert will provide fast and exceptional service, as well as, incur the
cost of shipping back to you. (Only within the Continental United States)
3.
Please include the following information when sending in your camera.
a.
RA# on the outside of the package
b.
Return address
c.
Telephone and E-mail address
d.
Brief description of the problem
e.
Copy of proof of purchase
4.
Please make sure all the accessories are removed (SD cards, batteries,
solar panels, SIM cares, straps, ETC.) before shipping. All accessories
received by Covert Scouting Cameras will NOT be returned.
5.
Thiswarrantyonlycoversmanufactures’defectsanddoesnotcover
damage caused by misuse or abuse of the product.
Covert International Warranty Policy and Procedure
1.
OutsidetheUS,serviceisavailable through thedistributor /reseller of
purchase
2.
All returns must have an RA# provided by Covert Scouting Cameras.
3.
Covert Scouting Cameras isnotresponsibleforlost ofdamageproducts
incurred during the shipping process.
4.
Insurance for returns is at the discretion of the customer. Additional
charges apply for return shipping.
In the maintenance of the product, Covert Scouting Cameras may use new or
equivalent, to new parts, assemblies, or products for equal or improved
quality. All defective parties, assemblies, and products became the property of
Covert. Returns and claims will be handled according to the current Covert
Scouting Cameras, Inc. procedure.
These warranties shall not apply to any defect failure or damage caused by

P11
improper use or improper or inadequate maintenance and care. Covert
Scouting Cameras shall not be obligated under these warranties:
1.
To repair damage resulting from attempts by personnel other than Covert
Scouting Cameras representatives to install, repair, or service the product
unless directed by a Covert Scouting Cameras representative.
2.
To repair damage, malfunction or degradation of performance resulting
from improper use of connection to incompatible equipment or memory.
3.
To repair damage, malfunction, or degradation of performance caused by
the use of non-Covert supplies or consumables or the use of Covert
supplies not specified for use with this product.
4.
To repair and item that has been modified or integrated with other products
whenthe effect ofsuchmodification or integration increases the time or
difficultyofservicing theproduct ordegradesperformanceorreliability.
5.
Toperform user maintenance or clearing or to repair damage, malfunction.
6.
To repair damage, malfunction or degradation of performance resulting
fromuseofthe product inanenvironmentnot meetingtheoperation
specifications set forth in the user manual.
7.
Torepair damage, malfunction ordegradation ofperformance resulting
from failure to properly prepare and transport the product as prescribed in
published product materials.
8.
Failure to register the product warranty within 10 days or purchase.
9.
Toreplace items that have been refilled, are used up,abused, misused, or
tampered with in any way.
10.
Toinstall replacement items that are not considered customer replaceable.
11.
To support software not supplied by Covert.
12.
To provide software of firmware updates or upgrades.
Any service identified in the above list and provided by Covert at the
Customer’s request shall be invoiced to the customer, at Covert’s then current
rates for parts, labor and shipping.

P12
THE ABOVE WARRANTIES ARE GIVEN BY COVERT WITH RESPECT TO
THIS PRODUCT AND ITS RELATED ITEMS IN LIEU OF ANY OTHER
WARRANTIES, EXPRESS OR IMPLIED. COVERT AND ITS VENDORS
DISCLAIM ANY IMPLIED WARRANTIES OF MERCHANTABILITY OR
FITNESS FOR A PARTICULAR PURPOSE OR ANY SIMILAR STANDARD
IMPOSED BY APPLICABLE LEGISLATION. COVERTS RESPONSIBILITY
TO REPAIR, REPLACE, FOR DEFECTIVE PRODUCTS AND RELATED
ITEMS IS SOLE AND ECLUSIVE REMEDY PROVIDED TO THE CUSTOMER
FOR BREACH OF THESE WARRANTIES.
Some states, provinces, and countries do not allow the exclusion or limitation
of incidental or consequential damages or exclusions or limitation on the
duration of implied warranties or conditions, so the above limitations or
exclusions may not apply to you. This warranty gives you specific legal rights,
and you may also have other rights that vary by state, province, or country.
TO THE EXTENT ALLOWED BY LOCAL LAW, EXCEPT FOR THE
OBLIGATIONS SPECIFICALLY SET FORTH IN THIS WARRANTY
STATEMENT, IN NO EVENT SHALL COVERT AND ITS VENDORS BE
LIABLE FOR ANY INDIRECT, SPECIAL, INCIDENTAL, OR CONSEQUENTIAL
DAMAGES (INCLUDING LOSS OF PROFITS) WHETHER BASED ON
CONTRACT, TORT, OR ANY OTHER LEGAL THEORY AND IRRESPECTIVE
OF WHETHER COVERT OR THE VENDOR HAS ADVANCE NOTICE OF THE
POSSIBLILTY OF SUCH DAMAGES.
Table of contents
Other Covert Scouting Cameras Scouting Camera manuals
Covert Scouting Cameras
Covert Scouting Cameras WC30-V User manual
Covert Scouting Cameras
Covert Scouting Cameras LB-V User manual
Covert Scouting Cameras
Covert Scouting Cameras WC30-A User manual
Covert Scouting Cameras
Covert Scouting Cameras CA 3.0 User manual
Covert Scouting Cameras
Covert Scouting Cameras AW1-V User manual
