Kangaroo™ Console | 2
Safety and Cautions
Safety notice
This section summarizes information basic to the safe operation of the equipment
described in this manual. All safety precautions and operating instructions should be
read and understood before installation, operation, maintenance, or repair of this device.
Consult with Covidien-trained personnel before attempting to operate this equipment.
Always follow product labeling and manufacturer’s recommendations. If in doubt as to
how to proceed in any situation, contact your Covidien representative.
Note: For Enteral Fluids Only
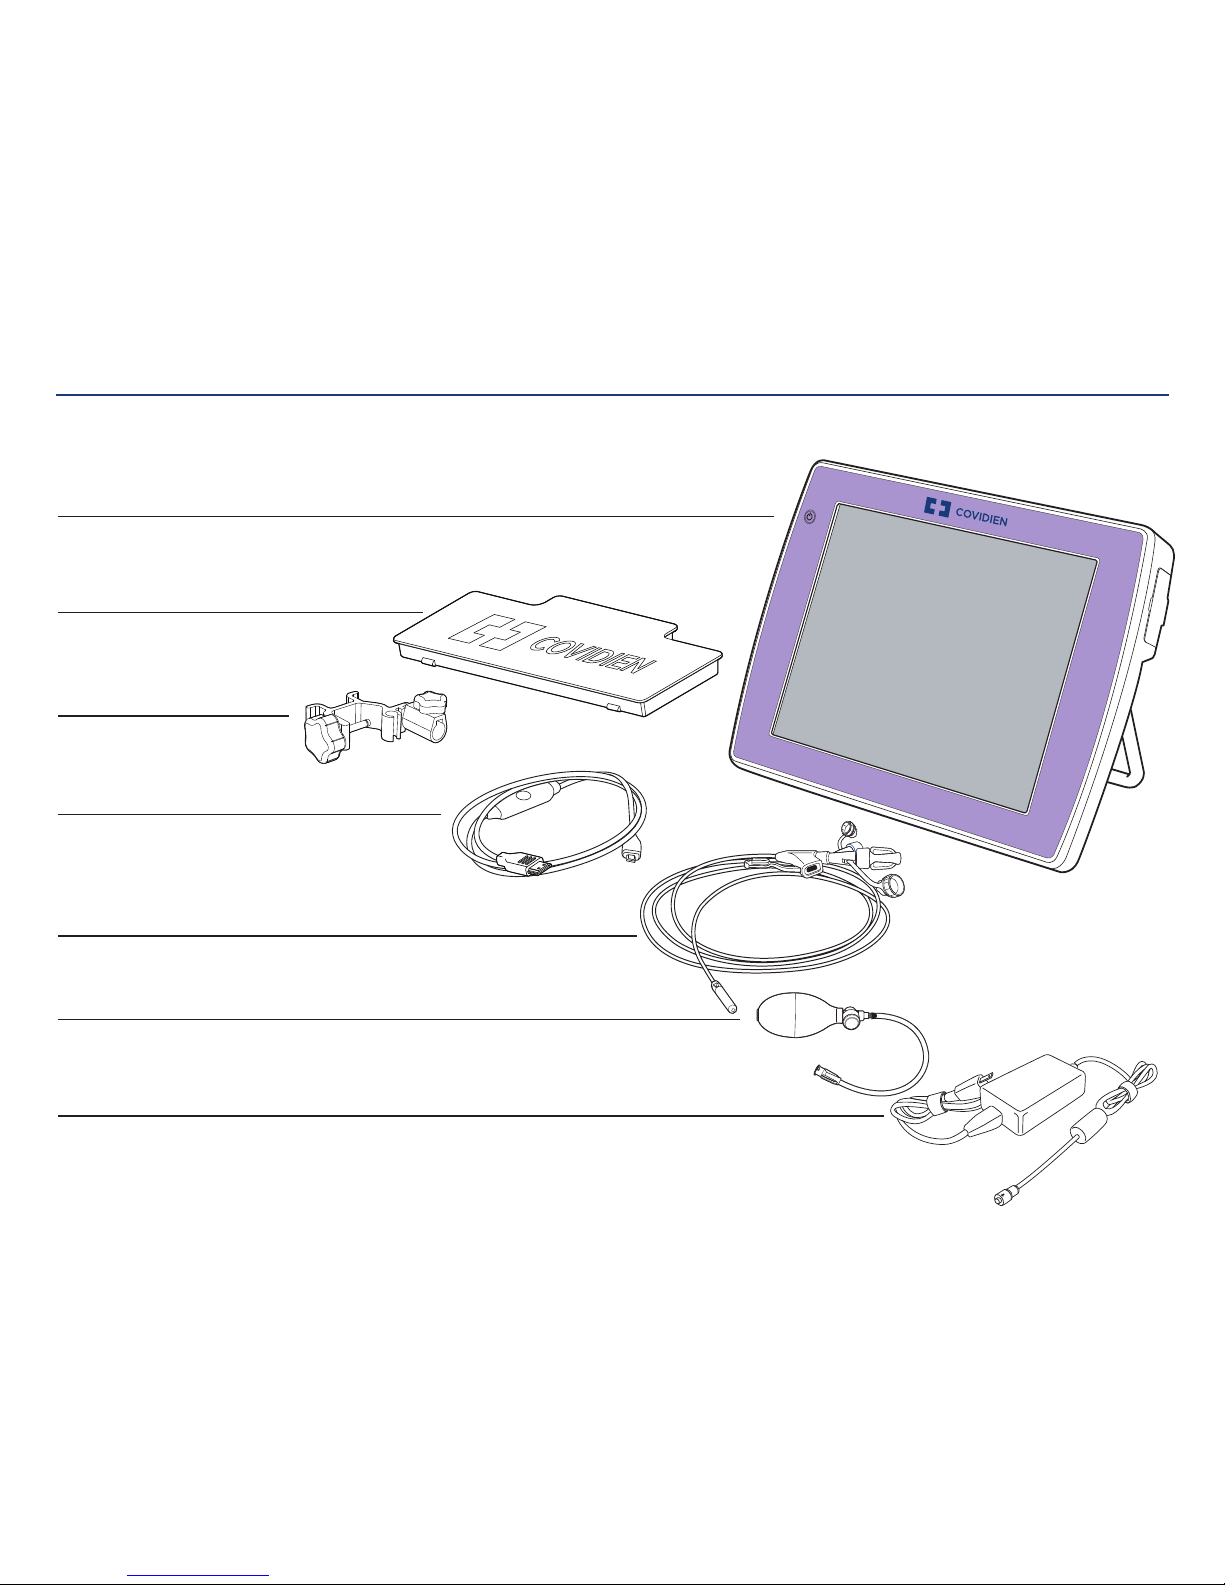
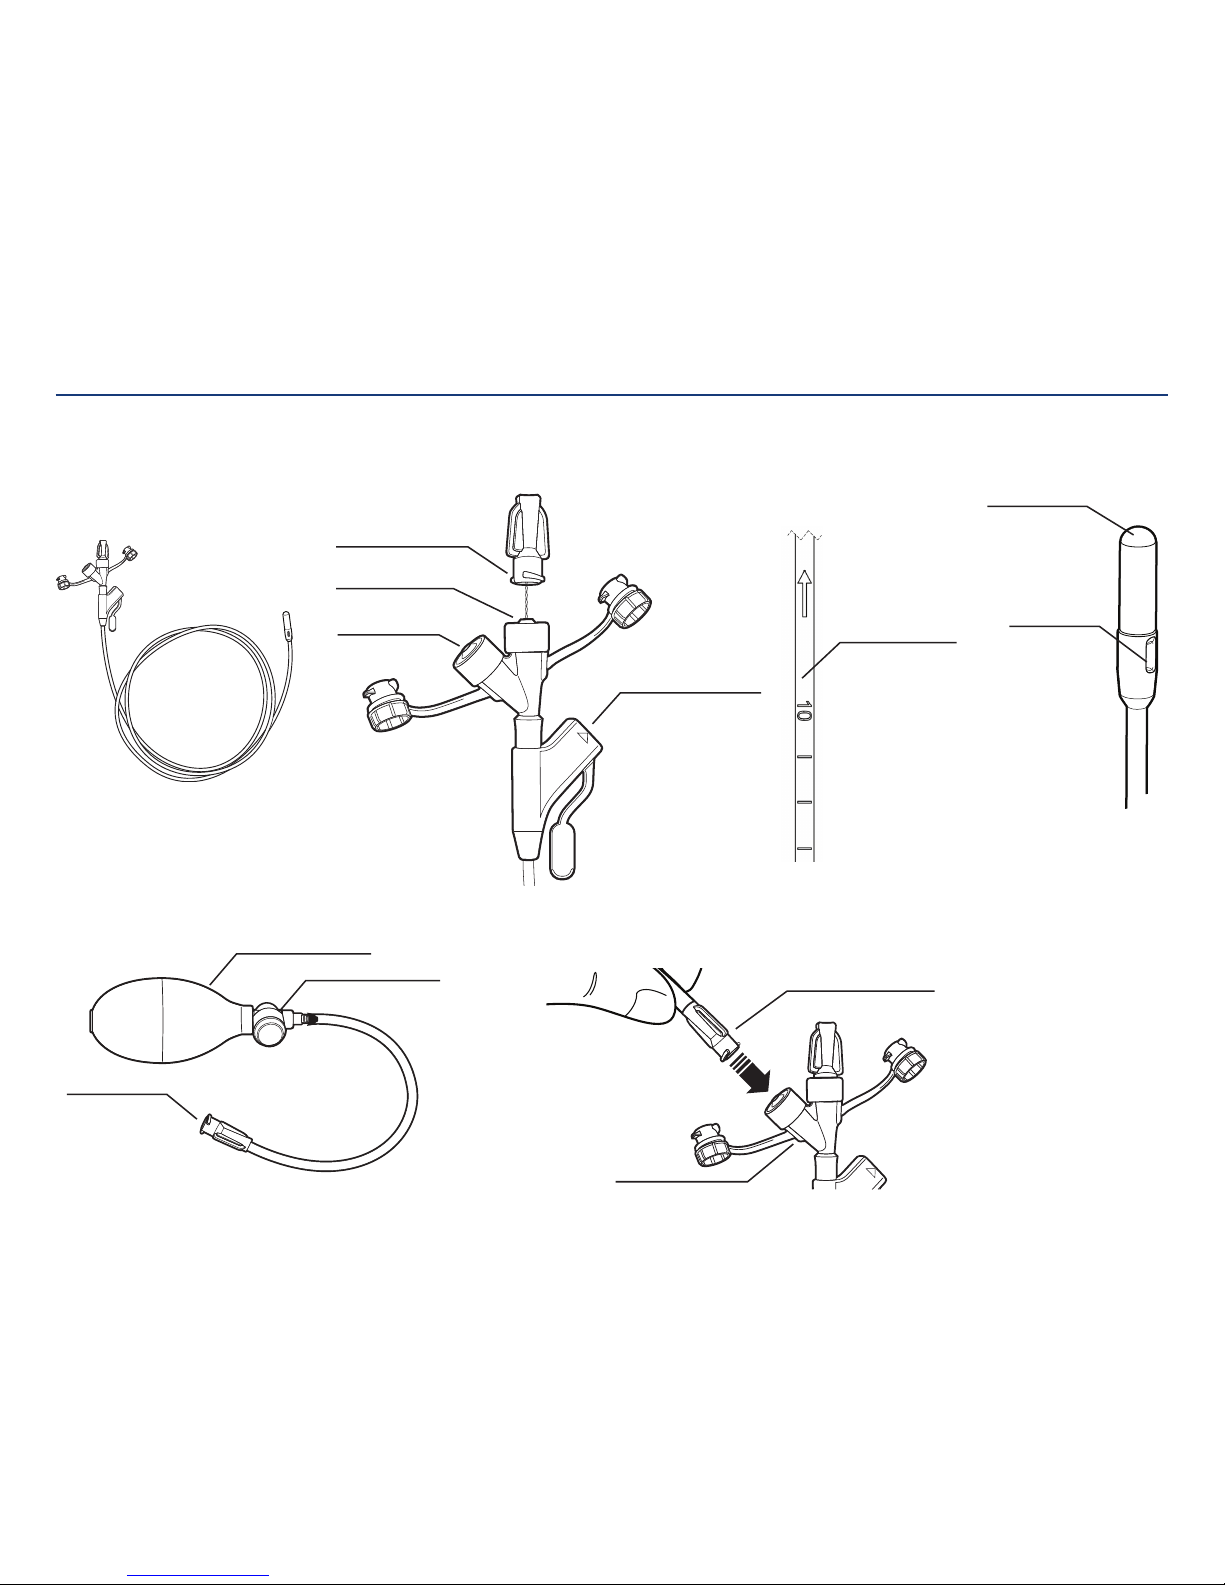
Description
The Kangaroo™ feeding tube with IRIS technology is a single use device with a camera
embedded in the distal end to aid in placement. The tube is made of radiopaque
polyurethane material and features a Hydromer™* coated tip.
For use with ENFit™* Connection System.
Indications
The Kangaroo feeding tube with IRIS technology utilizes a video stream to aid a trained
user during placement into the stomach or small bowel for the administration of nutrition,
fluids, and medications by the naso-enteric route for patients aged 18 years and older
who have an intact gastrointestinal tract, but are physically unable to manage nutritional
intake through normal mastication and deglutition.
A trained user, as defined per facility protocol or determined by clinical privileging, should
read the Kangaroo Feeding Tube with IRIS Technology User Manual, Instructions for Use
and review the training program provided. Facility protocol for insertion of any feeding
tube should also be followed. Placement of the tip of the device into the small bowel
should only be attempted by clinicians with expertise in small bowel placement.
Prior to commencing administration, confirm correct tube placement per
institutionalprotocol.
Actions
• Acts as a conduit for food, fluids, and medications to a patient’s stomach or smallbowel.
• Avoid administration of light sensitive medications while the tube is connected to the
interface cable.
Contraindications
• Use caution with patients who have anomalies or diseases of the nose, throat,
oresophagus.
• The use of this product is contraindicated in patients with known sensitivities or
allergies to its components.
Warnings
• Coughing or any other symptom of respiratory distress would likely indicate that the
device had been misplaced in the trachea. If this is suspected, remove the tube and
stylet and reinsert.
• At any point during the procedure if continuous resistance is felt the device
should be withdrawn and then reinserted. The operator should discontinue all
attempts at placement after repetitive unsuccessful attempts (such as 5 or more) at
deviceplacement.
• The presence of an endotracheal device tends to guide the feeding tube into the trachea.
Should the feeding tube and stylet (if stylet is used) enter the tracheobrochial tree
during tube placement, damage to the lung or esophagus could occur. If any resistance
is felt during placement, remove the tube and stylet and reinsert. Coughing or any
other symptom of respiratory distress would likely
indicate that the device had been misplaced in the
trachea. Misplacement of tubes into the lungs resulting
in pneumothorax has been reported in neurologically
impaired patients and those with endotracheal tubes in
place. The operator should discontinue all attempts at
placement after repetitive unsuccessful attempts (such
as 5 or more) at device placement.
• This device should only be inserted by a trained user.
• The feeding tube is a disposable device intended for
single use. Do notreuse.
• Maintaining the patient in a High-Fowlers or Semi-
Fowlers position may reduce regurgitation or aspiration.
If using this position, do not lean patientforward.
• The stylet must be removed prior to a patientMRI.
• No modification of this equipment is allowed.
• Do not use this device near flammableanesthetics or in
oxygen rich environments.
• The Kangaroo feeding tube with IRIS technology is
intended for enteral feeding, fluids and medication
administration, but has the potential to misconnect with
small bore connectors of other healthcare applications.
This nasogastric feeding tube should not be used with
connectors from other healthcare applications. The
feeding tube is specifically for the purpose of enteral
fluids. The insufflation device is for use with the viewing
system for connection with the feeding tube during
placement, and is to be disconnected from the feeding
tube after placement. Please avoid connection of these
devices to devices of other applications and ensure
that the tubing is appropriately connected in order to
provide enteral nutrition to the patient.
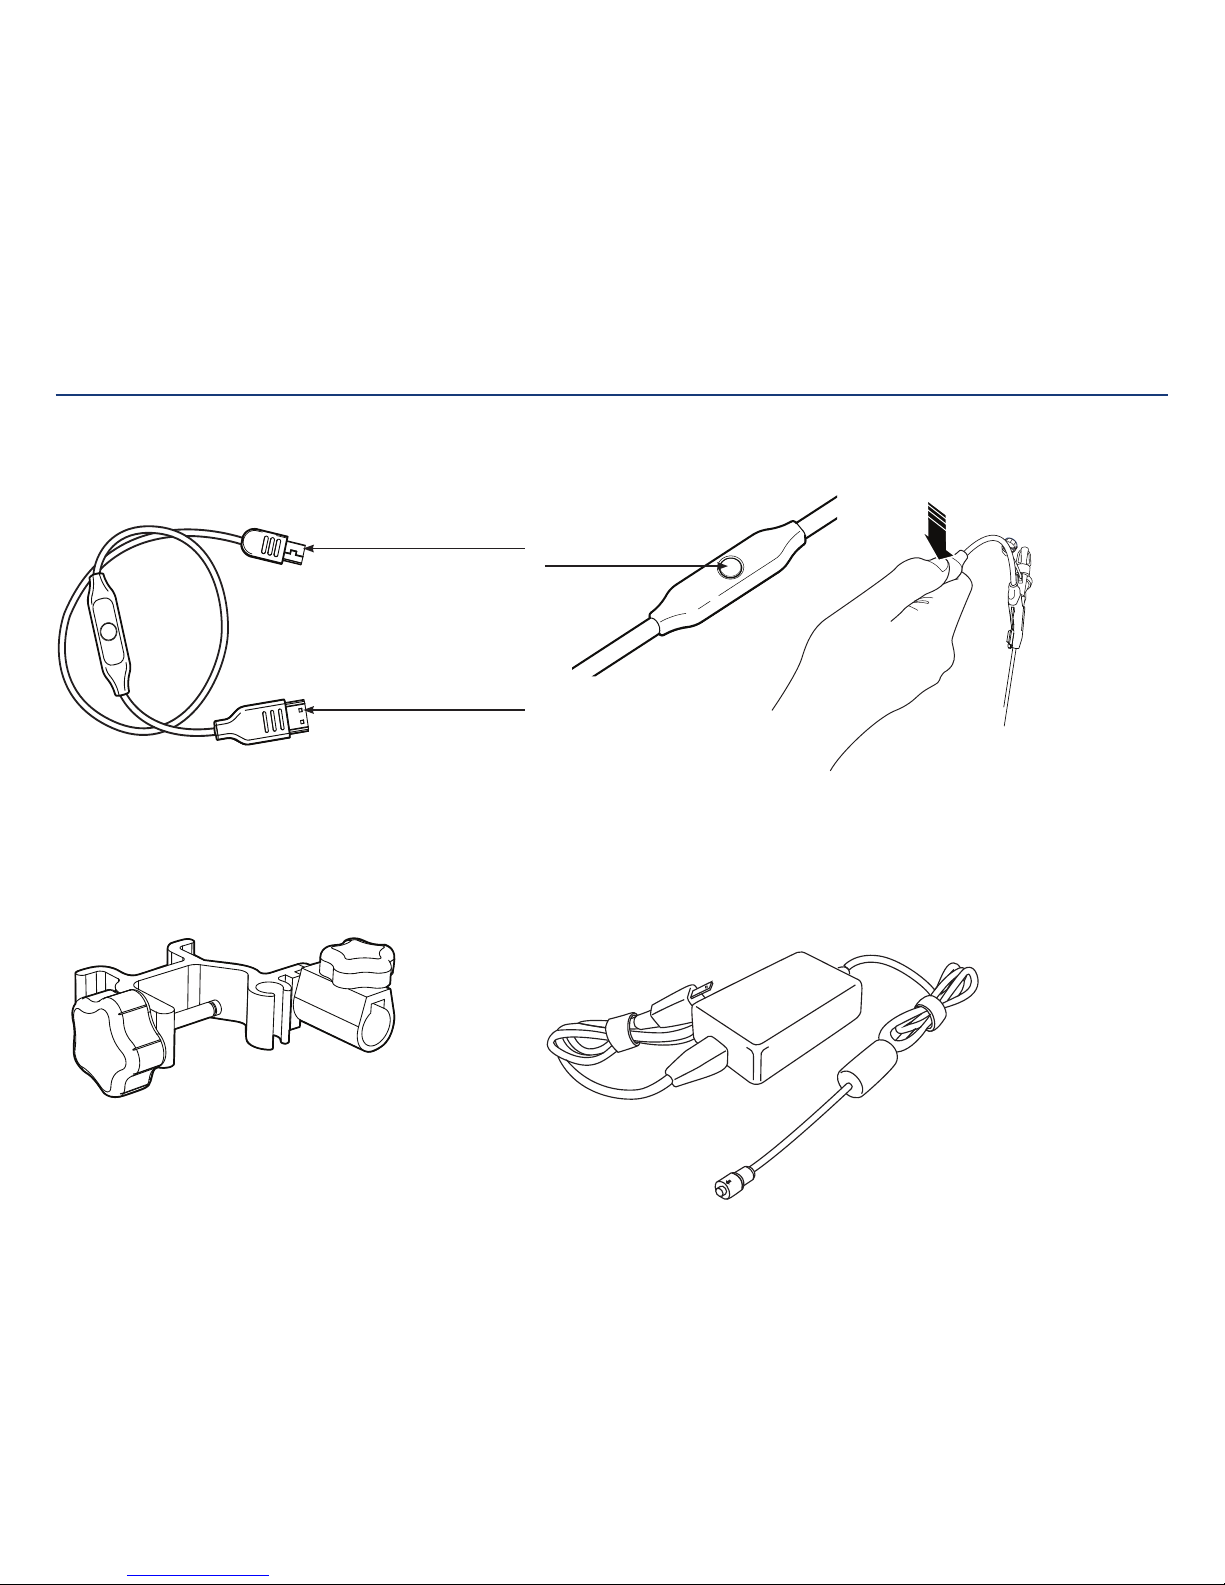
• Additional components or equipment connected to
medical electrical equipment must comply with the
respective IEC or ISO standards. All configurations
shall comply with the requirement for medical
electrical systems (see clause 16 of IEC 60601-1 Ed
3.1). If the operator connects additional components
or equipment to the medical electrical equipment, the
operator configures a medical system, and it is the
operator’s responsibility that the system complies with
the requirements for medical electrical systems. If in
doubt, consult your local representative or the technical
servicedepartment.
• When light is emitted from tube tip, do not point directly
at eye.
• To minimize heat exposure of tissue, the Kangaroo
feeding tube with IRIS technology should be
disconnected from the interface cable after the
placement is complete.
Precautions
• This device is not intended for diagnosis. Consult the
appropriate service for diagnostic evaluation if there is
concern regarding an image observed duringplacement.
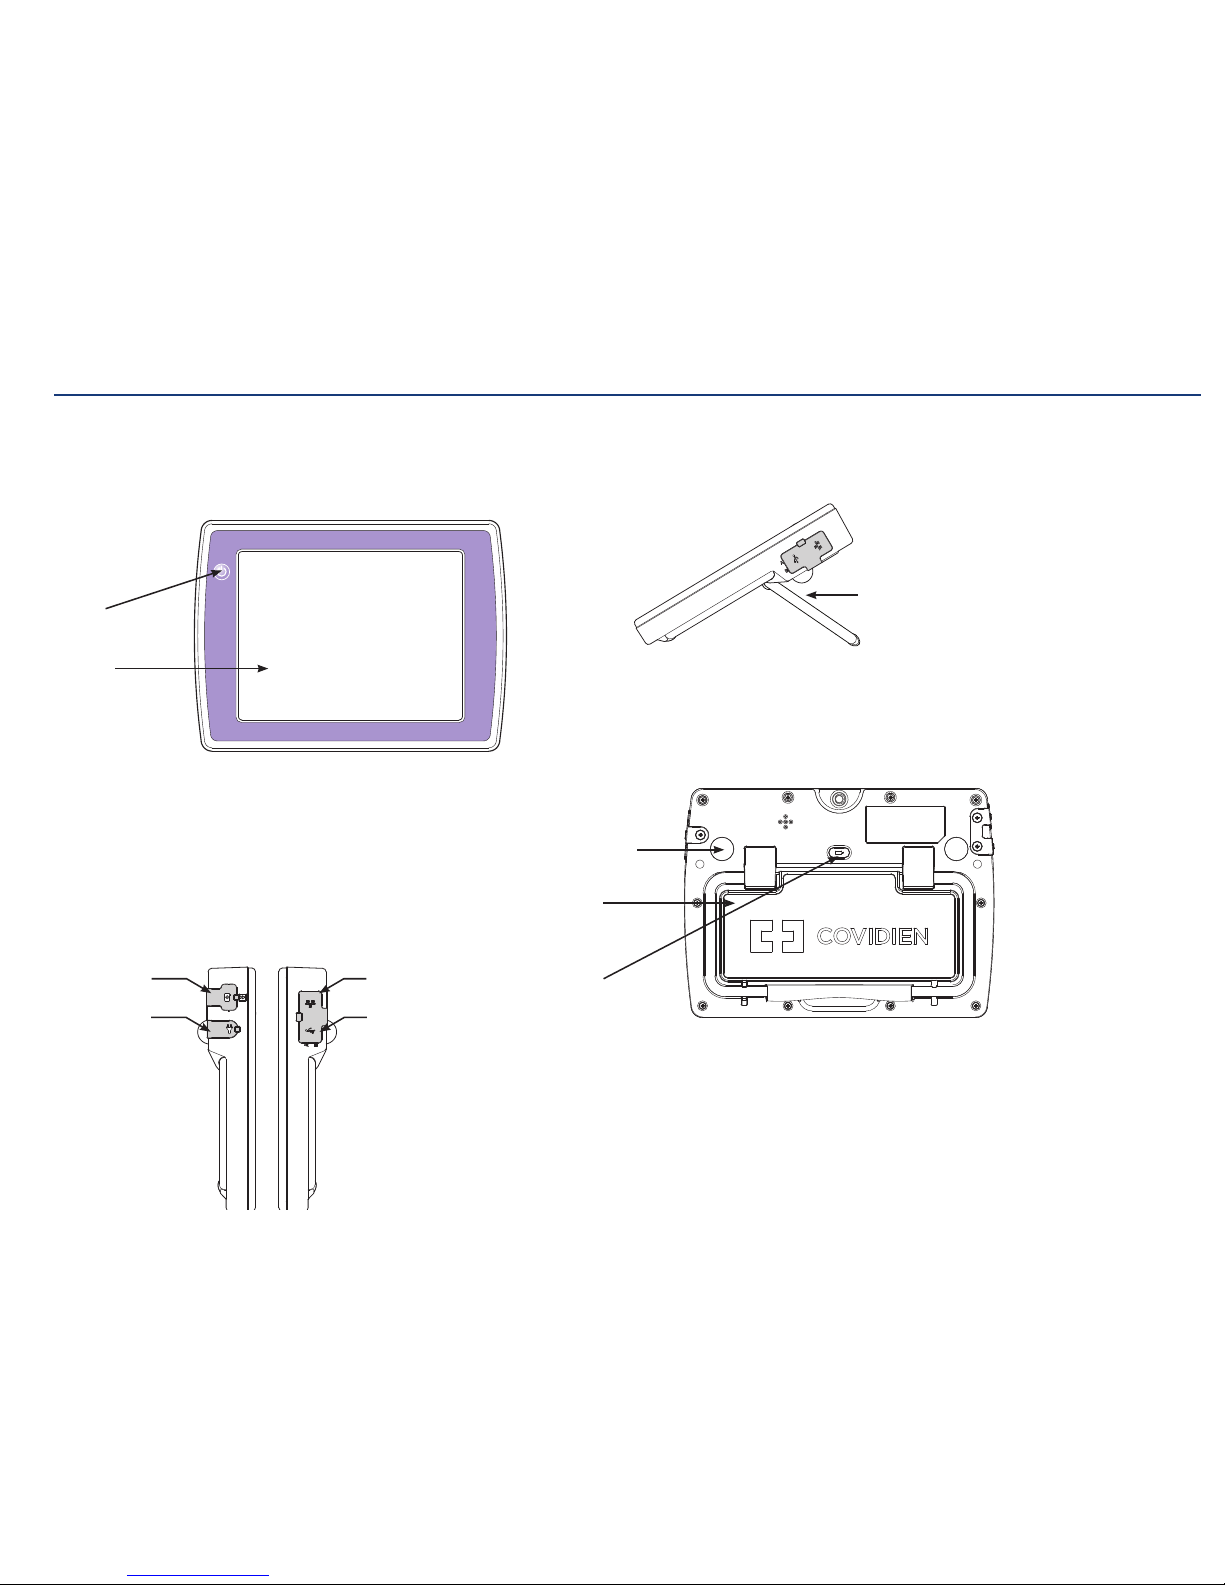
Section I: System Overview
• The user should be aware of patients who have
photosensitivity due to administered medications or
other conditions since the device exposes internal
tissues to light.
• Do not autoclave.
• Feeding tubes should be flushed frequently to prevent
clogging. Suggested flushing schedule:
a) before and after each feeding
b) before and after administering medication
c) once every four hours during continuous feeding or
between intermittentfeedings
d) each time the feeding set is disconnected
e) each time the feeding container is filled/changed
f) each time the pump is stopped
• Use only water to flush. Do not use solutions containing
meat tenderizer to flush or open a clogged feeding tube.
• Tube replacement may be considered at four (4) week
intervals to ensure optimum tube patency.
• Use a Kangaroo™ enteral feeding pump for accuracy
and control of nutritional formula delivery. Infusion
pumps that deliver in excess of 40 psi should not be
used as excessive pressure is capable of causing tubes
and pump sets to balloon and/or rupture. Consult pump
manufacturer’s specifications andrecommendations.
• Administration of medications should be guided by
hospital policy. Many liquid preparations contain
Sorbitol which tends to interact with enteral formulas
and clog the feeding tube. Thoroughly crush tablets,
excluding enteric tablets which should never be crushed;
however, always consult with your pharmacist regarding
which tablets should be crushed for feeding tube
administration.
• The device generates light, the user should be aware of
patients who have taken light sensitive medications or
who may have photosensitivity.
• Images from the camera going to the console may
be lost or temporarily suspended during placement
if performed near sources of electromagnetic energy
such as RFID, diathermy equipment or hand-held
metaldetectors.
Adverse events
Pneumothorax, intestinal perforation, and aspiration
pneumonia have been reported during the use of this type
of device.