COWLEY INDUSTRIES LM05 User manual
Lasmanipulator
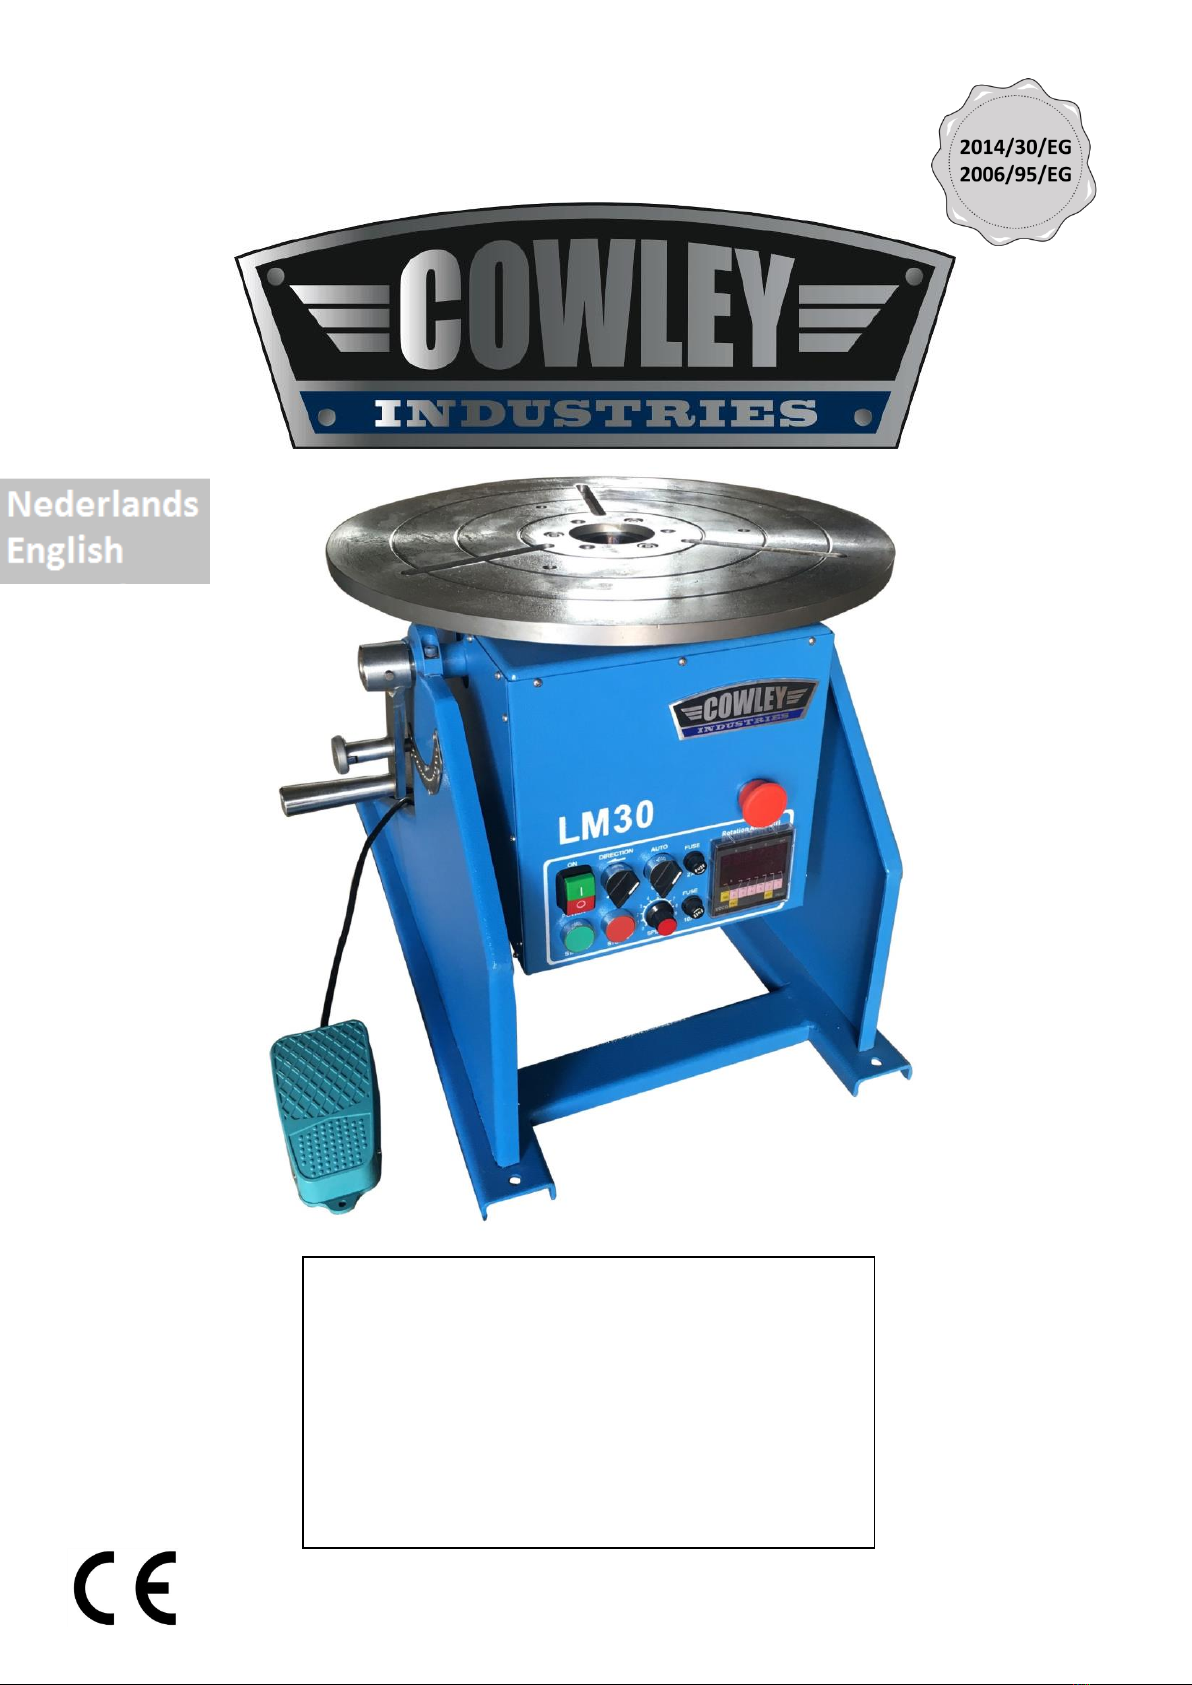
Welding positioner
LM05, LM10, LM30
Montage- en gebruiksinstructies
Installation and operating instructions

1
1. Algemene informatie
Voor het in gebruik nemen van deze machine dient eerst de gebruiksaanwijzing volledig te lezen en
te begrijpen!!!
Deze handleiding bevat belangrijke informatie voor de juiste manier van het installeren, de werking
en het onderhouden van de uitrusting die hierin beschreven is. Bij het gebruik van iedere
lasmanipulator komen verschillende risico’s op eigen verwondingen of eigendomsschade kijken.
Iedereen die in aanraking komt met het installeren, onderhouden of met de werking van de
lasmanipulator moet volledig bekend zijn met de inhoud van deze handleiding. Om u te beschermen
tegen het oplopen van persoonlijk letsel of eigendomsschade dient u de volgende aanwijzingen en
instructies in deze handleiding op te volgen.
Iedere Cowley lasmanipulator is geproduceerd in overeenstemming met de EMC-richtlijn
2014/30/EG en de Laagspanningsrichtlijn 2006/95/EG. Bij iedere lasmanipulator wordt een
handleiding inclusief conformiteitsverklaring geleverd, deze dienen goed bewaard en bijgehouden te
worden.
Omdat er in het oog van de kwaliteit constant verbeteringen aan de apparatuur worden
doorgevoerd, behoudt Cowley zich het recht voor om specificaties van de in de handleiding
beschreven apparatuur te wijzigen.
Beschrijving van de machine
De Cowley lasmanipulator met roterende tafel is ontworpen om uw werkstuk in de meest ideale
positie te positioneren, roteer vervolgens uw werkstuk op de door u gewenste snelheid. Het maakt
het lassen van werkstukken een stuk makkelijker en de kwaliteit van lassen zal er ook op vooruitgaan,
omdat U de beste laspositie aan kan nemen en de goede voorloopsnelheid kan bepalen.
2. Veiligheidsvoorschriften
1. Alvorens men gaat lassen met behulp van de lasmanipulator, dient men de volledige
handleiding te lezen en begrijpen, anders bestaat de mogelijkheid voor lichamelijk letsel of
schade aan materialen/de machine.
2. Degene die gaat werken met de lasmanipulator, dient op de hoogte te zijn van alle risico’s
die het lassen met mechanische bewegingssystemen met zich meebrengt en van de risico’s
van lassen in het algemeen, daarnaast dient deze persoon alle waarschuwingen in deze
handleiding en die van het lasapparaat gelezen te hebben. Het niet opvolgen van deze
instructie kan leiden tot lichamelijk letsel en/of schade aan materialen/eigendommen.
3. De lasmanipulator is ontworpen en bedoeld voor gebruik door professioneel en ervaren
personeel. Wanneer u niet bekend bent met het gebruik van een lasmanipulator, gebruik
deze dan niet tot u hier voldoende ervaring en kennis voor heeft opgedaan.
4. Gebruik deze lasmanipulator niet voor andere doeleinden dan waar deze voor is bedoeld.
Wanneer dit toch gebeurt, vervalt de garantie en zijn wij niet aansprakelijk voor enige schade
of letsel dat hierdoor is ontstaan.
5. Gebruik te allen tijde een geschikte laskap om uw ogen te beschermen tegen de ultraviolette
straling die vrijkomt tijdens het lasproces.

2
6. Maak geen gebruik van deze machine wanneer u moe bent of onder invloed van
alcohol/medicijnen/drugs bent.
7. Controleer of de schakelaar in de OFF-positie staat voordat u de machine aansluit op de
voeding.
8. Zorg ervoor dat de machine goed geaard is.
9. Wanneer u reparaties of onderhoud aan de machine uitvoert, dient de stekker uit te zijn
getrokken van de voeding.
10. Verwijder gereedschap en dergelijke van de machine.
11. Controleer voor ieder gebruik op defecte onderdelen. Wanneer er sprake is van een defect
onderdeel, dient de machine buiten gebruik te worden gesteld tot het betreffende onderdeel
is gerepareerd of vervangen, dit mag alleen worden gedaan door een erkend bedrijf/
monteur.
12. Zorg ervoor dat de werkplek goed opgeruimd en verlicht is.
13. Gebruik het juiste lasapparaat met de correcte snelheid en voedingssnelheid.
14. Onderhoud uw gereedschap zorgvuldig. Houdt uw machine schoon en goed gesmeerd voor
de beste en meest veilige prestaties. Volg de instructies voor het smeren en vervangen van
onderdelen.
15. Ga niet op de machine staan. Wanneer deze omvalt kan ernstig letsel optreden.
16. Laat de machine nooit onbeheerd lopen. Schakel de stroom uit en verlaat de machine niet
tot deze volledig stilstaat.
17. Verwijder losse voorwerpen en onnodige werkstukken van de werkplek, alvorens u de
machine start.
3. Assemblage
Uitpakken
Neem de lasmanipulator uit de verpakking, controleer vervolgens of er sprake is van beschadigde
en/of missende onderdelen. Indien hier sprake van is, dient men onmiddellijk contact op te nemen
met het verkooppunt waar de lasmanipulator is aangekocht.
Installeren van de lasmanipulator
De plek van installatie dient goed verlicht te zijn, daarnaast dient er een afzuiging/goede ventilatie te
zijn in de ruimte van installatie i.v.m. lasdampen, deze bevatten stoffen die schadelijk zijn voor de
gezondheid. Ook dient men rekening te houden met vrije ruimte rondom het apparaat i.v.m. de
werkstukken die erop worden geplaatst welke ronddraaien etc..
Plaats de lasmanipulator op een horizontale ondergrond welke de krachten die erop komen te staan
bij zowel horizontale en verticale belasting met gemak kan weerstaan, bevestig de lasmanipulator
stevig op de ondergrond met behulp van bouten, veerringen en ringen (en eventueel moeren).
3
4. Bediening
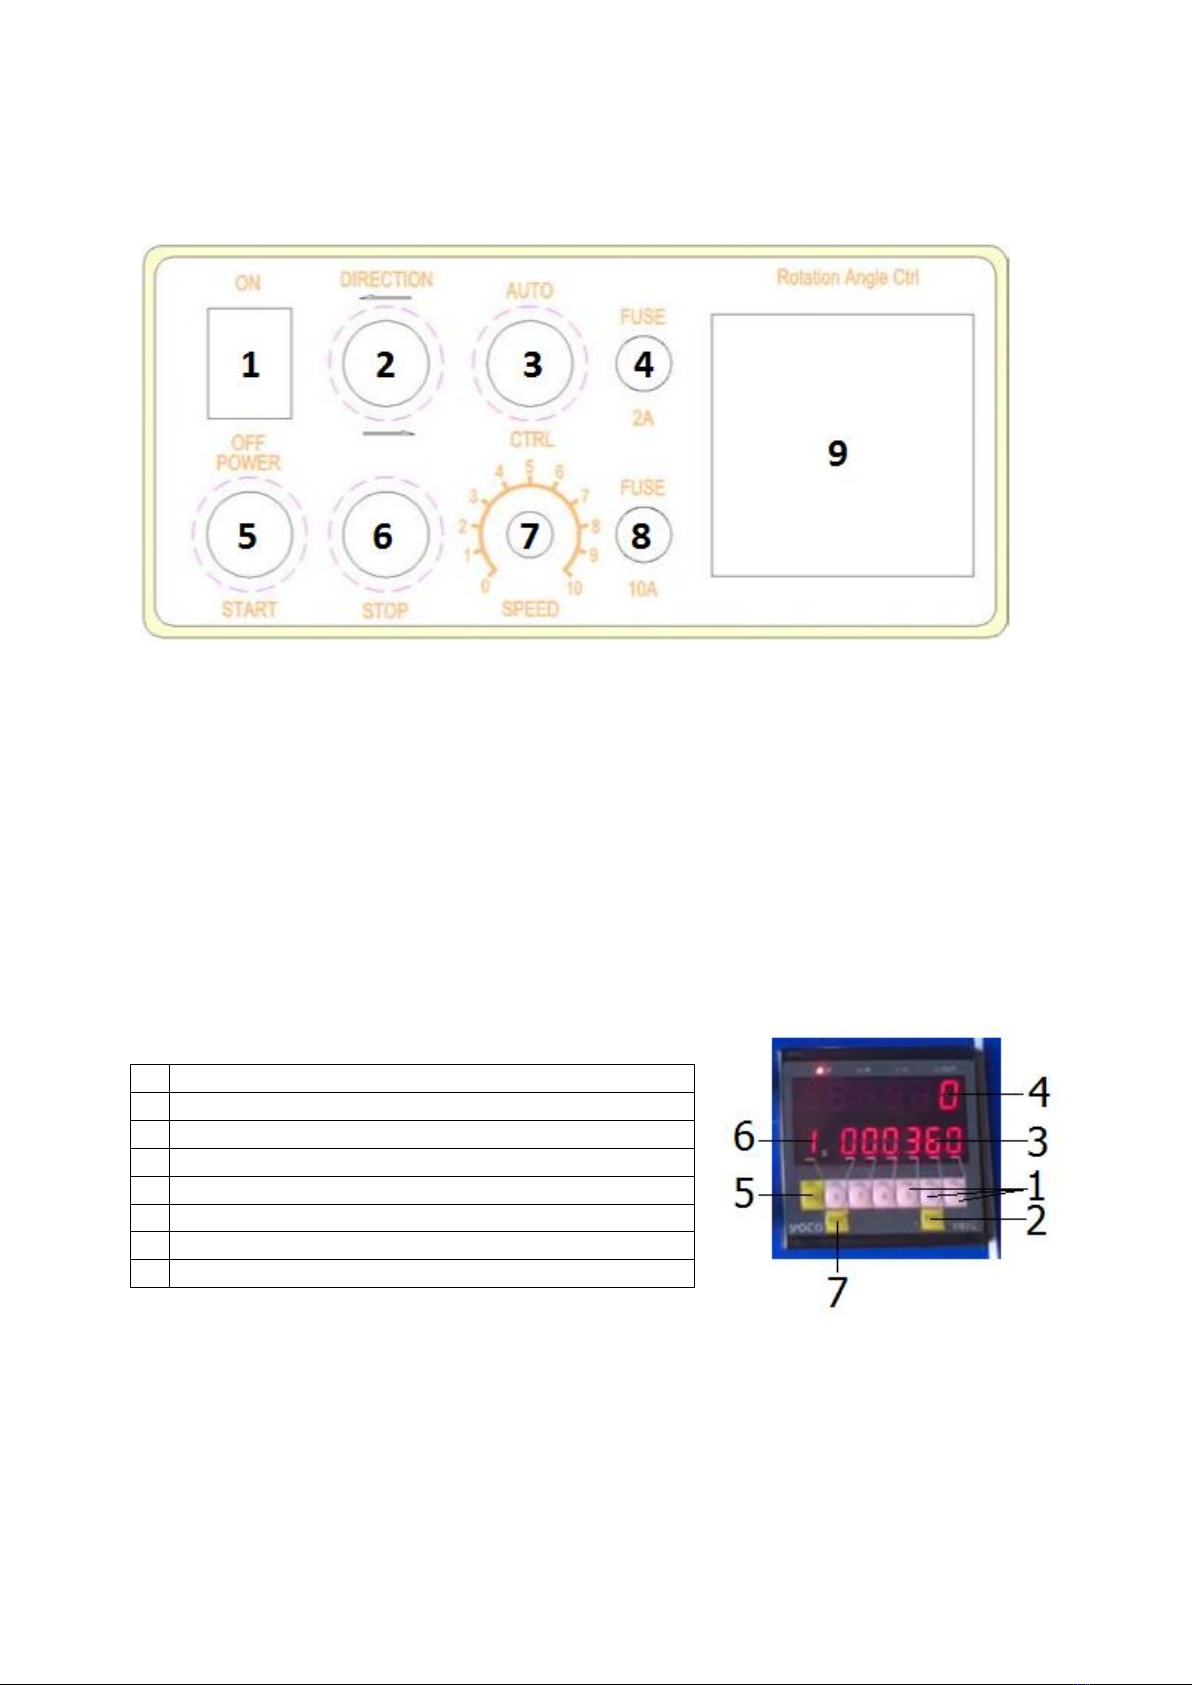
Schakelaars
1. Aan/Uit-schakelaar: Deze schakelaar kan in twee posities worden gezet, OFF en ON. Om de
machine te kunnen bedienen, dient deze schakelaar op de ON-stand te worden gezet.
2. Draairichting plateau: Draaiknop voor het instellen van de draairichting (linksom/rechtsom).
3. Keuzeknop Auto/Control: Met deze draaiknop kan men kiezen voor automatisch draaien of
gecontroleerd draaien d.m.v. voetpedaal.
4. 2A Zekering
5. Start-knop
6. Stop-knop
7. Draaiknop snelheid: Met deze knop kan men de draaisnelheid van het plateau instellen.
8. 10A Zekering
9. Display: Hierop kan men instellingen aflezen en instellen, zie afbeelding beneden.
Display
#
Beschrijving toetsfunctie
1
Toetsen voor vooraf instellen aantal graden
2
Reset voorafinstelling
3
Aflezen vooraf instelling
4
Aflezen gradenteller
5
Toets voor instellen vertraging output
6
Aflezen timer
7
RNC Output instelknop (Is al door fabriek ingesteld)

4
Werken met de lasmanipulator
1. Sluit de machine aan op de netvoeding (230V/50Hz).
2. Zet de machine aan middels de Aan/Uit-schakelaar (1).
3. Sluit de aardkabel aan op de achterkant van de machine op de daarvoor bedoelde
aansluiting.
4. Vervolgens dient men de machine juist in te stellen alvorens men daadwerkelijk gaat lassen
aan het werkstuk, denk hierbij aan draairichting, snelheid, gradenverdeling etc..
5. Nadat men alles heeft ingesteld, bevestig dan het werkstuk op de lasmanipulator, zorg
ervoor dat het werkstuk goed is bevestigd alvorens men gaat beginnen met lassen.
5. Onderhoud
PAS OP! Schakel voor het plegen van onderhoud eerst de stroom uit. Wanneer dit niet gebeurt,
kan dit leiden tot ernstige verwondingen!
1. Smeer regelmatig het tandwiel en de lagers in de kast met EP40 Multi vet.
2. Bescherm de draaitafel tegen roest door deze regelmatig schoon te maken en in te vetten.
Gebruiksvoorschriften
1. Gebruik de machine niet op een hoogte van meer dan 1000 meter boven zeeniveau.
2. De luchtvochtigheid mag niet meer zijn dan 85% en de temperatuur dient tussen de -10 en
40°C te liggen.
3. De machine moet op een trillingvrije plek geplaatst worden.
4. Installeer de machine niet in een omgeving waar explosieve stoffen en-of gassen afwezig zijn.
5. De machine moet geaard zijn en de weerstand dient lager dan 10Ω te zijn.
6. Indien de machine langere tijd niet is gebruikt, dient men te controleren of alle kabels nog
goed geïsoleerd zijn en of er geen sprake is van corrosie.
7. De gebruiker van de machine dient beschermende kleding te dragen.
8. Onderhoud en reparatie mogen enkel worden uitgevoerd door gespecialiseerde
personen/bedrijven.
6. Specificaties
Model
LM05
LM10
LM30
Ingangsspanning
220V
220V
220V
Frequentie
50/60Hz
50/60Hz
50/60Hz
Vermogen
60W
80W
120W
Rotatiesnelheid
1-12rpm
0,2-2rpm
0,2-2rpm
Diameter tafel
Ø300mm
Ø350mm
Ø450mm
Horizontale laadcapaciteit
50kg
100kg
300kg
Verticale laadcapaciteit
25kg
50kg
150kg
Afmetingen
49x44x46mm
54x44x47.5mm
72x48x53mm
Gewicht
36kg
45kg
58kg

5
7. Garantie
1. De garantie treed in werking op de datum vermeld op de aankoopnota en heeft een
geldigheid van 12 maanden.
2. De garantie is niet overdraagbaar zonder een schriftelijke verklaring van toestemming van
Uw leverancier.
3. Zonder aankoopnota kan geen aanspraak op garantie worden gemaakt.
4. Garantie is alleen van toepassing als het product volgens de bijgeleverde gebruiksaanwijzing
gebruikt wordt en uitsluitend voor het doel waarvoor het is ontworpen.
5. Er mogen geen wijzigingen aan het product worden uitgevoerd.
6. De garantie is niet van toepassing bij onoordeelkundig gebruik.
7. Eventuele verzendkosten vallen niet onder de garantie bepaling.
8. Reparaties dienen uitsluitend door Uw leverancier te geschieden. Elk door derden
uitgevoerde reparatie(s) zullen (zal) de aanspraak op garantie doen vervallen.
9. Reparaties gedurende de garantie periode zal de geldigheid niet verlengen. Wel wordt een
garantie op de reparatie van drie maanden afgegeven mocht de reguliere garantietermijn
vervallen.
10. De eventueel uit te voeren onderhoudswerkzaamheden, beschreven in de
gebruiksaanwijzing, dienen tijdig uitgevoerd te worden.
11. Voor garantie kunt u enkel terecht bij het verkooppunt waar u het artikel heeft aangekocht.

6
1. General information
Before starting to use the machine you need to read and fully understand the manual!!!
This manual contains important information about the proper way of installing, operating and
maintaining of the equipment described in this manual. When using any welding positioner there are
a different kind of risks that you may incur, risks in personal injuries or property damage. Everyone
who comes into contact with the installation, maintenance or operation of the welding positioner
must be fully familiar with the contents of this manual. To protect yourself against personal injury or
property damage you need to follow the following information and instructions in this manual.
Every Cowley welding positioner is manufactured in accordance with the EMC Directive 2014/30/EC
and Low Voltage Directive 2006/95/EC. Every welding positioner is supplied with a manual including
a declaration of conformity. These must be stored and kept up to date properly.
Because of quality reasons constant improvements are going to be made on the equipment, Cowley
reserves the right to alter specifications of the equipment described in this manual.
Description of the machine
The Cowley welding positioner with rotary table has been designed to position your work piece in the
most ideal position, rotate your work piece on the desired speed. It makes the welding work pieces a
lot easier and the quality of welding will also improve, because you can take the best welding
position and the good leading speed.
2. Safety instructions
1. Before you start welding using the welding manipulator, read and understand the entire
manual, otherwise there is a possibility of injuries or damage to materials/the machine.
2. The person who will be working with the welding manipulator must be aware of all the risks
of welding with mechanical motion systems and of the risks of welding in general, in
addition, this person must have read all warnings in this manual and of the welding machine.
Failure to heed these instructions may cause personal injuries and/or damage to
materials/properties.
3. The welding positioner is designed and intended for use by professional and experienced
staff. When you are not familiar with the use of a welding positioner, you should refrain from
using it until you have gained sufficient experience and knowledge for it.
4. Use the welding positioner for any purpose other than for which it is intended. When it does
occur, this will void your warranty and we are not liable for any damage or injury as a result.
5. Use a suitable welding helmet at all times to protect your eyes from the ultraviolet radiation
emitted during the welding process.
6. Do not operate this machine when you are tired or under the influence of
alcohol/drugs/narcotics.
7. Make sure the switch is in the OFF position before you connect the machine to the power
supply.
8. Make sure the machine is properly grounded.
9. When you perform repairs or maintenance to the machine, remove the plug from the power
supply.

7
10. Remove tools and such from the machine before use.
11. Check the machine for defective parts before every use. In case of a defective part, the
machine must be put out of service until the defect part is repaired or replaced, this should
only be done by an approved farm/mechanic.
12. Make sure that the workplace is tidy and well-lit.
13. Use the correct welding device with the correct speed and feed rate.
14. Maintenance your tools carefully. Keep your machine clean and well lubricated for the best
and safest performance. Follow the instructions for lubrication and replacement of parts.
15. Do not stand on the machine. Serious injury can occur when the machine tips over.
16. Never let the machine run unattended. Turn off the power and do not leave the machine
until it has stopped completely.
17. Remove loose objects and unnecessary fittings from the workplace, before you start the
machine.
4. Assembly
Unpacking
Take the welding positioner from the packaging, then check if there are any damaged/missing parts.
If it is, you should immediately contact the point of sale where the welding manipulator is purchased.
Installing the welding positioner
The place of installation should be well-lit, in addition there must be an extractor/suction/good
ventilation in the space of installation, this because welding fumes contain substances that are
harmful for your health. Also, one needs to take into account the free space around the device the
work pieces that are placed which are moving/ spinning around etc..
Place the welding positioner on a horizontal surface which can easily withstand the forces of the
horizontal load, fix the welding manipulator firmly on the surface with the help of bolts, spring
washers and washers (and if necessary nuts).
4. Operation
Switches

8
1. On/Off switch: This switch can be put in two positions, OFF and ON. In order to operate the
machine, the switch has to be put in the ON-position.
2. Rotation direction table: Turning knob for setting the rotation direction (clockwise/anti-
clockwise).
3. Choosing button Auto/Control: By means of this turning knob you can choose for automatic
turning or controlled turning by means of the foot pedal.
4. 2A Fuse
5. Start-button
6. Stop-button
7. Turning knob speed: With this button you can set the turning speed of the table.
8. 10A Fuse
9. Display: You can read and set settings, refer to below picture.
Display
#
Description key function
1
Keys for pre-setting number of degrees
2
Reset pre-setting
3
Reading pre-setting
4
Reading degree counter
5
Key for setting delay of output
6
Reading timer
7
RNC Output adjustment button (already set in factory)
Working with the welding positioner
1. Connect the machine to the power supply (230V/50Hz).
2. Turn on the machine with the On/Off switch (1).
3. Connect the earthing cable to the connector on the back side of the machine.
4. Now to set the machine correctly before one is actually going to weld the workpiece, turn
direction, speed, degree distribution etc..
5. After everything is set up, please fix the work piece on the welding manipulator, make sure
that the work piece is properly attached before one is going to start with welding.
5. Maintenance
PAY ATTENTION! Before maintenance first disconnect the machine from the power supply. When
this does not happen, it can lead to serious injuries!
1. Regularly lubricate the sprocket and the bearings in the cabinet with EP40 Multi-grease.
2. Protect the turntable against corrosion by regularly cleaning and greasing it.
Instructions for use
1. Do not operate machine at a height of more than 1000 meters above sea level.
2. The humidity must not exceed 85% and the temperature should be between -10 and 40°C.
3. The machine must be placed on a vibration-free surface.
4. Do not install the machine in an environment where explosive gases/substances are present.

9
5. The machine must be grounded and the resistance should be lower than 10 Ω.
6. If the machine has not been used for an extended period of time, it is necessary to verify that
all the cables are well-isolated and yet or there is no corrosion.
7. The operator of the machine must at all times wear protective gear.
8. Maintenance and repair may only be carried out by specialized persons/companies.
6. Specifications
Model
LM05
LM10
LM30
Power supply
220V
220V
220V
Frequency
50/60Hz
50/60Hz
50/60Hz
Power
60W
80W
120W
Rotation speed
1-12rpm
0,2-2rpm
0,2-2rpm
Diameter table
Ø300mm
Ø350mm
Ø450mm
Horizontal load capacity
50kg
100kg
300kg
Vertical load capacity
25kg
50kg
150kg
Measurements
49x44x46mm
54x44x47.5mm
72x48x53mm
Weight
36kg
45kg
58kg
7. Warranty
1. The warranty enters into force on the date that is mentioned on the receipt and has a validity
of twelve months.
2. The warranty is not transferable without written permission of your distributor.
3. Warranty cannot be claimed without a receipt.
4. Warranty only applies when the product is used according to the included manual and is
used exclusively in the way it was designed for.
5. No changes can be made to the product.
6. The warranty does not apply in case of injudicious use.
7. Possible shipping costs are not covered by the warranty.
8. Repairs should exclusively be carried out by your supplier. Repair(s) carried out by others will
result in cancellation of the warranty.
9. Repairs that are carried out during the warranty period will not extend the validity of the
warranty. There will be given a warranty of three months on the repair itself in case the
regular warranty should expire.
10. Potential maintenance of the product, as described in the user manual, should be carried out
on time.
11. For the warranty U can only turn to the outlet where U bought the product.

10
Onderhoud/keuring legenda, Maintenance/Examination,
Legenda Wartung/Inspektion-Legende
Naam gebruiker/Name of user/Name des
Nutzers:
Adresgegevens/Address data/Anschriftdaten:
Datum van ingebruikname/Date of
commissioning/Datum der Inbetriebname:
Controle –Inspection –Kontrolle
Datum/Date/Datum
In orde/Okay/In
Ordnung
Niet in orde,
ontmanteling/Not
okay,
decommissioning/
Nicht in Ordnung,
Außer Betrieb
gestellt
Handtekening/Signature/Unterschrift
11
EG-verklaring van overeenstemming - Declaration of
conformity –EG- Konformitätserklärung - Declaration de
conformite - Dichiarazion di conformita- Declaracion de
conformidad
Wij, Valkenpower BV, Industrieweg 4, 6051 AE Maasbracht, Nederland, verklaren geheel onder eigen
verantwoordelijkheid dat het product
We, Valkenpower BV, Industrieweg 4, 6051 AE Maasbracht, Nederland, declare under our sole responsability
that the product
Wir, Valkenpower BV Industrieweg 4, 6051 AE Maasbracht, Niederlande, erklären in alleiniger Verantwortung,
dass das Produkt
Nous, Valkenpower BV, Industrieweg 4, 6051 AE Maasbracht, Nederland, déclarons sous notre seule
responsabilité que le produit
Noi, Valkenpower BV, Industrieweg 4, 6051 AE Maasbracht, Nederland, dichiariamo sotto la nostra
responsabilià che il prodotto
La empresa, Valkenpower BV, Industrieweg 4, 6051 AE Maasbracht, Nederland, declaramos bajo nuestra
exclusiva responsabilidad que el producto
Type
Model
Type
Type
Tipo
Tipo
LM05, LM10, LM30
Beschrijving
Description
Beschreibung
Description
Descrizione
Descripción
Lasmanipulator, Welding
positioner
Merk
Brand
Marke
Marque
Marca
Marca
Cowley
Waarop deze verklaring betrekking heeft, in overeenstemming zijn met de volgende normen:
To which this declaration relates is in conformity with the following document:
Auf welches sich diese Erklärung bezieht, den folgenden Normen entspricht:
Auquel se réfère cette déclaration est conforme à le document suivant:
A cui si riferisce dichiarazione, corrisponde ai suguenti documenti:
Al que se refiere la presente declaración, corresponde a los siguientes documentos:
De EMC-richtlijn: 2004/108/EG, Laagspanningsrichtlijn:
2006/95/EG
Following the provisions of the EMC-Directive: 2004/108/EG, Low
Voltage Directive: 2006/95/EG
Die EMC-Richtlinie: 2004/108/EG, Niederspannungsrichtlinie:
2006/95/EG
Conformément aux dispositions de la Directive CEM:
2004/108/EG, la Directive Basse tension: 2006/95/EG
Comformemente alla direttiva CEM: 2004/108/EG, la direttiva
bassa tensione: 2006/95/EG
Conforme con la norma CEM: 2004/108/EG, la norma Baja tensión: 2006/95/EG
Nederland, Maasbracht, 15-03-2018
Valkenpower BV, Industrieweg 4, 6051 AE Maasbracht, Nederland
This manual suits for next models
2
Table of contents
Languages:
Other COWLEY INDUSTRIES Welding Accessories manuals


