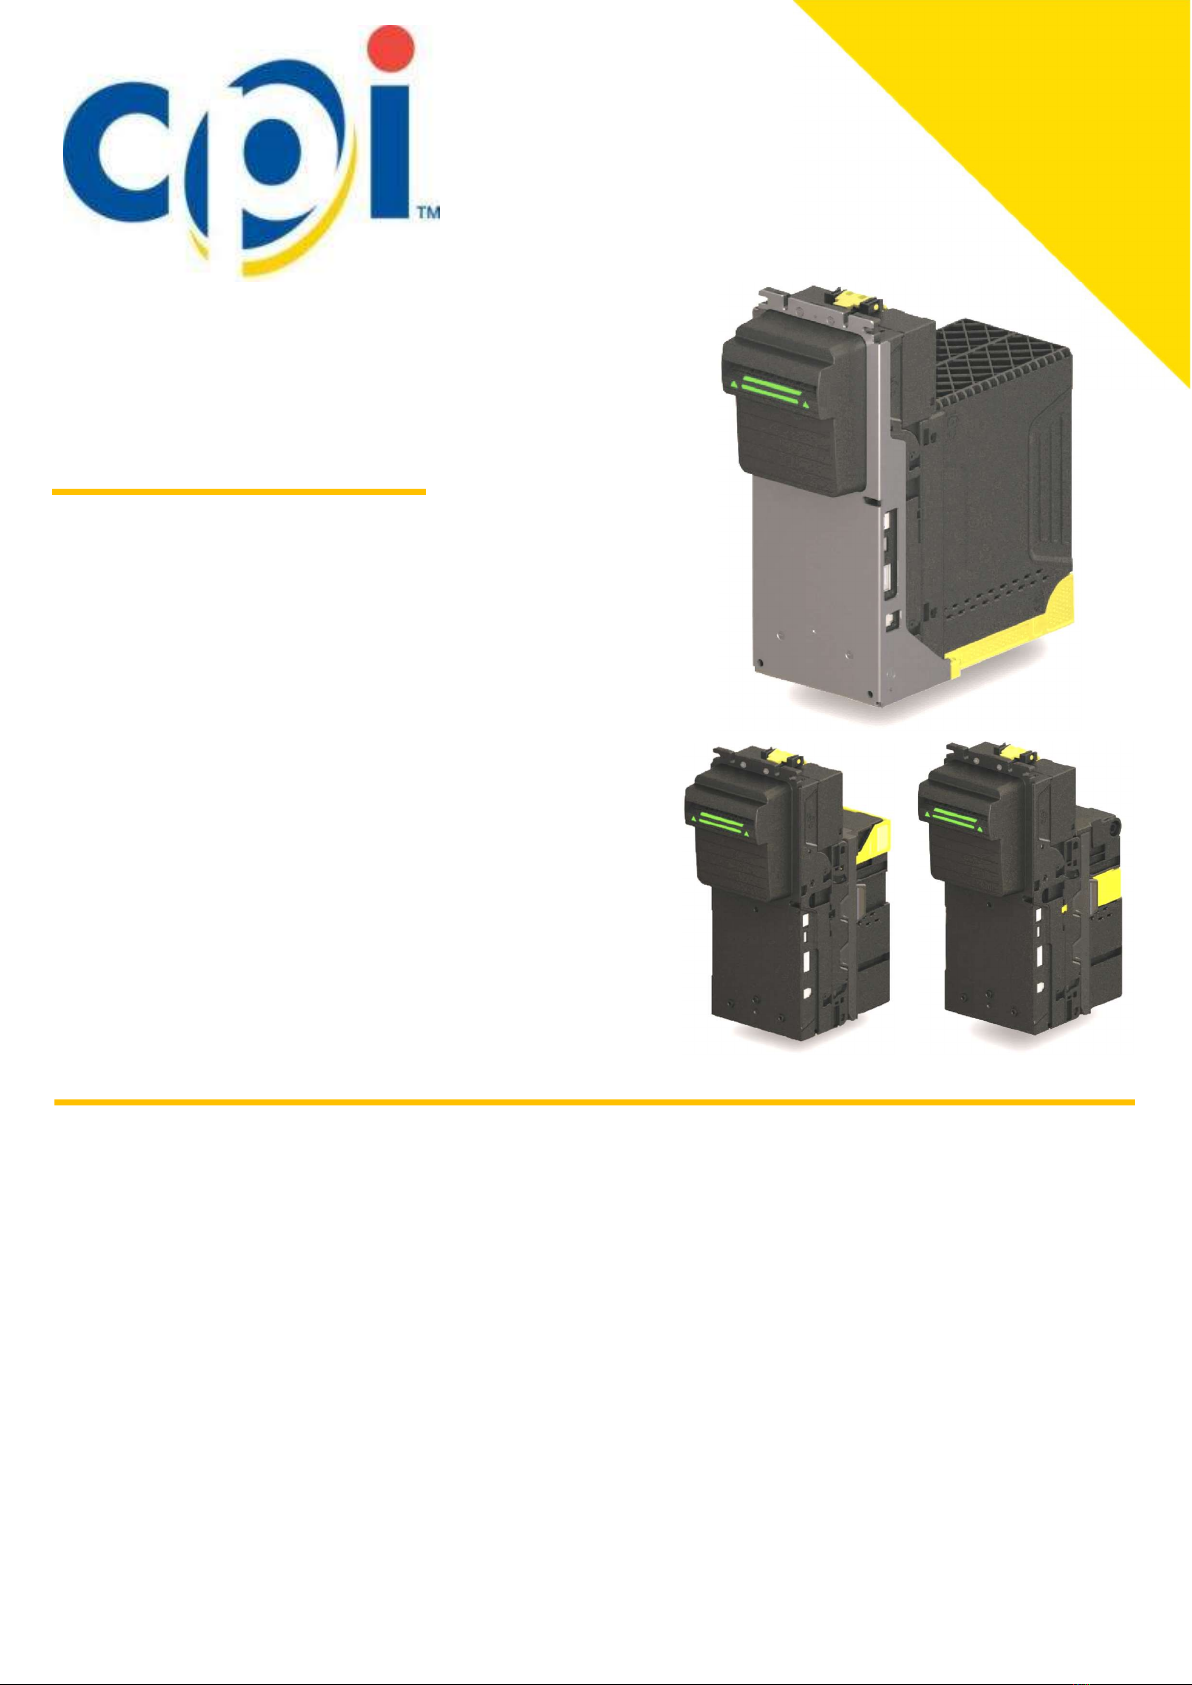
CPI R900 User manual

R900 Install Guide
The R900 bill validator is designed to fit into the standard bill acceptor opening
in most machines and can be mounted on existing studs or a mounting bracket
Features
- Four ways bill acceptance
- Multi-width bill handling mechanism
- Security cashbox (lockable) available
- 1K notes cashbox available
Interface
- The R900 bill validator operates via various interfaces
- MDB, MDBS, CCNET and ccTalk protocol are available
Operating Voltage
- 34VDC/24VDC for MDB interface
- 34VDC/24VDC for MDBS interface (MDB Sleep Mode)
- 12VDC for CCNET interface (RS232C base)
- 12VDC for ccTalk interface (RS232C base)
INSTALLATION
Before installation, remove the R900 bill validator from the packaging for any physical damages. If damaged, contact customer service
1. Turn off power from the vending machine.
2. Mount the R900 bill validator on the mounting studs, through the opening in the front of the vendor and secure using the included
hardware.
3. Connect the R900 bill validator to the interface harness. Apply gentle pressure to connect; the pins will bend if forced.
4. Turn on power to the vending machine.
5. Check the arrow LED on the front of R900. The LED should be flashing. In some cases, the machine door must be closed first.
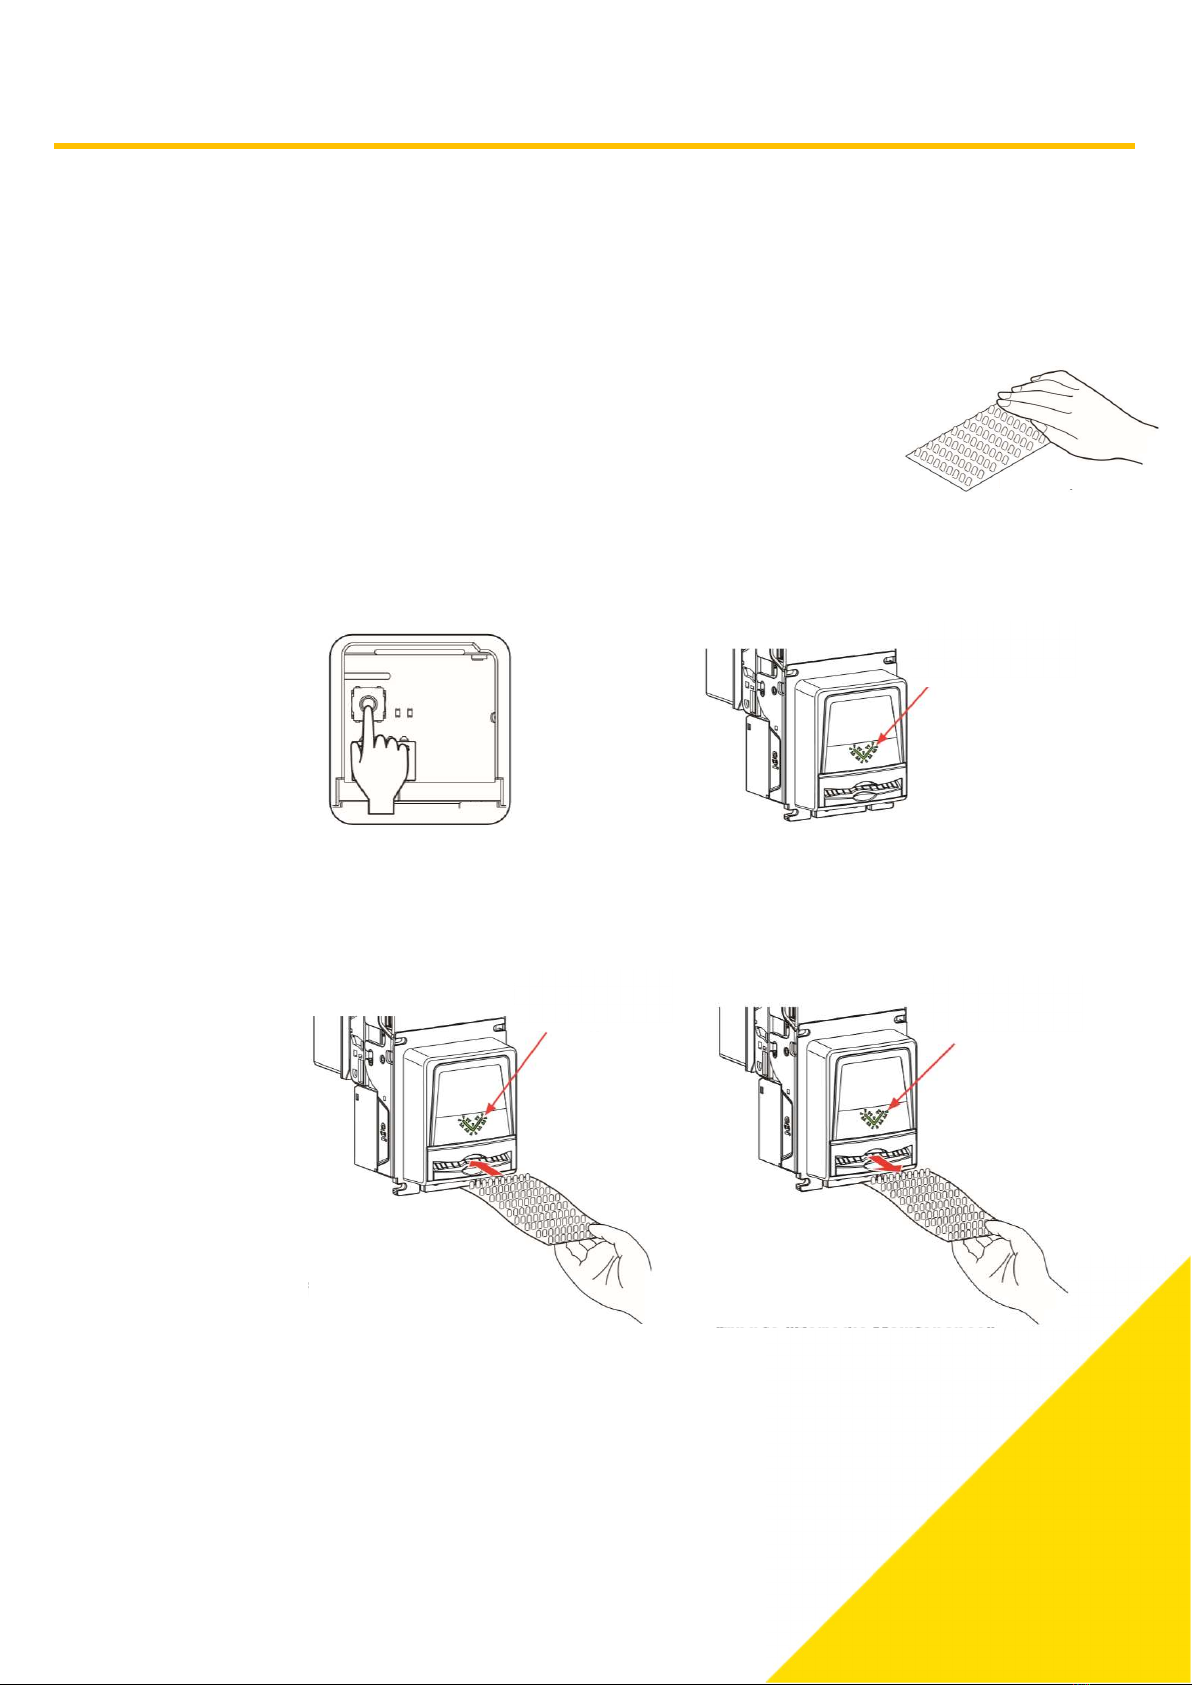
6. Once the LED is flashing, test the validator with appropriate bill.
a. Insert appropriate bill and confirm that it stacks and credit is given
b. Repeat this process for any other enable bills.
7. When your test is completed, remove the test bills from the bill magazine.
The installation is now complete. Refer to the other sections of this guide to configure the device, if necessary.

[Document Title Name Goes Here]
B4 B3 B2 B1
1 2 3 4
ON
A4 A3 A2 A1
1 2 3 4
ON
No.
ON
A1
Description
Bill 1
OFF
Accepted Inhibited
No.
A2
A3
A4
Bill 2
Bill 3
Bill 4
Accepted Inhibited
Accepted Inhibited
Accepted Inhibited
ON
B1
Description
Bill 5
OFF
Accepted Inhibited
B2
B3
B4
Bill 6
Bill 7
Security
Accepted Inhibited
Accepted Inhibited
Standard High
B4 B3 B2 B1
1 2 3 4
ON
A4 A3 A2 A1
1 2 3 4
ON
No. ON
B1
Description
Bill 5
OFF
Accepted Inhibited
B2
B3
B4
Sleep Mode1
Sleep Mode2
Security
Disable Enable
Disable Enable
Standard High
ON
A1
Description
Bill 1
OFF
Accepted Inhibited
No.
A2
A3
A4
Bill 2
Bill 3
Bill 4
Accepted Inhibited
Accepted Inhibited
Accepted Inhibited
B4 B3 B2 B1
1 2 3 4
ON
A4 A3 A2 A1
1 2 3 4
ON
No.
ON
A1
Description
Bill 1
OFF
Accepted Inhibited
No.
A2
A3
A4
Bill 2
Bill 3
Bill 4
Accepted Inhibited
Accepted Inhibited
Accepted Inhibited
ON
B1
Description
Bill 5
OFF
Accepted Inhibited
B2
B3
B4
Bill 6
Com Speed
Security
Accepted Inhibited
9600bps 19200bps
Standard High
Enabling bills
Refer to the DIP SW setting to enable or disable bills
(refer to the quick reference guide for specific switch settings based on the model you purchased)
The DIP SW locating on the back of bill validator and open the small clear door to access.
The DIP SW will be all “OFF” setting as factory default.
<MDB Model / ccTalk Model>
<MDBS Model>
<CCNET Model>

Phase2 - R900 Installation Guide (V1.1 2020-04-16).docx
Bezel LED
Bezel Lamp State Description
Flashing in Green
Every 0.3s, 2 times,
Repetition
Stand-by Ready to accept
the inserted bills
Flashing in Green
Every 0.3s, 5 times
Active
High-Security
Mode
Upon power-on, when the
initial cycle is completed,
the lamp operates one-
flash cycle in Green
(0.3s, 5 times)
to indicate in high-security
mode
Flashing in Green
Every 0.5s
In Cleaning Mode
Ready to be inserted
cleaning sheet to clean-up
the bill path
ON in Red
Not Ready
Not ready to accept the
inserted bills
Please refer to monitor
lamp to see BV status
OFF
No Power
Communication Error
Inhibited All Bills
Bill is in Inlet Sensor
Busy (in validation)
Abnormal State
Turn on Power
Check connector
Check DIP SW setting
Pull out the returned bill
---
Check BV status
Bezel LED Error flash code
Refer to the Bezel LED to identify the bill validator status.
The Bezel LED indicates the state of the bill validator by using lighting patterns.

Phase2 - R900 Installation Guide (V1.1 2020-04-16).docx
Monitor Lamp
Monitor Lamp LED Error flash code
Refer to the Monitor Lamp LED to identify the bill validator status.
The Monitor Lamp LED indicates the state of the bill validator by using lighting patterns.

Phase2 - R900 Installation Guide (V1.1 2020-04-16).docx
Problem Check Remedy
Do not work properly
No bill accepted at all
Is the machine turned on? Turn on power to the machine
Is the interface harness connected
correctly?
Connect the interface harness
properly
Is there any jammed bill or foreign
material inside the validator?
Remove the jammed bill or foreign
materials from the bill path
Is there any dirt on the validation
sensors?
Clean the sensors referring to the
“REGULAR MAINTENANCE”
Specific bills are not
accepted
Is the DIP SW setting correctly? Set DIP SW to be enabled referring to
the “ENABLING BILLS”
Is there any dirt on the validation
sensors?
Clean the sensors referring to the
“REGULAR MAINTENANCE”
Poor Acceptance
Is the security mode set as “High”? Set DIP SW to be standard referring
to the “ENABLING BILLS”
Is there any dirt on the validation
sensors?
Clean the sensors referring to the
“REGULAR MAINTENANCE”
Bill Jam
Is there any jammed bill inside? Remove the jammed bill or foreign
objectives from bill path
Is the jammed bill wet, creased,
torn or folded? Do not insert damaged bills
Is the bill validator installed
properly?
Check the installation referring to the
“INSTALLATION”
troubleshooting
In case of any problems, check the items listed in the table below. If the problem can not be solved, contact ASC

Phase2 - R900 Installation Guide (V1.1 2020-04-16).docx
Bezel Lamp
starts Flashing
Bezel Lamp
keeps Flashing Bezel Lamp
keeps Flashing
Use proper cleaning
sheet CPI supported
To enter the “Cleaning Mode”
Press push switch twice
If the BV is in “Cleaning Mode”,
the bezel lamp starts flashing
To enter the “Cleaning Mode”
Insert
cleaning sheet
into bill insertion slot
Once completed cleaning for
bill path and validation sensors,
the cleaning sheet is
automatically returned to
insertion slot
regular maintenance
The R900 bill validator will not need to be cleaned as often as magnetic sensing bill acceptors.
However, if it becomes too dirty, that will effect to product performance such as bill acceptance rate, etc.
To maintain the bill validator with the best performance, we recommend to do regular maintenance once every 3-6 months.
If cleaning is required, use a soft cloth moisture with mild non-abrasive detergent.
Cleaning Mode
Use proper cleaning sheet CPI supported. (Contact local ASC)
To enter the “Cleaning Mode”, press the push switch twice
The bezel lam starts flashing. It means the product is in “Cleaning Mode”
To cancel the “Cleaning Mode”, press push switch once or leave it for 30 seconds
Insert the cleaning sheet into the bill insertion slot.
The sheet is pulled inside to start the cleaning operation.
The sheet moves back and force 3 times to complete bill path and sensor cleaning.
Upon the completion of cleaning, the cleaning sheet is returned to the bill insertion slot.

C ON T AC T U S
Crane Payment Innovations
CPI Corporate Headquarters
3222 Phoenixville Pike
Suite 200
Malvern, PA 19355
CranePI.com
Table of contents
Other CPI Bank Note Validator manuals
Popular Bank Note Validator manuals by other brands

AccuBANKER
AccuBANKER D490 Startup guide

Innovative Technology
Innovative Technology BV20 user manual

charismaTec OG
charismaTec OG Doculus Lumus user manual

Innovative Technology
Innovative Technology NV9 Spectral user manual

PRO Intellect Technology
PRO Intellect Technology PRO-1500 LCD Series user manual

Innovative Technology
Innovative Technology NV11 user manual