CPR AeroForce 2 User manual

CPR Aquatic, INC•P.O. Box 1111•3749 West End Road, Arcata, CA 95521
AeroForce 2TM
As many hobbyists venture into the world of reef keeping, a common goal among most is to keep the filtration
system as simple as possible. One of the most important components to filtration is the removal of compounds
which could eventually break down into ammonia and nitrite. The AeroForce 2TM is designed to provide a simple yet
highly efficient protein skimmer for a reef system. The AeroForce 2TM employs a new dual-body chamber to make
maintenance easier and for sturdier construction. Requiring no supplemental plumbing, the AeroForce 2TM simply
hangs on the back of the tank and can be installed in a few short minutes.
To place your AeroForce 2TM into operation:
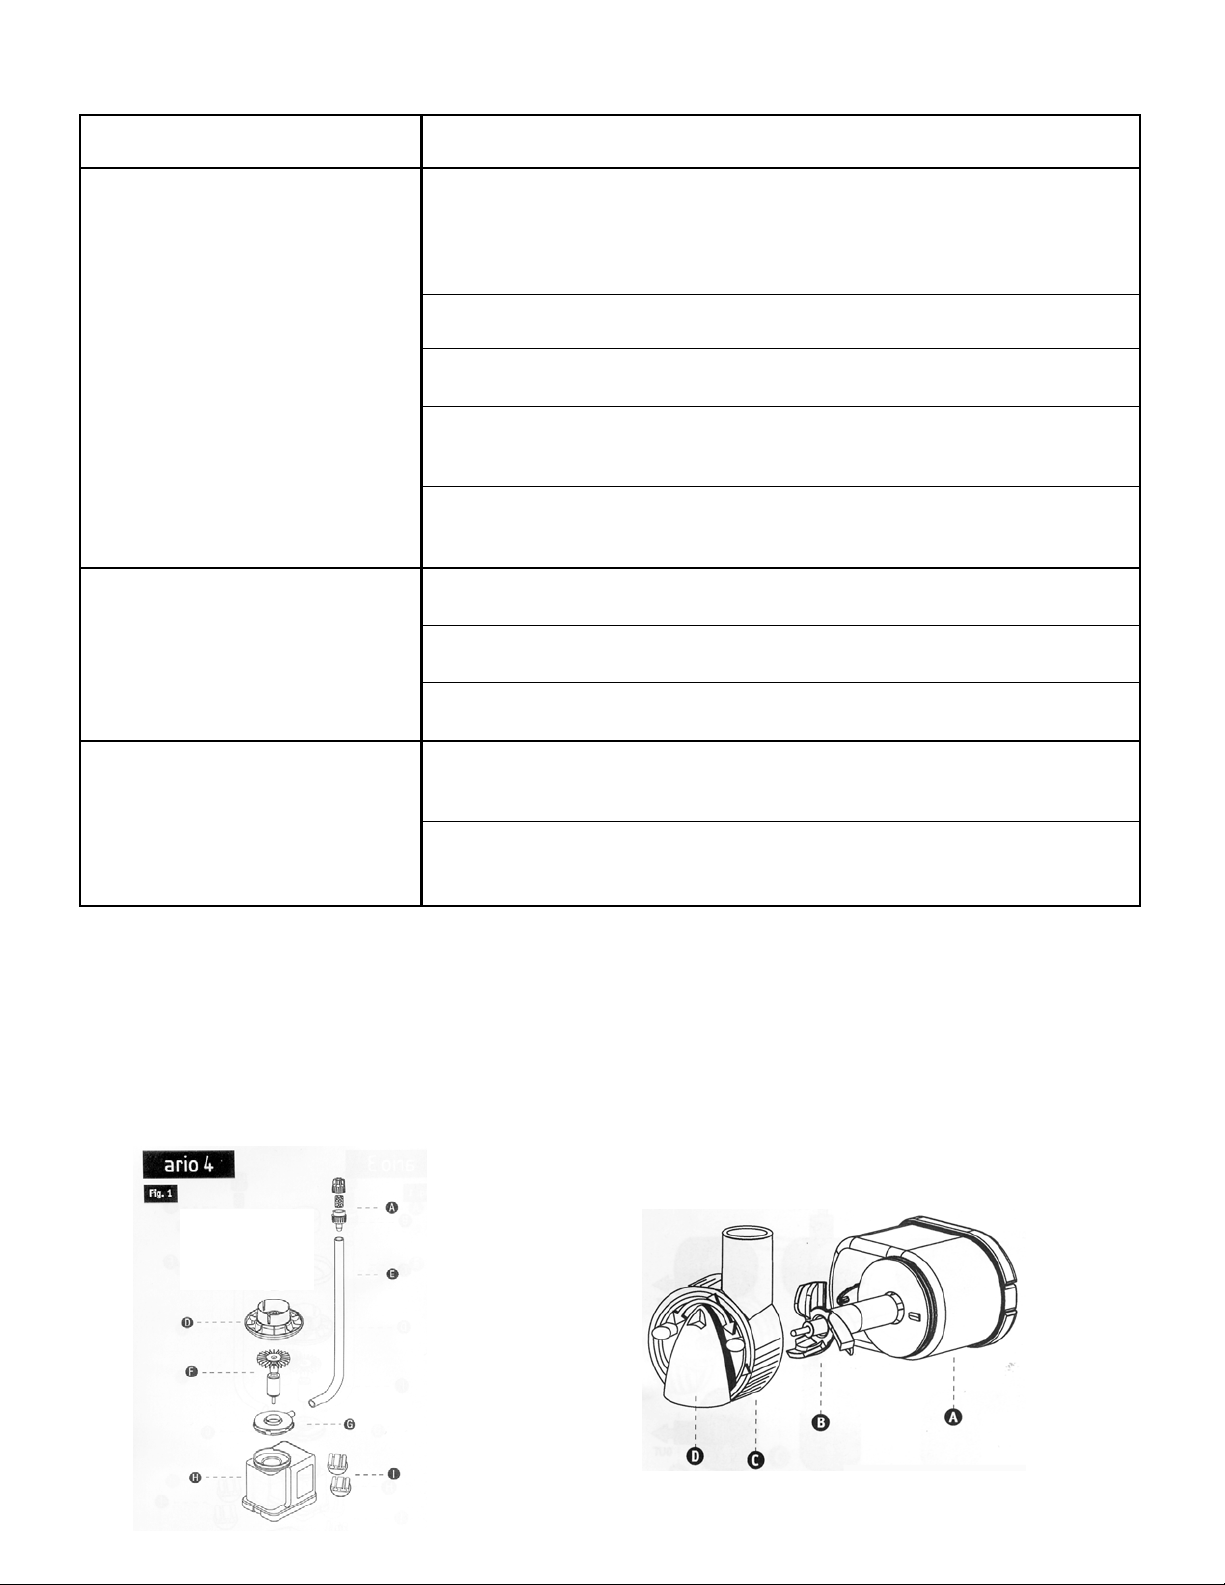
1) Carefully remove all packaging and inspect the unit for damaged or missing parts. You should have:
(1) Outer acrylic body
(1) Inner protein skimmer body
(1) Pico400 (feed pump)
(1) Ario4 (skimmer pump) glued to acrylic base plate
(1) Collection cup assembly with “O” ring and lid
(1) O-ring for base plate support (packaged with Ario 4 pump cord)
(1) Support pin
If any items are damaged or missing, please contact your dealer immediately.
2) Rinse inside of the AeroForce 2TM with warm water. (optional)
3) Remove inner body from outer body. Feed the power cord from the Ario4 through the center of the o-ring.
Connect the airline to the pump. Insert the base plate with the attached Ario4 pump (#8 pg.4 diagram) to the
inside skimmer body by using the o-ring to hold into position. Insert the base plate from the bottom of the inner
skimmer body (3) and stretch the o-ring to hold onto the support bars (10) on the sides of the opening. Pull
the slack out of the airline and make sure it is secured through the airline access hole and into the black airline
clip on the side of the unit.
4) Slide the inner skimmer body (3) into the outer body (4). The inlet pipe parts 1 and 2 should line up once the
two bodies are together (see page 4).
5) Attach the Pico4 (9) to the inlet part 2.
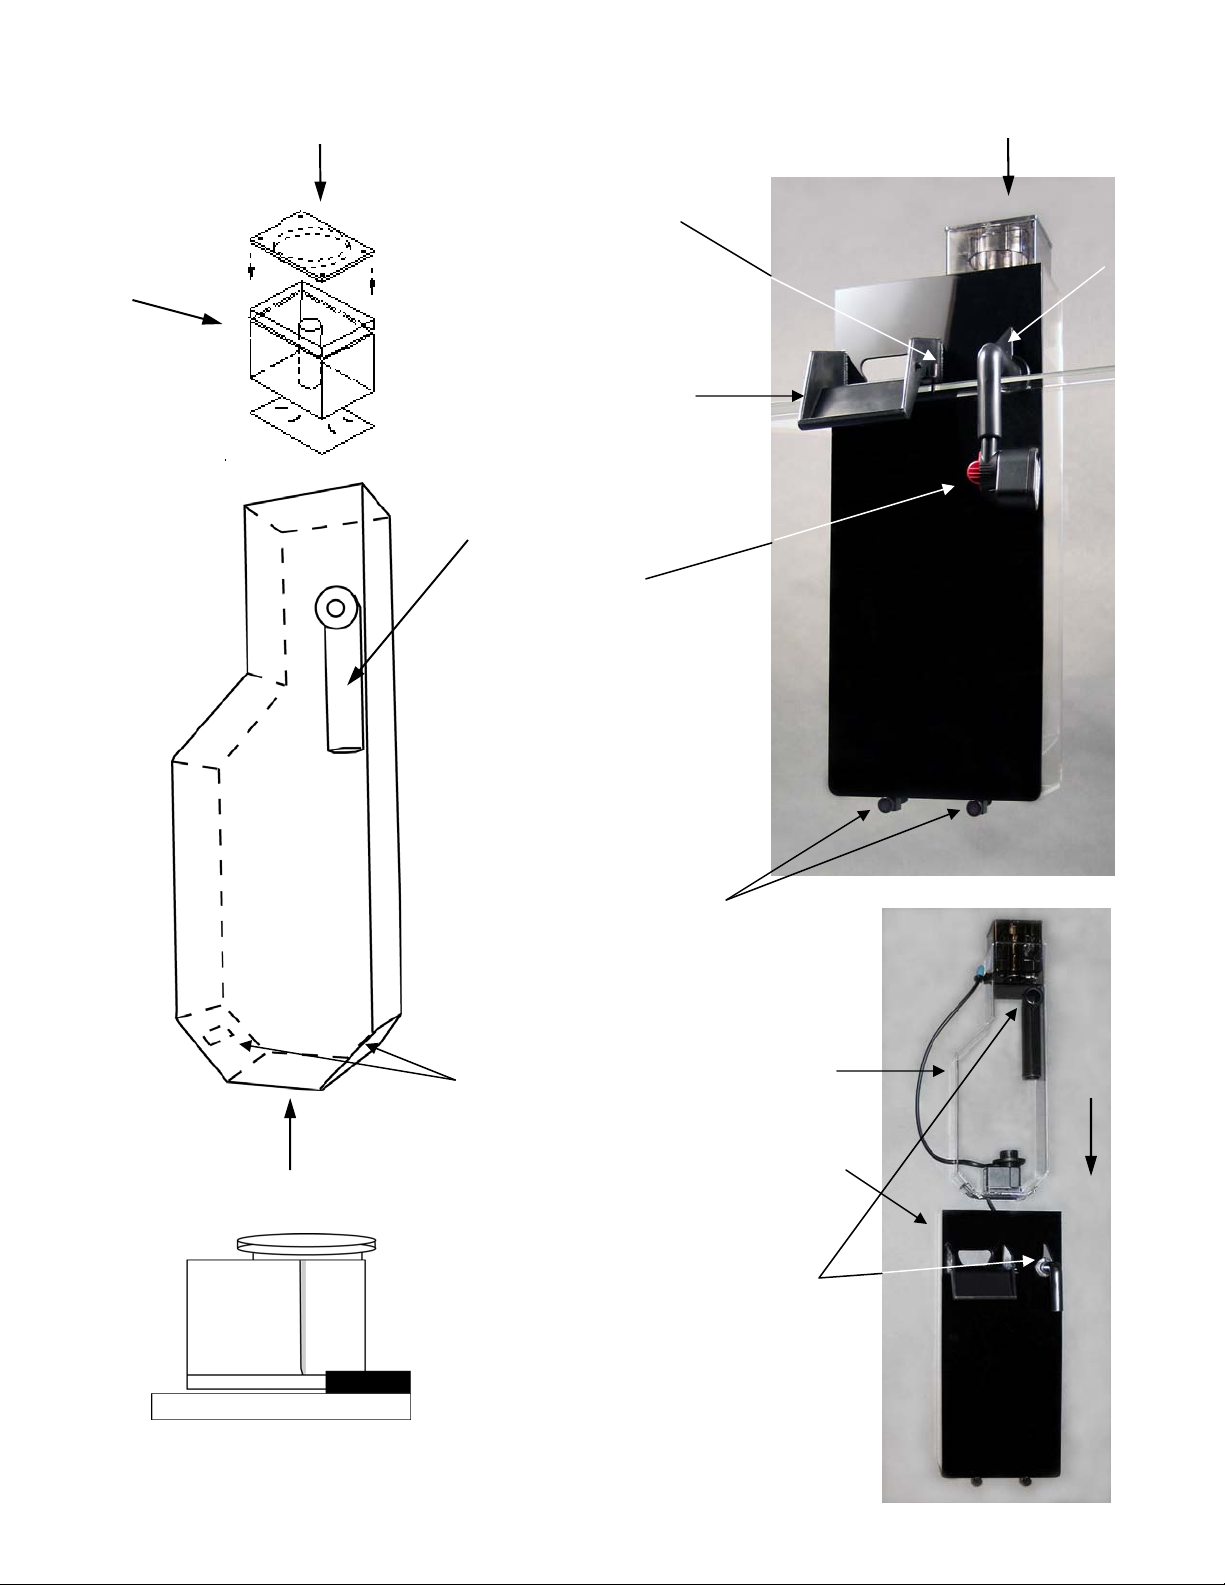
6) Hang the AeroForce 2TM on your tank. Use the adjustment screws (11) and support pin (12) to position the
AeroForce 2TM so that it is parallel to the back of the tank. Insert the support pin into the desired position
first, and then adjust the screws accordingly.
7) Clean the collection cup (1) including the throat of the funnel in hot water. This will cause the skimmer to begin
collecting waste faster. Do not use any detergents on the collection cup. Insert cup inside protein skimmer
section with O-ring placed around the outside. The o-ring acts as a support for the cup to rest on top of the
AeroForce 2TM body. This is not intended to form a seal inside the body.
CPR Technical Support (707) 826-9636 • FAX (707) 826-9623

MAINTENANCE
1) The collection cup should be emptied regularly. Every time you empty the cup, clean the base of the funnel
and the inside of the throat for better collection.
2) The AeroForce 2TM should be cleaned every three months, or as needed.
3) Clean the powerheads at least once a month. Replace each powerhead every twelve to eighteen months to
ensure optimal performance. To clean the powerheads, follow the “Removal and Cleaning of your Powerhead”
instructions below.
REMOVAL AND CLEANING OF YOUR POWERHEAD
1) Remove the inner body from the outer body then remove the pump and base plate from the inner body
2) Remove the Pico 400 pump by pulling straight down on the pump from the inlet part 2.
3) See the next page for pump disassembly images to assist in taking them apart. Remove the airline by
pulling away from the powerhead. During disassembly, ensure that no pieces are misplaced. The Pico 400
pump includes a small clear translucent bushing that the impeller rod fits into (inside red cap) and is
required for quiet operation. It can pop out, so please be careful during disassembly.
4) Wash all parts under warm tap water. Do not use any detergents. Make sure that the air line is clear of
any foreign matter, calcium buildup or salt creep before reassembling.
5) Place the powerheads back in place on your AeroForce 2TM
8) Plug in the feed pump (9) first. Once the skimmer pump becomes submerged, plug in the skimmer pump (8).
Your AeroForce 2TM is now operational.
9) Place the collection cup (1) in the skimmer column of the unit.
The base of the collection funnel should be 1/8”
below the water surface for optimal performance. Slide the O-ring (2) up or down until the desired skimmate wet-
ness is achieved.
It is common that some of the micro-bubbles escape to the tank during the initial set up. The surface tension may rise
due to the oils on the acrylic, additives and/or water conditioners being introduced to the water. The skimmer may pro-
duce excess bubbles until it is able to break down whatever is raising the surface tension of the water. This process can
take from a few days to a number of weeks to clear completely

TROUBLE SHOOTING
Before calling CPR’s Technical Support, please take some time to look over this trouble
shooting guide. Most of the problems associated with the performance of the
AeroForce 2TM are due to improper maintenance of the pumps.
Cleaning the powerhead at least once a month will ensure
optimal performance of the Aero ForceTM
Pico 400 disassembly
disassembly
Problem: Cause and Solution:
Small air bubbles returning to the tank The surface tension of the water has been increased by added supplements, medications,
or conditioners. Disable the protein skimmer by submerging the airline into the water
(remove muffler first) or shutting off the air valve for 24 hours. Many products contain
chemicals which will still be present in the aquarium after 24 hours. Run the protein
skimmer as normal to remove compounds which may be affecting surface tension.
The salinity is too high. Lower the salinity to 1.023.
Adjust the red flow controller on the feed pump. Reducing the flow will slow the flow
rate through the skimmer, reducing the draft of bubbles into the tank.
The aquarium has just been cleaned or water has been changed. Synthetic salt mixes
often contain conditioners which increase the surface tension of the water. Bubbles
should disappear within 48 hours.
The air line is clogged with detritus or salt creep. This will increase the water flow rate
and possibly sweep the bubbles from the skimmer chamber back into the tank before
they can dissipate. The airline should be cleaned every two weeks.
No waste collecting in collection cup. The powerhead and its air line may be dirty. Clean the whole unit every two weeks for
optimal performance.
The collection cup is not low enough. See instructions for the correct height of the
collection cup.
The biological load may not be sufficient to generate waste. On a new tank or a tank
with supplemental filtration it may take over a week to generate waste foam.
The Ario pump is producing little or no
bubbles. The airline or the air control valve may be blocked. Detritus, calcium and salt will build
up in these parts over time. Clean these parts every two to three weeks with warm tap
water.
The pump may need to be cleaned. If the pump becomes clogged with organic material
the flow rate and the air intake rates will reduce. Follow the instructions included with
your AeroForce 2TM to clean your pump.
* a small, clear, translucent bushing is located inside of the red cap. It can
pop out during disassembly, so be careful to not misplace that required part.

Collection cup (1)
O-Ring (2)
(around cup)
Ario4 (8)
Inner body (3)
Inlet (part 1)
Diagram A
O-ring support
bars (10)
Adjustment screws (11)
Base plate and pump are glued
together and cannot be sepa-
rated. New pumps will need to
be purchased with base plate.
Pico 400 (9)
Collection cup
Inlet
(part 2)
Support pin (12)
Outlet
Inner body slides into outer
body as shown. Ensure that the
Inlet (part 1) and Inlet (part 2)
are in line with each other so
that water can pass through both
inlet parts.
Inner body (3)
Outer body (4)
Table of contents
Other CPR Aquarium manuals
Popular Aquarium manuals by other brands

D-D The Aquarium Solution
D-D The Aquarium Solution REEF-PRO 900 installation instructions

Sera
Sera alu reflector 150 manual

Red Sea
Red Sea Reefer Peninsula 650 Assembly manual

Hobby
Hobby AQUA COOLER Series Instructions for use

Neptune
Neptune APEX Cloning Guide

Tetra
Tetra Tetratec EasyCrystal FilterBox 300 instruction manual