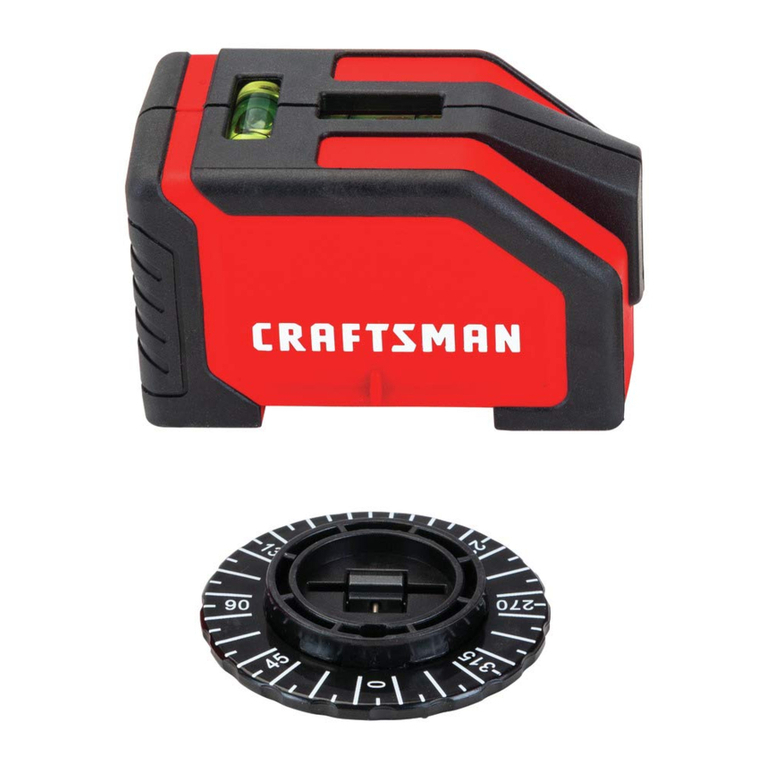
Craftsman CMHT77629 User manual

CMHT77629
Self-Leveling Cross-line Laser
E
PT
ES
F
Please read these instructions before operating the product.
www.CRAFTSMAN.com

>
4º
=
=
< 4º
_
A
1 2 3
Figures
2

B
C
3
1/4-20

45°
a
90°
b
a
≥ 30 ft. (9m)
D
1
2
Figures
4

ab
≥ 30 ft. (9m)
ab
a
c
b
b
E
1
2
3
5

5 ft. (1.5m)
5 ft. (1.5m)
a
a
b
D
F
1
2
Figures
6

G
1
2
3
4
7

8
EContents
• Laser Information
• User Safety
• Battery Safety
• Installing AA Batteries
• Turning the Laser On
• Checking Laser Accuracy
• Using the Laser
• Maintenance
• Troubleshooting
• Service and Repairs
• Specifications
Laser Information
The CMHT77629 laser is a Class 2 laser product. The
laser is a self-leveling laser tool that can be used
for horizontal (level) and vertical (plumb) alignment
projects.
User Safety
Safety Guidelines
The definitions below describe the level of severity for
each signal word. Please read the manual and pay
attention to these symbols.
DANGER: Indicates an imminently hazardous
situation which, if not avoided, will result in
death or serious injury.
WARNING: Indicates apotentially hazardous
situation which, if not avoided, could result in
death or serious injury.
CAUTION: Indicates apotentially hazardous
situation which, if not avoided, may result in
minor or moderate injury.
NOTICE: Indicates apractice not related to personal
injury which, if not avoided, may result in property
damage.
If you have any questions or comments about this or
any CRAFTSMAN®tool, go to www.CRAFTSMAN.com.
WARNING:
Read and understand all instructions. Failure
to follow the warnings and instructions in this
manual may result in serious personal injury.
SAVE THESE INSTRUCTIONS
WARNING:
Laser Radiation Exposure. Do not disassemble
or modify the laser level. There are no user
serviceable parts inside. Serious eye injury
could result.
WARNING:
Hazardous Radiation. Use of controls or
adjustments, or performance of procedures,
other than those specified herein may result in
hazardous radiation exposure.
The label on your laser may include the following
symbols.
Symbol Meaning
V Volts
mW Milliwatts
Laser Warning
nm Wavelength in nanometers
2 Class 2 Laser
WARNING LABELS
For your convenience and safety, the following labels are
on your laser.
WARNING: To reduce the risk of injury,
user must read instruction manual.
WARNING:LASER RADIATION. DO NOT
STARE INTO BEAM. Class 2 Laser Product.

9
E
Complies with 21 CFR 1040.10 and 1040.11 except for deviations
pursuant toLaser Notice No. 50, datedJune 24, 2007.
CMHT77629
www.CRAFTSMAN.com
888-331-4569
TYPE 1
:
3VDC
Made in China
SER.
LASER
2
≤1mW @630~680nm
IEC 60825-1:2014
• If the equipment is used in a manner not specified
by the manufacturer, the protection provided by the
equipment may be impaired.
• Do not operate the laser in explosive atmospheres,
such as in the presence of flammable liquids, gases,
or dust. This tool may create sparks which may ignite
the dust or fumes.
• Store an idle laser out of reach of children and other
untrained persons. Lasers are dangerous in the hands
of untrained users.
• Tool service MUST be performed by qualified
repair personnel. Service or maintenance performed
by unqualified personnel may result in injury. To
locate your nearest CRAFTSMAN service center go to
www.CRAFTSMAN.com.
• Do not use optical tools such as atelescope or
transit to view the laser beam. Serious eye injury
could result.
• Do not place the laser in aposition which may cause
anyone to intentionally or unintentionally stare into
the laser beam. Serious eye injury could result.
• Do not position the laser near areflective
surface which may reflect the laser beam toward
anyone’seyes. Serious eye injury could result.
• Turn the laser off when it is not in use. Leaving the
laser on increases the risk of staring into the laser
beam.
• Do not modify the laser in any way. Modifying the tool
may result in hazardous laser radiation exposure.
• Do not operate the laser around children or allow
children to operate the laser. Serious eye injury may
result.
• Do not remove or deface warning labels. If labels are
removed, the user or others may inadvertently expose
themselves to radiation.
• Position the laser securely on alevel surface. If
the laser falls, damage to the laser or serious injury
could result.
Personal Safety
• Stay alert, watch what you are doing, and use common
sense when operating the laser. Do not use the laser
when you are tired or under the influence of drugs,
alcohol, or medication. Amoment of inattention while
operating the laser may result in serious personal
injury.
• Use personal protective equipment. Always wear eye
protection. Depending on the work conditions, wearing
protective equipment such as adust mask, non-skid
safety shoes, hard hat, and hearing protection will
reduce personal injury.
Tool Use and Care
• Do not use the laser if the Power/Transport Lock
switch does not turn the laser on or off. Any tool that
cannot be controlled with the switch is dangerous and
must be repaired.
• Follow instructions in the Maintenance section of this
manual. Use of unauthorized parts or failure to follow
Maintenance instructions may create arisk of electric
shock or injury.

10
EFCC Statement
This equipment has been tested and found to comply
with the limits for a Class B digital device, pursuant
to part 15 of the FCC Rules. These limits are designed
to provide reasonable protection against harmful
interference in a residential installation. This equipment
generates, uses and can radiate radio frequency energy
and, if not installed and used in accordance with the
instructions, may cause harmful interference to radio
communications. However, there is no guarantee that
interference will not occur in a particular installation.
If this equipment does cause harmful interference to
radio or television reception, which can be determined by
turning the equipment off and on, the user is encouraged
to try to correct the interference by one or more of the
following measures:
- Reorient or relocate the receiving antenna.
- Increase the separation between the equipment and
receiver.
- Connect the equipment into an outlet on a different
circuit (not the circuit to which the receiver is
connected).
- Consult the dealer or an experienced radio/TV
technician for help.
Canada, Industry Canada (IC) Notices
This Device complies with Industry Canada License-
exempt RSS standard(s). Operation is subject to the
following two conditions: 1) this device may not cause
interference, and 2) this device must accept any
interference, including interference that may cause
undesired operation of the device.
Under Industry Canada regulations, this radio
transmitter may only operate using an antenna of a
type and maximum (or lesser) gain approved for the
transmitter by Industry Canada. To reduce potential radio
interference to other users, the antenna type and its gain
should be so chosen that the equivalent isotropically
radiated power (e.i.r.p.) is not more than that necessary
for successful communication.
Battery Safety
WARNING:
Batteries can explode, or leak, and can cause
injury or fire. To reduce this risk:
• Carefully follow all instructions and warnings on the
battery label and package.
• Always insert batteries correctly with regard to polarity
(+ and –), as marked on the battery and the
equipment.
• Do not short battery terminals.
• Do not charge disposable batteries.
• Do not mix old and new batteries. Replace all batteries
at the same time with new batteries of the same brand
and type.
• Remove dead batteries immediately and dispose of per
local codes.
• Do not dispose of batteries in fire.
• Keep batteries out of reach of children.
• Remove batteries when the device is not in use.
11
E
Installing AA Batteries
Load new AA batteries in the CMHT77629 laser.
1. Turn the laser upside down.
2. On the bottom of the laser, lift up the latch to open the
battery compartment cover (Figure B1).
3. Insert two new, high-quality, name brand AA batteries,
making sure to position the - and + ends of each battery
as noted inside the battery compartment (Figure B2).
4. Push the battery compartment cover closed until it snaps
in place (Figure B3).
When the laser is not in use, keep the Power/Transport
Lock switch in the center (OFF) position (Figure A2)
to save battery power.
Turning the Laser On
1. Place the laser on asmooth, flat, level surface, with the
laser facing straight ahead toward the opposing wall (0º
position).
2. Turn the laser ON to display the horizontal and vertical
laser beams. Either:
• Move the Power/Transport Lock switch to the left
to keep the pendulum locked and display the cross
beams in manual mode (Figure A1).
• Move the Power/Transport Lock switch to the right
to unlock the pendulum and display the cross
beams in self-leveling mode (Figure A3).
3. Check the horizontal and vertical laser beams.
• If the laser is tilted so much that it cannot self-
level (> 4°), or the laser is not level in manual
mode, the laser beams will flash.
• If the laser beams flash, the laser is not level (or
plumb) and should NOT BE USED for determining
or marking level or plumb. Try repositioning the
laser on alevel surface.
4. If ANY of the following statements are TRUE, continue
with the instructions for Checking Laser Accuracy
BEFORE USING THE LASER for aproject.
• This is the first time you are using the laser
(in case the laser was exposed to extreme
temperatures).
• The laser has not been checked for accuracy
in awhile.
• The laser may have been dropped.
Checking Laser Accuracy
The laser tools are sealed and calibrated at the factory.
It is recommended that you perform an accuracy check
prior to using the laser for the first time (in case the
laser was exposed to extreme temperatures) and then
regularly to ensure the accuracy of your work. When
performing any of the accuracy checks listed in this
manual, follow these guidelines:
• Use the largest area/distance possible, closest to the
operating distance. The greater the area/distance, the
easier to measure the accuracy of the laser.
• Place the laser on asmooth, flat, stable surface that is
level in both directions.
• Mark the center of the laser beam.
Horizontal Beam - Scan Direction
Checking the horizontal scan calibration of the laser
requires two walls at least 30‘ (9m) apart. It is important
to conduct acalibration check using adistance no
shorter than the distance of the applications for which
the tool will be used.
1. Place the back of the laser against awall and facing
straight ahead toward the opposing wall.
2. Move the Power/Transport Lock switch to the right
(Figure A3) to turn the laser ON in self-leveling
mode and display the horizontal and vertical beams.

12
E3. Turn the laser 45ºcounter-clockwise so that the
right-most end of the laser line is displayed on the
wall (Figure D1).
4. Mark aon the center of the beam on the wall.
5. Turn the laser 90ºclockwise so that the left-most
end of the laser line is displayed near a(Figure D
2).
6. Mark bon the center of the beam on the wall.
7. Measure the vertical distance between aand b.
8. If your measurement is greater than the Allowable
Distance Between aand bfor the corresponding
Distance Between Walls in the following table, the
laser must be serviced at an authorized service
center.
Distance Between
Walls
Allowable Distance
Between aand b
30′(9m) 7/16″(11.0mm)
40′(12m) 9/16″(14.4mm)
50′(15m) 23/32″(18.0mm)
Horizontal Beam - Pitch Direction
Checking the horizontal pitch calibration of the
laser requires asingle wall at least 30′(9m) long.
It is important to conduct acalibration check using
adistance no shorter than the distance of the
applications for which the tool will be used.
1. Place the laser against the end of the wall (Figure E
1).
2. Move the Power/Transport Lock switch to the right
(Figure A3)to turn the laser ON in self-leveling
mode and display the horizontal and vertical beams.
3. At least 30′(9m) apart along the laser beam, mark
aand b.
4. Move the laser to the opposite end of the wall
(Figure E2).
5. Position the laser toward the first end of the same
wall and parallel to the adjacent wall.
6. Adjust the height of the laser so the center of the
beam is aligned with b.
7. Directly above or below a, mark calong the laser
beam (Figure E3).
8. Measure the distance between aand c.
9. If your measurement is greater than the Allowable
Distance Between aand cfor the corresponding
Distance Between aand bin the following table,
the laser must be serviced at an authorized service
center.
Distance Between
aand b
Allowable Distance
Between aand c
30′(9m) 7/16″(11.0mm)
40′(12m) 9/16″(14.4mm)
50′(15m) 23/32″(18.0mm)
Vertical Beam - Plumb
Checking the vertical (plumb) calibration of the laser
can be most accurately done when there is asubstantial
amount of vertical height available, ideally 30′(9m),
with one person on the floor positioning the laser and
another person near aceiling to mark the position of
the beam. It is important to conduct acalibration check
using adistance no shorter than the distance of the
applications for which the tool will be used.
1. On the floor between two walls, mark a5 ft. (1.5 m)
line that is parallel to the adjacent wall (Figure F
1).
2. Move the Power/Transport Lock switch to the right
(Figure A3) to turn the laser ON in self-leveling
mode and display the horizontal and vertical beams.
3. Place the laser at one end of the line on the floor,
making sure the vertical laser beam is aligned and
centered on the line.
4. Where the vertical laser beam appears on the
ceiling, mark a. (This should be directly over the
midpoint of the line on the floor.)

13
E
5. Move the laser to the other end of the line on the
floor (Figure F2).
6. Where the vertical laser beam appears on the
ceiling, mark b, directly beside the first mark a.
7. Measure the distance between aand b.
8. If your measurement is greater than the Allowable
Distance Between aand bfor the corresponding
Ceiling Height Din the following table, the laser
must be serviced at an authorized service center.
Ceiling Height D
Allowable Distance
Between aand b
8′(2.5m) 1/8″(3.0mm)
10′(3.0m) 5/32″(3.6mm)
14′(4.0m) 7/32″(4.8mm)
20′(6.0m) 5/16″(7.2mm)
30′(9.0m) 15/32″(10.8mm)
Using the Laser
Operating Tips
• Always mark the center of the beam created by the
laser.
• Extreme temperature changes may cause movement
of internal parts that can affect accuracy. Check your
accuracy often while working.
• If the laser is ever dropped, check to make sure it is
still calibrated.
• As long as the laser is properly calibrated, the laser is
self-leveling. Each laser is calibrated at the factory to
find level as long as it is positioned on aflat surface
within average ± 4° of level. No manual adjustments
are required.
• Use the laser on asmooth, flat, level, surface.
Turning the Laser Off
Slide the Power/Transport Lock switch to the OFF position
(Figure A2) when the laser is not in use. If the switch
is not placed in the OFF position, the laser will not turn
off.
Using the Laser with the Bracket
Abracket (Figure G) is included with the laser so you
can easily attach the laser to astud or wall.
Securely attach the laser to the bracket.
• Using the 1/4-20 thread on the bottom of the laser
(Figure G1), position the laser on the 1/4-20
thread on the bracket arm (Figure G2).
• Turn the bracket knob (Figure G3) clockwise to
lock the laser on the 1/4-20 thread on the bracket
arm.
• The bracket has magnets and a keyhole for hanging
the laser from a wall (Figure G4).
Using the Laser with Other Accessories
WARNING:
Since accessories other than those offered by
CRAFTSMAN have not been tested with this
laser, use of such accessories with this laser
could be hazardous.
Only use CRAFTSMAN®accessories that are
recommended for use with this model. Accessories that
may be suitable for one laser may create arisk of injury
when used with another laser.
The laser is equipped with a1/4-20 female thread on
the bottom (Figure C) to accommodate current or future
CRAFTSMAN®accessories.
Other recommended accessories for use with this laser
are available at extra cost from your local dealer or
authorized service center. If you need assistance locating
any accessory, please contact your nearest CRAFTSMAN
service center or visit our website:
www.CRAFTSMAN.com.

14
EMaintenance
• When the laser is not in use, clean the exterior parts
with adamp cloth, wipe the laser with asoft dry cloth
to make sure it is dry, and then store the laser in the
kit box provided.
• Although the laser exterior is solvent resistant, NEVER
use solvents to clean the laser.
• Do not store the laser at temperatures below -5˚F
(-20˚C) or above 140˚F (60˚C).
• To maintain the accuracy of your work, check the laser
often to make sure it is properly calibrated.
• Calibration checks and other maintenance repairs may
be performed by CRAFTSMAN service centers.
Troubleshooting
The Laser Does Not Turn On
• Check the AA batteries to make sure:
• Each battery is installed correctly, according to (+)
and (–) listed inside the battery compartment.
• The battery contacts are clean and free of rust or
corrosion.
• The batteries are new, high-quality, name brand
batteries to reduce the chance of battery leakage.
• Make sure the AA batteries are in proper working
condition. If in doubt, try installing new batteries.
• When using rechargeable batteries, make sure the
batteries are fully charged.
• Be sure to keep the laser dry.
• If the laser has been stored in extremely hot
temperatures, allow it to cool. The laser level will not
be damaged by using the Power/Transport Lock switch
before cooling to its proper operating temperature.
The Laser Beams Flash
When in self-leveling mode, the lasers are designed
to self-level up to an average of 4° in all directions. If
the laser is tilted so much that the internal mechanism
cannot level itself (or the laser is not level when in
manual mode), the laser beams will flash indicating that
the tilt range has been exceeded.
THE FLASHING BEAMS CREATED BY THE LASER ARE
NOT LEVEL OR PLUMB AND SHOULD NOT BE USED
FOR DETERMINING OR MARKING LEVEL OR PLUMB. Try
repositioning the laser on amore level surface.
The Laser Beams Will Not Stop Moving
The laser is aprecision instrument. Therefore, if it is
not positioned on astable (and motionless) surface,
the laser will continue to try to find level. If the beam
will not stop moving, try placing the laser on amore
stable surface. Also, try to make sure that the surface is
relatively flat and level, so that the laser is stable.
Service and Repairs
Note: Disassembling the laser level will void all
warranties on the product.
To assure product SAFETY and RELIABILITY, repairs,
maintenance and adjustment should be performed by
authorized service centers. Service or maintenance
performed by unqualified personnel may result in arisk
of injury. To locate your nearest CRAFTSMAN service
center, go to www.CRAFTSMAN.com.
Warranty
Go to www.CRAFTSMAN.com for the latest warranty
information.

15
E
Specifications
CMHT77629
Light Source Laser diodes
Laser Wavelength 630–680 nm visible
Laser Power ≤ 1 mW CLASS 2 LASER PRODUCT
Working Range 33′(10m)
Accuracy ±1/4” @ 33′(±6 mm @ 10m)
Power Source 2 AA (1.5V) size batteries (3V DC)
Operating Temperature 14°F to 104°F (-10°C to 40°C)
Storage Temperature -5°F to 158°F (-20°C to 70°C)
IP Rating IP50

16
ES
Contenido
• Información de láser
• Seguridad de usuario
• Seguridad de batería
• Instalación de Baterías AA
• Encendido del láser
• Verificación de precisión de Láser
• Uso del Láser
• Mantenimiento
• Solución de problemas
• Servicio yReparaciones
• Especificaciones
Información de láser
El láser CMHT77629 es un producto láser de clase 2. El
láser es una herramienta láser de nivelación automática
que se puede utilizar para proyectos de alineación
horizontal (nivel) y vertical (caída).
Seguridad del usuario
Guías de Seguridad
Las siguientes definiciones describen el nivel de
severidad para cada palabra de señal. Por favor lea el
manual yponga atención aestos símbolos.
PELIGRO: Indica una situación inminentemente
peligrosa que, si no se evita, resultará en la
muerte olesiones serias.
ADVERTENCIA: Indica una situación
potencialmente peligrosa que, si no se evita,
podría resultar en la muerte olesiones serias.
PRECAUCIÓN: Indica una situación
potencialmente peligrosa que, si no se evita,
puede resultar en lesiones menores omoderadas.
AVISO: Indica una práctica no relacionada con
lesiones personales que, si no se evita, puede
resultar en daño a la propiedad.
Si tiene cualquier pregunta ocomentario sobre esta
ocualquier herramienta CRAFTSMAN®, visite
www.CRAFTSMAN.com.
ADVERTENCIA:
Lea yentienda todas las instrucciones. La falla
en seguir las advertencias einstrucciones en
este manual puede resultar en lesiones
personales serias.
CONSERVE ESTAS INSTRUCCIONES
ADVERTENCIA:
Exposición aRadiación Láser. No
desensamble omodifique el nivel láser. No
hay partes alas que se pueda dar servicio en
el interior. Podría resultar en lesiones serias
alos ojos.
ADVERTENCIA:
Radiación Peligrosa. El uso de controles
oajustes, ola realización de procedimientos,
diferentes alos especificados en el presente
pueden resultar en exposición aradiación
peligrosa.
La etiqueta en su láser puede incluir los siguientes
símbolos.
Símbolo Significado
V Voltios
mW Miliwatts
Advertencia de Láser
nm Longitud de onda en nanómetros
2 Láser Clase 2

17
ES
Etiquetas de advertencia
Para su conveniencia yseguridad, las siguientes
etiquetas se encuentran en su láser.
ADVERTENCIA: Para reducir el riesgo de
lesiones, el usuario debe leer el manual
de instrucciones.
ADVERTENCIA: RADIACIÓN LÁSER. NO
MIRE FIJAMENTE EL RAYO. Producto Láser
Clase 2.
Complies with 21 CFR 1040.10 and 1040.11 except for deviations
pursuant toLaser Notice No. 50, datedJune 24, 2007.
CMHT77629
www.CRAFTSMAN.com
888-331-4569
TYPE 1
:
3VDC
Made in China
SER.
LASER
2
≤1mW @630~680nm
IEC 60825-1:2014
• Si el equipo se utiliza de una manera no especificada
por el fabricante, la protección proporcionada por el
equipo puede ser deteriorada.
• No opere el láser en atmósferas explosivas, tal
como en la presencia de líquidos, gases opolvo
inflamables. Esta herramienta puede crear chispas
que pueden encender el polvo ovapores.
• Guarde un láser que no esté en uso fuera del
alcance de los niños yotras personas sin
capacitación. Los láseres son peligrosos en las manos
de usuarios sin capacitación.
• El servicio de la herramienta se DEBE realizar
por personal de reparación calificado. El servicio
omantenimiento por personal no calificado puede
resultar en lesiones. Para localizar su centro de
servicio CRAFTSMAN más cercano, visite
www.CRAFTSMAN.com.
• No use herramientas ópticas tales como un
telescopio otránsito para ver el rayo láser. Podría
resultar en lesiones serias alos ojos.
• No coloque el láser en una posición que
pueda causar que alguien observe intencional
oinadvertidamente el rayo láser. Podría resultar en
lesiones serias alos ojos.
• No coloque el láser cerca de una superficie
reflejante que pueda reflejar el rayo láser alos ojos
de alguien. Podría resultar en lesiones serias alos
ojos.
• Apague el láser cuando no esté en uso. Dejar el láser
encendido incrementa el riesgo de ver al rayo láser.
• No modifique el láser en ninguna manera. Modificar
la herramienta puede resultar en exposición peligrosa
ala radiación de láser.
• No opere el láser alrededor de niños ni permita
que niños operen el láser. Puede resultar en lesiones
serias alos ojos.
• No retire oelimine las etiquetas de advertencia.
Si se retiran las etiquetas, el usuario uotros pueden
exponerse inadvertidamente ala radiación.
• Coloque el láser firmemente sobre una superficie
nivelada. Si el láser cae, podría resultar en daño al
láser olesiones serias.
Seguridad Personal
• Permanezca alerta, observe lo que está haciendo,
yuse el sentido común cuando opere el láser. No use
el láser cuando esté cansado obajo la influencia de
drogas, alcohol, omedicamentos. Un momento de falta
de atención mientras opera el láser puede resultar en
lesiones personales serias.
• Use equipo de protección personal. Siempre use
protección para los ojos. Dependiendo de las
condiciones de trabajo, usar equipo de protección tal
como una máscara de polvo, zapatos de seguridad
anti-deslizantes, casco, yprotección auditiva reducirá
las lesiones personales.

18
ES
Uso yCuidado de la Herramienta
• No use el láser si el interruptor de Bloqueo de
energía/Transporte no enciende oapaga el láser.
Cualquier herramienta que no se pueda controlar con
el interruptor es peligrosa yse debe reparar.
• Siga las instrucciones en la sección de Mantenimiento
de este manual. El uso de partes no autorizadas ola
falla en seguir las instrucciones de Mantenimiento
puede crear un riesgo de descarga eléctrica olesiones.
Declaración de FCC
Este equipo ha sido probado ycumple con los límites
para dispositivos digitales de clase B, de conformidad
con la parte 15 de las normas FCC. Estos límites han
sido diseñados para proporcionar una protección
razonable contra las interferencias nocivas en
instalaciones residenciales. Este equipo genera, usa
eirradia energía de radiofrecuencia y, si no se instala
yse usa de acuerdo con las instrucciones, puede causar
interferencia perjudicial para las radiocomunicaciones.
No obstante, no existe ninguna garantía de que no se
producirá interferencia en una instalación determinada.
Si este equipo causa interferencias perjudiciales para la
recepción de radio otelevisión, que puede determinarse
al encender yapagar el equipo, el usuario puede tratar
de corregir la interferencia tomando una ovarias de las
siguientes medidas:
- Reorientar oreubicar la antena receptora.
- Aumentar la distancia entre el equipo yel receptor.
- Conectar el equipo en un tomacoriente de otro circuito
diferente (no el circuito al que está conectado el
receptor).
- Consulte al vendedor oaun técnico experto en radio/TV
para solicitar su ayuda.
Seguridad de la batería
ADVERTENCIA:
Las baterías pueden explotar, otener
fugas, ypueden causar lesiones personales
oincendios. Para reducir este riesgo:
• Siga todas las instrucciones yadvertencias colocadas
en las etiquetas yel paquete de las baterías.
• Siempre inserte las baterías correctamente respecto
ala polaridad (+ y–), como está marcado en la
batería yel equipo.
• No ponga en corto las terminales de la batería.
• No cargue las baterías desechables.
• No mezcle baterías nuevas yviejas. Cambie todas las
baterías al mismo tiempo con baterías nuevas del
mismo tipo ymarca.
• Retire las baterías descargadas de inmediato
ydeséchelas conforme alos códigos locales.
• No deseche las baterías en fuego.
• Mantenga las baterías fuera del alcance de los niños.
• Retire las baterías cuando el dispositivo no esté en
uso.
Instalación de Baterías AA
Carga de baterías AA nuevas en el láser CMHT77629.
1. Voltee el láser.
2. En la parte inferior del láser, levante el seguro para abrir
la cubierta del compartimiento de baterías (Figura B
1).
3. Inserte dos baterías AA de marca de alta calidad
nuevas, asegurándose de colocar los extremos - y+
de cada batería como se indica en el interior del
compartimiento de baterías (Figura B2).
4. Cierre la cubierta del compartimiento de baterías hasta
que se conecte en su lugar (Figura B3).

19
ES
Cuando el láser no esté en uso, mantenga el interruptor
de Bloqueo de energía/Transporte en la posición central
(Apagado) (Figura A2) para ahorrar energía de las
baterías.
Encendido del láser
1. Coloque el láser sobre una superficie lisa, plana
ynivelada, con el láser viendo directo al frente hacia la
pared opuesta (posición de 0º ).
2. Encienda el láser para mostrar los rayos láser horizontal
yvertical. Ya sea:
• Mueva el interruptor de Bloqueo de energía/
Transporte ala izquierda para mantener el
péndulo bloqueado ymostrar los rayos cruzados en
modo manual (Figura A1).
• Mueva el interruptor de Bloqueo de energía/
Transporte ala derecha para desbloquear el
péndulo ymostrar los rayos cruzados en modo de
nivelación automática (Figura A3).
3. Revise los rayos láser horizontal yvertical.
• Si el láser está inclinado demasiado de forma que
no se pueda nivelar automáticamente (> 4°), oel
láser no está nivelado en modo manual, los rayos
láser parpadearán.
• Si los rayos láser parpadean, el láser no está
nivelado (ocon caída) yNO SE DEBE USAR para
determinar orealizar el nivel ocaída. Intente
reubicar el láser sobre una superficie nivelada.
4. Si CUALQUIERA de las siguientes declaraciones es
VERDADERA, continúe con las instrucciones para
Verificación de precisión de láser ANTES DE USAR EL
LÁSER para un proyecto.
• Ésta es la primera vez que usa el láser (en
caso de que el láser haya estado expuesto
atemperaturas extremas).
• No se ha verificado la precisión del láser por un
tiempo.
• Se puede haber dejado caer el láser.
Verificación de precisión de
Láser
Las herramientas láser están selladas ycalibradas en
la fábrica. Se recomienda que realice una verificación
de precisión antes de usar el láser por primera vez (en
caso que el láser se haya expuesto atemperaturas
extremas) ydespués regularmente para garantizar la
precisión de su trabajo. Cuando realice cualquiera de las
verificaciones de precisión indicadas en este manual,
siga estas guías:
• Use el área/distancia mayor posible, más cerca ala
distancia de operación. Mientras mayor sea el área/
distancia, más fácil será medir la precisión del láser.
• Coloque el láser sobre una superficie lisa, plana
yestable que esté nivelada en ambas direcciones.
• Marque el centro del rayo láser.
Rayo Horizontal - Dirección de Exploración
Verificar la calibración de exploración horizontal del
láser requiere dos paredes apor lo menos 30′(9m) de
distancia. Es importante realizar una verificación de
calibración utilizando una distancia no más corta que la
distancia de las aplicaciones para las que se utilizará
la herramienta.
1. Coloque la parte trasera del láser contra una pared
yviendo al frente hacia la pared opuesta.
2. Mueva el interruptor de Bloqueo de energía/Transporte
ala derecha (Figura A3) para encender el láser en
modo de nivelación automática ymostrar los rayos láser
horizontal yvertical.
3. Gire el láser 45ºen sentido contrario alas manecillas
del reloj de forma que el extremo derecho de la línea
láser se muestre en la pared (Figura D1).
4. Marque aen el centro del rayo sobre la pared.
5. Gire el láser 90ºen sentido de las manecillas del reloj
de forma que el extremo izquierdo de la línea láser se
muestre cerca a(Figura D2).

20
ES
6. Marque ben el centro del rayo sobre la pared.
7. Mida la distancia vertical entre ay b.
8. Si su medición es mayor ala Distancia permisible
entre ay bpara la Distancia entre paredes
correspondiente en la siguiente tabla, se debe dar
servicio al láser en un centro de servicio autorizado.
Distancia
entre Paredes
Distancia Permisible
Entre ay b
30′(9m) 7/16″(11.0mm)
40′(12m) 9/16″(14.4mm)
50′(15m) 23/32″(18.0mm)
Rayo Horizontal - Dirección de Inclinación
Verificar la calibración de inclinación horizontal del
láser requiere una sola pared de por lo menos 30′(9m)
de largo. Es importante realizar una verificación de
calibración utilizando una distancia no más corta que la
distancia de las aplicaciones para las que se utilizará
la herramienta.
1. Coloque el láser contra el extremo de la pared (Figura
E1).
2.
Mueva el interruptor de Bloqueo de energía/Transporte ala
derecha (Figura
A3
) para encender el láser en modo de
nivelación automática ymostrar los rayos láser horizontal
yvertical.
3. Por lo menos a30′(9m) alo largo del rayo láser,
marque ay b.
4. Mueva el láser al extremo opuesto de la pared (Figura
E2).
5. Coloque el láser hacia el primer extremo de la misma
pared yparalelo ala pared adyacente.
6. Ajuste la altura del láser de forma que el centro del rayo
esté alineado con b.
7. Directamente arriba oabajo de a, marque calo
largo del rayo láser (Figura E3).
8. Mida la distancia entre ay c.
9. Si su medición es mayor que la Distancia permisible
entre ay cpara la Distancia correspondiente entre
ay ben la siguiente tabla, se debe dar servicio al
láser en un centro de servicio autorizado.
Distancia Entre
ay b
Distancia Permisible
Entre ay c
30′(9m) 7/16″(11.0mm)
40′(12m) 9/16″(14.4mm)
50′(15m) 23/32″(18.0mm)
Rayo Vertical - Caída
Verificar la caída vertical (caída) del láser se puede
realizar con mayor precisión cuando hay una cantidad
substancial de altura vertical disponible, idealmente
30′ (9m), con una persona en el piso colocando el láser
yotra persona cerca del techo para marcar la posición
del láser. Es importante realizar una verificación de
calibración utilizando una distancia no más corta que la
distancia de las aplicaciones para las que se utilizará
la herramienta.
1. En el piso entre dos paredes, marque una línea de 5 pies
(1.5m) que sea paralela ala pared adyacente (Figura
F1).
2. Mueva el interruptor de Bloqueo de energía/Transporte
ala derecha (Figura A3) para encender el láser en
modo de nivelación automática ymostrar los rayos láser
horizontal yvertical.
3. Coloque el láser en un extremo de la línea sobre el suelo,
asegurándose que el rayo láser vertical esté alineado
ycentrado sobre la línea.
4. Donde aparece el rayo láser vertical en el techo, marque
a. (Éste debe estar directamente sobre el punto medio
de la línea sobre el piso.)
5. Mueva el láser al otro extremo de la línea sobre el piso
(FiguraF2).
6. Donde aparece el rayo láser vertical en el techo, marque
b, directamente aun lado de la primera marca a.
7. Mida la distancia entre ay b.
Table of contents
Languages:
Other Craftsman Laser Level manuals

Craftsman
Craftsman 320.48249 User manual

Craftsman
Craftsman 320.48290 User manual

Craftsman
Craftsman 320. 48295 User manual

Craftsman
Craftsman CMHT77634 User manual

Craftsman
Craftsman 320.48251 User manual

Craftsman
Craftsman 320.48293 User manual

Craftsman
Craftsman 320.48252 User manual

Craftsman
Craftsman 320.48291 User manual

Craftsman
Craftsman CMHT77630 User manual

Craftsman
Craftsman 320.48292 User manual