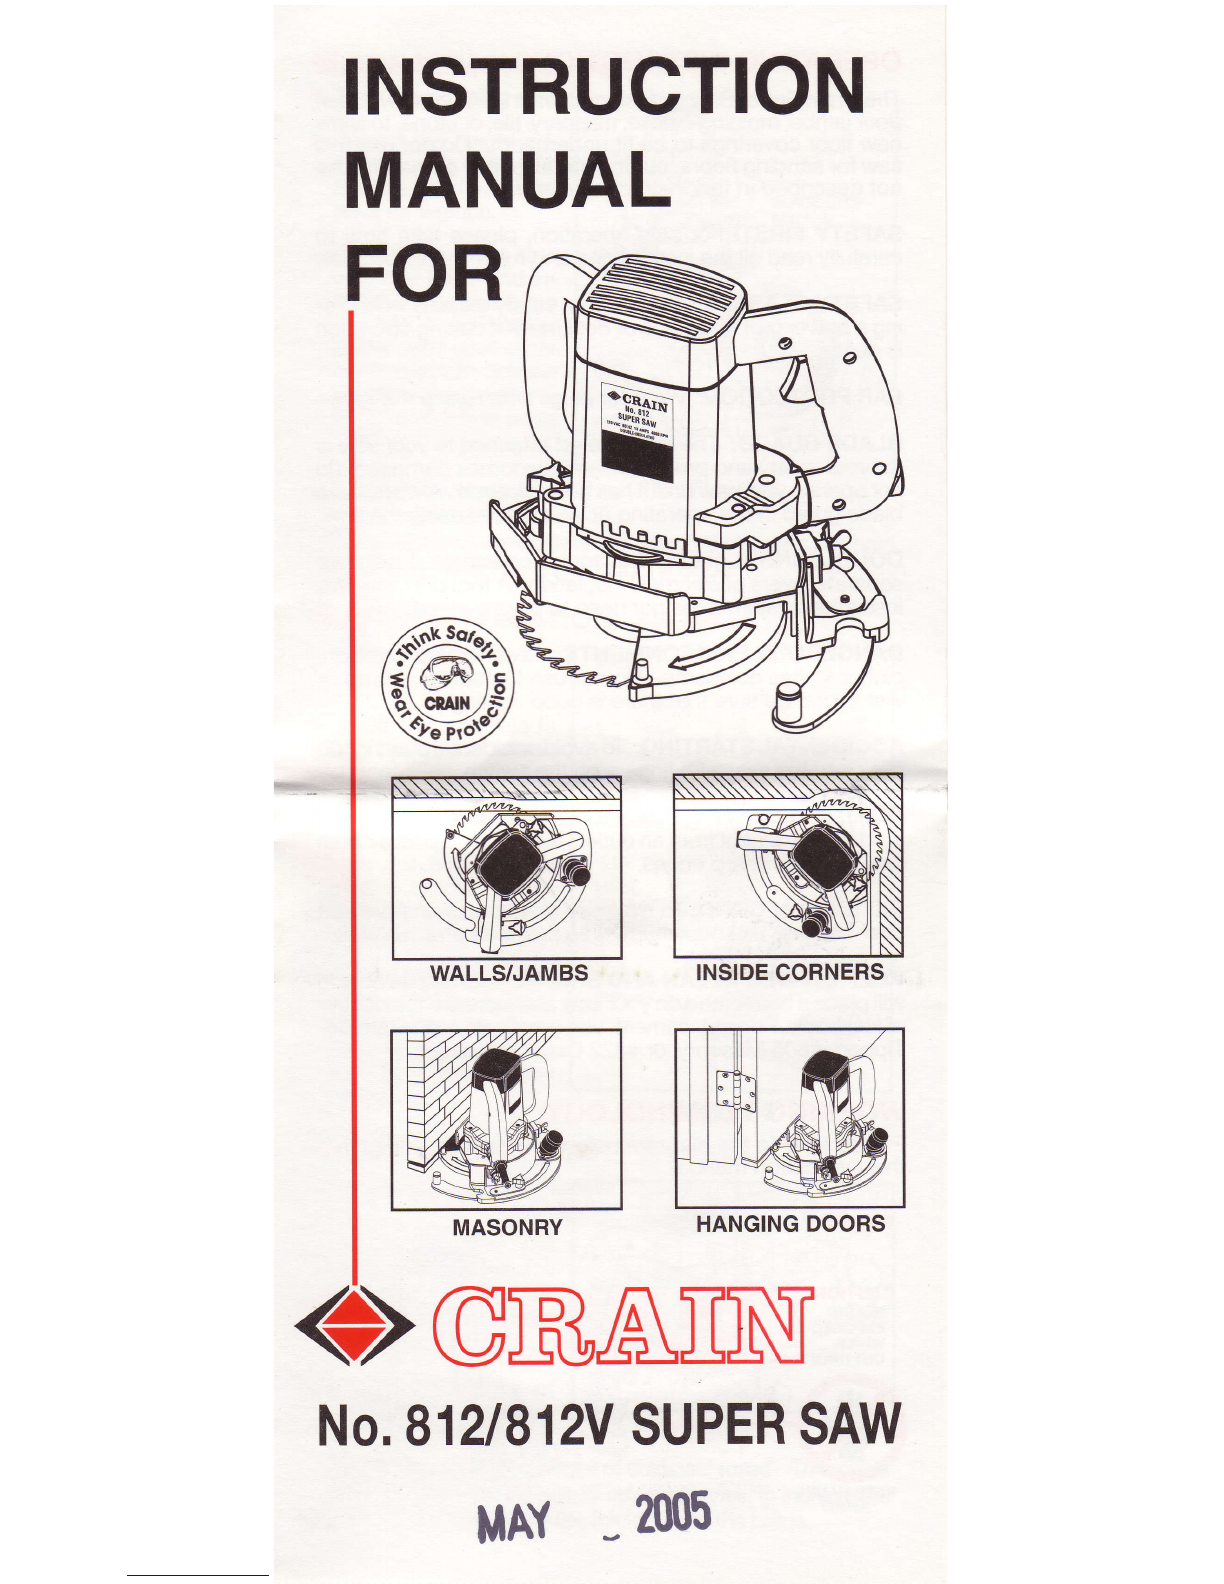
OPERATINGINSTRUCTIONS
The
CrainSuper
Saw
is
desiqned
for
undercuttino
wooden
door
jambs,
rholdings,
base,inasonry,tile,
orston6,to
allow
newfloor
coveringsto befitunderneath.Donotuse
this
sawforsandingfloors,
cuttingmetal,or
anyother
purpose
notdescribedinthis
instructionmanual.
SAFETYFIRST!Forsafeoperation,
please
take time to
carefullyread
alltheinstructionsand
rulesinthis
booklet.
SAFEW GLASSES:
Alwayswear
safety
glasses
when
us-
ingapower
tool.Usefaceordustmaskif
cuttingoperation
isdusty.
EARPROTECTION:
Wear
ear
plugs
when
usingthis
saw.
BLADE
GUARD:Theblade
guard
attachedtoyour
sawis
foryour
safetyandprotection.lf itbecomes
damaged,do
not
operate
your
sawuntilithasbeenrepaired.
Alwaysleave
blade
guard
intheoperating
position
when
usingthesaw.
DOUBLE-INSULATED:Thistoolis
constructedwithtwo
separate
layers
ofelectrical
insulation.
Atool
built
withthis
insulation
system
doesnotneedto be
grounded.
DANGEROUSENVIRONMENTS:Keepwork
areaclean;
clutter
invites
accidents.
Donotuse
thesawondampor
wetfloors.Besurethatthereis
good
lighting.
ACCIDENTAL
STARTING:
To
avoidaccidentalstarting,
do
not
carry
the
saw
with
fingerson
the
switch.
CORD
ABUSE: Never
carry
toolsbythecordoryank
the
cordtodisconnectfromanoutlet.Keepthecord
awayfrom
heat,oil,andsharp
edges.
EXTENSION
GORD:
Tominimize
power
loss
andprevent
over-heating,usemaximum
of25feetlong
and
16AWG.
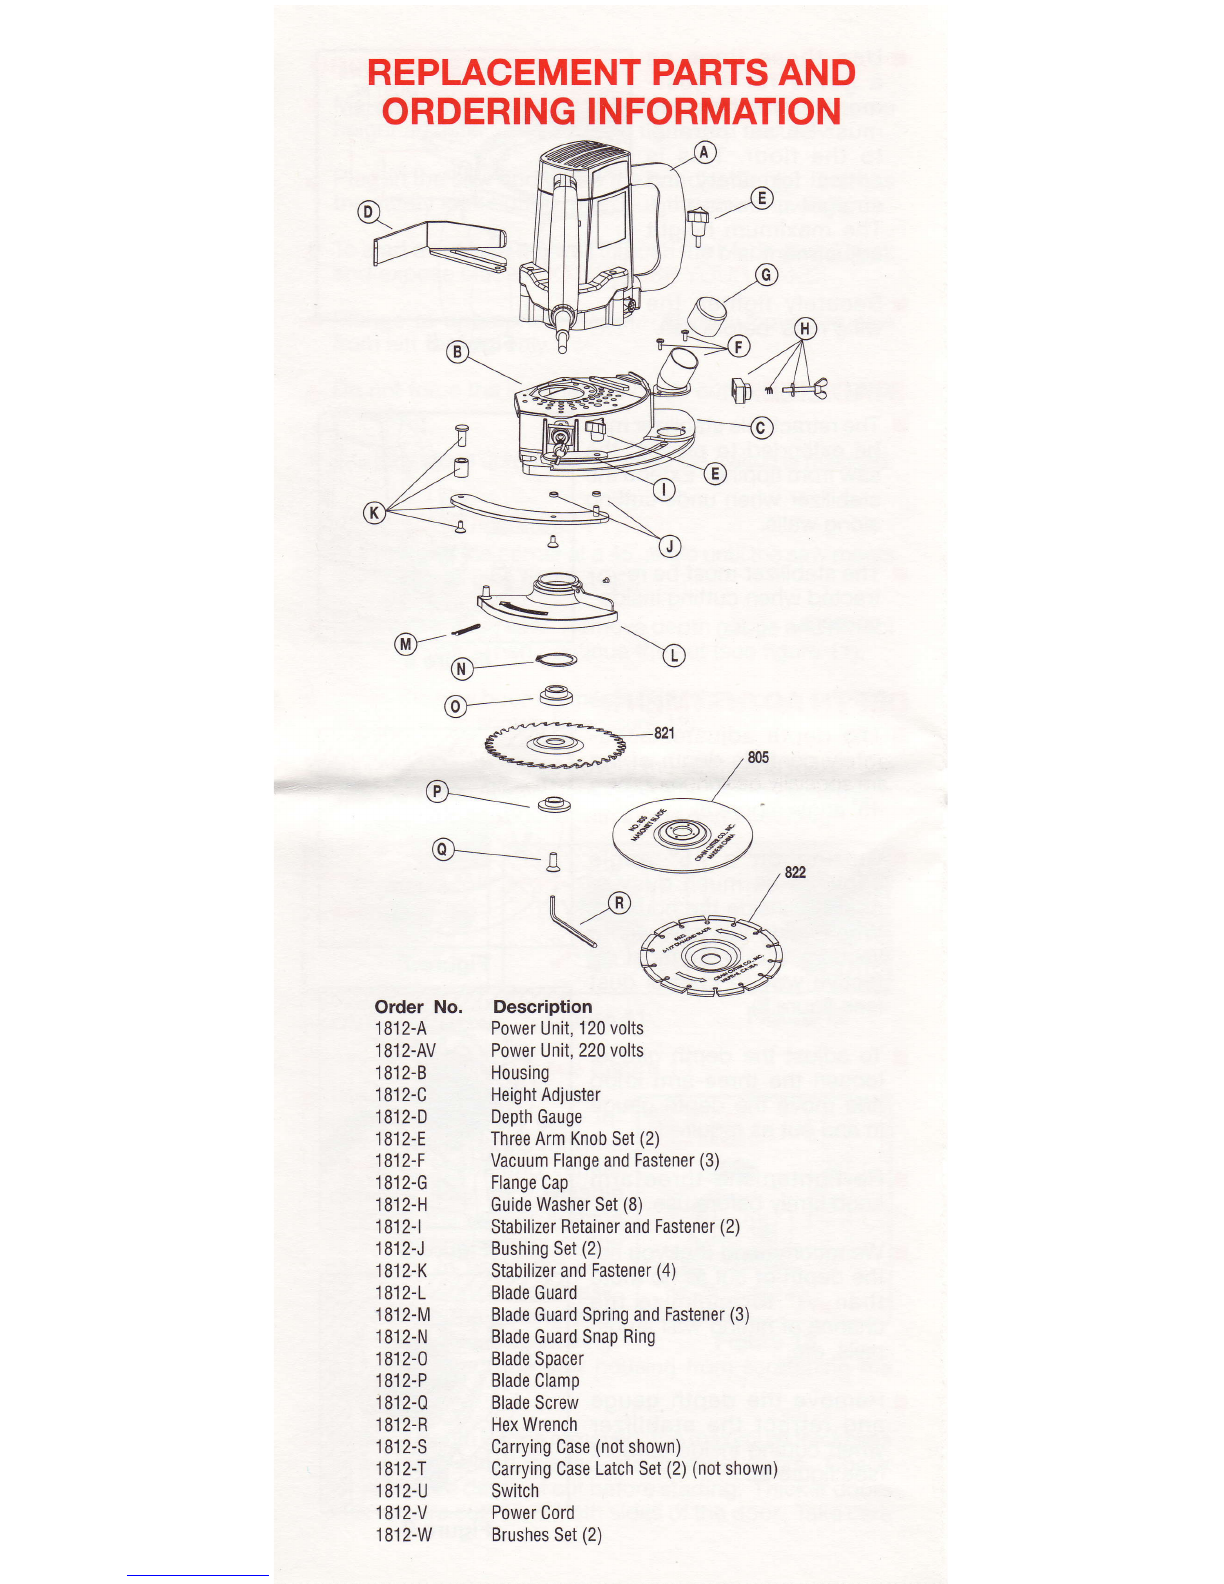
KEEPBLADES
CLEAN
ANDSHARP: Usingadullblade
will
place
a
heavyload
on
your
sawand
increase
thedanger
ofkickback.Forreplacement,
useonlyCrain
#821
Carbide-
Tipped,
#805Masonryor#822DiamondBlades.
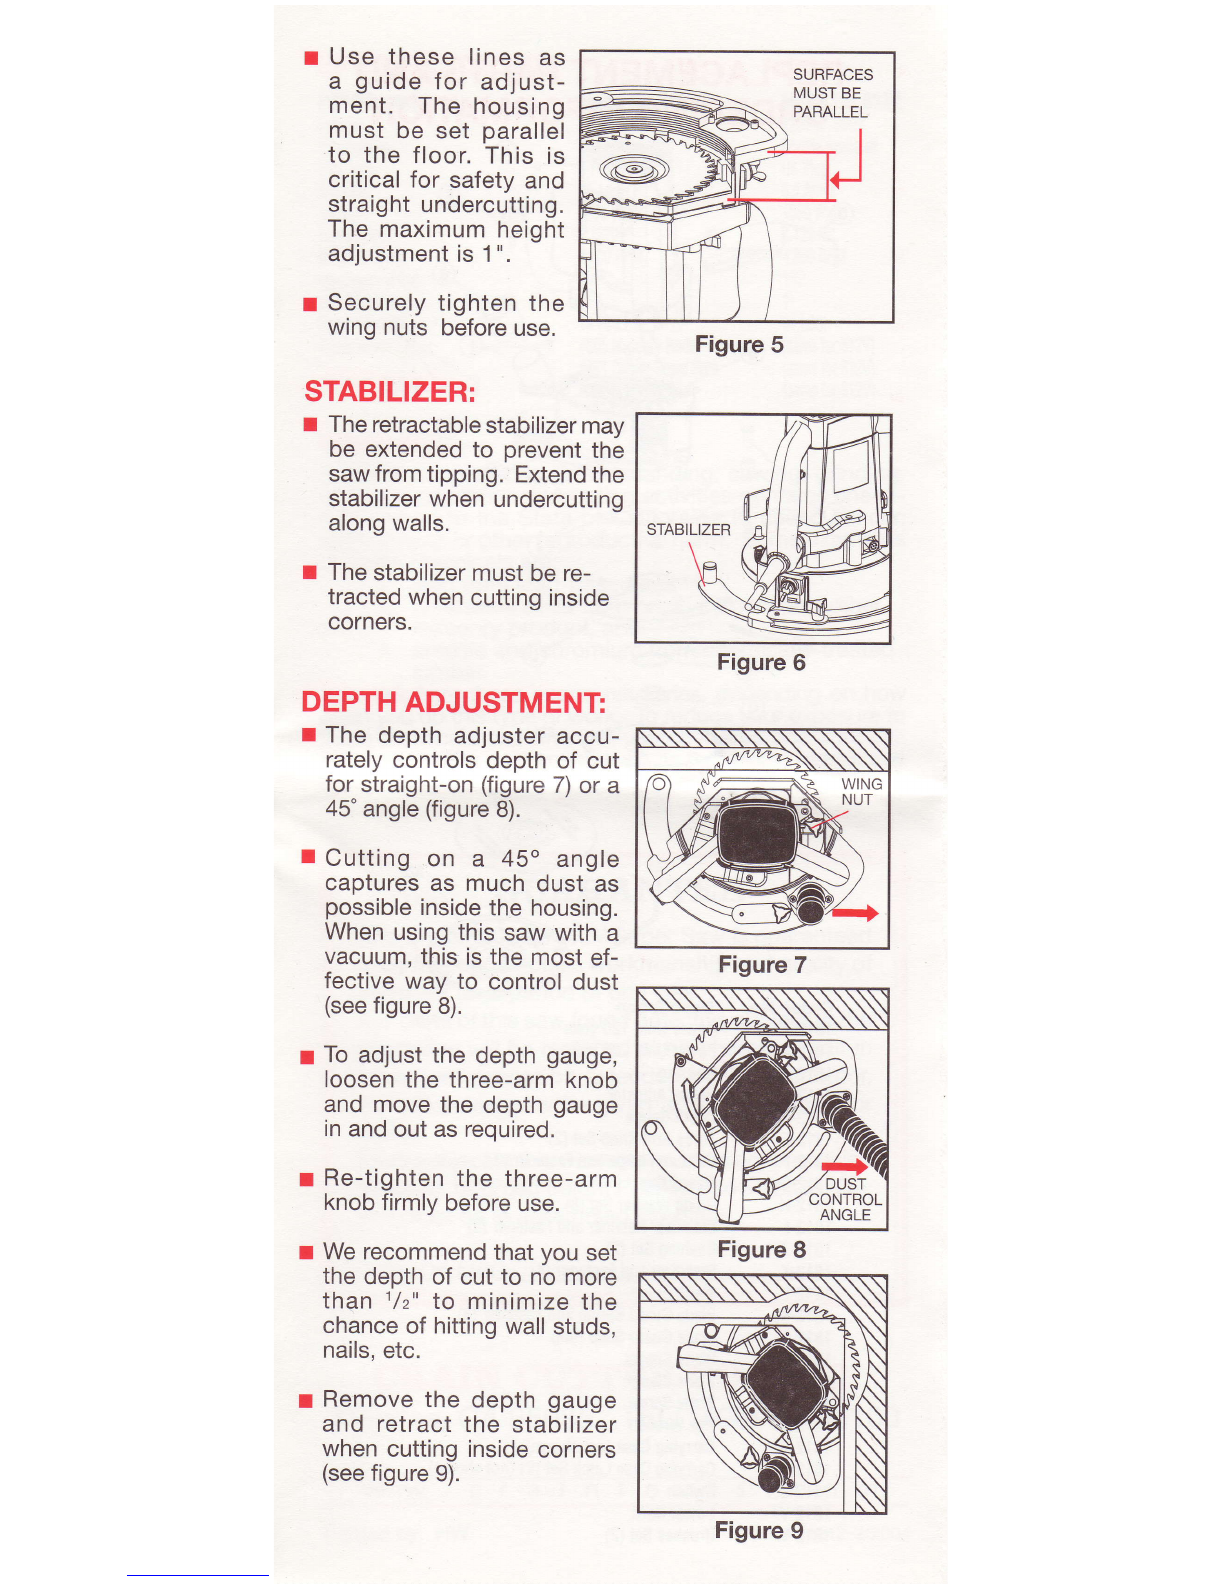
WORKINGTERMINOLOGY
Pleasereferto thediagrambelowfortheterms
used
in
thisinstructionmanual. TRIGGER
HANDLE
Figure1
CAUTION!
BLADE
EXPOSED
WHILE
CUTTING!
KEEPHANDS
AWAY! HEIGHT