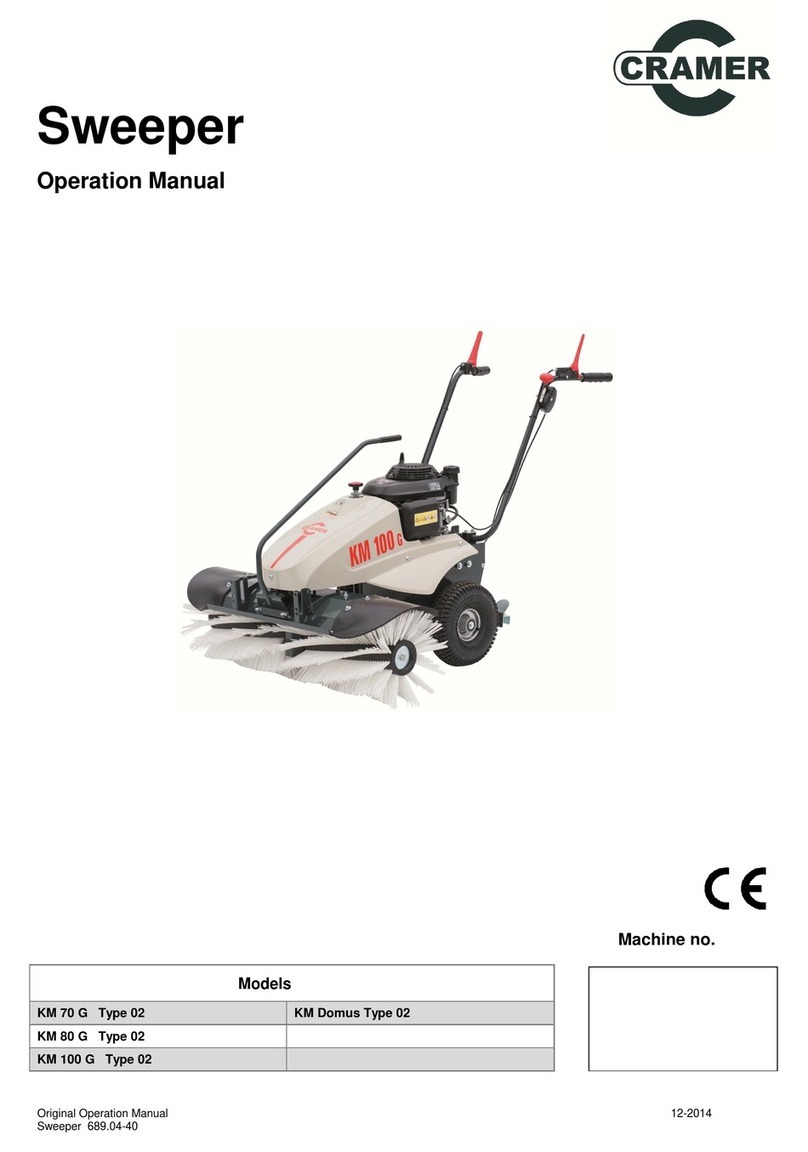
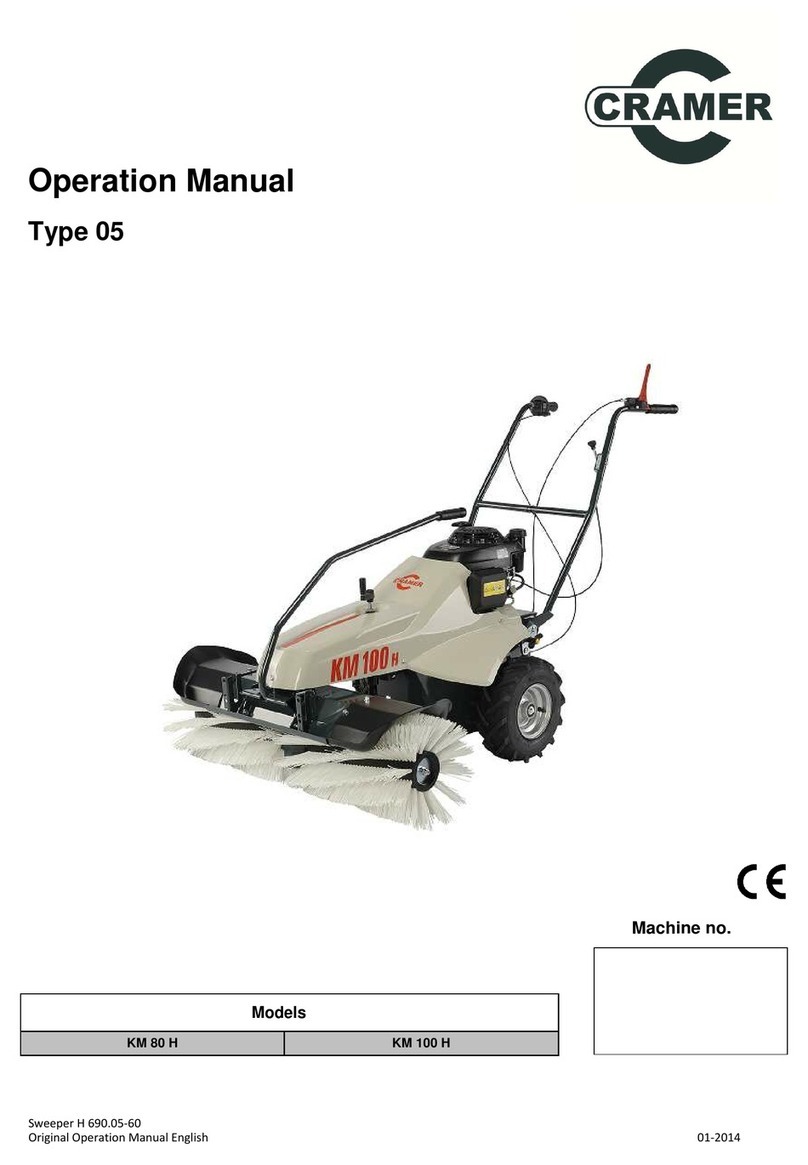
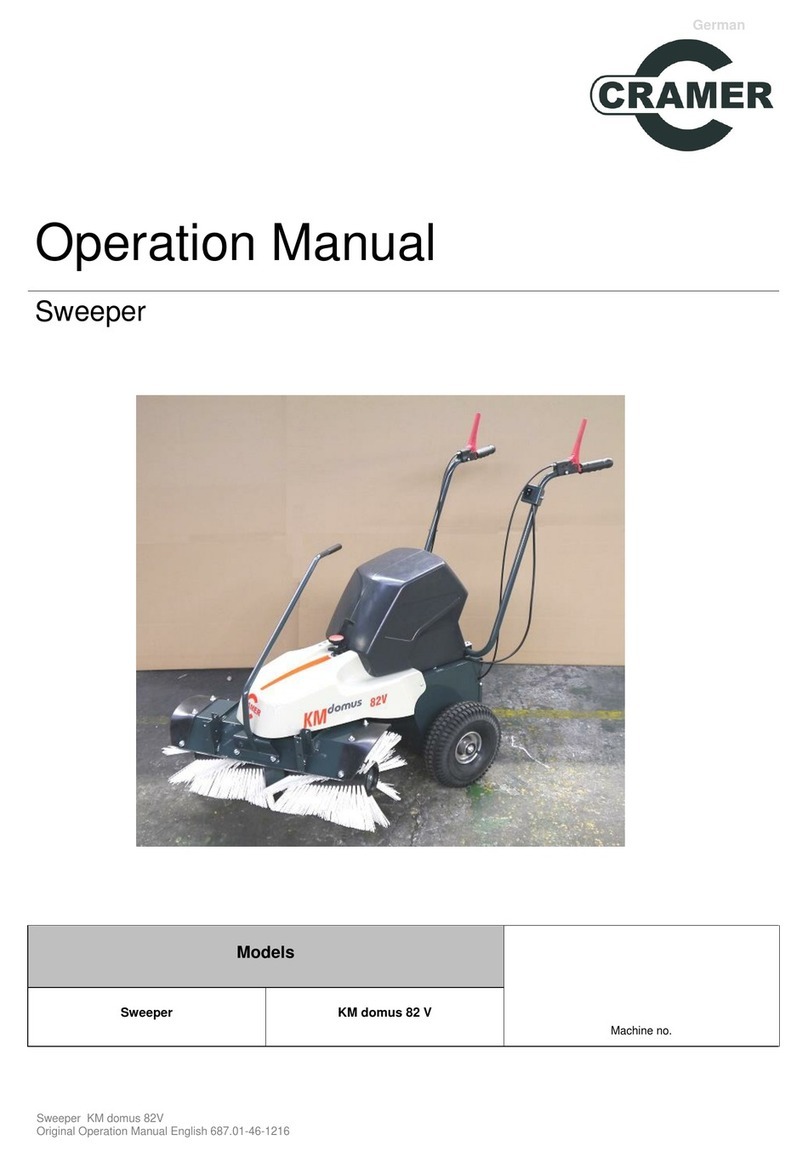
Cramer KM domus 82 V User manual

English
Sweeper KM domus 82V
Original Operation Manual 687.01-46-1216
Operation Manual
Sweeper
Models
Machine no.
Sweeper
KM domus 82 V

English
Sweeper
Original Operation Manual -2
Contents
1 Important General Information............................................................................................................................3
1.1 General.................................................................................................................................................3
1.2 Symbols................................................................................................................................................3
1.3 Limitation of liability ..............................................................................................................................3
1.4 Copyright..............................................................................................................................................3
1.5 Warranty...............................................................................................................................................3
2 Safety.................................................................................................................................................................4
2.1 Use in compliance with intended purpose............................................................................................4
2.2 Possible misuse ...................................................................................................................................4
2.3 General sources of risks.......................................................................................................................4
2.3.1 Use and operation...............................................................................................................4
2.3.2 Product-specific risks...........................................................................................................4
2.3.3 Risks from electric motor operation .....................................................................................4
2.3.4 Risks from battery and battery charger................................................................................4
2.3.5 Operating risks ....................................................................................................................4
2.3.6 Risks for persons, children and pets....................................................................................4
2.4 Maintenance.........................................................................................................................................4
2.5 Staff and operator qualification.............................................................................................................4
2.6 Safety instructions................................................................................................................................4
2.7 Required protection equipment for operation .......................................................................................5
2.8 Safety devices......................................................................................................................................5
2.9 Behaviour in case of fire.......................................................................................................................5
2.10 Environmental protection......................................................................................................................5
3 Design and function............................................................................................................................................5
3.1 Brief description....................................................................................................................................5
3.2 Sweeper KM domus 82V overview.......................................................................................................5
3.3 Operating elements for all models........................................................................................................6
4 Operation............................................................................................................................................................9
4.1 Safety...................................................................................................................................................9
4.2 Activities prior to use ............................................................................................................................9
4.3 Charge battery system .........................................................................................................................9
4.4 Start and stop.......................................................................................................................................9
4.5 Normal operation..................................................................................................................................9
4.6 Activities after use ..............................................................................................................................10
4.7 Energy saving recommendations for extended battery runtime..........................................................10
4.8 Motor cover ........................................................................................................................................10
5 Transport, storage..........................................................................................................................................10
5.1 Transport............................................................................................................................................10
5.2 Storage...............................................................................................................................................10
6 Maintenance.....................................................................................................................................................11
6.1 Safety during maintenance work .......................................................................................................11
6.2 Maintenance plan...............................................................................................................................11
6.3 Maintenance work ..............................................................................................................................11
6.3.1 Check safeguards..............................................................................................................11
6.4 Maintenance work on electric motor...................................................................................................11
6.5 Cleaning work.....................................................................................................................................11
6.5.1 Machine cleaning...............................................................................................................11
7 Troubleshooting................................................................................................................................................12
7.1 Safety.................................................................................................................................................12
7.2 Service address..................................................................................................................................12
7.3 First action for troubleshooting...........................................................................................................12
8 Declaration of Conformity.................................................................................................................................12
9 Technical data..................................................................................................................................................13
10 Installation of sweeping brushes, installation of side covers.............................................................................16

English
Sweeper
Original Operation Manual -3
1 Important General Information
We are pleased that you have selected a machine from Cramer
GmbH in Germany.
Please read this Operation Manual before you use the machine
for the first time and observe the notes and safety instructions.
Imprint
Cramer GmbH
Reimersstr. 36
26789 Leer
Phone: +49491/60950
Fax: +49491/6095200
District court of Aurich HRB 110877
VAT ID: DE 814 305 398
1.1 General
Information on this Manual
Observing the instructions in this manual allows for the safe and
efficient handling of the machine.
The operator must have read this manual carefully and
understood it before starting working with the machine.
Compliance with the safety instructions contained is a
prerequisite for using the machine without any risk.
Keeping the Operation Manual
The Operation Manual is an integral part of the machine and
shall be kept in its immediate vicinity.
The operator must have access to this Manual at any time.
Traffic regulations
Any applicable traffic regulations have to be complied with in
regard to manoeuvring and transporting the machine on public
roads.
Accident prevention regulations
General safety and local accident prevention regulations must
also be observed.
National occupational safety regulations shall be complied with.
Other applicable documents
Installation instructions, Declaration of Conformity
1.2 Symbols
DANGER !
This symbol cautions against an immediate
threat resulting in serious injuries or death if
not avoided.
WARNING !
This symbol cautions against a potentially
dangerous source of risk which may result in
death or serious injury if not avoided.
CAUTION !
Indication of a potential risk which may result
in minor injuries if not avoided.
NOTE !
This symbol indicates a potential risk source which may
result in damage to property.
1.3 Limitation of liability
Liability on part of the manufacturer is excluded in the following
cases:
Non-compliance with the Operation Manual
Use of the machine and accessory equipment not in compliance
with intended purpose
Assignment of untrained staff.
Use of unauthorised spare parts. Only original components may
be used.
Unauthorized modifications on the machine and the accessory
equipment.
1.4 Copyright
© Cramer GmbH
Copying of the Operation Manual is only permissible for internal
training purposes.
1.5 Warranty
The General Terms and Conditions of Business as issued by us in
every country shall be applicable. Failures within the statutory
warranty period will be remedied by us free of charge if they are
caused by a material or manufacturing defect in our responsibility.
Please contact your dealer in case of a failure and submit the proof
of purchase.

English
Sweeper
Original Operation Manual -4
2 Safety
2.1 Use in compliance with intended purpose
The machine is suitable as a sweeper for sweeping leaves,
waste and snow. With the sweepings container attached, the
sweeper can also be used for collecting leaves and litter.
Any use exceeding this is considered not in compliance with
the intended purpose. The manufacturer shall not be liable
for damage resulting from use not in compliance with the
intended purpose; the risk for this shall be in the sole
responsibility of the user.
Use in compliance with the intended purpose shall also include
compliance with the operation and maintenance provisions
specified by the manufacturer.
2.2 Possible misuse
It is particularly prohibited:
˗To sweep up any wires, cables or heavy stones (risk of injuries
and damage to the machine!);
˗To use a foot to push items under the sweeper (risk of injuries!)
˗To sweep any materials which may block the sweeping brushes
(machine damage!)
˗To charge the KM domus batteries with a non-original charger
(damage to battery);
˗To expose the battery in the machine to direct sunlight;
˗To pull the machine backwards unless it is absolutely necessary.
2.3 General sources of risks
2.3.1 Use and operation
Prior to starting the machine, the machine including accessories
shall be checked for their proper condition and operational safety.
The operator shall use the machine in compliance with its
intended purpose.
Indoor machine operation is prohibited.
The machine is only approved for floorings as indicated in the
Operation Manual.
The machine may only be operated by staff who have been
instructed in its use or have provided evidence of their operating
capability, and who have explicitly been instructed to operate the
machine.
When starting the motor, no other persons may be in the vicinity
of the machine.
Any protection equipment must be properly attached and in
functional order.
Never leave the machine unattended.
When leaving the machine, stop the motor and secure the
machine against unintended movement.
The operator shall be responsible for accidents involving other
persons or their property.
Do not apply force to the machine. It will work better and safer if
it is operated at the speed for which it was rated.
2.3.2 Product-specific risks
Do not sweep any highly flammable materials or hot objects (e.g.
barbecue coal) (danger to life by burns)!
Lithium-Ions represent a toxic and caustic material and are used
in the battery packs.
Do not operate the machine in an explosive atmosphere, such as
near burning liquids, gases or dust. The machine might produce
sparks which could lead to ignition.
2.3.3 Risks from electric motor operation
Do not touch any parts of the motor during or after operation.
Significant risk of burning by hot surfaces.
Stop the motor and let it cool down before working on the
machine as well as before performing maintenance, cleaning and
repair work.
Do not expose the machine to rain or a wet environment. If used
on snow, the machine is only approved for operation with a
splashguard attached (risk of electric shock).
The battery must be removed for repair and maintenance work.
Risk of electric shock.
2.3.4 Risks from battery and battery charger
When using battery-driven equipment, general precautions must be
observed at all times in order to minimise the risk of fire, leaking
batteries or injuries.
Only use the enclosed battery charger for charging.
Do not use the enclosed charger for charging other batteries.
The battery system and the charger have to be kept dry. They
must not be exposed to rain or humidity.
Do not expose the battery to high temperatures e.g. as caused by
fire, heating radiators, etc.
Do not pull the cable when disconnecting the charger, but pull the
plug. This will help to minimise damage to the plug and cable.
Do not use a damaged charger. The damaged charger must
always be replaced completely.
Do not dismantle the charger or attempt to repair it. Do not
bump, hit or stand on the battery.
Remove the battery from the machine before cleaning it.
Keep batteries not in use clear from other metal objects such as
paper clips, coins, keys, nails, etc.
If liquids leak from the battery, avoid contact and discontinue
using the battery. In case of accidental contact rinse the liquid off
with water and consult a doctor.
Please also refer to and observe the operating instructions for the
battery and charger as provided by the manufacturer.
2.3.5 Operating risks
Without any accessories mounted, only use the machine on
slopes of up to 12 %.
With accessories mounted, only use the machine on slopes of up
to 2 %.
When using the machine transverse to the direction of travel, this
is only possible on slopes up to 12 %.
When operating the machines on slopes -> be careful when lifting
off mounted accessories
2.3.6 Risks for persons, children and pets
The operator shall take account of surrounding conditions, e.g.
the effects of noise on persons and animals.
The machine must never be left on a slope.
Children and pets/livestock must not stay near the machine.
Children must not play with/on the machine.
2.4 Maintenance
Servicing, maintenance and repair work as well as
troubleshooting shall only be carried out when the machine is
switched off and the motor is at a standstill. As required, the
spark plug connectors shall be disconnected.
The machine must not be cleaned with spray water (risk of short
circuits or other damage).
Safety checks pursuant to local regulations for non-stationary
commercially used machines shall be complied with.
Always use appropriate tools for working on the machine.
Only use the manufacturer's original spare parts.
2.5 Staff and operator qualification
Persons with physical, sensory or mental handicaps or persons
with insufficient experience or knowledge must not operate the
machine unless a person in charge for their safety acts as
operation or instruction supervisor.
People under the age of 16 must not operate the machine.
The operator's responsiveness must not be affected, e.g. by
drugs, alcohol or medications.
The operator must have been instructed in the operation of the
machine or be familiar with the instructions in the Manual. Safety
instructions
2.6 Safety instructions
These warning labels on the machine warn you of possible dangers
and thus help you to avoid serious injuries and damage to property.
If labels have become detached or illegible, please contact your
Cramer dealer to have the labels replaced.

English
Sweeper
Original Operation Manual -5
Read and observe the Installation and
Safety Instructions prior to starting the
machine.
Risk by flinging parts with running motor.
Keep a safety distance of 3m.
2.7 Required protection equipment for operation
Rugged footwear
Close-fitting clothing
Ear protection
Safety gloves
Protection goggles
The information on accident prevention regulations must also be
observed.
2.8 Safety devices
Do not remove any covers during operation.
Immediately remedy any damage to safety devices.
2.9 Behaviour in case of fire
1. Stop immediately.
2. Stop the motor
3. Leave the machine.
4. Remedy the risk situation.
2.10 Environmental protection
Oils, fuels, greases and filters shall be disposed of properly and
separately in accordance with legal regulations. Please do not
dispose of any wastes in the environment.
Packaging materials are recyclable. Please make sure that they
are collected for reuse.
Legacy devices contain valuable recyclable materials which
should be collected for reuse. These devices may be disposed of
through appropriate collection systems.
Any toxic materials (lithium-ions in batteries) must be disposed of
as instructed by the local waste management or environmental
protection authority.
3 Design and function
3.1 Brief description
The sweeper may be used for sweeping and collecting (if a sweepings container is mounted) of loose dirt or snow. Die machine has a travel drive
and is driven by a petrol engine with electric starter. The sweeper brush function may be operated by means of a lever. The sweeper brushes can
be inclined in an angle of 45° in both directions. The KM domus 82V has a motor-battery connection allowing for sweeping at the push of a button.
3.2 Sweeper KM domus 82V overview
1
Travel drive coupling lever
2
Brush drive lever
3
Electric starter
4
Splashguard motor cover (accessory)
5
Drive wheel
6
Parking brake
7
Sweeping brushes (photograph shows
accessory snow brush in white colour)
8
Attachment points for accessories
9
Sweeping brush height adjustment
10
Pivot lever for adjusting the sweeping
brush
11
Motor

English
Sweeper
Original Operation Manual -6
3.3 Operating elements for all models
Lever for brush drive
The left-hand lever is used to operate the sweeper brush mechanism.
Operate the lever as follows:
Lever activated: Brush turns
Lever released (O): Deactivate brush
Lever for travel drive.
The right-hand lever is used to operate the sweeper drive mechanism.
Operate the lever as follows:
Lever pulled: Machine moves forward
Lever released (O): Deactivate travel drive
Brush height adjustment
The crank handle is used to set the height of the sweeper brushes by adjusting the support
wheel. The bristles of the brushes should only just touch the floor to be set optimally. An
excessively deep setting results in an overload of the drives and in inappropriate wear of the
brushes. An improperly adjusted brush will also result in a faster consumption of the battery
capacity.
Height adjustment:
Loosen the star grip nut, subsequently turn the screw to the requested position.
Turn right = sweeper brush is lifted
Turn to the left = lower the sweeping brush
Tighten the star grip nut in this position.
Electric motor 82V
1 Battery cover
2 Electric motor 82 Volt
The KM domus Akku 82 V is equipped with a battery-operated electric motor. The motor is
simply started and stopped by operating a toggle on steering arm.
Start motor:
1. Lift the battery cover of the battery compartment
2. Push the charged battery over the battery holder into the battery compartment until the
battery release button engages
3. Close the battery cover
4. Operate the ON/OFF toggle
Stop motor
1. Operate the ON/OFF toggle
Do not leave the battery in the machine after operation.
Remove battery
Important! Before removing the battery, the machine must be shut down and the motor must
be at a standstill.
1. Open the battery compartment.
2. Push the release button so that you can remove the battery.
3. The release function will push the battery slightly out of the battery.
ON/OFF toggle
Toggle for starting and stopping the motor
O = Stop
I = Start

English
Sweeper
Original Operation Manual -7
Charger with battery system
This battery system is fitted with a diagnostic
charger. The lithium-ion battery does not
develop any memory effect and can be charged
at any time
Caution!
The battery system and the charger have to be
kept dry. The battery system must not be
exposed to rain or humidity.
For avoiding electric shock, it is to be ensured
that water ingress into the plug, the battery
compartment or the battery is avoided.
Detailed notes on safety and risks of use are contained in the enclosed Operating Instructions
for the battery and the charger. Please read them before using the machine. Please read
them before using the machine.
Overview
1 Charger
2 Connection for battery
3 Battery
4 Green LED Charging
capacity
5 Button for battery
capacity indication
6 CHARGE LED lamp
charging state
7 Explanation of
temperature display
As to 4: Normal charge
The number of lamps that light up green indicates the charging capacity.
As to 5: Battery capacity
By pressing the button (5) for the battery charge indication (BCI), the lamps (4) light up in
accordance with the charging conditions of the battery.
Lamps
Capacity
4 green LEDs
Over 80 %
3 green LEDs
between 80% and 60%
2 green LEDs
between 60% and 40%
1 green LED
between 40% and 25%
LED go black
below 25%
As to 6: CHARGE LED lamp
The LED (6) may light up as follows when the battery is inserted.
LED status
Description
Item
flashing green
Charging
a
green
Fully charged
b
red
Overheating
c
flashing red
Charging error
d
As to 7: Explanation reg. Charging LED lamp
a) FLASHING GREEN:
The battery is o.k. and is being charged.
b) GREEN:
The battery is fully charged.
c) RED:
If a warm or hot battery is inserted into the charger, the CHARGE LED lights up RED. Let
the battery cool down outside the charger for approx. 30 minutes.
d) FLASHING RED:
With a RED flashing LED, remove the battery from the charger and insert it again within 2
hours.
If the LED flashes RED again, the battery is defective and must be replaced.
If the pilot lamp indicates a normal charging process, the battery is o.k. For a check,
remove the battery after 2 hours and disconnect the charger for one minute. Insert the
battery and connect the charger to the power supply again. If a normal charging process
is indicated, the battery is o.k.
Charge battery system
Connect the battery charger to the power supply.
Push the battery into the charger. If the green LED is flashing, the battery is being charged. If
the LED lights up green, the battery is fully charged. The battery can now be removed from
the charger. Subsequently always disconnect the charger from the power supply.
Power button
This LED shows the capacity increase to 3300 revolutions. If additional capacity is required for
sweeping, the motor will automatically switch to the Turbo setting.
Note!
Increasing the speed will result in a faster consumption of the battery capacity and the battery
will have to be charged more often.
Always store the battery at
room temperature when it is
not used, in order to maintain
the battery capacity.

English
Sweeper
Original Operation Manual -8
Pivot lever for brush adjustment
In order to sweep dirt to a specific side, the sweeper brush may be set to the left or the right.
Change brush setting:
1. Lift pivot lever (disengage)
2. Select setting
(centre, left, right)
3. Lower swivel bracket
(engage).
Parking brake on support wheel
Brake activated: Press down the lower lever with your foot
.
Brake deactivated: Press down the upper lever with your foot
.
Attachment points for accessories
Cramer front-mounted devices (such as snow-clearing plate, sweepings container, etc.)
can be mounted at the attachment points on the sweeping brushes. For a complete list
of Cramer accessories, please refer to our catalogue or our homepage.
Mounting accessories:
Mount accessories in the provided elongated hole guide and secure them using the
included R-clips. For more details regarding accessory mounting, please refer to the
installation instructions of the relevant accessory.
R-clip
Disengage or fold steering arm; adjust steering arm height
The steering arm may be folded for transport and space-saving storage. In addition, its height
may be adjusted for a convenient working position.
Fold steering arm:
Position the pivot lever for the sweeping brushes in the
centre of the machine. Loosen the cross-headed screw.
Now slowly tilt the steering arm towards the motor cover.
Hold Bowden cables at the right and left of the motor
block.
Steering arm height setting:
Loosen the cross-headed screw. The height may be
selected using the three holes. Reinsert and tighten the
cross-headed screw at the requested height.

English
Sweeper
Original Operation Manual -9
4 Operation
Before starting the machine, please read the safety information on
pages 4 and 5 as well as the “Activities prior to use” section on this
page.
4.1 Safety
Unauthorised restart
It is prohibited to start the machine while another person is
working on it.
Risks of non-applied safety devices
WARNING!
Danger of injuries due to missing protective
covers!
When covers are missing, serious injuries may result from flinging
materials.
Parts of the body may be seized when you reach into the brushes
of V-belt.
Do not reach into the brushes during operation.
Do not open or remove any covers during operation.
Risks of insufficient order and cleanliness
Clean the machine regularly.
Check the machine for blocking objects.
Requirements at location of use
Only leave the machine on plane surfaces and solid ground.
4.2 Activities prior to use
To ensure your safety and the maximum service life of the machine,
please check the following before switching on the machine:
Observe the safety information in this manual at all times.
Check the sweeping brushes for foreign objects.
Check the machine for damage and repair as required
Check the condition of the safety devices. The machine must not
be started if safety devices are missing or defective.
Remove any objects from the area to be treated
Read the electric motor and battery system operation manuals.
4.3 Charge battery system
Warning!
Short circuit and risk of fire!
The incorrect use of battery and charger may result in electric shock
and fire.
Check the condition of the charger before charging.
The battery system and the charger have to be kept dry.
Charging for the first time.
The battery is not dispatched in a fully charged condition. We
recommend to charge the battery fully before using it in order to
ensure the maximum operating time. Please also refer to the batter
operating instructions.
Charge battery
Charge the battery in accordance with the enclosed operating
instructions and the description in Section 3
A completely discharged battery needs approx. one hour to be
charged completely.
4.4 Start and stop
WARNING!
Danger to life due to toxic gases and caustic
liquids!
A cracked or broken battery, leaking or non-leaking, must not be
charged or used. DO NOT ATTEMPT TO REPAIR IT! Dispose of it
and use a new battery.
For the prevention of fire, explosions or electric shock and
environmental damage:
Cover the contacts using adhesive tape.
Do NOT attempt to remove or destroy parts of the battery pack.
Do NOT attempt to open the battery pack.
Starting the motor
Start with battery start button
1. Insert the battery
2. Set ON/OFF toggle to (I)
Please observe the notes in items 4.3 and 3.3 for the initial start-up
(page 7).
Stopping the motor
Operate the ON/OFF toggle. Set it to (O).
Behaviour in an emergency situation
Stop machine.
Restart after an EMERGENCY STOP
Remove blockage
Restart the machine
4.5 Normal operation
WARNING!
Risk of injuries by highly flammable
materials and heat!
Materials coming into contact with a hot surface may result in
serious burns on the body when they inflame; e.g. hot or burning
materials such as coal.
Keep highly flammable materials away from the machine.
Do not sweep any spilled fuel or similar substances.
1. Basic setting:
Park machine on an even surface.
Insert the charged battery.
Close the motor cover.
Set brush height
2. Switch on the machine
3. Move machine across the area to be swept.
Operate lever for brush mechanism
Check areas swept for sweeping quality regularly and adjust
brush height if required.
Adjust brush to the left or right in order to sweep dirt aside.
4. Stop the machine
Release the travel drive lever, release the brush drive lever.
Should functional failures occur, please contact your authorized
Cramer dealer.

English
Sweeper
Original Operation Manual -10
4.6 Activities after use
Switch off the machine after use. Park the machine at a clean and dry
place and remove the battery. Check the machine condition; remedy
damage to paint coating, if any.
4.7 Energy saving recommendations for extended battery
runtime
In order to increase the battery runtime for machine use, the following
machine settings are recommended.
- Set the sweeping brushes to a low-wear working height.
- Always remove the battery when you do not use the machine and
store it at room temperature.
- Only use fully charged batteries.
- Storing the battery under cold conditions may significantly reduce
the battery capacity.
4.8 Motor cover
A splashguard motor cover is to be used when it rains or snows
(accessory all-weather package). This will protect the motor against
humidity and resulting damage. In order to access the battery
compartment, the swivel bracket has to be set to the side so that the
motor cover can be opened.
5 Transport, storage
5.1 Transport
Transport without packaging
•Shut down the machine before loading it for transport. Always
remove the battery.
•Always secure the machine to the transporter using tensioning
straps.
•Tilt the machine as little as possible.
5.2 Storage
The following recommendations will help to ensure the long-standing
functionality of your Cramer machines:
•Do not store the machine outdoors.
•Remove the battery after using and before storing the machine
and check the battery for damage.
•The battery system must not be exposed to rain or humidity. The
battery system and the charger must be stored indoors (room
temperature) under dry, frost-free and weather-protected
conditions.
•Do not leave the battery in the machine, and do not expose it to
direct sunlight.
•There must be no aggressive materials in the vicinity of the
machine.
•The machine must be stored outside the reach of devices with an
ignition flame or source. These include: furnaces, water boilers or
other, similar devices. Fuel gases could be ignited by such
devices.
•Clean the machine and check if for damage; repair the paint
coating as required-
Important!
Please observe the relevant enclosed motor operation manual as
regards the handling and care of the motor!

English
Sweeper
Original Operation Manual -11
6 Maintenance
6.1 Safety during maintenance work
Regular and correctly performed maintenance work is essential for the
safe, economical and fault-free operation of the machine.
The information in the following sections help you to ensure the
correct maintenance of your machine. You can perform routine
maintenance work yourself using basic hand tools. More complex
maintenance work requiring special tools should be performed by
qualified staff, e.g. at your Cramer dealer or by a qualified mechanic.
Some of the most important safety precautions and dangers are listed
in the box below. However, it is not possible here to list all potential
dangers that could arise during maintenance work and describe the
associated precautions. You are solely responsible for deciding which
maintenance work you wish to perform yourself.
DANGER!
Risk of injury by inappropriately performed
maintenance work!
Defective work may result in serious bodily injuries and damage to
property.
Make sure that you have sufficient working space.
Remove the battery from the compartment.
Place components separately.
Remount all components.
Remount all safety covers.
Keep the risk area clear of persons.
6.2 Maintenance plan
For information on maintenance of the motor, refer to the
separate operation manual of the motor.
Maintenance
Prior to
each use
Annually
Intervals
in hours
200
Cleaning
X
(Item 6.4)
Check safety precautions
X
(Item
6.3.1)
Check all screws for tight
fitting
O
Clean or replace air filter
B
Adjust tyre pressure
O
Check sweeping brushes
for tapes wrapped
around
O
Check sweeping brush
height adjustment
X
(Item 3.3)
Check sweeping brush
for wear
O
Check and adjust
Bowden cables
F
Grease rotating points
and joints
O
Grease Bowden cables
O
Check machine for
corrosion on paint
coating and remedy as
appropriate
O
Check machine for
damage and remedy as
appropriate
O
X = Described in this Operation Manual in the indicated
section
O = Not described in the present Operation Manual
F = Work may only be performed by a
qualified expert in this field.
B = Description is enclosed in attached motor operation instructions.
6.3 Maintenance work
Only original parts should be used for maintenance. Spare parts
should be replaced by an authorized service engineer.
CAUTION !
Risk of injuries from motor and battery
Cleaning and repair work must never be performed when the
battery is inserted, since an unintentional start of the machine
could result in serious injuries.
Remove the battery and let the machine cool down.
WARNING!
Never open the battery! Risk of explosion and
injuries!
The batteries are absolutely maintenance-free. Do never attempt to
open them.
Replace damaged batteries by new ones. . Old, defective
batteries must not be disposed of in domestic waste.
6.3.1 Check safeguards
Safeguards are:
- Rubber side guard for stone chip protection
- Motor cover (splashguard as all-weather accessory package)
- Cover plate
The machine must not be operated if the covers show any signs of
damage or are removed. They are to be replaced by original spare
parts in case of damage or loss. The machine must not be started
without the safeguards.
6.4 Maintenance work on electric motor
Repair and maintenance work on the motor required special protection
and knowledge. Such work should only be performed by qualified
staff.
6.5 Cleaning work
WARNING !
For the prevention of fire or electric shock:
1. Do not use damp cloths or cleanser for cleaning the battery, the
battery compartment or the charger.
2. Always remove the battery when working on the machine.
The machine should be cleaned regularly so that any damage to the
paint coating or plastic components can be detected. Please observe
the notes listed for cleaning in order to avoid damage to the
electronics.
6.5.1 Machine cleaning
Park the machine on an even surface before cleaning it. Switch off the
machine and allow the motor to cool down. The machine can then be
cleaned using a soft brush. If necessary, subsequently wipe the
machine (except for battery or battery compartment) with a damp
cloth. Attention! The battery system must not be exposed to humidity.

English
Sweeper
Original Operation Manual -12
7 Troubleshooting
7.1 Safety
Procedure for failures and accidents
1. Initiate emergency stop (stop machine).
2. Determine the failure cause.
3. Remedy failure or contact specialist dealer.
7.2 Service address
Please contact your sales consultant in case of failures, problems or otherwise. Please always indicate the machine serial no. in inquiries. (See
machine nameplate)
7.3 First action for troubleshooting
Failure / Error message
Possible cause / Remedy
Notes
LED flashing red on charger -
˗Incorrect defect indication
Remove battery for one minute and then reinsert it. If LED continuous
flashing red, remove the battery and disconnect the charger from the power
supply. Reconnect charger after one minute and insert battery. If the LED still
flashes, the battery is defective and must be replaced.
Notify authorized dealer
if failure persists.
Only use original spare
parts!
Red LED on charger
˗Overheating
If a warm or hot battery is inserted into the charger, the LED lights up red.
Remove the battery and let the machine cool down for around 30 minutes.
Motor does not start
Low motor capacity
˗Check throttle position (START).
˗Check Bowden cable to motor.
Motor is running, but machine
does not move.
Drive performance weak
˗Adjust Bowden cable of operation drive.
˗Check V-belt tension
Sweeping brushes are not
sweeping properly
Rapid and heavy wear of
brush
˗Check sweeping brush for wear; replace if required.
˗Lower and/or lift sweeping brush by height adjustment.
Significantly reduced brush
speed
˗V-belt slips → Tighten belt using adjustment screw on brush drive lever.
˗Re-adjust Bowden cable of sweeping drive.
Brushes are rotating
˗Adjust Bowden cable at set screws of belt tensioner.
˗Check coupling belt.
Snow is thrown under the
machine
˗Use snow plow when snow is too high.
˗Set brushes to the very left or right.
8 Declaration of Conformity
EU Declaration of conformity pursuant to machine directive
2006/42/EC Annex II 1-A
The authorised party with residence in the EU,
Cramer GmbH
Reimersstr. 36
26789 Leer
herewith declares, that the following product
Manufacturer: Cramer GmbH
Reimersstr. 36
26789 Leer
Product designation: Sweeper, electric start
Make: Cramer GmbH
Serial number: see cover nameplate
Type(s): KM domus 82 V
complies with all relevant regulations of the above-stated Directive as
well as all other applicable Directives - including their amendments
applicable at the date of this declaration.
The following other EU Directives were applied:
EMC Directive 2004/108/EC
EU Directive 2000/14/EC
The following harmonized standards were applied:
EN 12733:2001+A1:2009
EN 349:1993+A1:2008
EN 55012:2007/A1:2009
DIN EN 60335-1:2012
EN ISO 12100:2010
Name and address of person authorised to compile the technical
documentation:
Achim Peters
Cramer GmbH
Reimersstraße 36
26789 Leer
Place: Leer
Date: 14/12/2016
A. Bruns A. Peters
Managing director CE commissioner

English
Sweeper
Original Operation Manual -13
9 Technical data
KM domus 82 V
Device data
Length x Width x Height, cm
135 x 71 x 110
Deadweight (transport weight), kg
66
Drive speed, forward km/h
2.4
Brush speed rpm
220
Climbing power, max %
12
Climbing power with accessories, max %
2
Working width, cm
70
Support wheel
360° freely rotatable
Brush is adjustable
Left Centre Right
Motor
Model
Electric motor 82 Volt
Max. motor speed, rpm
3.100
Net capacity KW/HP at 3100 rpm
1.5
Battery
Type
Lithium-ion
Rated voltage:
82 V
Charger
Full charging time, min.
60
Input power
230V AC 50/60Hz 2.5A
Output
82V DC
Tyres
Drive wheel
Ø 300 (4.00-4)
Air pressure, bar
1.8
Support wheel
Ø 125
Wheel drive
Worm gear
Ambient conditions
Temperature, °C
-5 to +40, please also refer to battery storage conditions
Working ground
Asphalt, industrial flooring, floor screed, concrete, pavement
Application area
Normal use in facilities and landscaping maintenance
Noise emission
Guaranteed acoustic power level, dB
92
Sound pressure level at operator ear, dB
74.5
Hand-arm vibration, m/s²
˂2.5
Responsibility limits for components:
(Motor)
Working position and areas of risk
Working position
Behind the machine on the handles
Areas of risk
Catchment area of sweeping brushes
Ejection area of sweeping brushes
Year of construction
See machine nameplate
Accessories and spare parts
Original parts
Only original spare parts and original accessories may be used.

English
Sweeper
Original Operation Manual -14

English
Sweeper
Original Operation Manual -15

English
Sweeper
Original Operation Manual -16
10 Installation of sweeping brushes, installation of side covers
Safety
Delivery, packaging, assembly
CAUTION!
Squeezing hazard during assembly
Parts of the body may be squeezed when
components are assembled.
Wear close-fitting clothing and protection
gloves during assembly.
Risk of high dead weight
•The machine must not be lifted manually.
•Pull the machine off the transporter at its handles.
•Remove machine parts separately from packaging.
Perform transport inspection
•Check the machine for completeness and potential damage upon delivery.
•The machine shall be supplied to the specialist dealer in a partially assembled
condition.
•Assembly and start-up have to be performed by a specialist dealer and/or an expert
in this field.
Packaging
•Please dispose of packaging materials separately.
Installation of support wheel
Installation
The support wheel (2) must be attached to the castor
receptacle (1) by means of the enclosed nut M12. By
using a mandrel Ø 5mm or something similar, the castor
may be fixed on the borehole (3).
Assembly of sweeping brushes
Overview
Right brush
installation
1. Right brush overview
1. Right brush
2. Washer
3. Washer with nibs
2. Press-fit the washer with nibs
(no. 1) into the hollow body
recess of the right brush.
Lightly hit on it as needed.
3. Press-fit the washer (no. 2) in
the recess on the outside of the
right brush.
1. Washer with nibs
2. Washer
3. Recess

English
Sweeper
Original Operation Manual -17
Left brush
installation
1. Left brush overview
1. Left brush
2. Washer
3. Washer with nibs
2. Press-fit the washer with
nibs (no. 1) into the hollow
body recess of the left
brush. Lightly hit on it as
needed.
1. Washer with nibs
2. Washer
3. Recess
3. Press-fit the washer (no. 2)
in the recess on the outside
of the left brush.
Assemble left
and right brush
shaft!
1. Plug feather keys into shaft
groove of brush.
2. Plug brush shaft into the
gear unit drill hole with
feather keys on the left and
right.
1. Gear boring
2. Feather key
3. Brush shaft
Overview
Install brushes
on machine
1. Push pre-assembled brushes on brush shafts.
2. Push threaded rod through the entire brush unit from one side.
3. Subsequently, place a washer and the lock nut onto the end of the threaded rod and tighten the nut.
Installation of side covers
Assemble side
covers on the left
and right
As to item 3:
1. Position the rubber side covers over the cover plate holes as
indicated in the drawing.
2. Push screws through holes from below.
3. Place punched disc over screw end on the other side and secure it by
a locking nut.

English
Sweeper
Original Operation Manual -18
DE
In order to protect the environment and avoid a waste of resources, we at Cramer attempt to restrict paper
consumption to the largest possible extent. For this reason, our machines are delivered inclusive of operation
manuals in the national language of the relevant import country only.
Should you require an operation manual, you can find and download it, if needed, in different languages for each of
our machines from our homepage.
http://www.cramer.eu/service.html
EN
In order to protect the environment and avoid a waste of resources, we at Cramer attempt to restrict paper
consumption to the largest possible extent. For this reason, our machines are delivered inclusive of operation
manuals in the national language of the relevant import country only.
Should you require an operation manual, you can find and download it, if needed, in different languages for each of
our machines from our homepage.
http://www.cramer.eu/en/service.html
NL
Om het milieu te ontzien en grondstoffen niet onnodig te gebruiken, proberen we bij de Firma Cramer het
papiergebruik tot het absolute minimum te beperken. Daarom worden de gebruiksaanwijzingen alleen in de taal
van het land meegeleverd waar de machine wordt geleverd.
Als u een gebruiksaanwijzing nodig hebt, dan kunt u die in verschillende talen op onze website vinden en
eventueel downloaden.
http://www.cramer.eu/service/international-manuals.html
FR
Pour préserver l’environnement et éviter de gaspiller inutilement des ressources, nous essayons par la société
Cramer de limiter la consommation de papier au strict nécessaire. C'est pour cette raison que nos machines sont
accompagnées uniquement de notices d’utilisation dans la langue du pays d'importation.
En cas de besoin d’une telle notice, vous trouvez sur notre site Internet différentes langues pour chacune de nos
machines, tant pour information que pour un éventuel téléchargement.
http://www.cramer.eu/service/international-manuals.html
FI
Pyrimme Cramer-yhtiössä rajoittamaan paperinkäytön välttämättömään ympäristön suojelemiseksi ja
luonnonvarojen tuhlaamisen vähentämiseksi. Tästä syystä koneidemme mukana toimitetaan käyttöoppaat vain
tuontimaan kielellä.
Jos tarvitset käyttöoppaan, kaikkien koneidemme käyttöoppaat löytyvät verkkosivustoltamme eri kielillä tiedoksi
sekä tarvittaessa ladattavaksi.
http://www.cramer.eu/service/international-manuals.html
SE
Vi värnar om miljön och våra resurser, därför försöker vi hos Cramer att reducera användningen av papper så
mycket som möjligt. Av denna anledning bifogas endast bruksanvisningen i importlandets modersmål till våra
maskiner.
Om du behöver en bruksanvisning så kan du ladda ner bruksanvisningar till alla våra maskiner i olika språk från vår
webbsida.
http://www.cramer.eu/service/international-manuals.html
DK
For at beskytte miljøet og spare på ressourcerne forsøger vi fra firmaet Cramer at begrænse papirforbruget til det
absolut nødvendige. Af den grund leveres vores maskiner kun med de driftsvejledninger, der er skrevet på det
sprog, der tales i importlandet.
Har du brug for driftsvejledninger, findes disse på forskellige sprog til alle vores maskiner på internettet; disse kan
downloades efter ønske.
http://www.cramer.eu/dk/hjem.html
PL
By chronić środowisko i nie marnować niepotrzebnie jego zasobów, firma Cramer stara się ograniczać zużycie
papieru do niezbędnego minimum. Z tego względu do maszyn naszej produkcji dołączamy instrukcje obsługi
wyłącznie w języku kraju importującego.
Jeśli potrzebują Państwo instrukcji obsługi którejkolwiek z naszych maszyn, znajdą ją Państwo na naszej stronie
internetowej w tłumaczeniu na różne języki, zarówno do wglądu, jak i do pobrania.
http://www.cramer.eu/pl/strona-glowna.htm

English
Sweeper
Original Operation Manual -19

English
Sweeper
Original Operation Manual -20
Picture similar, cover is supplied without stickers
①Weather protection cover
The weather protection cover protects the motor against rain and snow.
②White snow brush
The snow brushes are especially intended for use on snow.
The bristles are harder than those of the comfort brush.
Winter set item no.: 1.490.533
Other manuals for KM domus 82 V
1
Table of contents
Other Cramer Blower manuals

Cramer
Cramer 82B1000 User manual

Cramer
Cramer LS 5000 XP User manual

Cramer
Cramer 2401086 User manual

Cramer
Cramer KM 70 G Type 02 User manual

Cramer
Cramer KM domus 82 V User manual

Cramer
Cramer 40B730 User manual

Cramer
Cramer KM 80 H User manual

Cramer
Cramer 2400986 User manual

Cramer
Cramer 2400186 User manual

Cramer
Cramer 2400386 User manual
Popular Blower manuals by other brands

Cobra
Cobra BV3001E owner's manual

Black & Decker
Black & Decker LEAF HOG BV4000 instruction manual

Maruyama
Maruyama MD8026-1 owner's manual

Little Wonder
Little Wonder Optimax 9270-12-59 Owner's manual and safety instructions

AirTech
AirTech ASC 1M Series Installation and operating instruction

Stiga
Stiga BL 2.6 E Operator's manual