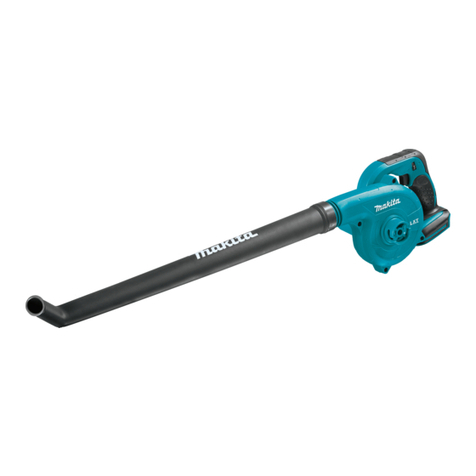
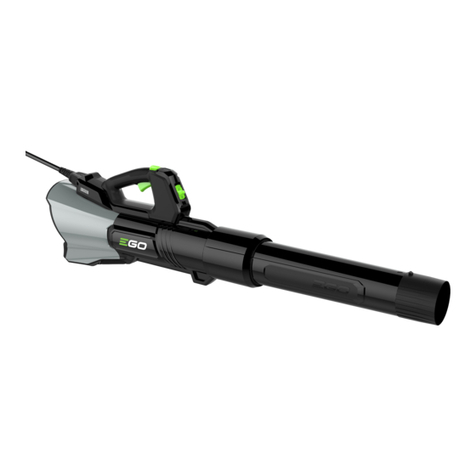
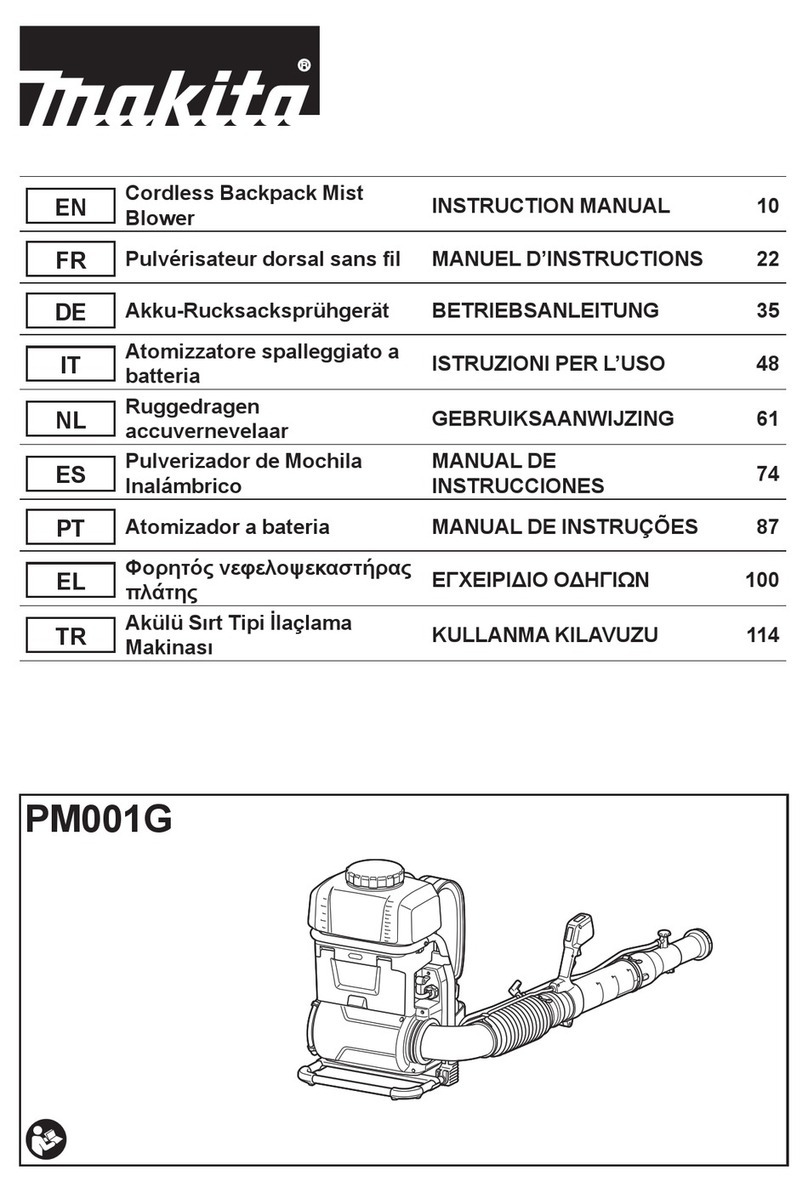
Cramer 2400186 User manual

cramer.eu
2400186 (82B1300)
EN | DE | ES | IT | FR | PT | NL | RU| FI | SV | NO| DA| PL | CS | SK | SL| HR| HU|
RO| BG| EL | AR| TR | HE | LT | LV | ET |

1
cramer.eu
GB
EN
1 Back Pack Assembly
2 Blower Tube Assembly
3 Middle Blower Tube
4 Rear Blower Tube
5 Operator’s Manual
Product Overview
Your machine has been engineered and manufactured to high standard
for dependability, ease of operation, and operator safety. When properly
cared for, it will give you years of trouble-free performance.
Know your Blower
Packing List
Safety Precautions
Carefully read all the safety
warnings and instructions in this
manual before operating this
blowers. Save this operator’s
manual for future reference.
These blowers conform to CE safety
standards and directives concerning
electromagnetic compatibility,
machines and low voltage.
Training
•Read the instructions carefully be
familiar with the controls and the proper
use of the appliance.
•Never allow children, persons with
reduced physical, sensory or mental
capabilities or lack of experience and
knowledge or people unfamiliar with
these instructions to use the machine,
local regulations may restrict the age of
the operator.
The recommended ambient temperature range:
Blower storage Temperature range -4 ˚F (-20 ˚C) ~ 158 ˚F (70 ˚C)
Blower operation temperature range -4 ˚F (-20 ˚C) ~ 104 ˚F (40 ˚C)
Battery Charging Temperature Range 39˚F (4°C) ~ 104 ˚F (40 ˚C)
Charger Operation Temperature Range 39˚F (4°C) ~ 104 ˚F (40 ˚C)
Battery storage Temperature range
1 year: 32˚F (0°C) ~ 73 ˚F (23 ˚C)
3 month: 32˚F (0°C) ~ 113 ˚F (45°C)
1 month: 32˚F (0°C) ~ 140 ˚F (60 ˚C)
Battery Discharging temperature
Range -4 ˚F (-20 ˚C) ~ 113 ˚F (45°C)

2cramer.eu
EN •Never operate the appliance while
people especially children, or pets are
nearby.
•The operator or user is responsible for
accidents or hazards occurring to other
people or their properly.
Preparation
•While operating the appliance, always
wear substantial footwear and long
trousers.
•Do not operate the machine when
barefoot or wearing open sandals. Avoid
wearing clothing that is loose fitting or
that has hanging cords or ties.
•Do not wear loose clothing or jewellery
that can be drawn into the air inlet. Keep
long hair away from the air inlets.
•Obtain ear protection and safety
glasses. Wear them at all times while
operating the machine.
•Wearing a face mask is recommended
to prevent dust irritation.
•Operate the machine in a recommended
position and only on a firm, level
surface.
•Do not operate the machine on a paved
or gravel surface where ejected material
could cause injury.
•Before using, always visually inspect
to see, that fasteners are secure, the
housing is undamaged and that guards
are in place. Replace worn or damaged
components in sets to preserve balance.
Replace damaged or unreadable labels.
Operation
•Operate the appliance only in daylight or
in good artificial light.
•Always be sure of your footing on steps.
•Walk, never run.
•When using in direct sunshine, keep out
of water.
•Don’t expose to rain when operating the
machine.
•Keep all cooling air inlets clear of debris.

3
cramer.eu
GB
EN
•Never blow debris in the direction of
bystanders
•Before starting the machine, make
certain that the tube inlet is empty.
•Keep your face and body away from the
air intake opening.
•Do not allow hands or any other part
of the body or clothing inside the tube
inlet, discharge chute, or near any
moving part.
•Inspect unit to ensure no foreign
material/ debris is in the machine prior
to operation.
•Do not allow processed material to
build up in the discharge zone; this
may prevent proper discharge and can
result in kickback of material through the
intake opening.
•Never operate the machine with
defective guards or shields, or without
safety devices.
•Keep the power source clean of debris
and other accumulations to prevent
damage to the power source or possible
fire.
•Always stand clear of the discharge zone
when operating this machine.
•Do not overreach. Keep proper footing
and balance at all times. This enables
better control of the power tool in
unexpected situations.
•Do not pull or carry by the cord.
•Stop the machine, and remove battery
pack. Make sure that all moving parts
have come to a complete stop
- whenever the machine is left by the
user;
- before clearing a blockage;
- before checking, cleaning or working
on the machine;
- after striking a foreign object to inspect
the machine for damage;
•If the machine starts to vibrate abnor-
mally, for immediately check
- inspect for damage;
- replace or repair any damaged parts;

4cramer.eu
EN - check for and tighten any loose parts
Maintenance and Storage
•keep all nuts, bolts and screws tight to
be sure the appliance is in safe working
condition.
•Replace worn or damaged parts.
•Use only genuine replacement parts and
accessories. Store the machine in a dry
place out of the reach of children.
•Do not to touch moving hazardous parts
before the machine shut down and the
moving hazardous parts have come to
a complete stop. Allow the machine to
cool before making any inspections,
adjustments, etc. Maintain the machine
with care and keep it clean.
•Always allow the machine to cool before
storing.
•Never attempt to override the
interlocked feature of the guard.
•Store indoors, and do not expose to rain
or water, avoid direct sunshine.
Residual Risks
Even when using the power tool
properly, remaining risks may exist. The
following hazards may occur based on the
construction of the equipment:
•Lung damage when not wearing a
suitable protective mask.
•Hearing damage when not wearing
suitable ear protection.
•Mage to health due to handarm vibration
when using the equipment for extended
periods, and not properly operated and
maintained.
Intended Use
It is used to propel air out of a tube to move
yard debris such as leaves.
SAVE THESE INSTRUCTIONS. REFER TO
THEM FREQUENTLY AND USE THEM TO
INSTRUCT OTHERS WHO MAY USE THIS
UNIT. IFYOU LOAN SOMEONE THIS UNIT,
LOAN THEM THESE INSTRUCTIONS ALSO.

5
cramer.eu
GB
EN
Disposal
Do not dispose of the power tool
with other household waste.
Dispose of power tool in return and
collection systems designated for
environmental safe recycling.
Separate collection of used
products and packaging allows
materials to be recycled and used
again. Re-use of recycled materials
helps prevent environmental
pollution and reduces the demand
for raw materials.
Batteries
Li-ion
At the end of their useful life,
discard batteries with due
care for our environment.The
battery contains material which
is hazardous to you and the
environment. It must be removed
and disposed of separately at a
facility that accepts lithium-ion
batteries.
Symbol
SYMBOL DESCRIPTION/EXPLANATION
Precautions that involve your
safety.
Read the operation manual and
follow all warnings and safety
instructions.
Wear eye protection and ear
protection.
Thrown objects can ricochet
and result in personal injury or
property damage. Wear protec-
tive clothing and boots.
Keep all bystanders, especially
children and pets, at least 15m
from the operating area.
Do not touch the fan when op-
erating this unit.
Do not expose to rain or damp
conditions.

6cramer.eu
EN Failure to keep long hair away
from the air inlet could result in
personal injury.
Failure to keep loose clothing
from being drawn into air intake
could result in personal injury.
Rotating impeller blades can
cause severe injury.
Double-insulated construction.
Before Operation
The safe use of this product requires an understanding of the features on the
product and the information in the operator’s manual. Before use of this product,
familiarize yourself with all operating features and safety rules. (see Figure 1)
1. Blower Tube
The blower tube can be installed onto the blower without additional tools.
2. Trigger
Starts and Stops the flow of air.
3. Cruise Control Lever
Press down on the cruise control lever to engage and lock the trigger. Pull up on
the cruise control lever to release and disengage the trigger.
4. Turbo Button
Press the turbo button to run at peak performance. Release the turbo button to
run at normal speed.
5. Harness
A well adjusted backpack blower and harness makes work easier. Adjust the
harness to give you the best working stance. Adjust the side straps so the weight
is equally distributed across your shoulders.
6. Battery Life Indicator
This is located on the blower handle. There are 4 green LED lights, where each
one represents 25% of battery life.This calculates the estimated remaining
battery life of one battery. If one battery is depleted, the machine will stop
working, and the LED lights on the trigger handle will flash. On this occasion,
please release the trigger, the other battery can be used once the trigger pressed
again.
Assembly
WARNING!
To prevent accidental starting that could cause serious
personal injury, always remove the batterypack from the tool
when assembling parts.

7
cramer.eu
GB
EN
WARNING!
Do not use this product if any parts on the Packing List are
already assembled to your product when you unpack it.
Parts on this list are not assembled to the product by the
manufacturer and require customer installation. Use of a
product that may have been improperly assembled could
result in serious personal injury.
Assembling the Trigger Handle (see Figure 2)
1 Slide trigger handle (A) on the front tube (B).
2 Move trigger handle to desired location before fully tightening. Use
supplied knob (C) to tighten trigger handle to the blower tube.
3 Place the cord (E) in the cord retainer (F).
Assembling the Blower Tube (see Figure 3)
1 The flexible tube (D) is connected to the fan outlet tube from the
manufacturer.
2 Align either of the grooves (a) in tube (G) with the tabs (b) on tube (B). Turn
the tube in the direction of the arrow until both of the tabs slide into the
lock positions (c).
3 Connect tube (H) to tube (G). For shorter tube application, turn rear tube
counterclockwise and move tube to upper position (d).
Assembling the Tube Assembly (see Figure 4)
The tube assembly can be disconnected from the backpack assembly.
1 Press the blower release button (l) and pull up to disconnect the tube
assembly from the backpack assembly.
Back Pack Assembly Application (see Figure 5)
The backpack assemby is designed with a cord adapter (sold separately) so that
other 82V products can be connected.
1 Align the plug release button (K) with the arrow (L) on the socket (J).
2 Insert the plug into the cord adapter, and turn clockwise until the release
button engages.
3 To disengage the plug, pull the plug release button back (K) and turn
counterclockwise.
To Install/ Remove the Battery
WARNING!
Follow these instructions in order to avoid injury and to reduce
the risk of electric shock or re:
• Replace the battery pack or the charger immediately if the
battery case or charger cord is damaged.
• Verify that the switch is in the OFF position before inserting or
removing the battery pack.
• Verify that the battery pack is removed and the switch is in
the OFF position before inspecting, adjusting, or performing
maintenance on any part of the blower.
• Read, understand, and follow the instructions contained in the
section entitled Charging Procedure.
WARNING!
Always take care of your feet, children, or pets around you when
pressing the battery release button. Serious injury could result if
the battery pack falls. NEVER remove the battery pack when in a
high location.

8cramer.eu
EN To Remove the Dust Cover
1 Unlock the latches on both sides to release the dust cover.
2 Remove the dust cover to expose the battery compartment.
NOTE: Please keep the battery cap installed to prevent entry of dust or water.
To Remove (see Figure 6)
1 Press and hold the battery release button (M) with firm grip.
2 Grasp the backpack firmly. Pull the battery pack out of the compartment.
NOTE: The blower can hold two batteries, but only one of the batteries works
during operation.
To Install (see Figure 6)
1 Align the battery pack with the cavity in the backpack housing.
2 Insert the battery pack into the backpack housing.
3 Grasp the backpack firmly.
4 Push the battery pack into the backpack until it locks into place.
You will hear a click once it is locked into place.
5 Do not use force when inserting the battery pack. It should slide
into place and click.
To Put on the Backpack
Adjust the Harness (see Figure 7)
A well adjusted backpack blower and harness makes work easier. Adjust the
harness to give you the best working stance. Adjust the side straps so the weight
is equally distributed across your shoulders.
a Once the blower is properly fitted on your back, pull the ends of the straps
downward to tighten the harness.
b Connect the horizontal chest strap, and pull the end of the strap to tighten.
c Lift the tabs of the adjusters to loosen the straps.
d Close and lock the quick-release fastener by pushing it together.
e Squeeze the hooks to open the quick-release fastener.
Harness Removal
WARNING!
The backpack blower must be quickly removed in the event of
imminent danger.The chest and waist strap must be released
before putting the backpack blower on the ground.
1 Open the quick-release fasteners on both chest strap and waist strap.
2 Loosen the harness straps by lifting the sliding adjusters and then take off
the blower.
Put on the Shoulder Strap. (see Figure 7)
1 Adjust the harness straps (1) to the correct length.
2 Adjust chest strap (2) and waist strap (3) to correct length and fasten it
together.
Operation
WARNING!
Do not allow familiarity with this product to make you careless.
Remember that a careless fraction of a second is sufcient to
inict serious injury.

9
cramer.eu
GB
EN
WARNING!
Do not use any attachments or accessories not recommended
by the manufacturer of this product.The use of attachments or
accessories not recommended can result in serious personal
injury. Before each use, inspect the entire product for damaged,
missing, or loose parts, such as screws, nuts, bolts, caps,etc.
Tighten securely all fasteners and caps and do not operate this
product until all missing or damaged parts are replaced.
WARNING!
To prevent serious personal injury or damage to the unit, make
sure the blower tube is in place before operating the unit.
Starting/Stopping the Blower (see Figure 8)
Before start-up, make sure that the blower is in perfect condition to guarantee
safe operation.
1 Squeeze the switch trigger (2) to start.
2 To change speed, press or release trigger to increase or decrease the speed.
Using Cruise Control (see Figure 8)
This blower is equipped with a cruise control function. Please read and
understand the function of the cruise control lever.
1 Squeeze the trigger (2) to start the unit.
2 Once the unit is on, pull the lever back (3) clockwise to increase the speed.
This will lock the speed at the desired setting.
3 To decrease the speed, push the lever counter clockwise to decrease the
speed to the desired setting.
NOTE: If you decrease the speed all the way, the unit will shut off and step one
will need to be repeated.
Using Turbo Button (see Figure 8)
This blower is equipped with a turbo button. Please read and understand the
function of the turbo button.
1 Squeeze the switch trigger (2) to start.
2 To boost speed, press the turbo button (4) so that the blower can be
operated at the highest speed. Once the turbo button is released, the blower
will be operated at the normal speed.
LED Application
The trigger handle is equipped with LED light which has the below indication.
4 LED Lights 100% Est. Battery Life Remaining
3 LED Lights 75% Est. Battery Life Remaining
2 LED Lights 50% Est. Battery Life Remaining
1 LED Lights 25% Est. Battery Life Remaining
Operating Tips
WARNING!
Never cover air vents. Keep them free of obstructions and debris.
They must always remain clear for proper motor cooling.
•Ensure that the unit is not directed at anybody or any loose debris before
starting the unit.
•Verify that the unit is in good working condition. Make sure the tubes and
guards are in place and secure.
•To reduce the risk of hearing loss associated with sound level(s), hearing
protection is required.
•Operate power equipment only at reasonable hours—not early in the
morning or late at night when people might be disturbed. Comply with

10 cramer.eu
EN times listed in local ordinances. Usual recommendations are 9:00 am to
5:00 pm, Monday through Saturday.
•To reduce noise levels, limit the number of pieces of equipment used at
any one time.
•To reduce noise levels, operate power blowers at the lowest possible
speed to do the job.
•Use rakes and brooms to loosen debris before blowing.
•Conserve water by using power blowers instead of hoses for many lawn
and garden applications, including areas such as gutters, screens, patios,
grills, porches, and gardens.
•Watch out for children, pets, open windows or freshly washed cars, and
blow debris safely away.
Holding the Tool (see Figure 8)
The operator should wear proper clothing, such as boots, safety glasses or
goggles, ear/hearing protection, gloves, long pants and a long-sleeved shirt.This
backpack blower is designed to be operated with one hand.The user can carry
it holding the control lever with the left or right hand. Always walk slowly while
working. Always check the blowing nozzle outlet area.
Operating the Blower
Hold the blower firmly. Sweep from side to side with the nozzle several inches
above the ground or floor. Slowly advance the unit, keeping the accumulated pile
of debris in front of you. Most dry blowing operations are better suited to low
speeds, rather than high speeds. High speed blowing is a better way to move
heavier items like large debris or gravel.
Maintenance
WARNING!
Do not at any time let brake uids, gasoline, petroleum based
products, penetrating oils, etc. come in contact with plastic parts.
They contain chemicals that can damage, weaken or destroy
plastic.
WARNING!
To avoid serious personal injury, always remove the battery pack
from the tool when cleaning or performing any maintenance.
Cleaning
•Remove the battery pack.
•Brush or blow dust and debris out of the air vents using compressed air
or a vacuum. Keep the air vents free of obstructions, sawdust, and wood
chips. Do not spray, wash, or immerse the air vents in water.
•Wipe off the housing and the plastic components using a moist, soft cloth.
Do not use strong solvents or detergents on the plastic housing or plastic
components. Certain household cleaners may cause damage, and may
cause a shock hazard.
Avoid using solvents when cleaning plastic parts. Most plastics are susceptible to
damage from various types of commercial solvents and may be damaged by their
use. Use clean cloths to remove dirt, dust, oil, grease, etc.
Storing the blower
Clean the blower thoroughly before storing. Store the blower in a dry, well-
ventilated place that is inaccessible to children. Keep away from corrosive agents
such as garden chemicals and de-icing salts.
•Do not use solvents to clean the tool.
•Store the tool in a dry place, and out of reach of children.

11
cramer.eu
GB
EN
Troubleshooting
Motor fails to
start when
switch trigger is
depressed.
Battery is not
secure.
Ensure the battery is fully secure in the
battery compartment and the battery
release button locks into place.
Battery is not
charged.
Charge the battery pack according to
the instructions included with your
model.
The unit will
start, but air will
not flow through
the tube.
The air inlet
or tube outlet
is blocked.
Clear the blockage.
Unit will not
start.
Defective
power switch.
Have the defective parts replaced by an
authorized service center.
Cruise Control
Lever doesn’t
work.
The screw is
loose.
Tighten the screw with a Phillips
screwdriver.
Unit has blinking
LED lights.
One battery
has been
depleted.
Re-engage the trigger to activate the
second battery.
* If the fault is not solved, you must go to your distributor and/or nearest Authorized
Technical Service.
Technical Data
Type Cordless, battery-operated
Voltage 82V
Air Volume 1,300 m³/h
Air speed 69 m/s
Weight (Without Battery) 7.2 kg
Battery Pack 82V220G/82V430G/82V220/82V430
Charger 82C1G/82C2/82C6
Sound pressure level 90 dB(A), KPA: 3 dB(A)
Measured sound power level LWA= 106.3 dB(A)
Guaranteed sound power level LWA= 110 dB(A)
Vibration level < 2.5 m/s2

12 cramer.eu
CE Declaration of Conformity
Manufacturer Name: Changzhou Globe Co., Ltd.
Address: No.65 Xinggang Road Zhonglou Zone Changzhou, Jiangsu
213000 P.R.China
Name and address of the person authorised to compile the technical
file
Name: Peter Söderström
Address:
WE HEREBY DECLARE UNDER OUR OWN RESPONSIBILITY
THE MACHINE
Original Instruciotn
Type Cordless Dual Pack Blower
Brand Cramer
Model 82V
Serial No See product rating label
Has been manufactured in accordance with the standards or
regulatory documents:
Electromagnetic compatibility EN-55014-1/EN-55014-2
Electrical safety EN-60335-1/EN 50636-2-100/ EN
62233
Noise Emission Directive 2000/14/EC amended by 2005/88/EC
And conforms to the essential requirements of the following
directives:
Machine directive 2006/42/CE
Electromagnetic compatibility
directive
2014/30/EU
Ted Qu Haichao
Quality Director
Changzhou, 22/07/2017
Propellergatan 1
211 15 Malmö
Sweden
EN

13
cramer.eu
DE
Produktüberblick
Ihr Gebläse wurde nach den Qualitätsstandards mit höchsten Ansprüchen an
Zuverlässigkeit, Benutzerfreundlichkeit und Anwendersicherheit entwickelt
und hergestellt. Bei sorgsamer Pflege wird Ihnen das Gerät über viele Jahre
zuverlässige und strörungsfreie Dienste leisten.
Machen Sie sich mit Ihrem Laubbläser vertraut
Packliste
1 Rucksackmontage
2 Montage des Gebläserohrs
3 Mittleres Gebläserohrs
4 Hinteres Gebläserohr
5 Bedienungsanleitung
Empfohlene Umgebungstemperatur:
ARTIKEL TEMPERATUR
Lagertemperatur des Laubbläsers -20 ˚C ~ 70 ˚C
Betriebstemperatur des Laubbläsers -20 ˚C ~ 40 ˚C
Ladetemperatur 4 ˚C ~ 40 ˚C
Betriebstemperatur des Ladegerätes 4 ˚C ~ 40 ˚C
Lagertemperatur der Akkus
1 Jahr 0 ˚C ~ 23 ˚C
3 Monate 0 ˚C ~ 45 ˚C
1 Monat 0 ˚C ~ 60 ˚C
Entladetemperatur der Akkus -20 ˚C ~ 45 ˚C
Sicherheitsvorkehrungen
Lesen Sie sorgfältig alle Sicherheitsregeln und Anweisungen
in dieser Bedienungsanleitung, bevor Sie diesen Laubbläser
benutzen. Bewahren Sie diese Bedienungsanleitung zum
späteren Nachlesen auf.
Diese Laubbläser entsprechen dem CE Sicherheitsstandard
und Richtlinien über elektromagnetische Verträglichkeit,
Maschinen und Niederspannung.
Einweisung
•Lesen Sie die Anweisungen
sorgfältig durch. Machen Sie sich
mit den Bedienelementen und dem
ordnungsgemäßen Gebrauch des Geräts
vertraut.
•Lassen Sie niemals Kinder, Personen
mit eingeschränkten körperlichen,
sensorischen oder mentalen Fähigkeiten
oder mangelnder Erfahrung und
Wissen oder Personen die mit diesen
Anweisungen nicht vertraut sind das
Produkt benutzen. Örtliche Vorschriften
können das Alter des Benutzers
begrenzen.

14 cramer.eu
DE
ganze Zeit, während Sie die Maschine
benutzen.
•Zur Vermeidung von Staubirritationen
wird das Tragen einer Gesichtsmaske
empfohlen.
•Bedienen Sie die Maschine in der
empfohlenen Stellung und nur auf einem
festen, ebenen Untergrund.
•Betreiben Sie diese Maschine nicht
auf gepflastertem Untergrund oder
Schotter, wo ausgeworfenes Material zu
Verletzungen führen könnte.
•Führen Sie vor der Benutzung immer eine
Sichtprüfung durch, um sicherzustellen,
dass alle Verschlüsse gesichert sind,
das Gehäuse nicht beschädigt ist und
alle Schutzvorrichtungen montiert
sind. Ersetzen Sie abgenutzte oder
beschädigte Teile satzweise, um das
Gleichgewicht zu erhalten. Ersetzen Sie
beschädigte oder unleserliche Etiketten.
Operation.
•Betreiben Sie das Gerät niemals wenn
sich Personen, besonders Kinder, oder
Tiere in der Nähe befinden.
•Der Bediener bzw. Benutzer trägt die
Verantwortung für Unfälle oder Gefahren
gegenüber anderen Personen oder deren
Besitz.
Vorbereitung
•Tragen Sie beim Betrieb des Geräts
immer festes Schuhwerk und lange
Hosen.
•Arbeiten Sie mit der Maschine niemals
Barfuß oder in offenen Sandalen.
Vermeiden Sie lockere Kleidung oder
Kleidung mit Schnüren oder Bändern zu
tragen.
•Tragen Sie keine lose Kleidung oder
Schmuck,die in den Lufteinlass gesaugt
werden könnten. Halten Sie lange Haare
von den Lufteinlässen fern.
•Tragen Sie Gehörschutz und ein
Sicherheitsbrille.Tragen Sie diese die

15
cramer.eu
DE
Betrieb
•Betreiben sie das gerät nur bei tageslicht
oder in gutem künstlichen licht.
•Achten sie an abhängen auf einen festen
stand.
•Gehen sie immer, laufen sie nie.
•Bei Benutzung in direktem Sonnenlicht,
von Wasser fernhalten.
•Die Maschine bei der Benutzung nicht
dem Regen aussetzen.
•Halten sie alle lüftung sein lässe von
verunreinigungen frei.
•Blasen sie kehrgut niemals dorthin, wo
sich außenstehende personen aufhalten.
•Stellen Sie vor dem Start der Maschine
sicher, dass die Zufuhrkammer leer ist.
•Halten sie Ihr Gesicht und Körper fern von
der Zuführöffnung.
•Halten Sie nicht Ihre Hände oder
andere Körperteile oder Kleidungindie
Zuführkammer, den Auswurfschacht oder
in die Nähe anderer sich bewegender
Teile.
•Überprüfen Sie das Gerät um
sicherzustellen, dass vor der Benutzung
keine Fremdkörper/ Schmutz in der
Maschine sind.
•Halten Sie nicht Ihre Hände oder
andere Körperteile oder Kleidung in den
Einlassschlauch,den Auswurfschacht oder
in die Nähe anderer sich bewegender
Teile.
•Lassen Sie verarbeitetes Material sich
nicht in dem Auswurfbereich ansammeln;
das kann den ordentlichen Auswurf
behindern und zum Rückschlag von
Material durch die Einlassöffnung führen.
•Halten Sie den Motor frei von
Fremdkörpern oder anderen
Ablagerungen um Schäden an dem Motor
oder mögliche Feuer zu verhindern.
•Halten Sie sich immer von dem
Ausstoßbereich fern, wenn Sie diese

16 cramer.eu
DE
Maschine benutzen;
•Falls das gerät beginnt ungewöhnlich zu
vibrieren (sofort überprüfen)
- überprüfen von Schäden;
- ersetzen oder reparieren von
beschädigten Teilen;
- überprüfen Sie ob Teile locker sind und
ziehen sie fest
Pege und Aufbewahrung
•Sorgen Sie um sicherzustellen, dass
das Gerät sich in einem sicheren
Arbeitszustand befindet, dafür, dass
alle Schrauben, Muttern und Bolzen fest
angezogen sind.
•Ersetzen Sie abgenutzte oder beschädigte
Teile.
•Verwenden Sie nur Original-Ersatzteile
und Zubehör. Lagern Sie das Gerät
an einem trockenen Ort und außer
Reichweite von Kindern.
•Berühren Sie keine gefährlichen, sich
Maschine benutzen.
•No extienda demasiado el brazo. Afírmese
bien en sus piernas. Una posición de
trabajo estable permite controlar mejor
la máquina en caso de producirse algún
imprevisto Tragen Sie geeignete Kleidung.
•Nicht am Netzkabel ziehen oder damit
tragen.
•Stoppen Sie die Maschine und entfernen
den Akkupack. Stellen Sie sicher, dass alle
bewegliche Teile vollständig angehalten
sind,
- wenn die Maschine von dem Benutzer
zurückgelassenist
- vor dem Entfernen von Blockaden
- bevor Sie die Maschine prüfen,
reinigen oder daran arbeiten
- nachdem Sie auf einen Fremdkörper
getroffen sind. Überprüfen Sie die
Maschine auf Beschädigung und
reparieren diese, bevor Sie die
Maschine wieder starten oder die

17
cramer.eu
DE
bewegende Teile, bevor die Maschine
gestoppt ist und die gefährlichen,sich
bewegende Teile vollständig angehalten
sind. Lassen Sie die Maschine abkühlen,
bevor Sie Inspektionen, Einstellungen
usw. durchführen. Warten Sie die
Maschine sorgfältig und halten Sie sie
sauber.
•Lassen Sie die Maschine vor der
Aufbewahrung immer abkühlen.
•Versuchen Sie niemals die Verriegelung
der Schutzvorrichtung außer Kraft zu
setzen.
•Drinnen lagern und nicht Regen oder
Wasser aussetzen, vermeiden Sie
direktes Sonnenlicht.
Restrisiken
Auch bei ordnungsgemäßem Umgang mit
dem Elektrowerkzeug können verbleibende
Risiken bestehen. Aufgrund des
Geräteaufbaus können folgende Gefahren
auftreten:
•Lungenschäden, wenn keine geeignete
Schutzmaske getragen wird.
•Gehörshäden, wenn kein geeigneter
Gehörschutz getragen wird.
•Gesundheitliche Beeinträchtigungen durch
Hand-Arm-Vibrationen, wenn das Gerät
über einen längeren Zeitraum benutzt
und nicht ordnungsgemäß bedient und
gewartet wird.
Vorgesehene Verwendung
Damit wird Luft durch ein Rohr geblasen,
um Schmutz, wie Blätter, zu bewegen.
BEWAHREN SIE DIESE ANWEISUNGEN
AUF. LESEN SIE REGELMÄSSIG DARIN
NACH UND ERKLÄREN SIE SIE JEDER
PERSON,DIE DIESES GERÄT EVENTUELL
BENUTZEN WILL. WENN SIE DIESES
GERÄT VERLEIHEN, GEBEN SIE AUCH
DIESE BEDIENUNGSANLEITUNG MIT.

18 cramer.eu
DE
Entsorgung des geräts
Werfen Sie elektrische Geräte
nicht in den Hausmüll. Geben Sie
diese Geräte bei Recyclingzentren
ab. Wenden Sie sich an die
entsprechenden Behörden oder an
Ihren Händler, um Auskünfte über
das.
Getrennte Sammlung gebrauchter
Produkte und Verpackungen
erlaubt die Wiederverwertung
von Materialien. Die
Wiederverwendung von Materialien
hilft Umweltverschmutzung zu
verhindern und reduziert den Bedarf
an Rohmaterialien.
Batteries
Li-ion
Entsorgen Sie Akkus am Ende
der Nutzungsdauer und achten
auf unsere Umwelt. Der Akku
enthält Material, das für Sie und
die Umwelt schädlich ist. Er muss
daher separat in einer Einrichtung,
die Lithium-Ionen Batterien
annimmt, entsorgt werden.
Símbolo
SÍM-
BOLO DESCRIPTION/EXPLANATION
Wichtige Sicherheitsmaßnahmen.
Hier geht es um Ihre
Sicherheit.
Lesen Sie die Bedienungsanleitung
durch und beachten
Sie die Warnungen und Sicherhe-
itsvorschriften.
Tragen Sie Schutzkleidung und
Stiefel!

19
cramer.eu
DE
Objekte können abprallen und
Verletzungen oder Sachbeschädi-
gungen verursachen.Zuschauer
fernhalten.
Halten Sie alle Zuschauer,be-
sonders Kinder und Tiere,
mindestens 15m vom Arbeitsbere-
ich fern.
Berühren Sie das Gebläse
während des Betriebs nicht.
Verwenden Sie dieses Gerät nicht
im Regen, und lassen Sie es nicht
im Freien, wenn es regnet.
Wenn lange Haare nicht von dem
Lufteinlass fern gehalten werden,
kann das zu Verletzungen führen.
Wenn nicht verhindert wird, dass
weite Kleidung in den Lufteinlass
eingezogen wird,kann das zu Ver-
letzungen führen.
Rotierende Flügelklingen können
schwerste Verletzungen verursa-
chen.
Construcción con doble aislamien-
to.
Vor dem Betrieb
Für die sichere Benutzung dieses Grills ist Verständnis der Produkteigenschaften
und der Information in dieser Bedienungsanleitung erforderlich. Machen Sie sich
vor Gebrauch dieses Produkts mit allen Betriebsvorgängen und Sicherheitsregeln
vertraut. (Siehe Abb 1)
1. Gebläserohr
Das Gebläserohr kann ohne zusätzliche Werkzeuge an dem Laubbläser montiert
werden.
2. Auslöser
Startet und stoppt den Luftstrom.
3. Geschwindigkeitsregler
Drücken Sie den Geschwindigkeitsregler, um den Auslöser einzuschalten und zu
verriegeln. Ziehen Sie den Geschwindigkeitsregler, um den Auslöser zu lösen und
zu entriegeln.
4. Turbo-Knopf
Drücken Sie den Turbo-Knopf, um die höchste Geschwindigkeit zu wählen. Lassen
Sie den Turbo-Knopf los, um die normale Geschwindigkeit zu wählen.
Table of contents
Languages:
Other Cramer Blower manuals
Cramer
Cramer KM domus 82 V User manual
Cramer
Cramer 82B1000 User manual
Cramer
Cramer 40B730 User manual
Cramer
Cramer 2400986 User manual

Cramer
Cramer LS 5000 XP User manual
Cramer
Cramer KM 70 G Type 02 User manual

Cramer
Cramer KM domus 82 V User manual
Cramer
Cramer 2401086 User manual
Cramer
Cramer KM 80 H User manual

Cramer
Cramer 2400386 User manual

