manuals.online logo
Brands
  1. Home
  2. •
  3. Brands
  4. •
  5. Create Room
  6. •
  7. Indoor Furnishing
  8. •
  9. Create Room oh happy day User manual

Create Room oh happy day User manual

U052021
Sew Station Assembly Instructions
oh happy day
Happy crafting!
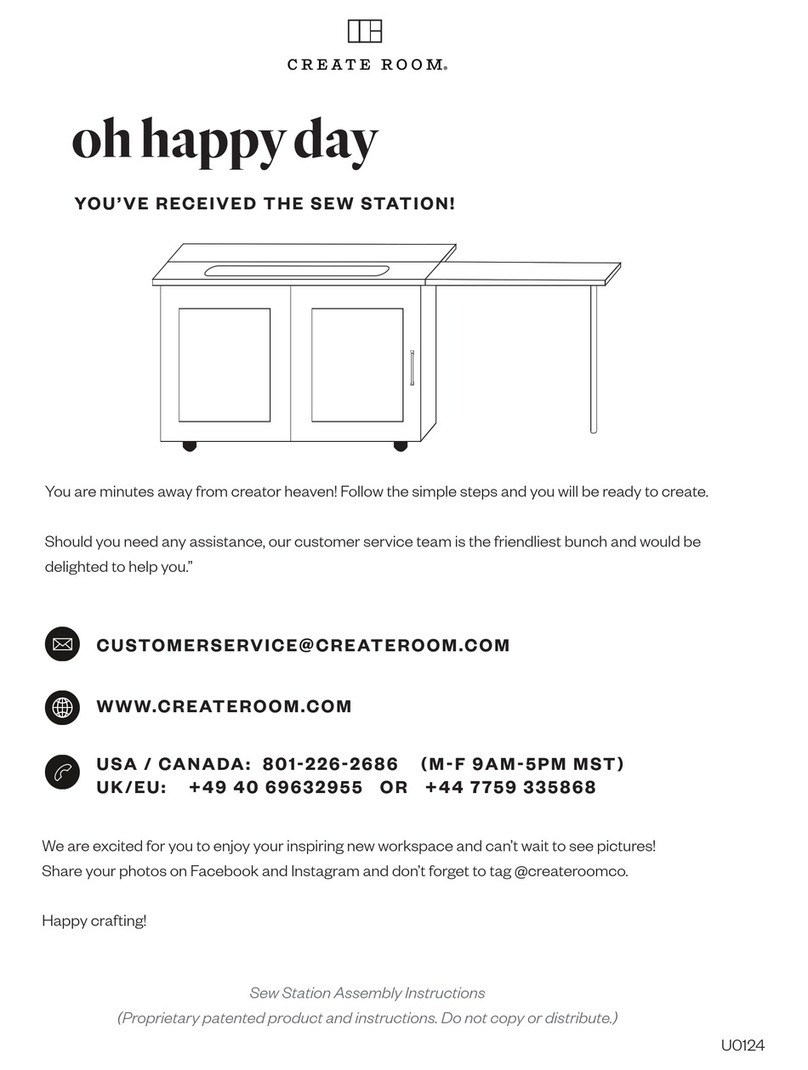
YOU’VE R E CEIVED THE SEW STATION!
Sewing is about to get a lot more fun—and convenient!
CUSTOMERSERVICECREATEROOM.COM
WWW.CREATEROOM.COM
USA  CANADA: 8012262686 MF 9AM5PM MST
UK  EU: +49 40 69632955 OR +44 7759 335868
Follow simple steps to assemble your Sew Station. All necessary hardware is
included.
Our customer service team are the friendliest bunch of furniture experts. Do
not hesitate to reach out to them if you have questions at any point of the
assembly process.
We are excited for you to enjoy your inspiring new workspace and can’t wait
to see pictures! Share your photos on Facebook and Instagram and don’t
forget to tag @createroomco.
HARDWARE YOU’LL NEED (INCLUDED):
TOOLS YOU’LL NEED (NOT INCLUDED)
x12
Hinges
x4
Guide Spaces
(for drawer rails)
x1
White Magnetic
Door Catch and Strike
(screws included)
x1
Door support wheel
w/ 2 screws
x2
Table Legs
w/ adjustable foot
x2
16” Drawer Rail Guides
x2
270° Door Hinges
x2
270° Door Hinge
Mounting Plates
x1
Door Handle
(DreamBox Pull)
x2
1” Screws
x19
Connecting
Bolts
x84
13mm Euro Screws
(72 for hinges)
(12 for spacers)
x8
Table Leg
Screws
x1
Silver Barrel Lock
Catch w/ Screws
x4
Wheels w/ U
Channel Plates
& 4 Machine Screws
x16
Angle Bracket
Screws
x4
Angle Brackets
x21 Center
Shelf Supports
x6 Left Shelf
Support Locks
x6 Right Shelf
Support Locks
x1
Sash Lock
(screws included)
Our furniture is designed to
be built with two people.
Please don’t try to build
alone.
A Friend
(not included)
Phillips head
Screw Driver
Electric Drill with
Phillips bit
* ADDITIONAL HARDWARE FOR
MACHINE LIFT AND SPOOL DRAWER
LISTED LATER.
x1
Silver Barrel Lock
for WorkBox 3.0 and
Her HobbyBox owners
x4
Flathead Hinge
Screws
(2) 1/2 inch
wrenches
L
R
Before you build your Sew Station & Spool Holder, you’ll need to separate the drawer rails into
two pieces to be installed individually. The rails are comprised of three pieces. The outer and
intermediate pieces don’t separate. The inner piece can be completely removed.
Remove the inner track by pressing the black lever
inside the track up or down to unlock it. Slide the
track free from the intermediate and outer tracks.
Ok, all set!
outer track
intermediate track
inner track
Back
Side 1
Side 2
Build on a blanket or rug to protect your wood panels.
Push in (12) connecting bolts into the corresponding holes in
Side 1, Side 2 and Back as shown.
Now, pause to do some planning.
Decide how you want to configure your Sew Station. There are some steps that need to be done
differently depending on which configuration you choose.
If you’re planning to use your Sew Station on the left side of your DreamBox, use Left Side Configu-
ration (the side table will extend to the right). If you’d like to use your Sew Station on the right side of
your DreamBox, use Right Side Configuration (the table will extend to the left.
If you wish to use your sewing machine knee lift, spool holder needs to be installed on Side 1.)
As always, if you have questions, please reach out to our furniture experts. They are happy to assist
you.
1
Top
RIGHT CONFIGURATION
(turn Top so that side table hinge holes are on the right)
LEFT CONFIGURATION
(turn Top so that side table hinge holes are on the left)
side table hinge holes
Push in (7) connecting bolts into the
corresponding holes in Top.
2
Top
If you use a machine knee lift, spacers and rails will be installed on Side 1 for spool
holder. Be sure to install door hinge mounting plates on Side 1 if you have a left
configuration and a machine with knee lift (as in step 10) before you install rails.
Screw (8) euro screws into (4) spacers just until screw is protruding through to the
other side of the spacer before installing on side panel. Install (4) spacers on Side 2.
3
LEFT SIDE CONFIGURATION
RIGHT SIDE CONFIGURATION
Separate mounting plate from door hinge by pressing down
silver lever (notice how it connects to make door install easier on
step 20). Install (2) Door Hinge Mounting Plates to Side 2 as
shown using a Phillips screwdriver & the included screws.
Long side of mounting plate faces inside of panel.
Side 2
x2
Side 2
x4
Side 1
(For machine knee lift sewists)
RIGHT CONFIGURATION
LEFT CONFIGURATION
Side 2
Side 2
Install (2) outer tracks over the spacers on
Side 2 using (4) euro screws.
4
Back
Insert a phillips head screwdriver
at a slight angle and turn clockwise
to tighten.
Line up (3) built-in cams in Back with corre-
sponding connecting bolts in Top. Slide Back
into place.
5
Top
Top
Back
Side 1
Slide Side 1 onto (2) connecting bolts in right side of Top and (3) built-in cams in Back.
Turn clockwise to tighten.
Note: If you chose “Right Side Configuration” the side table hinge holes will be on the same
side of the Top as Side 1. If you chose “Left Side Configuration” the side table hinge holes will
correspond with Side 2.
6
Top
Back
Side 2
Slide Side 2 onto (2) connecting bolts in left side of Top and (3) built-in cams in Back.
Turn clockwise to tighten.
Note: If you chose “Left Side Configuration” the side table hinge holes will be on the same
side of the Top as Side 2. If you chose “Right Side Configuration” the side table hinge holes
will correspond with Side 1.
7
Top
Back
Side 1
Top
Side 1
Side 2
Back
Top
Side 1
Side 2
Back
Base
Using an electric phillips head screw-
driver, install (4) angle brackets as
shown using ((16) included screws.
8
Lift Base onto (6) connecting bolts in
Sides and Back. Tighten built-in cams
to secure Base.
9
Lift Base
into place
Install magnetic catch with
(2) included screws.
Install magnetic catch with
(2) included screws.
Top
Side 1
Side 2
Back
Base
Top
Side 2
Side 1
Back
Base
RIGHT SIDE CONFIGURATION
LEFT SIDE CONFIGURATION
10
Install (2) mounting plates to Side 1
using (2) euro screws each.
10
Catch is adjustable. Move toward edge of Top.
(Knee lift sewers with left side configuration will
already havr door hinges installed in step 3.)
Top
Side 1
Side 2
Back
Base
Side Table
Install barrel
lock receiver
Top
Side 2
Side 1
Back
Side Table
Install barrel
lock receiver
RIGHT SIDE CONFIGURATION
LEFT SIDE CONFIGURATION
Attach Side Table using (3)
hinges and (18) euro screws. DO
NOT tighten screws all the way
at first. Once table is attached
tighten one screw in each hinge
and repeat until all screws are
tight.
Attach Side Table using (3) hinges and (18)
euro screws. DO NOT tighten screws all the
way at first. Once table is attached tighten
one screw in each hinge and repeat until all
screws are tight.
11
11
Base
Back
Side 2
Side 1
Table
Base
Side Table
Attach Table using (5) hinges and (30) euro screws. DO NOT tighten screws all the way at
first. Once table is attached tighten one screw in each hinge and repeat until all screws are
tight.
12
Attach (1) table leg to each table using (4) table leg screws for each table leg. Install side
table leg into the set of pre-drilled holes indicated so that the table leg opens toward the
front side of the Sew Station. Be careful not to over-screw.
13
Table Leg Holes
for Right Side Configuration
Table Leg Holes
for Left Side Configuration
(LEFT SIDE CONFIGURATION PICTURED)
**larger hole
towards the outside
Back
Side 2
Side 1
Back Table
Side 2
Side Table
Install (4) wheels using the included screws.
Install with the largver hole towards the outside.
Manually tighten.
14
With two people fold tables and turn onto front of Sew Station. Carefully lift onto 4
wheels. Please use caution. The Sew Station is heavy!
IMPORTANT: TO AVOID DAMAGING YOUR SEW STATION!
Once the Sew Station is upright, extend the back table and lock the back table leg open
to keep your Sew Staion from tipping over. Lock wheels before continuing to build.
x4
Line up metal arms with
metal center.
Install (4) bearing wheels onto the front
2 holes on each metal arm using (4) washers, bolts
and nuts. Using 2 - 1/2" wrenches tighten the bolt
and the nut. Make sure the black side (lock thread)
of nut is on the outside. The silver side is toward
the Bearing Wheel. Bearing wheel should spin
freely once tightened. IMPORTANT: Placement of
the washer is important so bearing spins freely and
doesn't burn out your motor.
a
b
Next, you’ll assemble and install the machine electric lift & assemble the spool drawer.
Metal Arm
Metal Arm
Center
Nut
Bearing Wheel
Washer
Bolt
HARDWARE YOU’LL NEED
x6
Rubber
pads
x8
Bolts
x8
Washers
x8
Bearing
wheels
x2
Cords
x8
Nuts
x16
1/2“ Screws. (2) for metal center, (6) for lift
Shelf, (8) for installing lift to Sew Station.
x4
Plastic Cord
Holders
x2
Screws for
lift control
x2
7/8“ Screws for
metal center.
Use (2) 1/2” screws to fasten metal
centerpiece to the power lifter.
Install from back of lifter. Make
sure 2 metal lips are flush with the
white plastic lifter. There are no
drill holes. Please self tap.
x2
Install (4) bearing wheels onto the back
2 holes on each metal arm. Use (4) washers
and (4) nuts.
c
d
**You may want to use a
piece of tape to keep lifter
in place while assembling
Side 1
Side 2
Table
Top
Install power lifter using (8) 1/2” screws. If you have a left side configuration the unused pilot
holes in the base will be visible after install on the left. If you have a right side configuration the
unused pilot holes in the base will be on the right . This will assure your lifter is centered.
Connect the top of the center lift guide to the Sew Station with (2) 7/8" screws. Be careful to
screw SLOWLY and not strip the back panel.
Side Table
15
x2
7/8“ Screws for
metal center.
x2
1/2” Screws
x2
1/2” Screws
Install cords to power lift motor.
Plug in and raise the lift.
Use (6) screws to fasten sewing
shelf onto the power lifter by
pushing down on shelf and
screwing from under shelf.
Shelf
16
Install lift control on right or left side of the Top
using the included screws. Please install lift control
switch on the OPPOSITE side of the rails. Attach
cord using plastic cord holders to top and back of
Sew Station.
x6
Insert (6) rubber pads
into metal arms
Spool Base Spool Side 1 Spool Side 2 Spool Shelf
Spool Back
Push in (14) connecting bolts to
corresponding holes in Spool Base,
Spool Side 1 Spool Side 2, and Spool
Back.
SPOOL HOLDER DRAWER ASSEMBLY
a
HARDWARE YOU’LL NEED
x2
Inner Drawer
Rail Guides
x14
Connecting
Bolts
x16
Spool Holders
x8
Guide screws
x1
Door Knob w/
Screws
x4
Inner Shelf Supports
x2
Left Shelf Supports
x2
Right Shelf Supports
x2
Acrylic Guards
R
L

This manual suits for next models

1

Other Create Room Indoor Furnishing manuals

Create Room Cubby User manual

Create Room

Create Room Cubby User manual

Create Room DREAMCART User manual

Create Room

Create Room DREAMCART User manual
Create Room oh happy day DREAMBOX 2 User manual

Create Room

Create Room oh happy day DREAMBOX 2 User manual

Create Room deluxe crown User manual

Create Room

Create Room deluxe crown User manual

Create Room Cubby User manual

Create Room

Create Room Cubby User manual
Create Room oh happy day DREAMBOX 2 User manual

Create Room

Create Room oh happy day DREAMBOX 2 User manual

Create Room DREAMBOX User manual

Create Room

Create Room DREAMBOX User manual

Create Room DREAMCART User manual

Create Room

Create Room DREAMCART User manual

Create Room DREAMBOX User manual

Create Room

Create Room DREAMBOX User manual

Create Room Sew Station User manual

Create Room

Create Room Sew Station User manual
Popular Indoor Furnishing manuals by other brands
Epoch Design Ashton 5308 Assembly instructions

Epoch Design

Epoch Design Ashton 5308 Assembly instructions

Walker Edison W70IV3D Assembly instruction

Walker Edison

Walker Edison W70IV3D Assembly instruction

DIR Marino 6021d instruction manual

DIR

DIR Marino 6021d instruction manual

Ameriwood HOME 3321884COM Instruction booklet

Ameriwood HOME

Ameriwood HOME 3321884COM Instruction booklet

Studio Designs TRIFLEX 10098 Assembly instructions

Studio Designs

Studio Designs TRIFLEX 10098 Assembly instructions

Verilux VP02 owner's manual

Verilux

Verilux VP02 owner's manual

Furinno 18055 Assembly instruction

Furinno

Furinno 18055 Assembly instruction

Whalen Asherton File SPUS-ASHF user manual

Whalen

Whalen Asherton File SPUS-ASHF user manual

CasaOne Paxton Wingback Chair Assembly instructions

CasaOne

CasaOne Paxton Wingback Chair Assembly instructions

ED 1580WC-24-201 Assembly instructions

ED

ED 1580WC-24-201 Assembly instructions

BED BATH & Beyond C3012T43-HKW/AGY-5X Assembly instruction

BED BATH & Beyond

BED BATH & Beyond C3012T43-HKW/AGY-5X Assembly instruction

Songmics VASAGLE LSC75 manual

Songmics

Songmics VASAGLE LSC75 manual

Walker Edison BR3DSLDR Assembly instructions

Walker Edison

Walker Edison BR3DSLDR Assembly instructions

BEMETA 104202122 manual

BEMETA

BEMETA 104202122 manual

Next MALVERN 182349 Assembly instruction

Next

Next MALVERN 182349 Assembly instruction

Hailey Home CT1858 Assembly instructions

Hailey Home

Hailey Home CT1858 Assembly instructions

Linon MONACO 0217VESP-01-KD-U Assembly instructions

Linon

Linon MONACO 0217VESP-01-KD-U Assembly instructions

Glas Italia Wunderkammer Assembling and use instruction

Glas Italia

Glas Italia Wunderkammer Assembling and use instruction

manuals.online logo
manuals.online logoBrands
  • About & Mission
  • Contact us
  • Privacy Policy
  • Terms and Conditions

Copyright 2025 Manuals.Online. All Rights Reserved.