manuals.online logo
Brands
  1. Home
  2. •
  3. Brands
  4. •
  5. Create Room
  6. •
  7. Indoor Furnishing
  8. •
  9. Create Room deluxe crown User manual

Create Room deluxe crown User manual

®
deluxe crown
HARDWARE YOU’LL NEED:
PARTS INCLUDES:
x1
Crown Base
x1
Crown Front
x1
Crown Side (Right)
x1
Crown Side (Left)
x2
Light strip
x1
Splitter
x1
Light Plug
x4
Double Ended Bolts
x24
Locking Cams
x22
Posts
U1123
x1
Crown Lid
x1
Crown Side (Left)
1Carefully access the 4topmost Back Screws and remove them. Save Back Screws as you will need
them for later installation.
2
2
Carefully access the 4topmost Back Screws and remove them. Save Back Screws as you will need
them for later installation. Turn 6 Cams until the arrow is facing up (towards lid of DreamBox).
LH
3
Turn 6 Cams until the arrow is facing up (towards lid of DreamBox). Grab a friend and carefully lift the Center Box Lid.
3
LH
CAUTION: This step requires two people.
34
x24
Cams
Crown Base
Crown Lid
(Top View)
x4
Double
Ended Bolts
4
Grab a friend and carefully lift the Center Box Lid.
4.1: Once the Center Box Lid is removed add 6 posts in Crown Lid.
4.2: Insert Cams into Crown Base and Center Box Lid. Insert Double Ended Bolts into Crown Base.
Tighten Cams.
x6
Posts
45
CB Lid
(Bottom View)
4.1:
4.2:
1
5
x16
Posts
Crown Front
Crown Side (Left) Crown Side (Right)
Crown Lid
Crown Base
4.1: Once the Center Box Lid is removed add 6 posts in Crown Lid.
4.2: Insert Cams into Crown Base and Center Box Lid. Insert Double Ended Bolts into Crown Base.
Tighten Cams.
5.1: Connect Crown Base to Center Box Lid, and tighten Cams by turning until locked.
5.2: Insert Posts into Crown Sides and Crown Front. Insert Cams into Crown Sides.
5.1:
5.2:
56
2
11
66
Grab a friend and carefully lift the Crown Base and Lid and guide the 6 Posts into the holes on CB 1 and
CB2. Once crown is flush carefully tighten Cams on the inside of CB 1 and 2 . Replace the 4 Back Screws
to attach your crown to your DreamBox.
7
CB1
3
11
77
7. 2 :
7.3 :
7.1: Install Crown Sides and Front into Crown Base and Center Box Lid by inserting Posts into
corresponding holes. Tighten Cams by turning until tight.
7.2 : Install 2Light Strips by threading cords through right or left hole on Crown Base. Remove adhesive
back, and adhere it into the grooves underneath the crown lid. Each light has their own on/off switch.
7.3: Connect light strips to Splitter and then connect Splitter to Light Plug. Warning:Warning: Failure to use the
included plug in place of your original plug may result in serious damage or fire.
Arrow
x1
Light strip
x1
Splitter
x1
Light Plug
78
4
11
88Determine the appropriate distance of the safety bracket from the wall. Secure the Safety Brackets in
place by tightening 4 Short Screws into the DreamBox. Locate the wall studs to find the optimal posi-
tion for attachment. Use Large Screws to securely fasten the DreamBox to the wall by anchoring them
into the wall studs. If wall studs cannot be found, utilize Drywall Screws instead and use long screws to
attach the DreamBox to the wall.
x4
Large Screws
(secure to wall)
x4
Drywall Screws
(if needed)
x4
Short Screws
(in lid or crown)
!WARNING: Serious or fatal crushing injuries can occur from tipping furniture.
To prevent tip-over hazard, secure the DreamBox to the wall before use.
TIP:
Stabilizers can be removed, if desired, after
Safety Brackets have been attached.
x2
Safety Bracket
9
(Safety Bracket is included with
original purchase of DreamBox.)
yipee!
YOU’VE DONE IT.
Congrats on your new setup! Remember to share pictures of your crafts and craft
space with us on Facebook @CreateRoomFamily.
Proprietary, patented product and assembly instructions. Do not copy or distribute.

Other Create Room Indoor Furnishing manuals

Create Room Cubby User manual

Create Room

Create Room Cubby User manual

Create Room DREAMCART User manual

Create Room

Create Room DREAMCART User manual
Create Room Sew Station User manual

Create Room

Create Room Sew Station User manual

Create Room DREAMBOX User manual

Create Room

Create Room DREAMBOX User manual

Create Room DREAMCART User manual

Create Room

Create Room DREAMCART User manual
Create Room oh happy day DREAMBOX 2 User manual
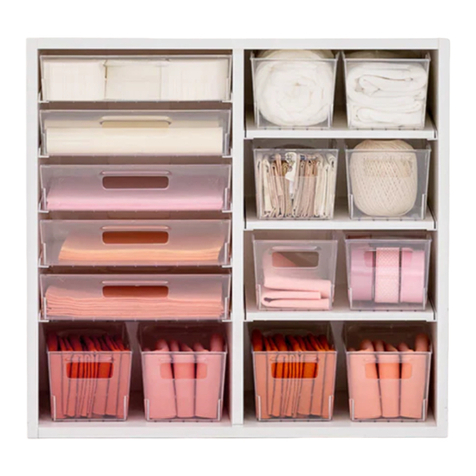
Create Room

Create Room oh happy day DREAMBOX 2 User manual

Create Room Cubby User manual

Create Room

Create Room Cubby User manual

Create Room oh happy day DREAMBOX 2 User manual

Create Room

Create Room oh happy day DREAMBOX 2 User manual

Create Room DREAMBOX User manual

Create Room

Create Room DREAMBOX User manual
Create Room oh happy day User manual

Create Room

Create Room oh happy day User manual

Popular Indoor Furnishing manuals by other brands

Regency LWMS3015 Assembly instructions

Regency

Regency LWMS3015 Assembly instructions

Furniture of America CM7751C Assembly instructions

Furniture of America

Furniture of America CM7751C Assembly instructions

Safavieh Furniture Estella CNS5731 manual

Safavieh Furniture

Safavieh Furniture Estella CNS5731 manual

PLACES OF STYLE Ovalfuss Assembly instruction

PLACES OF STYLE

PLACES OF STYLE Ovalfuss Assembly instruction

Trasman 1138 Bo1 Assembly manual

Trasman

Trasman 1138 Bo1 Assembly manual

Costway JV10856 manual

Costway

Costway JV10856 manual

moss DESIGN Caisson Credenza Assembly instructions

moss DESIGN

moss DESIGN Caisson Credenza Assembly instructions

Aquaglide FULL DECK 15.0 owner's manual

Aquaglide

Aquaglide FULL DECK 15.0 owner's manual

AREBOS AR-HE-SW30 user manual

AREBOS

AREBOS AR-HE-SW30 user manual

Till-Hilft Fulda 87005.330 Assembly instructions

Till-Hilft

Till-Hilft Fulda 87005.330 Assembly instructions

Twoey Outside 2010 quick start guide

Twoey Outside

Twoey Outside 2010 quick start guide

Hettich Easys 200 operating instructions

Hettich

Hettich Easys 200 operating instructions

The bedboss RELAX 404 Series owner's manual

The bedboss

The bedboss RELAX 404 Series owner's manual

Oeseder Möbelindustrie Bern 991 720 Assembly instructions

Oeseder Möbelindustrie

Oeseder Möbelindustrie Bern 991 720 Assembly instructions

Costway HW68469 user manual

Costway

Costway HW68469 user manual

Next ALIX A27743 Assembly instructions

Next

Next ALIX A27743 Assembly instructions

BROSA Hans Assembly guide

BROSA

BROSA Hans Assembly guide

Prodigg MINIKA PBA015T-FUR installation manual

Prodigg

Prodigg MINIKA PBA015T-FUR installation manual

manuals.online logo
manuals.online logoBrands
  • About & Mission
  • Contact us
  • Privacy Policy
  • Terms and Conditions

Copyright 2025 Manuals.Online. All Rights Reserved.