manuals.online logo
Brands
  1. Home
  2. •
  3. Brands
  4. •
  5. Cree
  6. •
  7. Floodlight
  8. •
  9. Cree Edge Series User manual

Cree Edge Series User manual

1 of 2 CI321X01R0
Cree Edge™
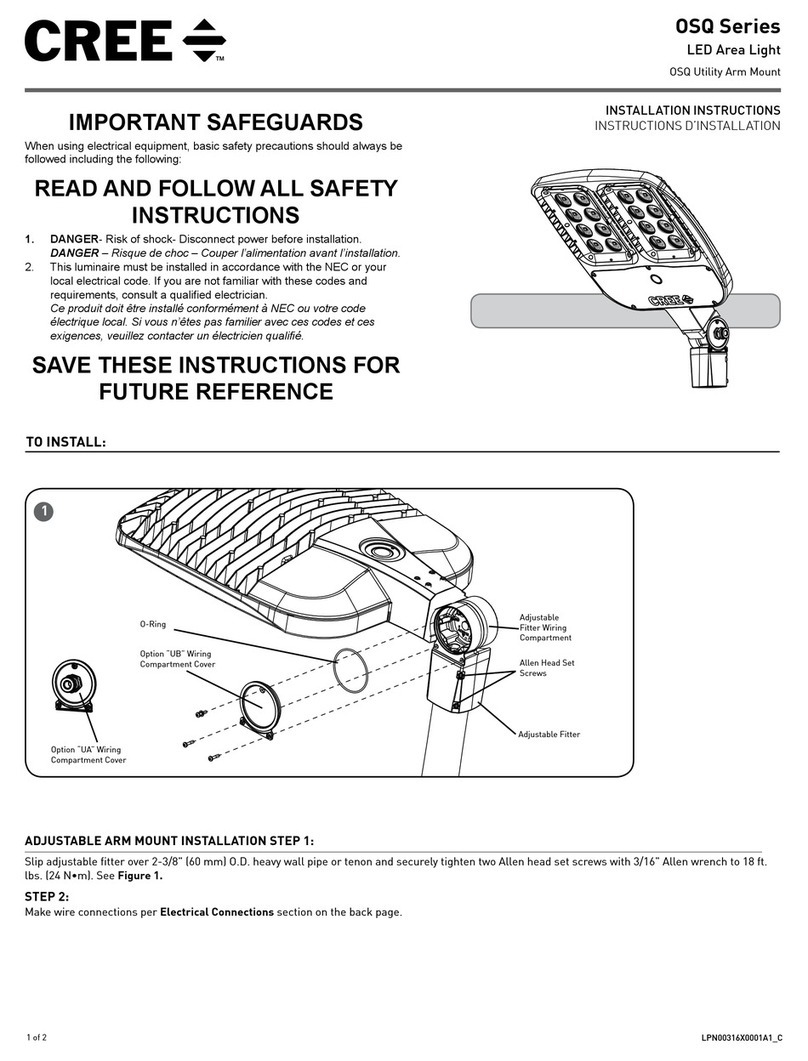
LED Security Wall Mount
Includes: SEC-EDG-WM
INSTALLATION INSTRUCTIONS
INSTRUCTIONS D’INSTALLATION
TO INSTALL:
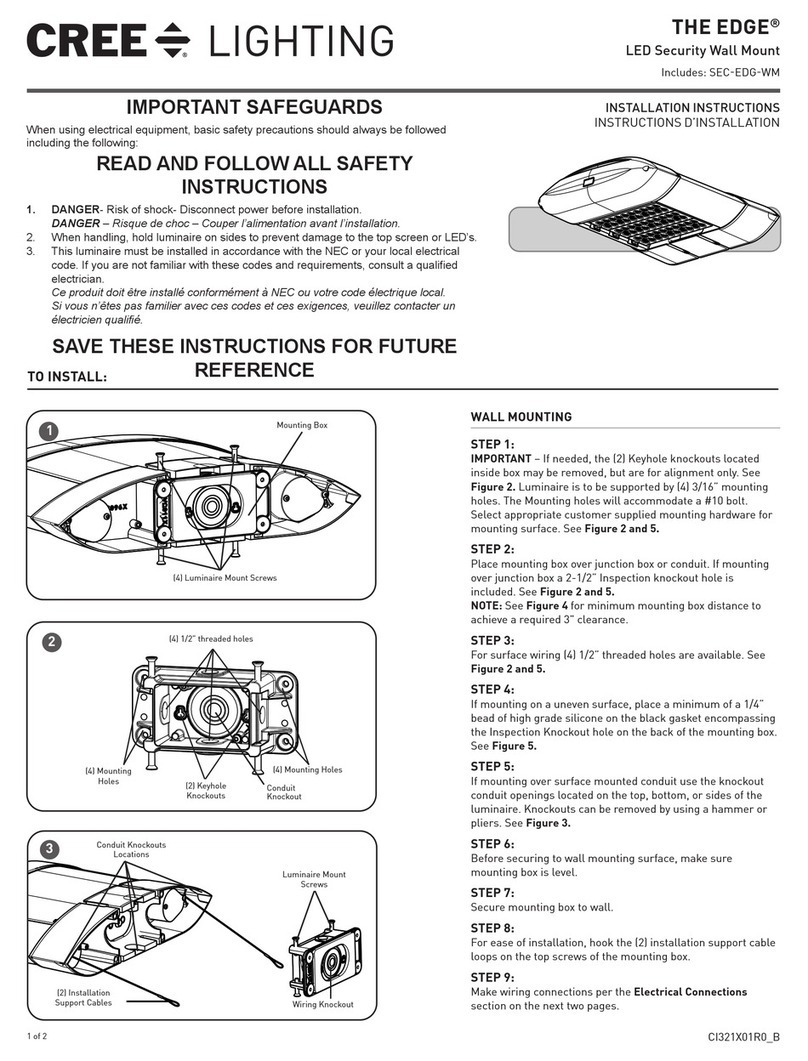
WALL MOUNTING
STEP 1:
IMPORTANT – If needed, the (2) Keyhole knockouts
located inside box may be removed, but are for
alignment only. See Figure 2. Luminaire is to be
supported by (4) 3/16” mounting holes. The Mounting
holes will accommodate a #10 bolt. Select appropriate
customer supplied mounting hardware for mounting
surface. See Figure 2 and 5.
STEP 2:
Place mounting box over junction box or conduit.
If mounting over junction box a 2-1/2” Inspection
knockout hole is included. See Figure 2 and 5.
NOTE: See Figure 4 for minimum mounting box
distance to achieve a required 3" clearance.
STEP 3:
For surface wiring (4) 1/2” threaded holes are available.
See Figure 2 and 5.
STEP 4:
If mounting on a uneven surface, place a minimum of
a 1/4” bead of high grade silicone on the black gasket
encompassing the Inspection Knockout hole on the
back of the mounting box. See Figure 5.
STEP 5:
If mounting over surface mounted conduit use the
knockout conduit openings located on the top, bottom,
or sides of the luminaire. Knockouts can be removed by
using a hammer or pliers. See Figure 3.
STEP 6:
Before securing to wall mounting surface, make sure
mounting box is level.
STEP 7:
Secure mounting box to wall.
STEP 8:
For ease of installation, hook the (2) installation
support cable loops on the top screws of the mounting
box.
1
(2) Installation
Support Cables
Luminaire Mount
Screws
Wiring Knockout
Conduit Knockouts
Locations
(4) Luminaire Mount Screws
Mounting Box
3
2
(2) Keyhole
Knockouts
(4) 1/2" threaded holes
(4) Mounting Holes
(4) Mounting
Holes Conduit
Knockout
IMPORTANT SAFEGUARDS
When using electrical equipment, basic safety precautions should always be
followed including the following:
READ AND FOLLOW ALL SAFETY INSTRUCTIONS
1. DANGER- Risk of shock- Disconnect power before installation.
DANGER – Risque de choc – Couper l’alimentation avant l’installation.
2. When handling, hold luminaire on sides to prevent damage to the top
screen or LED’s.
3. This luminaire must be installed in accordance with the NEC or your local
electrical code. If you are not familiar with these codes and requirements,
consult a qualied electrician.
Ce produit doit être installé conformément à NEC ou votre code électrique
local. Si vous n’êtes pas familier avec ces codes et ces exigences,
veuillez contacter un électricien qualié.
SAVE THESE INSTRUCTIONS FOR FUTURE REFERENCE

2 of 2 CI321X01R0
www.cree.com/lighting
© 2013 Cree, Inc. All rights reserved. For informational purposes only. Content is subject to change. See
www.cree.com/lighting/products/warranty for warranty and specifications. Cree® and the Cree logo are
registered trademarks and Edge™ is a trademark of Cree, Inc.
STEP 9:
Make wiring connections per
the Electrical Connections
section on the next two
pages.
STEP 10:
Unhook the installation
support cables and tuck
the cables neatly into the
housing.
STEP 11:
Place luminaire on mounting
box by sliding the luminaire
so that the (4) Luminaire
Mount Screws on the
mounting box are at the end
of each slot in the housing.
See Figure 3.
STEP 12:
Tighten (4) Phillips screws
and verify luminaire is
secure. See Figure 1.
ELECTRICAL CONNECTIONS
STEP 1:
Make the following Electrical Connections to the terminal block:
a. For 120/277V connect the black fixture lead to the voltage
supply lead (Hot 1 for 208/240V wiring).
b. For 120/277V connect the white fixture lead to the neutral
supply lead. (Hot 2 for 208/240V wiring).
c. Connect the green or green/yellow ground lead to the
green lead.
LINE
OR HOT 1
GREEN
LINE-BLACK
GROUND-GREEN
NEUTRAL-WHITE
NEUTRAL
OR HOT 2
SUPPLY WIRING
LUMINAIRE
7.0"
6.0"
Mounting
2.4"
Mounting
3.4"
5
(4) Mounting Holes
for 3/16" Customer
supplied Screws
Keyhole Knockouts- Provided
for Alignment Over Junction Box
ONLY
1/2" Conduit Knockout
2-2/12" Inspection Knockout Hole for
Mounting Over Recessed Junction Box
4
3.500" Min. Box Mounting
Ht. to Achieve 3" Required
Clearance Above Fixture

This manual suits for next models

1

Other Cree Floodlight manuals

Cree Edge Series User manual

Cree

Cree Edge Series User manual

Cree NTF Series User manual

Cree

Cree NTF Series User manual

Cree OSQ Series User manual

Cree

Cree OSQ Series User manual

Cree NTF Series User manual

Cree

Cree NTF Series User manual

Cree NTF Series User manual

Cree

Cree NTF Series User manual

Popular Floodlight manuals by other brands

PLUSLITE DUOBAT-PL073 User instructions

PLUSLITE

PLUSLITE DUOBAT-PL073 User instructions

ONNLINE CGS927 instruction manual

ONNLINE

ONNLINE CGS927 instruction manual

Colorlight CLITE2IR Installation & user manual

Colorlight

Colorlight CLITE2IR Installation & user manual

ProLights Evo190E user manual

ProLights

ProLights Evo190E user manual

Golight 2000 Instruction guide

Golight

Golight 2000 Instruction guide

thomann STAIRVILLE HL-x9 Quad Color user manual

thomann

thomann STAIRVILLE HL-x9 Quad Color user manual

Intermatic Malibu CL9 instructions

Intermatic

Intermatic Malibu CL9 instructions

Music & Lights PROLIGHTS WIZARD user manual

Music & Lights

Music & Lights PROLIGHTS WIZARD user manual

Intermatic Malibu CL115 instructions

Intermatic

Intermatic Malibu CL115 instructions

ASTORA WS 840D quick start guide

ASTORA

ASTORA WS 840D quick start guide

RAB Lighting FLOODZILLA quick start guide

RAB Lighting

RAB Lighting FLOODZILLA quick start guide

Life 39.9F4030C user manual

Life

Life 39.9F4030C user manual

Terex RL4000D2 Service manual

Terex

Terex RL4000D2 Service manual

ACME TS-300M CW user manual

ACME

ACME TS-300M CW user manual

MAXSA 40330 operating instructions

MAXSA

MAXSA 40330 operating instructions

American DJ Revo 4 General information

American DJ

American DJ Revo 4 General information

Sealey LED30WDL manual

Sealey

Sealey LED30WDL manual

Maurer 82079 manual

Maurer

Maurer 82079 manual

manuals.online logo
manuals.online logoBrands
  • About & Mission
  • Contact us
  • Privacy Policy
  • Terms and Conditions

Copyright 2025 Manuals.Online. All Rights Reserved.