manuals.online logo
Brands
  1. Home
  2. •
  3. Brands
  4. •
  5. Crestron
  6. •
  7. Speakers
  8. •
  9. Crestron SAROS SR4T User manual

Crestron SAROS SR4T User manual

Saros®2-Way Surface Mount Speakers
quickstart guide
SAROS_SR4T/SR6T/SR8T
www.crestron.com
888.273.7876 201.767.3400
Specifications subject to
change without notice.
SAROS_SR4T/SR6T/SR8T
QUICKSTART DOC. 7149D (2033424) 08.13
1
1Installation
NOTE: Before starting installation, ensure the wall and wall material is capable of supporting the combined
weight of the speakers and the wall mount assemblies. Refer to section
➌
"Specifications" for weights.
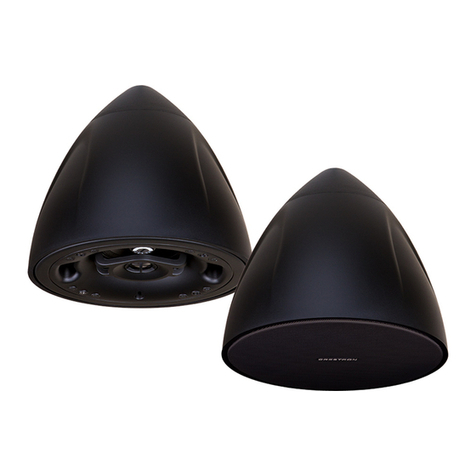
Saros®speakers by Crestron®deliver professional grade performance and
flexible installation in a range of popular sizes for demanding commercial
applications. Solid construction and high end components are hallmarks of the
complete Saros speaker line. Each Saros model is engineered to achieve a
smooth, even coverage pattern, and clear, natural sound quality through the
employment of a horn loaded titanium dome tweeter, high performance
damped cone woofer, and a finely tuned crossover.
Featuring a unique “Quick Ball” mounting system, the Saros speakers can be
mounted to any solid flat surface with the ability to orient and aim the speaker
in virtually any position. The Quick Ball bracket achieves a very clean and
stable installation using a tool-free ball-and-socket mechanism. Simply
position the speaker as desired and flip the clamp lever closed. A security
screw is included to deter theft by preventing the lever from being released.
Saros speakers, supplied in pairs, are available in black or white and can be
painted to blend with the surrounding architecture.
2Physical Views (SAROS_SR8T Shown)
Front View
(Grill Removed)
10.73 in
(273 mm
)
2.16 in
(55 mm)
Side View
Rear View
(Mounting Bracket
Removed)
6.94 in
(177 mm)
9.05 in
(230 mm)
Bottom View
9.57 in
(244 mm)
13.31 in
(338 mm)
Security
Cable
Attachment
Point
Security
Screw
Speaker
Cable
Access
Hole
Ball Socket
Clamp Lever
Detachable
Screw Terminal Block
Quick Ball
Mounting
Bracket
From
Audio
Source
To
Parallel
Speaker
Refer to the illustration to the right as necessary, and install the speakers as
follows:
1. Route the cables from the audio source to the intended speaker locations
following all appropriate local codes.
2. Attach the Quick Ball mounting bracket directly to the wall or to a flush mounted
1-gang US, UK, or European electrical box, allowing the cable coming through
the wall (and the electrical box, if used) to exit through the speaker cable
access hole of the mounting bracket.
NOTE: If the mounting bracket is to be attached to an electrical box, be
sure it is also attached to surrounding framing, to provide the support
needed to hold the weight of the speaker.
The Quick Ball mounting bracket can also be mounted to a light pole or post
using pole-mounting straps (not included).
3. Detach the 4-pin screw terminal block connector from the speaker. Connect the
audio source’s + and - outputs to the connector’s outer +and -(IN) terminals.
Maximum wire size is 12 AWG. Use the inner +and -(THRU) terminals to
connect a second speaker in parallel.
NOTE: The number of speakers that can be added is limited only by the
specifications of the amplifier.
a. Strip the wires 1/4 in (~6 mm), twist the strands, insert them into the
terminal block, and tighten the screws to secure them.
b. Reattach the terminal block to the speaker connector.
+ + - -
IN
THRU
SAROS_SR4T
Transformer Tap
Selection Switch
Label
4. Carefully mount the speaker on the Quick Ball mounting bracket, rotate
and set the speaker at the desired angle, and raise the ball socket clamp
lever into position against the bottom of the speaker to secure the speaker
in position. Use the supplied security screw to prevent the lever from being
accidentally pulled, releasing the speaker.
5. Attach a security cable (SPKA-ST-15, sold separately) to the security cable
attachment point. The other end of the cable must be attached to a
secondary point able to support several times the weight of the speaker.
6. The Saros speakers are equipped with a 70V/100V matching transformer
for distributed audio systems. The transformer tap selector switch on the
rear panel is used for setting the speaker power level. Use a flat blade
screwdriver to adjust the switch.
a. For SAROS_SR4T 70V distributed systems, use the left side settings
and select from 1.88, 3.75, 7.5, 15, or 30 watts.
b. For SAROS_SR4T 100V distributed systems, use the right side
settings and select from 3.75, 7.5, 15, or 30 watts. The Xposition
should not be used.
c. For SAROS_SR6T and SAROS_SR8T 70V distributed systems, use
the left side settings and select from 3.75, 7.5, 15, 30, or 60 watts.
d. For SAROS_SR6T and SAROS_SR8T 100V distributed systems, use
the right side settings and select from 7.5, 15, 30, or 60 watts. The X
position should not be used.
The switch may also be set to 8Ω operation, bypassing the transformer
completely. This setting should be used only for 8 Ω audio systems.
SAROS_SR6T,
SAROS_SR8T
Transformer Tap
Selection Switch
SAROS_SR4T/SR6T/SR8T
quickstart guide
SAROS_SR4T/SR6T/SR8T
www.crestron.com
888.273.7876 201.767.3400
Specifications subject to
change without notice.
Saros®2-Way Surface Mount Speakers
SAROS_SR4T/SR6T/SR8T
QUICKSTART DOC. 7149D (2033424) 08.13
The specific patents that cover Crestron products are listed at patents.crestron.com.
Crestron, the Crestron logo, and Saros are either trademarks or registered trademarks of Crestron Electronics, Inc. in the
United States and/or other countries. Other trademarks, registered trademarks, and trade names may be used in this
document to refer to either the entities claiming the marks and names or their products. Crestron disclaims any proprietary
interest in the marks and names of others. Crestron is not responsible for errors in typography or photography.
This document was written by the Technical Publications department at Crestron.
©2013 Crestron Electronics, Inc.
3Specifications
2
SPECIFICATION SAROS_SR4T
Drivers
Woofer
Tweeter
Crossover Frequency
Impedance
Transformer Taps
Frequency Response
Frequency Range
Power Handling
Sensitivity
Environmental
Temperature
Humidity
Construction
Enclosure
Grill
Mounting
Dimensions
Height
Width
Depth
SAROS_SR4T/SR6T/SR8T Specifications
Positioning
Yaw (Horizontal)
Pitch (Vertical)
Roll
4 in (102 mm) polypropylene with treated
cloth “W” surround and steel basket
0.79 in (20 mm) horn-loaded titanium
dome
2.5 kHz
8 Ω nominal with transformer set to 8Ω
“bypass”
1.88, 3.75, 7.5, 15, 30 watts at 70 V;
3.75, 7.5, 15, 30 watts at 100 V
100 Hz to 16 kHz (±3 dB)
80 Hz to 18 kHz (-10 dB)
100 watts program (8 Ω)
-2º to 120º F (-19º to 49º C)
5% to 95% RH (non-condensing)
ABS plastic, textured finish, paintable
Aluminum, powder coated, paintable
Surface mount to a solid flat surface with
option to position over a flush-mounted
1-gang electrical box, 1-gang UK (BS
4662) electrical box, or 1-gang European
(DIN 49073) electrical box; pole mount
(straps not included); rigging point for
safety tether (SPKA-ST-15 sold
separately); theft-resistant security screw
8.67 in (220 mm)
5.91 in (151 mm)
6.55 in (167 mm), 8.66 in (220 mm)
with mounting bracket
± 30°
± 30°
360°
8 in (203 mm) polypropylene with treated
cloth “W” surround and steel basket
0.98 in (25 mm) horn-loaded titanium
dome
2 kHz
8 Ω nominal with transformer set to 8Ω
“bypass”
3.75, 7.5, 15, 30, 60 watts at 70 V;
7.5, 15, 30, 60 watts at 100 V
80 Hz to 16 kHz (±3 dB)
60 Hz to 18 kHz (-10 dB)
200 watts program (8 Ω)
-2º to 120º F (-19º to 49º C)
5% to 95% RH (non-condensing)
ABS plastic, textured finish, paintable
Aluminum, powder coated, paintable
Surface mount to a solid flat surface with
option to position over a flush-mounted
1-gang electrical box, 1-gang UK (BS
4662) electrical box, or 1-gang European
(DIN 49073) electrical box; pole mount
(straps not included); rigging point for
safety tether (SPKA-ST-15 sold
separately); theft-resistant security screw
13.31 in (338 mm)
9.57 in (244 mm)
6.94 in (177 mm), 9.05 in (230 mm)
with mounting bracket
± 30°
± 30°
360°
SAROS_SR6T
6 in (153 mm) polypropylene with treated
cloth “W” surround and steel basket
0.98 in (25 mm) horn-loaded titanium
dome
2 kHz
8 Ω nominal with transformer set to 8Ω
“bypass”
3.75, 7.5, 15, 30, 60 watts at 70 V;
7.5, 15, 30, 60 watts at 100 V
90 Hz to 16 kHz (±3 dB)
70 Hz to 18 kHz (-10 dB)
-2º to 120º F (-19º to 49º C)
5% to 95% RH (non-condensing)
ABS plastic, textured finish, paintable
Aluminum, powder coated, paintable
Surface mount to a solid flat surface with
option to position over a flush-mounted
1-gang electrical box, 1-gang UK (BS
4662) electrical box, or 1-gang European
(DIN 49073) electrical box; pole mount
(straps not included); rigging point for
safety tether (SPKA-ST-15 sold
separately); theft-resistant security screw
11.19 in (285 mm)
8.08 in (205 mm)
6.75 in (172 mm), 8.86 in (225 mm)
with mounting bracket
± 30°
± 30°
360°
150 watts program (8 Ω)
SAROS_SR8T
89.5 dB @ 1W/1m 90 dB @ 1W/1m 91.5 dB @ 1W/1m
The following table provides corrective action for possible trouble situations.
If further assistance is required, please contact a Crestron customer service
representative.
Further Inquiries
To locate specific information or resolve questions after reviewing this guide, contact
Crestron's True Blue Support at 1-888-CRESTRON [1-888-273-7876] or, for
assistance within a particular geographic region, refer to the listing of Crestron worldwide
offices at www.crestron.com/offices.
To post a question about Crestron products, log onto Crestron’s Online Help at
www.crestron.com/onlinehelp. First-time users must establish a user account to fully
benefit from all available features.
Future Updates
As Crestron improves functions, adds new features and extends the capabilities of the
SAROS_
SR4T/SR6T/SR8T speakers
, additional information may be made available as
manual updates. These updates are solely electronic and serve as intermediary
supplements prior to the release of a complete technical documentation revision.
Check the Crestron Web site periodically for manual update availability and its relevance.
Updates are identified as an “Addendum” in the Download column.
4Problem Solving
Troubleshooting
TROUBLE POSSIBLE CAUSE(S) CORRECTIVE ACTION
No sound or
intermittent sound
from speakers.
Cable connection error. Verify cable connections between
amplifier and speakers.
Amplifier not receiving
input signal or amplifier
malfunction.
Verify amplifer is functioning
correctly, that it is receiving an input
signal and that correct input source
is selected.
Faulty device in system. Verify all devices in system are
functioning properly.
Constant noise such as
buzz, hum or hiss from
speakers. System grounding fault. Verify system grounding.
Poor low frequency
output.
Incorrect polarity connection
at speaker or amplifier.
Verify speaker connection polarity
(i.e. +on amplifier to +on speaker).
Weight 5.9 lb (~3 kg) 10.1 lb (~5 kg)8.3 lb (~4 kg)
This manual suits for next models

2

Other Crestron Speakers manuals

Crestron SAROS PD4T User manual

Crestron

Crestron SAROS PD4T User manual

Crestron SAROS IC6LPT User manual

Crestron

Crestron SAROS IC6LPT User manual

Crestron Aspire IC5 User manual

Crestron

Crestron Aspire IC5 User manual

Crestron UC-SB1 User manual

Crestron

Crestron UC-SB1 User manual

Crestron REFERENCE OD4.1-4-S10-BRZ-T KIT User manual

Crestron

Crestron REFERENCE OD4.1-4-S10-BRZ-T KIT User manual

Crestron IW5 User manual

Crestron

Crestron IW5 User manual

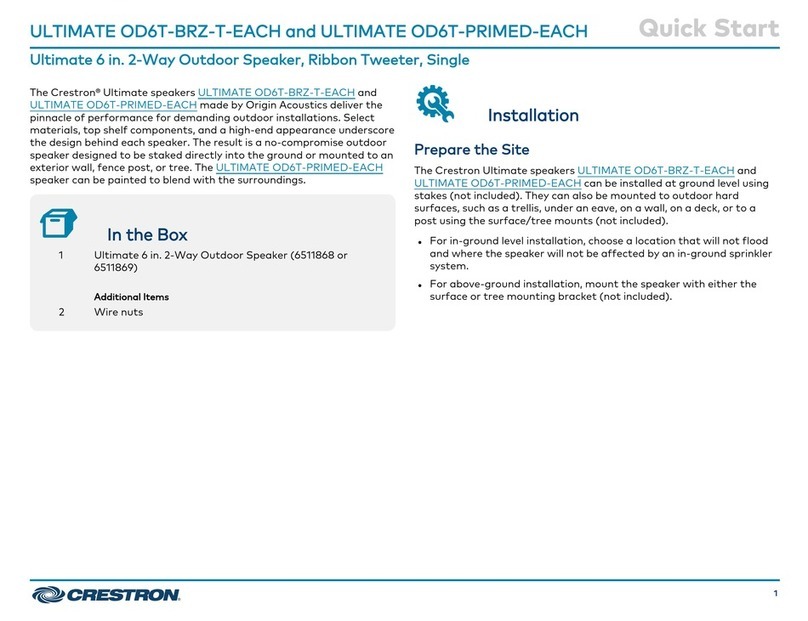
Crestron ULTIMATE OD6T-BRZ-T-EACH User manual

Crestron

Crestron ULTIMATE OD6T-BRZ-T-EACH User manual

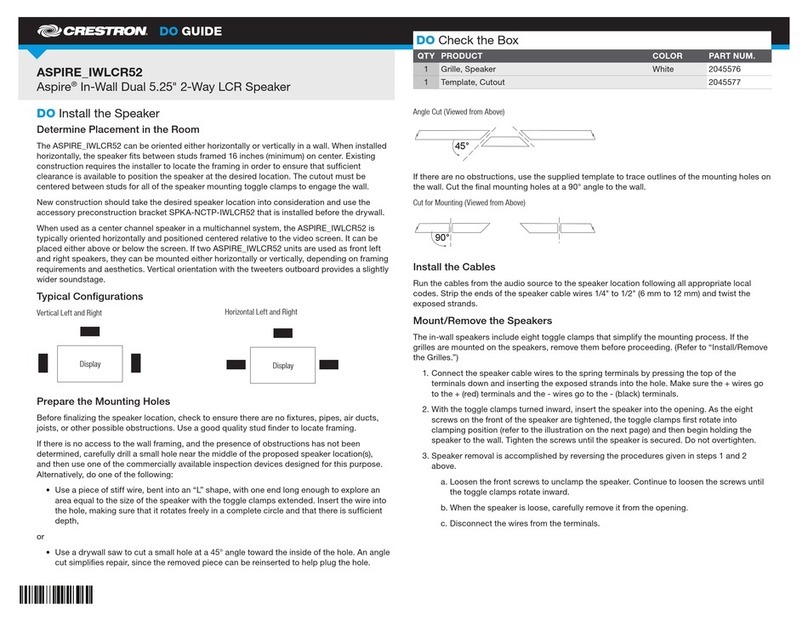
Crestron ASPIRE_IWLCR52 Dimensional drawing

Crestron

Crestron ASPIRE_IWLCR52 Dimensional drawing

Crestron SAROS ICS8T User manual

Crestron

Crestron SAROS ICS8T User manual

Crestron ULTIMATE IC6-W-T-EACH User manual

Crestron

Crestron ULTIMATE IC6-W-T-EACH User manual

Crestron Excite IC6DT User manual

Crestron

Crestron Excite IC6DT User manual

Crestron FS6-B User manual

Crestron

Crestron FS6-B User manual

Crestron VECTOR CD896 User manual

Crestron

Crestron VECTOR CD896 User manual

Crestron SAROS ICI4T Dimensional drawing

Crestron

Crestron SAROS ICI4T Dimensional drawing

Crestron SPK-6L User manual

Crestron

Crestron SPK-6L User manual

Crestron SAROS ICT5T-12-W-T-EACH+ User manual

Crestron

Crestron SAROS ICT5T-12-W-T-EACH+ User manual

Crestron SAROS IC4T User manual

Crestron

Crestron SAROS IC4T User manual

Crestron Aspire IC8DT User manual

Crestron

Crestron Aspire IC8DT User manual

Crestron SPKA-BC-IC6 User manual

Crestron

Crestron SPKA-BC-IC6 User manual

Crestron AIR SR4 User manual

Crestron

Crestron AIR SR4 User manual

Crestron ESSENCE IC5 User manual

Crestron

Crestron ESSENCE IC5 User manual

Crestron Aspire IW5 User manual

Crestron

Crestron Aspire IW5 User manual

Crestron ULTIMATE IC8-AW-W-T-EACH User manual

Crestron

Crestron ULTIMATE IC8-AW-W-T-EACH User manual

Crestron Ultimate IC3-AW-SA-BOX-WOOFER-W-T-EACH User manual

Crestron

Crestron Ultimate IC3-AW-SA-BOX-WOOFER-W-T-EACH User manual

Popular Speakers manuals by other brands

RCF MQ 50i user manual

RCF

RCF MQ 50i user manual

Anchor Xtreme XTR-6000CU2 owner's manual

Anchor

Anchor Xtreme XTR-6000CU2 owner's manual

auna Areal Bar 355 instruction manual

auna

auna Areal Bar 355 instruction manual

Blackweb BWA18SB001 quick start guide

Blackweb

Blackweb BWA18SB001 quick start guide

ION POWER GLOW 300 quick start guide

ION

ION POWER GLOW 300 quick start guide

Philips HTL3140B quick start guide

Philips

Philips HTL3140B quick start guide

Toa HY-PF1B installation manual

Toa

Toa HY-PF1B installation manual

Genelec 1036A datasheet

Genelec

Genelec 1036A datasheet

Mackie HD1521 owner's manual

Mackie

Mackie HD1521 owner's manual

iHome iBT371 quick start guide

iHome

iHome iBT371 quick start guide

RCF BD 5EN user manual

RCF

RCF BD 5EN user manual

Grandstream Networks GSC3516 user manual

Grandstream Networks

Grandstream Networks GSC3516 user manual

HEOS HomeCinema owner's manual

HEOS

HEOS HomeCinema owner's manual

HEADRUSH FRFR-108 user guide

HEADRUSH

HEADRUSH FRFR-108 user guide

KEF FiveTwo 7 Specifications

KEF

KEF FiveTwo 7 Specifications

Sonus Faber Lilium owner's manual

Sonus Faber

Sonus Faber Lilium owner's manual

XINDAO XD DESIGN P326.63 Series manual

XINDAO

XINDAO XD DESIGN P326.63 Series manual

Videx 4832 Installation instruction

Videx

Videx 4832 Installation instruction

manuals.online logo
manuals.online logoBrands
  • About & Mission
  • Contact us
  • Privacy Policy
  • Terms and Conditions

Copyright 2025 Manuals.Online. All Rights Reserved.