CRUSSIS PAN-Guera 8.8 User manual

Electric bicycle
user manual
CZECH MANUFACTURER OF E-BIKES
Enjoy your ride!
E
GX Ultimate I GX Power Plus
PAN-Guera 8.8
PAN-Atland 8.8
PAN-Fionna 8.8
PAN-Largo 8.8
ONE-PAN Guera 8.8
ONE-PAN Largo 8.8
ONE-PAN Guera 9.8
ONE-PAN Largo 9.8
ONE-PAN Cross 9.8
ONE-PAN Cross low 9.8
PAN-Guera 9.8
PAN-Atland 9.8
PAN-Fionna 9.8
PAN-Largo 9.8
PAN-Cross 9.8
PAN-Cross low 9.8


Content
Foreword .................................................................................................................................4-5
General warnings .................................................................................................................6-10
Electric bike system ............................................................................................................11-14
Electric bike control (color LCD display) ...........................................................................14-41
Troubleshooting .......................................................................................................................42
Maintenance and storage .......................................................................................................43
Notice ........................................................................................................................................44
Warranty ...................................................................................................................................44

4
FOREWORD
Dear users,
thank you for purchasing a CRUSSIS e-bike! We appreciate you choosing our product.
For proper operation of the CRUSSIS e-bike, read the product information carefully be-
fore using it. In this manual we inform you about all the details related to the use of the
e-bike (including the installation of the device, settings and normal use of the display).
This manual will also help you solve any ambiguities and problems.
CRUSSIS ELECTROBIKES s.r.o wishes you many beautiful and safe kilometers on the
new e-bike.
A list of CRUSSIS dealers can be found on the website www.crussis.com.
WHAT IS AN E-BIKE?
It is a classic bicycle that is equipped with an electric motor. This can be located in the centre, rear
or front hub. The maximum assist speed is limited to 25 km/h and this limitation corresponds to the
European standard EN 15194-1 (the electric motor is switched offwhen exceeding this speed and
switches on as soon as the speed falls below this limit). Furthermore, the bike is equipped with a
battery that can be placed in the frame or on the rear rack. The most important parameters of the
battery are voltage and capacity. The higher the values, the greater the range of the e-bike. Current-
ly, lithium-ion (Li-ion) batteries are the most commonly used. The advantage of these batteries is
mainly in their low weight and long service life. It is important to keep the battery regularly rechar-
ged to prolong its life. The communication between the individual electrical components is provided
by a control unit that evaluates the data from the individual sensors, according to which it controls
the performance of the electric motor. Operation of the electric motor is provided by a control panel
which provides information on battery status, support level and remaining range. Time, speed and
distance travelled are standard on most displays. The motor function is activated by pedalling, which
is sensed by a special sensor located in the pedal centre. So you have to keep pedaling the e-bike,
the motor only helps you. The pedalling sensor is responsible for informing the control unit whether
the rider has started or stopped pedalling and informs about the pedalling frequency. This function
is taken care of by either a magnetic waist sensor or a torsion sensor. The magnetic waist sensor is a
basic sensor that works on the magnetic principle. This sensor, which is installed on the center axis,
checks the pedaling frequency. Activation of the sensor by back pedalling is impossible due to the
magnets being out of phase. Torsion sensors are used on more expensive sports bikes. Compared
to magnetic sensors, they provide information about both the frequency of pedalling and the force
exerted on the pedal. A torsion sensor is ideal for off-road riding where there are frequent changes
in pedaling frequency. If we need to pedal with more force, the motor will immediately help us with
more power. On the other hand, when riding downhill, when less pedal pressure is applied, the mo-
tor function is reduced, thus saving battery power. You can set the e-bike in motion using the control
button , which is located on the display controller, but only up to the maximum speed limit, i.e.
6km/h (used to assist walking). On an electric bicycle that complies with the European standard

5
7
8
9
10
11
12
EN 15194-1, is considered as a normal bicycle in terms of the Road Traffic Act. This means that
you can ride on cycle paths, you do not need a driving licence and a helmet is only compulsory
up to the age of 18. We recommend the use of a bicycle helmet to all users regardless of age.
Switching on the e-bike
1. Press the on/offbutton on the battery briefly to switch on the battery (see page 12 for more
information),
2. press the on/offbutton on the display for approx. 2 seconds to switch on the display,
3. select the desired level of assistance on the display (see page 14 for more on displays).
Switching offthe e-bike
1. press the on/offbutton on the display briefly to switch offthe display,
2. press the on/offbutton on the battery for approx. 2 seconds to switch offthe battery.
Electric bike components
1
2
3
4
5
6
3. control panel
12. tire and rim
11. derailleur 4. torque sensor
(inside of the motor)
2. motor
9. cranks and pedals
10. quick release
skewer
7. brakes
5. brake levers
8. shifter lever
6. battery lock
1. battery
battery
motor
control panel (lcd display)
torque sensor (inside of the motor)
brake levers
battery lock
brakes
shifter lever
cranks and pedals
quick release skewer
derailleur
tire and rim
R
oad Tra
ffi
c Act. This means that
a
nd a helmet is onl
y
com
p
ulsor
y
e
t to all users re
g
ardless o
f
a
g
e
.
the batter
y
(see pa
g
e 12
f
or more

6
GENERAL WARNINGS
Riding an e-bike, like other sports, can pose a risk of injury and damage. If you want to use an e-bike,
you must learn and follow the rules of safe riding, proper use and maintenance of an e-bike. Regular
maintenance and proper use will reduce the risk of injury and extend the life of the product.
The electric bike models PAN-Guera, PAN-Atland, PAN-Fionna, PAN-Largo, ONE-PAN Guera,
ONE-PAN Largo are suitable for riding on paved roads, cycle paths, gravel and forest roads,
off-road riding. The e-bikes are equipped with tires with a coarser tread pattern to ensure
sufficient grip for off-road riding. Therefore, vibrations may occur when riding on smooth
surfaces (asphalt, concrete...).
The PAN-Cross, ONE-PAN Cross, PAN-Cross low, ONE-PAN Cross low models are suitable for
riding on paved roads, bike paths, gravel and forest roads.
E-bikes should not be used for wading, for any jumping and impacts from height, do not use
them for extreme riding in difficult terrain (downhill, enduro, riding on obstacles)!
We recommend that you have your e-bike assembled and adjusted by a professional e-bike
workshop.
The e-bike can be used as a conventional bicycle without the assistance of an electric motor. During
unassisted riding (i.e. assistance OFF), every e-bike puts some resistance caused by the transmission
in the motor.
Check before your first ride:
• The right size of e-bike: An inappropriately chosen bike size can affect the handling of an e-bike.
• Saddle adjustment: the correct height and position of the saddle affects the comfort and han-
dling of the bike. The position of the saddle on the seat tube is determined by the scale on the
seat rails, there is a marking for the maximum distance and proximity to the handlebars!
Please note: The maximum permissible height of the seat tube is marked with a line on the
seat tube. Never set the seat tube above this height! This will prevent damage to the frame of
the e-bike or the seat tube and possible injury.
• The correct height of the stem and handlebars.
Regular check:
Check the condition of your e-bike regularly before each ride. In this way, many technical problems
can be prevented in time. The consequences of an irregular check can be disastrous in many cases.
The life expectancy of the frame or components is influenced by the construction and material used,
as well as maintenance and intensity of use. Regular inspections by qualified professionals should
be a matter of course. Lift the e-bike to a height of 5-10 cm above the ground and drop it. This should
reveal any loose components. Then carry out a visual and tactile check of the whole e-bike, especi-
ally the correct tightening of all bolts, nuts, pedal centre, pedals etc.

7
Wheels and tires: Check that the tires are properly inflated. Riding on an underinflated or overinfl
ated tire can lead to poor e-bike control. We recommend to follow the maximum and minimum pre-
ssure values specified by the manufacturer on the tire. Check the tires for wear and proper shape. If
bumps or cracks appear on the tires, you must replace the tires before use. Then check whether the
wheels are correctly centered by turning them. Check if spokes are thight or are not missing. Make
sure that the front and rear wheels are properly secured (Fig. 1). If it is a wheel with a Thru-Axle,
make sure that the axle is fitted in the correct direction (at the front wheel).
Brakes: Check the function of the brakes. Press both brake levers and push the e-bike forward. Are
the brake pads in full contact with the disc without the levers touching the handlebars? If not, the
brakes must be adjusted (bled). Check the brake pads for wear. Brake pads and discs are worn out
during use, so it is necessary to service the brakes regularly and replace worn parts in time.
Gear shifting and chain: The chain requires regular maintenance to extend its lifetime. Before
lubrication, it is advisable to clean the chain and pinions first. Lubricate the chain with the lubricant
designated for the bicycle chain. The chain stretches over time. The lifespan of the chain is very
individual and depends on the quality of the chain, the mileage, the riding style and the terrain in
which you ride. Regular replacement is necessary. The condition of the chain can be checked with
a special gauge. A stretched or damaged chain can damage the gears and pinions. During shifting,
the shifter cable becomes worn and stretched. The shifting needs to be adjusted regularly to switch
correctly. By loosening or tightening the bowden nut at the shifter lever, fine corrections can be
achieved.
Forks: You can find different types of forks on Crussis e-bikes.
You should never lock the fork when riding off-road or jumping. The fork may be damaged
when compressed under heavy loads. This can also result in an accident and injury.
Also note that the fork is not intended for extreme terrain, jumps, downhill, freeride or dirt
jumps. Failure to follow this information may result in damage to the fork, accident or death.
Failure to follow this information will void the warranty.
ROCKSHOX suspension fork
RockShox FS Judy Silver TK Solo Air 29“
(PAN-Fionna 8.8-M / 9.8-M,
PAN-Largo 8.8-M / 8.8-L / 9.8-M / 9.8-L,
ONE-PAN Largo 8.8-M / 9.8-M)
Stroke: 100 mm
Fork column: 1 1/8“
Suspension: Solo Air
Locking: from fork (crown)
Axis: RU 9 mm
1.
g
on an underin
fl
ated or overin
fl
the maximum and minimum
p
re-
ires
f
or wear and
p
ro
p
er sha
p
e. I
f
f
ore use. Then check whether the
e thi
g
ht or are not missin
g
. Make
.
I
f
it is a wheel with a Thru-Axle,
n
t wheel
).
RockShox FS Judy Silver TK Solo Air 27,5“
(PAN-Atland 8.8-M / 8.8-L / 9.8-M / 9.8-L, PAN-Gu-
era 8.8-M / 9.8-M,
ONE-PAN Guera 8.8-M / 9.8-M)
Stroke: 100 mm
Fork column: 1 1/8“
Suspension: Solo Air
Locking: from fork (crown)
Axis: RU 9 mm

8
RockShox FS Paragon Gold RL Solo Air 700c
(PAN-Cross 8.8-M, ONE-PAN Cross 8.8-M, PAN-Cross low 8.8-M, ONE-PAN Cross low 8.8-M)
Stroke: 65 mm
Fork column: 1 1/8“
Suspension: Solo Air
Locking: from fork (crown)
Axis: RU 9 mm
IMPORTANT SAFETY INFORMATION
1. It is very important to have the RockShox suspension fork installed correctly by a qualified bicycle
mechanic. Improperly installed forks are extremely dangerous and can cause serious or fatal inju
ries.
2. The fork on your bike is designed for use by a single rider on mountain roads and similar terrain
conditions. It is not advisable to drive off-road when the fork is locked.
3. Before driving, make sure that the brakes are properly installed and adjusted. Use the brakes
carefully and familiarize yourself with their properties and braking performance in non emergency
conditions. Hard braking or improper use of the front brake can cause you to fall. If the brakes are
not properly adjusted or improperly installed, the rider can be seriously or fatally injured.
4. The fork may malfunction under certain circumstances. For instance if oil is lost, components or
parts of the fork are bent or cracked. The fault in the fork may not be visible. Do not ride a bicycle if
you notice bent or broken fork parts, oil loss, sounds due to excessive suspension, or other indicati-
ons of a possible fork defect, such as loss of shock absorbing properties. Take your bike to a qualifi
ed dealer for inspection and repair. Damage to the fork may result in wheel damage or personal
injury. Suspension forks and rear shock absorbers contain highly pressurized liquids and gases. The
warnings in this manual must be followed to prevent injury or death. Never try to open the cartridge
or the rear silencer, they are under a lot of pressure, as mentioned above. If you try to open the
cartridge or the rear absorber, you risk serious injuries.
5. Always use genuine RockShox parts. The use of non-original spare parts will void the wa-
rranty and may cause a structural defect in the fork. A structural failure can cause you to lose
control of your bicycle with possible serious or fatal injuries.
6. If you use a bike carrier on a car, the instructions for use of the bike carrier must be followed du-
ring any handling. If you are carrying the bike in a carrier on or behind the car in bad weather, you
need to protect the bike from water with a suitable cover. Because when driving in the rain, e-bike is
exposed to pressure of the water and it i is equal to a pressure washing, which can seriously damage
the bike.
7. The fork is designed to secure the front wheel with a quick release or thru-Axle . Make sure you
understand which shaft your wheel has and how to handle it properly. Do not use a screw on the
shaft. An incorrectly mounted wheel can allow the wheel to move or release, this can cause the da

9
mage to the bicycle and serious injury or death to the rider.
8. Follow all instructions in the user manual regarding care and maintenance of this product.
INSPECTION AND MAINTENANCE
Before each ride
If you find any cracks, dents, abrasions, deformations, or oil leaks on the fork or other components,
contact a qualified mechanic to inspect the fork or e-bike.
Check air pressure. Load the fork with all your weight. If you find it soft, pump the fork to the requi-
red hardness. (For more information, see the section „Setting the air pressure“).
Check the wheel mounting and cable and bowdens routing - they must not restrict the movement
of the handlebars.
After each ride
Clean all dirt. Do not use high-pressure cleaners - water may flow through the dusters into the fork.
Lubricate the dust seals and fork legs. Do not use other oil than designed for forks lubrication. Con-
sult your dealer for the use of a suitable oil.
Every 25 hours of drive
Oil inspection.
Check the correct tightening torque of the fork holders and other components.
Cleaning and lubrication of the outer cable and bowden cable.
Every 50 hours of drive
Removal of shock absorbers, cleaning / checking inserts and changing oil (if necessary).
Cleaning and lubrication of the air damper mounting kit.
Every 100 hours of drive
Complete cleaning of the fork inside and out, cleaning and lubrication of dust caps and cleaning
rings, oil change in the damping system, tightening control and adjustment to the driver‘s preferen-
ces.
Prior to disassembly, check the fork clearance by braking the front wheel and gently pushing the
stem forwards and backwards. If there is clearence in the fork, contact a qualified mechanic.
AIR PRESSURE ADJUSTMENT
1. Unscrew the valve cap. Screw the pump inflator onto the valve.
2. Pump the fork to the required pressure. Never exceed the maximum permissible pressure from
the manufacturer. The recommended pressure and maximum pressure can be found in the table
below or on the fork leg.
a
intenance o
f
this
p
roduct
.
10
Use only pumps designed to inflate forks and shock absorbers to inflate RockShox forks.
Using an unsuitable inflator can damage the fork! The fork must be unlocked when inflating,
otherwise there is a risk of damage! Note that all Rock Shox forks are subject to normal wear
and tear and that their durability and proper functioning are very individual and depend on
the mileage, driving style, terrain and environment in which you ride. We do not recommend
using oils containing Teflon on a fork with plastic bushings, there is a risk of etching the
bushing.
Frame: Do not use a bent or cracked frame. You must never repair or straighten the frame under
any circumstances. Consult your Crussis e-bike dealer for frame damage. Crusis frames have a
mounting place for bottle holder. We recommend using side bottle holder (to remove the bottle to
the side) to avoid breaking the screws.
E-bike load: The e-bike load stated in the specifications of the individual models is the sum of the
rider‘s weight and the weight of the bike and the weight of all currently attached accessories (carrier,
fenders, child seat, bags ....) and cargo!
Always keep all components clean.
If you wash the e-bike with water (do not use high-pressure cleaners to clean the e-bike or
its parts) - always remove the battery from the e-bike before washing. Dry the e-bike before
returning the battery. We recommend drying the e-bike after each ride, especially all electri-
cal components. In winter, pay special attention to the maintenance of the e-bike, always
clean the components from salt and moisture after riding. Perform maintenance at regular
intervals. Information on the recommended tire pressure can be found directly on the side of
the tire!
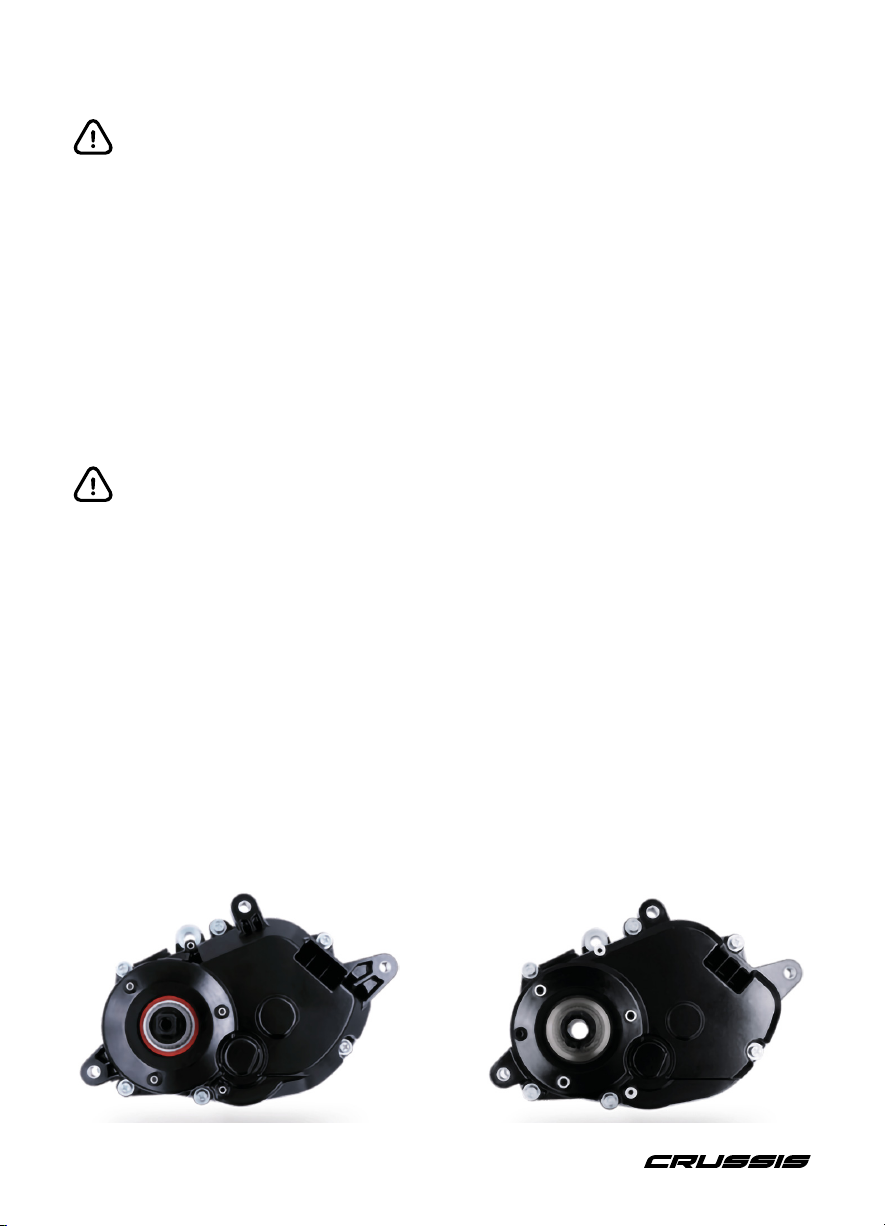
This manual is universal for Panasonic GX series drive system
All the Panasonic 8.8 models are equipped with the GX Power Plus motors.
All the Panasonic 9.8 models are equipped with the GX Ultimate motors.
System: Panasonic GX Ultimate
Torque: 95 Nm
Rated Power: 250 W
Weigh: 2,95 kg
Resistance: IPX5
Pedal sensor: Torque and speed sensor
System: Panasonic GX power plus
Torque: 75 Nm
Rated Power: 250 W
Weight: 3,2 kg
Resistance: IPX5
Pedal sensor: Torque and speed sensor

11
ELECTRIC BIKE SYSTEM
The motor is activated by means of a torsion (pressure, force) sensor integrated into the central
axis. The torsion sensor evaluates the frequency and force of pedaling, which it transmits to the
control unit, which doses the motor power according to the force you pedal with. The e-bike motor
switches on after about one turn of the pedal cranks. It switches offagain after 1-2 sec. when you
stop pedalling. The motor disengages when the speed reaches 25 km/h and re-engages when the
speed drops below this limit. It thus complies with all European standards and is still a bicycle. The
e-bike is equipped with an LCD panel that controls the electric drive. On the display (LCD panel) it is
possible to select different modes of assistance OFF - HIGH. The highest assistance mode is HIGH,
the OFF assistance mode is without the help of the electric motor. The LCD panel also contains a
„walking assist“ function. In this mode the bike travels at speeds up to approx. 6 km/h without
pedal assistance. The pedestrian assist helps when pushing or starting. The function is not intended
for continuous riding.
Optional driving programs:
[HIGH] *1 Strong motor assistance is provided on straight and uphill roads.
[AUTO] *1 Motor assistance changes automatically depending on road conditions.
[STD] *1 Medium motor assistance is provided on flat roads and uphill roads.
[ECO] *1 On flat and uphill roads, little motor assistance is provided.
[OFF] *1 No motor assistance.
*1Motor assistance may vary depending on weather conditions, road conditions, bicycle or
driving style.
The motor assistance can vary depending on weather conditions, road conditions, the bicycle
or driving style.The engine assistance modes are graded, i.e. ECO (lowest assistance) - HIGH
(highest assistance) up to a speed of 25 km/h. The torsion sensor transmits information about
the pedaling force, the more you pedal, the more the electric motor assists. Walk assist: the
bike rides on its own at speeds up to approx. 6 km/h and helps when starting or pushing. This
function is not intended for continuous riding! The speed and power of the walking assist is
dependent on the gear (larger pinion less speed but more power, can be used on hills - smaller
pinion more speed but less power, can be used on flat ground). We recommend using smaller
pinions for proper function of the walking assist.
BATTERY INFORMATION
Lithium-ion (Li-ion) batteries are the most commonly used batteries today. The advantage of these
batteries is mainly their light weight and long life. Li-ion batteries have a very low self-discharge rate.
From the first charge, the battery needs to be kept in its working cycle (discharge/charge), even when
not in use, the battery discharges naturally. It is recommended to recharge the battery regularly
even when not using the electric bike about once a month and store it charged to 60 - 80% capacity.
Otherwise, the battery may be damaged, which may cause a shorter range or, in the worst case, com-
plete non-functionality. By recharging regularly you extend the life of the battery. We recommend
that you fully charge the battery before first use. Since batteries do not have a memory effect, they
can be recharged at any time. The maximum capacity is reached after approx. 5 - 10 charges. Always
keep the battery charged and recharge it after a ride, not before the next ride. Li-Ion batteries are
100% recyclable. You can drop offthe battery at any collection point or directly at the dealer. The
battery is recharged using the included 230/240V charger, charging time is approximately 5 - 9 hours
(depending on battery capacity and state of discharge). The battery can be left on the bike while
charging, or it can be removed. To remove the battery, turn the key and then remove the battery.

12
Always switch offthe e-bike system before charging the battery! Never immerse the battery
in water (any liquids), store it in a humid environment or disassemble it. Please make sure
the battery is properly seated and locked before each ride. There are several types of batte-
ries available with Crussis e-bikes.
To unlock the battery, turn the key to the left to release it. To lock it, turn it to the right. Or
you can unlock the battery by turning the key to the left and lock it by snapping the battery
into the frame. Some models may be equipped with a latch pin, see picture below. To remove
the battery, the latch pin must be pushed down towards the motor.
Frame battery – fully integrated
To switch on the battery, briefly press the power button and the LED located next to the power
button starts flashing green-blue-red. The last colour, which stays on and goes offafter about 4
seconds, indicates the current state of charge of the battery.
If the battery is switched on, a short press of the button can be used to check the battery charge
status. The battery LED lights up in the colour corresponding to the current battery charge.
100 - 71% blue light on
70 - 31% green light on
30 - 11% red light on - the assist strength may gradually decrease
10 - 0% red light flashes until 0%
The battery charge status shown on the control panel display is for reference only. If the motor stops
running smoothly and runs intermittently, the battery capacity is too low. In this case, the electric
drive system must be switched off. Continue riding without motor assistance and ensure that the
battery will be recharged.
Turn offthe battery by pressing the button for about 3 seconds until the LED flashes green-blue-red.
When the battery is inserted into the e-bike, the battery always turns itself on, while the battery LED
flashes green-blue-red. If you do not want to use the e-bike immediately, we recommend that you
turn offthe battery by long pressing the battery button.
Battery indicator,
power button
Battery latch
Tucked latch pin
1.
2.
Charging
battery connector
for connecting the charger
Battery lock
First, attach the connector, then push
the battery towards to the lock

13
The color behavior of the battery LED may vary depending on the battery firmware. Do not
turn on the display while charging the bike battery. If you turn it on while charging, it will turn
itself offafter about 3 seconds.
The battery charge status shown on the display is for reference only. In case of excessive
overheating, the battery will automatically shut down. The battery is protected by a tem-
perature sensor. Once the battery has cooled down to operating temperature, it is possible
to continue driving. Overheating of the battery is a common phenomenon associated with
battery operation. If you leave the e-bike in a public place, we recommend locking the batte-
ry with a key. We recommend separating the keys of the battery, do not carry them all in one
bundle in case of loss.
Charging
The battery must be turned on before charging, so turn on the battery. Connect the charger to the
battery and only then to the electrical socket. As soon as the charger is connected to the el. socket,
a red LED on the charger lights up to signal the start of the charging process. In the process of char-
ging, the LED on the battery will flash green. At the end of the charging process, the green LED on
the battery will change color to blue. This means that the battery is charged to 100%. If the LED on
the charger is red after charging, it means balancing the cells. After balancing the cells, the LED on
the charger lights up green again. Only at this moment is the battery fully charged and the battery is
ready to use. The balancing time will increase depending on the age of the battery. We recommend
that the charging process including balancing the cells be carried out at least every third charge.
Charging time of the battery up to 100% takes 5 - 9 hours according to the state of discharge and
battery capacity. After completing the charging process, first disconnect the charger from the el.
socket, then from the battery. Interrupting the charging process does not damage the battery. The
battery is of the Li-ion type and its nominal voltage is 36V, fully charged it reaches 42V.
battery connector
LED light
electric plug

14
Recharge the battery at room temperature (approx. 20°C). Always keep the battery (e-bike)
under supervision when charging. Charging the battery at temperatures below 10°C and abo-
ve 40°C can seriously damage the battery. Only use the charger that came with your e-bike
to charge the battery. The battery is sensitive to accurate charging, using a different charger
may result in damage to the battery or other parts of the e-bike. If the charger (or its cables)
is damaged, never connect it to the electric bike or el. socket. The battery must be switched
on and the e-bike system switched offbefore charging!
FACTORS AFFECTING THE RANGE OF THE ELECTRIC BIKE
It is not possible to determine the range of an e-bike accurately because it is influenced by many
factors.
1. Route profile and surface: on flat terrain, the range is higher than when riding on long steep
climbs and worse surfaces.
2. Rider and load weight: higher rider and load weight means higher energy consumption.
3. Inflation and tire tread: correct tire inflation is important. Riding on under-inflated tires redu-
ces the range of the e-bike.
4. Battery condition: a fully charged, new battery has a greater range than a battery that has
been charged and discharged many times. The battery capacity also has an effect on the range.
Higher capacity = higher range. The battery reaches its maximum capacity after 5-10 charges.
5. Assist mode: more motor assistance means lower range.
6. Driving style and smoothness: if you pedal a lot, the motor uses less energy. The smoothness
of the drive also its influence, as frequent ride start reduces the range.
7. Weather conditions: temperatures around 20°C and no wind are ideal. If the temperature is
lower and there is a strong headwind, the range is reduced.
E-BIKE CONTROL (COLOUR LCD DISPLAY)
The Panasonic control panel with its high-contrast LCD display provides all the important informati-
on that displays seamlessly even in direct sunlight. Handlebar control provides good feedback and
ease of use. The user interface is clearly legible and intuitive. The control panel and display is protec-
ted against water and dirt ingress. It meets protection class IP 65. The system must be switched on
when the bike is stationary ( when the bike is not in motion). If the system is switched on while the
bike is in motion, the assist may not work.
If the system is switched on while driving, error E-001 may be displayed. This error will remain on the
display and the display cannot be operated at this time. You must switch the display offby briefly
pressing the on/offbutton and switch the system on again when the bike is stationary (if the e-bike
is not in motion).
15
Read this first!
For Your Safety
To reduce the risk of injury, loss of life, electric shock, fire, malfunction, and damage to equipment
or property, always observe the following safety precautions.
Explanation of symbols
The following symbols are used to classify and describe the level of hazard, injury, and property
damage caused when the warning is disregarded and improper use is performed.
DANGER
Denotes a potential hazard that will result in serious injury or death.
WARNING
Denotes a potential hazard that could result in serious injury or death.
CAUTION
Denotes a hazard that could result in minor injury or damage to the unit or other equip-
ment.
The following symbols are used to classify and describe the type of instructions to be observed
This symbol is used to alert users to a specific operating procedure that must not be perfor-
med.
This symbol is used to alert users to a specific operating procedure that must be followed in
order to operate the unit safety.
Console (Display)
Do not modify or disassemble the console.
Do not use or leave the console lying around in high temperatures.
●This may cause damage or heat, which may lead to fire.
Do not use the bicycle mark button (Walk assistance) when the wheels of the electric
bicycles are not in contact with
the ground.
●It may cause injury.
If a problem occurs when charging a USB device, disconnect the USB cable.
(Smoke is emitted, a strange smell or noise is present, the console or the USB cable is dam-
aged, or water gets inside the device.)
●Continued use in such circumstances can cause fire and electric shocks.
(Switching the device on/off, assist mode switching, light operation, etc.)
●If assistance deactivates when on a slope, when setting off, or due to erroneous operati-
on, you may suffer an injury due to losing your balance or falling over due to riding one-h-
anded.
WARNING

16
Bluetooth
Do not use the device near automatic doors, fire alarms, or other such automatic
control devices.z.
●Radio waves emitted by this device may interfere with automatic control devices, and this
may result in accidents due to malfunction.
Do not use the device in hospitals or in places where electronic medical devices are
present.
●Radio waves emitted by this device may interfere with electronic medical devices, and this
may result in accidents due to malfunction.
Keep this device at least 15 cm away from the part of the body where a cardiac pace-
maker is in place if you wear one.
●Radio waves emitted by this device may interfere with the operation of your pacemaker.
Console (Display)
When the electric bicycle is walked along while the Bicycle mark button (Walk
assistance) is pressed, the pedals will still rotate.
●Please be careful as injuries can occur.
Do not use smartphones, cellphones, or other such devices when riding.
●Doing so may lead to injury through accidents.
Do not stare at the screen when riding.
Doing so may lead to injury through accidents.
BATTERY
km/h
RANGE
50
25 AUTO
%
50
km
9
12
5
14 13
8
11
2
6
1
10
4
3
7
CAUTION

17
Mounting the side display
of the console
Insert the side display on the band mounted
on the handlebar of the electric bicycle.
1 Assist mode select buttons
Selects the assist mode from [HIGH], [STD],
[ECO], [OFF] and[AUTO].
2 Night mode button
Lights the backlight of the side display.
When power is supplied to the head light or
tail lamp from the battery on the electric bi-
cycle, the head lamp or tail lamp lights. It
depends on local regulation. ( page 35)
3 information button
Switches display items such as distance trave-
led. ( page 21)
4 Bicycle mark button (Walk assistance)
Drive can be assisted up to 6 km/h when
pushing the electric bicycle with a heavy load
on it.
5 Battery level display
Displays the battery remaining capacity.
6 USB connection mark
Displayed when an external device (e.g. mobi-
le phone) is connected to the side display for
charging.
7 Assist power indicator
Displays in the form of a graph how much the
rider is being assisted. The larger the number
on the graph, the more the rider is being assi-
sted.
( / )
M4 screw
3 mm Allen wrench
Tightening torque:
0.5 Nxm
M4 x L12
8 Text indication
Displays the current assist mode, etc.
9 Night mode indicator
Lights when the night mode button is pressed.
10 Speed indication
ZDisplays the current travel speed.
11 Value indication
Displays distance traveled, total distance tra-
veled, maximum speed, etc.
12 Power button
Turns on and offthe electric bicycle system.
13 USB Micro-B port
Used to charge an external device (e.g. mobile
phone). ( page 35-36)
14 Rubber cap
Protects the USB Micro-B port.

18
Methods of Use
To enable the assist function or display the various indications, press the power button on the
console to turn on the electric bicycle system.
Turning on the electric bicycle system
Press the power button on the side display.
●The system starts with “OFF”, unless the bicycle maker prepared it to an assist function. To
change the assist mode, refer to page 20.
AƩenƟon
●Before pressing the power button, do not place your feet on the pedals of the electric bicycle.
Otherwise, this will result in a torque sensor error or weak assist force.
Press the power button again without placing your feet on the pedals.
●While pressing the power button, do not press any other buttons, otherwise an error may be
displayed. In this case press the power button again without your feet on the pedals.
●Do not turn on/offthe power button during riding. If the assist function is not required, press the
assist mode select buttons to select [OFF].
Note
●The assist function of the electric bicycle will not work in the following cases:
– When you stop pedalling
– When a speed of 25 km/h is reached (The assist function starts to work by starting pedalling
again at 25 km/h or less.)
– When there is no remaining battery power
Turning offthe electric bicycle system
Press the power button on the console when the electric bicycle system is turned on.
Note
●Even if the power button is not pressed to turn offthe electric bicycle system, the power automa-
tically turns offto save energy if the electric
bicycle is not used for about ten minutes (for example, when the electric bicycle is parked).
BATTERY
km/h
RANGE
50
25 AUTO
%
50
km
Power button
( / )

19
Console (Display)
Use the buttons on the Side display to change the assist mode. This is shown as well as the remai-
ning capacity of the bicycle battery in the side display.
Battery level display
The battery charge status indicates the remaining capacity of the battery in the electric bicycle
The charged state of the battery on the electric bicycle can also be checked by the battery LED.
BATTERY
%
km
km/h
RANGE
50
25
50
STD
BATTERY
%
km
km/h
RANGE
50
25
50
AUTO
Night mode button
Bicycle mark button
(Walk assistance)
Battery level display
Assist mode select
buttons
OFF: Assistance stopped
Side Display
LCD screen display
Battery level (%) Guide
11% - 20%
21% - 30%
31% - 40%
41% - 50%
51% - 60%
20 40 60 80
When you turn the side display on after
charging it, the battery level display will
decrease in increments of 1/10. The
percentage display for battery level will
decrease in increments of 1%.
Ride assistance available
0% - 10%
Assist force may gradually decrease.
Charging required notification
Ride assistance stopped
The battery needs to be charged.
If it is not charged, you can ride the bicycle
unassisted.
61% - 70%
71% - 80%
81% - 90%
91% - 100%
Display full
Display empty with diagonal line
0 %
Display 9/10 full
Display 7/10 full
Display 5/10 full
Display 3/10 full
Display 8/10 full
Display 6/10 full
Display 4/10 full
Display 2/10 full
Display 1/10 full and red

20
Assist mode select buttons
The five assist modes can be selected by pressing the assist mode select buttons.
ƔChange in assist force
Level Assist from motor unit
Assist Mode Start Flat road Uphill Downhill Flat road
HIGH Powerful OFF Powerful
*
1
2QȵDWDQGXSKLOOURDGVDSRZHUIXO
assist force is provided for a
comfortable ride on slopes and
carrying heavy loads.
STANDARD Mid OFF Mid
*
1
2QȵDWDQGXSKLOOURDGVDPLGDVVLVW
force is provided.
ECO Low OFF Low
*
12QȵDWDQGXSKLOOURDGVDORZDVVLVW
force is provided allowing for a longer
distance traveled by a single charge.
OFF OFF *
1No assist force.
AUTO Mid Low Mid -
Powerful OFF Low *
1'HSHQGLQJRQURDGFRQGLWLRQVWKH
assist force automatically changes
from low to powerful.
*
17KHDVVLVWIRUFHPD\FKDQJHGHSHQGLQJRQZHDWKHUFRQGLWLRQVURDGFRQGLWLRQVELF\FOHFRQGLWLRQVRUULGLQJVW\OHV
ƔSide display on the console: The assist mode selected in the assist mode display is displayed.
( / )
Press the assist mode select buttons until the desired assist mode is displayed.
BATTERY
km/h
RANGE
50
25
AUTO
%
50
km
Assist mode select buttons
Assist Mode
[HIGH] *12QȵDWDQGXSKLOOURDGVDSRZHUIXODVVLVWIRUFHLVSURYLGHG
IRUDFRPIRUWDEOHULGHRQVORSHVDQGFDUU\LQJKHDY\ORDGV
[AUTO] *1'HSHQGLQJRQURDGFRQGLWLRQVWKHDVVLVWIRUFH
DXWRPDWLFDOO\FKDQJHVIURPORZWRSRZHUIXO
[STD] *12QȵDWDQGXSKLOOURDGVDPLGDVVLVWIRUFHLVSURYLGHG
[ECO] *12QȵDWDQGXSKLOOURDGVDORZDVVLVWIRUFHLVSURYLGHG
DOORZLQJIRUDORQJHUGLVWDQFHWUDYHOHGE\DVLQJOHFKDUJH
[OFF] *11RDVVLVWIRUFH
*1
7KHDVVLVWIRUFHPD\FKDQJHGHSHQGLQJRQZHDWKHUFRQGLWLRQVURDGFRQGLWLRQVELF\FOHFRQGLWLRQVRUULGLQJVW\OHV
This manual suits for next models
15
Table of contents
Other CRUSSIS Bicycle manuals


