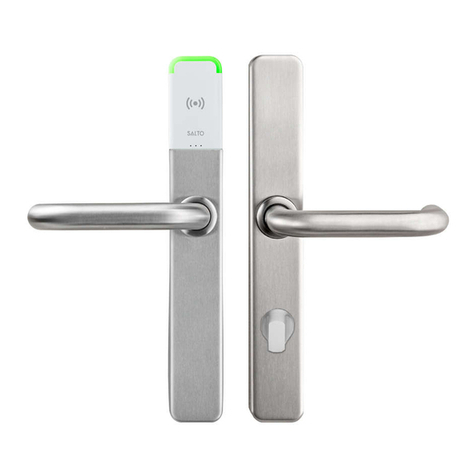
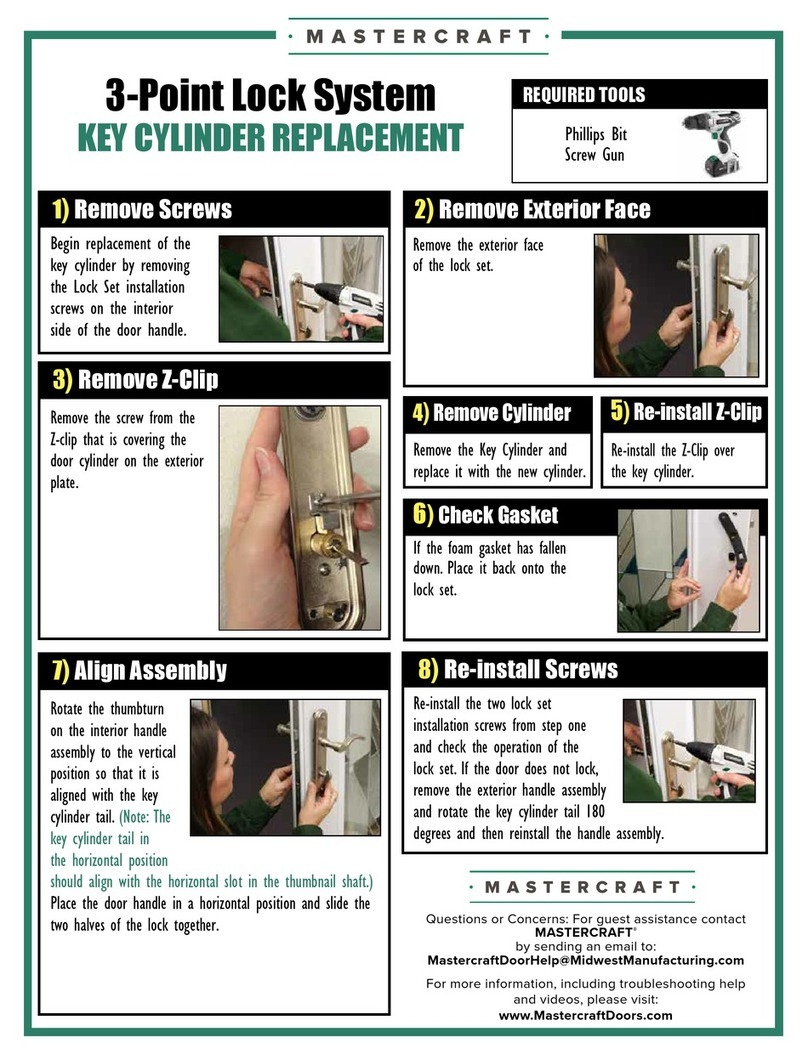
CSH ID.LATCH-BOOK.08 User manual

INSTRUCTION MANUAL
for Installing
CANE LATCH TO INVISIDOOR
ID.LATCH-BOOK.08 and
ID.LATCH-CANE.08

Cane Latch Kit Includes:
Book Kit Includes:
2
Instruction Manual for Cane Latch
for Invisidoor®
Handle BracketPadlock BracketStrike Plate
Cane Latch Bar
Knob
(4) #8x1/2” Blk
FH Philips Screw
(4) #8x5/8” Blk
PH Philips Screw
(3) #6x3/4” Blk
Hex Screws
(2) #10x1” Blk
PH Philips Screw
(2) #6x5/8”
FH Screw
Dummy Book Butt Hinge
Wire Crimp
23” Wire Cable with Loop
Loop Clamp
(3) Lock Nuts
(3) Washers
(2) Eyescrews

(x4)
M8x90(x4)
(x2)
C
DE
(x4)
F
G
(x2)
H
(x2)
(x2) M5x26(x2)
ST4.8X50(x8)
ST4.2X32(x8)
Ø8X35(x8)
Ø8
Ø3
Ø10
Ø19
Ø10
ST6X25(x16)
(x4)
M5x6(x4)
(x2)
Ø12
(x2)
Ø10X48(x4)
I
(x4)
(x4)
M8x90(x4)
(x2)
C
DE
(x4)
F
G
(x2)
H
(x2)
(x2) M5x26(x2)
ST4.8X50(x8)
ST4.2X32(x8)
Ø8X35(x8)
Ø8
Ø3
Ø10
Ø19
Ø10
ST6X25(x16)
(x4)
M5x6(x4)
(x2)
Ø12
(x2)
Ø10X48(x4)
I
(x4)
(x4)
M8x90(x4)
(x2)
C
DE
(x4)
F
G
(x2)
H
(x2)
(x2) M5x26(x2)
ST4.8X50(x8)
ST4.2X32(x8)
Ø8X35(x8)
Ø8
Ø3
Ø10
Ø19
Ø10
ST6X25(x16)
(x4)
M5x6(x4)
(x2)
Ø12
(x2)
Ø10X48(x4)
I
(x4)
Installation Tools Needed:
3
Application Notes:
A. Cane Latch works for both inswing and outswing Invisidoors manufactured
by CSH with a fixed shelf located at the standard dimension off the
bottom. If your Invisidoor is custom and fixed shelf location is different
than standard, modify the specified in hole locations off the bottom of
the cabinet specified below. Latch may not install as intended if Invisidoor
cabinet is manufactured and installed to different fixed shelf dimensions.
B. Door must be installed per the Inivisoor Hinge Kit instructions prior to Cane
Latch installation.
Cane Latch Installation Steps
1. Looking at the side of the Invisidoor
opposite the Hinge side, Open the
Invisidoor and prop it open to work on
the side of the cabinet (Fig. 1). With a
tape measure and pencil, mark a drill
location 5.5” off the back of the cabinet
and 29-7/16”” from the bottom of the
cabinet. This hole is critical to proper
operation of the Cane Latch.
3/64”
7/64”
#2 Philips bit
3/16”
Figure 1
Slotted screwdriver
Hand Router or
Oscillating Tool
Chisel
5/8”
Hole
5.5” Center
to Back
of Cabinet
29.43” Center
to Bottom
of Cabinet
5/8” Hole
Padlock
Bracket
Handle Bracket
Knob
Fully Engaged
in Lock Position
11/16”
Slot
Width
29.43” Center
to Bottom
of Cabinet
(Same Height as
5/8” Hole)
7.84”
Cane Latch Install
12
34
56
Hinge Side
Side of Cabinet
to locate for start
of installation
2.81”
Cane Latch
Orientation
Cane Latch
Making Contact
with Jamb Face Strike Plate
7/8” Drilled
Hole Before
Installing Plate
Book Pull Install
Install Eyescrews
3/16” Drilled
Hole
Install one side of Hinge to Shelf
Centered in line with drilled
pass-thru hole
4”
C
L
Transfer and
Drill Holes for
Hinge
Transfer and
Drill Hole for
Loop Clamp
2”
78
9 10
11 12
8”
4.75”
.25”
3/16”Thru Hole
Install Hinge to Book with
Hex Screws and washers behind
Hinge Plate with Cap Nuts in Book
Install Wire Loop
to Loop Clamp before
attaching Clamp
Feed Wire thru
Pass-Thru Hole and thru
both Eyescrews
Slide on Crimp and run Wire over Latch Bar
between the corner and the Tab
Crimp
Run Wire thru Crimp
Spring
Attachment
from Bar Tab
to Bracket
13 14
15 16
False Panel
Cleats
17
Tab
Corner

4
slide in and out, use some sandpaper wrapped around your finger to smooth out the
hole so that the bar glides in the hole but does not have any play or wiggle room.
4. Once the bar operates properly in the hole, set it aside and prepare to cut slot for the
handle side of the latch. Using the same height of the bottom of the cabinet as the hole,
mark a point 29-7/16” from the bottom of the cabinet and 7-27/32” from the side of
the cabinet (Fig. 3). Drill a 11/16” through hole. At the same height from the bottom of
the cabinet, mark and drill another 11/16” hole 2-13/16” from the first hole.
5. Draw lines connecting the tops and bottoms of the two holes and cut out the slot along
the established lines drawn using a hand router. This slot allows slide action of the Cane
Latch Handle, but also allows enough room for the Cane Latch Bar to be pivoted into the
first drilled hole.
6. Take the Cane Latch Bar and Padlock Bracket. Slide the Cane Latch end with the tapered
tip through the large grommeted hole in the Padlock bracket, making sure the end with
the (4) holes is pointing to the 90° angle of the Cane Latch Bar (Fig. 4). From the front
of the cabinet, slide the Cane Latch through the slot halfway until you need to move to
the front of the Cabinet. Pivot the Cane Latch so the Cane tip can slide into the 5/8” hole.
Make sure the Padlock Bracket stays against the bottom of the shelf as shown.
2. Using a stepped approach, at the marked
location, drill a ¼” through hole making sure
the hole is straight and square to the cabinet
(Fig. 2). Using a 5/8” Spade Drill bit, slowly
drill out the ¼” hole to 5/8”, again making
sure the hole is drilled straight and square
to the panel. This hole serves as the guide
hole for the latch. If the hole is not properly
drilled straight, this hole can cause the Latch
to bind during operation.
3. With the Cane Bar in hand, test fit the bar by
running it in and out of the hole from inside
the cabinet. If the Cane Bar is not easy to
Figure 3 Figure 4
Figure 2
5/8”
Hole
5.5” Center
to Back
of Cabinet
29.43” Center
to Bottom
of Cabinet
5/8” Hole
Padlock
Bracket
Handle Bracket
Knob
Fully Engaged
in Lock Position
11/16”
Slot
Width
29.43” Center
to Bottom
of Cabinet
(Same Height as
5/8” Hole)
7.84”
Cane Latch Install
12
34
56
Hinge Side
Side of Cabinet
to locate for start
of installation
2.81”
Cane Latch
Orientation
Cane Latch
Making Contact
with Jamb Face Strike Plate
7/8” Drilled
Hole Before
Installing Plate
Book Pull Install
Install Eyescrews
3/16” Drilled
Hole
Install one side of Hinge to Shelf
Centered in line with drilled
pass-thru hole
4”
C
L
Transfer and
Drill Holes for
Hinge
Transfer and
Drill Hole for
Loop Clamp
2”
78
9 10
11 12
8”
4.75”
.25”
3/16”Thru Hole
Install Hinge to Book with
Hex Screws and washers behind
Hinge Plate with Cap Nuts in Book
Install Wire Loop
to Loop Clamp before
attaching Clamp
Feed Wire thru
Pass-Thru Hole and thru
both Eyescrews
Slide on Crimp and run Wire over Latch Bar
between the corner and the Tab
Crimp
Run Wire thru Crimp
Spring
Attachment
from Bar Tab
to Bracket
13 14
15 16
False Panel
Cleats
17
Tab
Corner
5/8”
Hole
5.5” Center
to Back
of Cabinet
29.43” Center
to Bottom
of Cabinet
5/8” Hole
Padlock
Bracket
Handle Bracket
Knob
Fully Engaged
in Lock Position
11/16”
Slot
Width
29.43” Center
to Bottom
of Cabinet
(Same Height as
5/8” Hole)
7.84”
Cane Latch Install
12
34
56
Hinge Side
Side of Cabinet
to locate for start
of installation
2.81”
Cane Latch
Orientation
Cane Latch
Making Contact
with Jamb Face Strike Plate
7/8” Drilled
Hole Before
Installing Plate
Book Pull Install
Install Eyescrews
3/16” Drilled
Hole
Install one side of Hinge to Shelf
Centered in line with drilled
pass-thru hole
4”
C
L
Transfer and
Drill Holes for
Hinge
Transfer and
Drill Hole for
Loop Clamp
2”
78
9 10
11 12
8”
4.75”
.25”
3/16”Thru Hole
Install Hinge to Book with
Hex Screws and washers behind
Hinge Plate with Cap Nuts in Book
Install Wire Loop
to Loop Clamp before
attaching Clamp
Feed Wire thru
Pass-Thru Hole and thru
both Eyescrews
Slide on Crimp and run Wire over Latch Bar
between the corner and the Tab
Crimp
Run Wire thru Crimp
Spring
Attachment
from Bar Tab
to Bracket
13 14
15 16
False Panel
Cleats
17
Tab
Corner
5/8”
Hole
5.5” Center
to Back
of Cabinet
29.43” Center
to Bottom
of Cabinet
5/8” Hole
Padlock
Bracket
Handle Bracket
Knob
Fully Engaged
in Lock Position
11/16”
Slot
Width
29.43” Center
to Bottom
of Cabinet
(Same Height as
5/8” Hole)
7.84”
Cane Latch Install
12
34
56
Hinge Side
Side of Cabinet
to locate for start
of installation
2.81”
Cane Latch
Orientation
5/8”
Hole
5.5” Center
to Back
of Cabinet
29.43” Center
to Bottom
of Cabinet
5/8” Hole
Padlock
Bracket
Handle Bracket
Knob
Fully Engaged
in Lock Position
11/16”
Slot
Width
29.43” Center
to Bottom
of Cabinet
(Same Height as
5/8” Hole)
7.84”
Cane Latch Install
12
34
56
Hinge Side
Side of Cabinet
to locate for start
of installation
2.81”
Cane Latch
Orientation
5/8”
Hole
5.5” Center
to Back
of Cabinet
29.43” Center
to Bottom
of Cabinet
5/8” Hole
Padlock
Bracket
Handle Bracket
Knob
Fully Engaged
in Lock Position
11/16”
Slot
Width
29.43” Center
to Bottom
of Cabinet
(Same Height as
5/8” Hole)
7.84”
Cane Latch Install
12
34
56
Hinge Side
Side of Cabinet
to locate for start
of installation
2.81”
Cane Latch
Orientation
Cane Latch
Making Contact
with Jamb Face Strike Plate
7/8” Drilled
Hole Before
Installing Plate
Book Pull Install
Install Eyescrews
3/16” Drilled
Hole
Install one side of Hinge to Shelf
Centered in line with drilled
pass-thru hole
4”
C
L
Transfer and
Drill Holes for
Hinge
Transfer and
Drill Hole for
Loop Clamp
2”
78
9 10
11 12
8”
4.75”
.25”
3/16”Thru Hole
Install Hinge to Book with
Hex Screws and washers behind
Hinge Plate with Cap Nuts in Book
Install Wire Loop
to Loop Clamp before
attaching Clamp
Feed Wire thru
Pass-Thru Hole and thru
both Eyescrews
Slide on Crimp and run Wire over Latch Bar
between the corner and the Tab
Crimp
Run Wire thru Crimp
Spring
Attachment
from Bar Tab
to Bracket
13 14
15 16
False Panel
Cleats
17
Tab
Corner

5
7. Take the Handle Bracket and locate it on the back side of the cabinet over the slot
as shown in Fig. 5, with the slot close to the mounting holes flush to the wood slot.
Make sure the bracket is level, mark and pilot drill the (4) holes using a 7/64” Drill
about ¼” deep. Hand screw (4) #8x1/2” Black Flat Head screws to mount plate.
Install Knob to end of Cane Handle.
8. From inside the cabinet with the door still propped open away from the Jamb, make
sure the Cane latch is fully engaged in the “lock” position with the handle end flush
to the end of the slot and squared up to perpendicular first drilled hole (Fig. 6). Make
sure the Padlock bracket is flush against the Cane Latch Tab. Use a small Clamp to
hold them in place while you mark (3) of the (4) visible mounting holes. Pilot drill the
(3) exposed holes with the 7/64” drill bit 3/8” deep. Hand screw with (3) #8x5/8”
Black Pan Head screws. Check latch movement to make sure that the Cane Latch
slides easily back and forth. Adjust the padlock bracket if needed to make sure
the Cane Latch is gliding easily, squared up in the location when in the locked and
unlocked position. Slide Latch to unlocked position and pilot drill and install last
#8x5/8” screw.
9. While the door is still ajar and the
Latch is in fully locked position, ink
or pencil the end of the Cane Latch
Bar tip. Slide the latch to the unlock
position and close the Invisidoor
snug and tight as desired. While
making sure the door is held in the
closed position, slide the latch to lock
position, bumping the Door Jamb and
transferring the tip location to the
Jamb (Fig. 7). You should see a clear
mark on the Jamb where to drill for
the strike plate.
Figure 5 Figure 6
Figure 7
5/8”
Hole
5.5” Center
to Back
of Cabinet
29.43” Center
to Bottom
of Cabinet
5/8” Hole
Padlock
Bracket
Handle Bracket
Knob
Fully Engaged
in Lock Position
11/16”
Slot
Width
29.43” Center
to Bottom
of Cabinet
(Same Height as
5/8” Hole)
7.84”
Cane Latch Install
12
34
56
Hinge Side
Side of Cabinet
to locate for start
of installation
2.81”
Cane Latch
Orientation
Cane Latch
Making Contact
with Jamb Face
Strike Plate
7/8” Drilled
Hole Before
Installing Plate
Book Pull Install
Install Eyescrews
3/16” Drilled
Hole
Install one side of Hinge to Shelf
Centered in line with drilled
pass-thru hole
4”
C
L
Transfer and
Drill Holes for
Hinge
Transfer and
Drill Hole for
Loop Clamp
2”
78
9 10
11 12
8”
4.75”
.25”
3/16”Thru Hole
Cane Latch
Making Contact
with Jamb Face Strike Plate
7/8” Drilled
Hole Before
Installing Plate
Book Pull Install
Install Eyescrews
3/16” Drilled
Hole
Install one side of Hinge to Shelf
Centered in line with drilled
pass-thru hole
4”
C
L
Transfer and
Drill Holes for
Hinge
Transfer and
Drill Hole for
Loop Clamp
2”
78
9 10
11 12
8”
4.75”
.25”
3/16”Thru Hole
Install Hinge to Book with
Hex Screws and washers behind
Hinge Plate with Cap Nuts in Book
Install Wire Loop
to Loop Clamp before
attaching Clamp
Feed Wire thru
Pass-Thru Hole and thru
both Eyescrews
Slide on Crimp and run Wire over Latch Bar
between the corner and the Tab
Crimp
Run Wire thru Crimp
Spring
Attachment
from Bar Tab
to Bracket
13 14
15 16
False Panel
Cleats
17
Tab
Corner
Cane Latch
Making Contact
with Jamb Face Strike Plate
7/8” Drilled
Hole Before
Installing Plate
Book Pull Install
Install Eyescrews
3/16” Drilled
Hole
Install one side of Hinge to Shelf
Centered in line with drilled
pass-thru hole
4”
C
L
Transfer and
Drill Holes for
Hinge
Transfer and
Drill Hole for
Loop Clamp
2”
78
9 10
11 12
8”
4.75”
.25”
3/16”Thru Hole
Install Hinge to Book with
Hex Screws and washers behind
Hinge Plate with Cap Nuts in Book
Install Wire Loop
to Loop Clamp before
attaching Clamp
Feed Wire thru
Pass-Thru Hole and thru
both Eyescrews
Slide on Crimp and run Wire over Latch Bar
between the corner and the Tab
Crimp
Run Wire thru Crimp
Spring
Attachment
from Bar Tab
to Bracket
13 14
15 16
False Panel
Cleats
17
Tab
Corner
5/8”
Hole
5.5” Center
to Back
of Cabinet
29.43” Center
to Bottom
of Cabinet
5/8” Hole
Padlock
Bracket
Handle Bracket
Knob
Fully Engaged
in Lock Position
11/16”
Slot
Width
29.43” Center
to Bottom
of Cabinet
(Same Height as
5/8” Hole)
7.84”
Cane Latch Install
12
34
56
Hinge Side
Side of Cabinet
to locate for start
of installation
2.81”
Cane Latch
Orientation
Cane Latch
Making Contact
with Jamb Face Strike Plate
7/8” Drilled
Hole Before
Installing Plate
Book Pull Install
Install Eyescrews
3/16” Drilled
Hole
Install one side of Hinge to Shelf
Centered in line with drilled
pass-thru hole
4”
C
L
Transfer and
Drill Holes for
Hinge
Transfer and
Drill Hole for
Loop Clamp
2”
78
9 10
11 12
8”
4.75”
.25”
3/16”Thru Hole
Install Hinge to Book with
Hex Screws and washers behind
Hinge Plate with Cap Nuts in Book
Install Wire Loop
to Loop Clamp before
attaching Clamp
Feed Wire thru
Pass-Thru Hole and thru
both Eyescrews
Slide on Crimp and run Wire over Latch Bar
between the corner and the Tab
Crimp
Run Wire thru Crimp
Spring
Attachment
from Bar Tab
to Bracket
13 14
15 16
False Panel
Cleats
17
Tab
Corner

6
shelf. This will be the location for the hole for the Wire to pass through the shelf.
3. Due to the tight clearance from the back wall, use a cloth between the cabinet and the
drill to prevent the drill from marring the cabinet. Attempt to drill the hole as straight
as possible through the shelf. Make sure not to drill past the hole when breaking
through to the opposite side.
10. Prop the door back open and prepare
to drill the strike plate hole starting
with a power drill and ¼” drill bit. Drill
¾” Deep with the ¼” drill bit in the
center of the marked hole on the Jamb.
Proceed to drill then with a 7/8” Spade
Drill bit ¾” deep (Fig.8).
11. With 7/8” hole cleared out, transfer
holes from Strike Plate. Pilot drill 1/8”
holes 5/8” deep and install #10x1”
Black Philips Head Screws to secure
Strike Plate.
Book Pull Installation Steps
1. From under the fixed shelf, mark a spot
4-3/4” from the back of the inside of the
cabinet and 8” from the Padlock Bracket
(Fig. 9). With an Awl, punch location and
hand screw thread deep. Use screwdriver
as a wrench if tightening by hand
becomes difficult. Leave Eyescrew with
the eye at 45° to the shelf or pointed to
the Cane Handle slot as shown in Fig. 9.
2. Draw a line from that point back to the
back wall of the cabinet 8” from the
Padlock Bracket. From where the line
ends come off the wall, make a mark 1/2”
from the wall on the bottom of the fixed
12. Test Cane Latch with locking and unlocking from both sides of the door, making
sure Latch slides easily and engages properly into strike plate. Consider adjusting
Strike Plate screws to make Latch engage to hold door snugly in place in the closed
position.
13. Install Spring if tension action is desired using needle nose pliers. See Fig. 16 for
installation location.
14. Installation of Cane Latch is complete. Apply Bar Soap to any points of friction or
unwanted noises.
Book Pull Install Steps Start Below
Figure 8
Figure 9
5/8”
Hole
5.5” Center
to Back
of Cabinet
29.43” Center
to Bottom
of Cabinet
5/8” Hole
Padlock
Bracket
Handle Bracket
Knob
Fully Engaged
in Lock Position
11/16”
Slot
Width
29.43” Center
to Bottom
of Cabinet
(Same Height as
5/8” Hole)
7.84”
Cane Latch Install
12
34
56
Hinge Side
Side of Cabinet
to locate for start
of installation
2.81”
Cane Latch
Orientation
Cane Latch
Making Contact
with Jamb Face Strike Plate
7/8” Drilled
Hole Before
Installing Plate
Book Pull Install
Install Eyescrews
3/16” Drilled
Hole
Install one side of Hinge to Shelf
Centered in line with drilled
pass-thru hole
4”
C
L
Transfer and
Drill Holes for
Hinge
Transfer and
Drill Hole for
Loop Clamp
2”
78
9 10
11 12
8”
4.75”
.25”
3/16”Thru Hole
Cane Latch
Making Contact
with Jamb Face
Strike Plate
7/8” Drilled
Hole Before
Installing Plate
Book Pull Install
Install Eyescrews
3/16” Drilled
Hole
Install one side of Hinge to Shelf
Centered in line with drilled
pass-thru hole
4”
C
L
Transfer and
Drill Holes for
Hinge
Transfer and
Drill Hole for
Loop Clamp
2”
78
9 10
11 12
8”
4.75”
.25”
3/16”Thru Hole
Cane Latch
Making Contact
with Jamb Face Strike Plate
7/8” Drilled
Hole Before
Installing Plate
Book Pull Install
Install Eyescrews
3/16” Drilled
Hole
Install one side of Hinge to Shelf
Centered in line with drilled
pass-thru hole
4”
C
L
Transfer and
Drill Holes for
Hinge
Transfer and
Drill Hole for
Loop Clamp
2”
78
9 10
11 12
8”
4.75”
.25”
3/16”Thru Hole
Install Hinge to Book with
Hex Screws and washers behind
Hinge Plate with Cap Nuts in Book
Install Wire Loop
to Loop Clamp before
attaching Clamp
Feed Wire thru
Pass-Thru Hole and thru
both Eyescrews
Slide on Crimp and run Wire over Latch Bar
between the corner and the Tab
Crimp
Run Wire thru Crimp
Spring
Attachment
from Bar Tab
to Bracket
13 14
15 16
False Panel
Cleats
17
Tab
Corner
Cane Latch
Making Contact
with Jamb Face Strike Plate
7/8” Drilled
Hole Before
Installing Plate
Book Pull Install
Install Eyescrews
3/16” Drilled
Hole
Install one side of Hinge to Shelf
Centered in line with drilled
pass-thru hole
4”
C
L
Transfer and
Drill Holes for
Hinge
Transfer and
Drill Hole for
Loop Clamp
2”
78
9 10
11 12
8”
4.75”
.25”
3/16”Thru Hole
Install Hinge to Book with
Hex Screws and washers behind
Hinge Plate with Cap Nuts in Book
Install Wire Loop
to Loop Clamp before
attaching Clamp
Feed Wire thru
Pass-Thru Hole and thru
both Eyescrews
Slide on Crimp and run Wire over Latch Bar
between the corner and the Tab
Crimp
Run Wire thru Crimp
Spring
Attachment
from Bar Tab
to Bracket
13 14
15 16
False Panel
Cleats
17
Tab
Corner
5/8”
Hole
5.5” Center
to Back
of Cabinet
29.43” Center
to Bottom
of Cabinet
5/8” Hole
Padlock
Bracket
Handle Bracket
Knob
Fully Engaged
in Lock Position
11/16”
Slot
Width
29.43” Center
to Bottom
of Cabinet
(Same Height as
5/8” Hole)
7.84”
Cane Latch Install
12
34
56
Hinge Side
Side of Cabinet
to locate for start
of installation
2.81”
Cane Latch
Orientation
Cane Latch
Making Contact
with Jamb Face Strike Plate
7/8” Drilled
Hole Before
Installing Plate
Book Pull Install
Install Eyescrews
3/16” Drilled
Hole
Install one side of Hinge to Shelf
Centered in line with drilled
pass-thru hole
4”
C
L
Transfer and
Drill Holes for
Hinge
Transfer and
Drill Hole for
Loop Clamp
2”
78
9 10
11 12
8”
4.75”
.25”
3/16”Thru Hole
Install Hinge to Book with
Hex Screws and washers behind
Hinge Plate with Cap Nuts in Book
Install Wire Loop
to Loop Clamp before
attaching Clamp
Feed Wire thru
Pass-Thru Hole and thru
both Eyescrews
Slide on Crimp and run Wire over Latch Bar
between the corner and the Tab
Crimp
Run Wire thru Crimp
Spring
Attachment
from Bar Tab
to Bracket
13 14
15 16
False Panel
Cleats
17
Tab
Corner

7
4. Inspect the hole from the top of the shelf and drill from the opposite side to
straighten out the hole more using the cloth again to protect the back of the shelf.
5. Under the fixed shelf, on the back panel draw a line down from the through hole a ¼”
and punch with an Awl to install the other Eyescrew. Hand screw into place making
sure not to go deeper than the ½” material as shown in Fig. 9. This will happen
before you run out of visible thread.
6. Take the provided Dummy Book and place the Butt Hinge folded and against the
Binding as shown in Fig. 10. Mark holes for hinge location on book bottom. Drill (2)
5/32” holes through bottom of book (Fig. 10). Place Book with Hinge in place on
shelf with back of book centered over through hole (Fig.11).
7. Lift book up trying leaving hinge in exact spot established in the previous step with
front of hinge ~4” from through hole (Fig. 11). Open hinge and mark holes on hinge
closer to the back of the cabinet. Pilot drill with 3/32” drill bit down 3/8” and install
(2) #6x5/8” Flat Head Screws to secure Hinge.
8. Take book and drill 5/32” hole 2” from book bottom centered in back of book
opposite binding side (Fig. 12).
Figure 10 Figure 11
5/8”
Hole
5.5” Center
to Back
of Cabinet
29.43” Center
to Bottom
of Cabinet
5/8” Hole
Padlock
Bracket
Handle Bracket
Knob
Fully Engaged
in Lock Position
11/16”
Slot
Width
29.43” Center
to Bottom
of Cabinet
(Same Height as
5/8” Hole)
7.84”
Cane Latch Install
12
34
56
Hinge Side
Side of Cabinet
to locate for start
of installation
2.81”
Cane Latch
Orientation
Cane Latch
Making Contact
with Jamb Face Strike Plate
7/8” Drilled
Hole Before
Installing Plate
Book Pull Install
Install Eyescrews
3/16” Drilled
Hole
Install one side of Hinge to Shelf
Centered in line with drilled
pass-thru hole
4”
C
L
Transfer and
Drill Holes for
Hinge
Transfer and
Drill Hole for
Loop Clamp
2”
78
9 10
11 12
8”
4.75”
.25”
3/16”Thru Hole
Install Hinge to Book with
Hex Screws and washers behind
Hinge Plate with Cap Nuts in Book
Install Wire Loop
to Loop Clamp before
attaching Clamp
Feed Wire thru
Pass-Thru Hole and thru
both Eyescrews
Slide on Crimp and run Wire over Latch Bar
between the corner and the Tab
Crimp
Run Wire thru Crimp
Spring
Attachment
from Bar Tab
to Bracket
13 14
15 16
False Panel
Cleats
17
Tab
Corner
5/8”
Hole
5.5” Center
to Back
of Cabinet
29.43” Center
to Bottom
of Cabinet
5/8” Hole
Padlock
Bracket
Handle Bracket
Knob
Fully Engaged
in Lock Position
11/16”
Slot
Width
29.43” Center
to Bottom
of Cabinet
(Same Height as
5/8” Hole)
7.84”
Cane Latch Install
12
34
56
Hinge Side
Side of Cabinet
to locate for start
of installation
2.81”
Cane Latch
Orientation
Cane Latch
Making Contact
with Jamb Face Strike Plate
7/8” Drilled
Hole Before
Installing Plate
Book Pull Install
Install Eyescrews
3/16” Drilled
Hole
Install one side of Hinge to Shelf
Centered in line with drilled
pass-thru hole
4”
C
L
Transfer and
Drill Holes for
Hinge
Transfer and
Drill Hole for
Loop Clamp
2”
78
9 10
11 12
8”
4.75”
.25”
3/16”Thru Hole
Install Hinge to Book with
Hex Screws and washers behind
Hinge Plate with Cap Nuts in Book
Install Wire Loop
to Loop Clamp before
attaching Clamp
Feed Wire thru
Pass-Thru Hole and thru
both Eyescrews
Slide on Crimp and run Wire over Latch Bar
between the corner and the Tab
Crimp
Run Wire thru Crimp
Spring
Attachment
from Bar Tab
to Bracket
13 14
15 16
False Panel
Cleats
17
Tab
Corner
Figure 12
5/8”
Hole
5.5” Center
to Back
of Cabinet
29.43” Center
to Bottom
of Cabinet
5/8” Hole
Padlock
Bracket
Handle Bracket
Knob
Fully Engaged
in Lock Position
11/16”
Slot
Width
29.43” Center
to Bottom
of Cabinet
(Same Height as
5/8” Hole)
7.84”
Cane Latch Install
12
34
56
Hinge Side
Side of Cabinet
to locate for start
of installation
2.81”
Cane Latch
Orientation
Cane Latch
Making Contact
with Jamb Face Strike Plate
7/8” Drilled
Hole Before
Installing Plate
Book Pull Install
Install Eyescrews
3/16” Drilled
Hole
Install one side of Hinge to Shelf
Centered in line with drilled
pass-thru hole
4”
C
L
Transfer and
Drill Holes for
Hinge
Transfer and
Drill Hole for
Loop Clamp
2”
78
9 10
11 12
8”
4.75”
.25”
3/16”Thru Hole
Install Hinge to Book with
Hex Screws and washers behind
Hinge Plate with Cap Nuts in Book
Install Wire Loop
to Loop Clamp before
attaching Clamp
Feed Wire thru
Pass-Thru Hole and thru
both Eyescrews
Slide on Crimp and run Wire over Latch Bar
between the corner and the Tab
Crimp
Run Wire thru Crimp
Spring
Attachment
from Bar Tab
to Bracket
13 14
15 16
False Panel
Cleats
17
Tab
Corner
Cane Latch
Making Contact
with Jamb Face Strike Plate
7/8” Drilled
Hole Before
Installing Plate
Book Pull Install
Install Eyescrews
3/16” Drilled
Hole
Install one side of Hinge to Shelf
Centered in line with drilled
pass-thru hole
4”
C
L
Transfer and
Drill Holes for
Hinge
Transfer and
Drill Hole for
Loop Clamp
2”
78
9 10
11 12
8”
4.75”
.25”
3/16”Thru Hole
Install Hinge to Book with
Hex Screws and washers behind
Hinge Plate with Cap Nuts in Book
Install Wire Loop
to Loop Clamp before
attaching Clamp
Feed Wire thru
Pass-Thru Hole and thru
both Eyescrews
Slide on Crimp and run Wire over Latch Bar
between the corner and the Tab
Crimp
Run Wire thru Crimp
Spring
Attachment
from Bar Tab
to Bracket
13 14
15 16
False Panel
Cleats
17
Tab
Corner

8
11. Run loose wire end from behind Book down through Pass thru Hole in Shelf.
Underneath the Shelf, run wire through both Eyescrews. Slide provided Wire Crimp
onto Wire (Fig. 15). Run Wire up and over Cane Latch Bar between the Tab Weldment
and inner corner of the Cane Bar as shown in Fig. 16. Run Wire around and back
through Wire Crimp. Use Small Clamp to hold Latch in Locked position while you
9. Install Book to Hinge using (2) #6x3/4” Black Hex Machine Screws with a copper
washer installed between the hinge and the book, capped with a Lock Nut from inside
the Book side using a 5/64” Hex Tool and 5/16” wrench (Fig. 13).
10. Slip Pre-crimped Wire Loop in provided Loop Clamp (Fig. 14). Use #6x3/4” Philips
Screw and Washer with Lock Nut to Attach Loop Clamp as shown in Fig. 14. Flip
hardware around if Philips screw is easier to install from inside the book using Stubby
Philips Screwdriver.
tighten wire to remove any excess
slack in the Wire before you crimp
Wire tight into place. Holding the
Wire without slack, use Pliers to
clamp crimp to hold wires into place.
Tighten crimp with Pliers as hard
as you can to make sure Crimp is
providing adequate pressure to make
sure Wire is crimped successfully.
Crushing the ends of the Crimp onto
the Wire is easier.
12. Install supplied Spring into the
Padlock Side Hole and adjacent Tab
with Hole on the Cane Latch Bar
using needle nose pliers.
5/8”
Hole
5.5” Center
to Back
of Cabinet
29.43” Center
to Bottom
of Cabinet
5/8” Hole
Padlock
Bracket
Handle Bracket
Knob
Fully Engaged
in Lock Position
11/16”
Slot
Width
29.43” Center
to Bottom
of Cabinet
(Same Height as
5/8” Hole)
7.84”
Cane Latch Install
12
34
56
Hinge Side
Side of Cabinet
to locate for start
of installation
2.81”
Cane Latch
Orientation
Cane Latch
Making Contact
with Jamb Face Strike Plate
7/8” Drilled
Hole Before
Installing Plate
Book Pull Install
Install Eyescrews
3/16” Drilled
Hole
Install one side of Hinge to Shelf
Centered in line with drilled
pass-thru hole
4”
C
L
Transfer and
Drill Holes for
Hinge
Transfer and
Drill Hole for
Loop Clamp
2”
78
9 10
11 12
8”
4.75”
.25”
3/16”Thru Hole
Install Hinge to Book with
Hex Screws and washers behind
Hinge Plate with Cap Nuts in Book
Install Wire Loop
to Loop Clamp before
attaching Clamp
Feed Wire thru
Pass-Thru Hole and thru
both Eyescrews
Slide on Crimp and run Wire over Latch Bar
between the corner and the Tab
Crimp
Run Wire thru Crimp
Spring
Attachment
from Bar Tab
to Bracket
13 14
15 16
False Panel
Cleats
17
Tab
Corner
Cane Latch
Making Contact
with Jamb Face Strike Plate
7/8” Drilled
Hole Before
Installing Plate
Book Pull Install
Install Eyescrews
3/16” Drilled
Hole
Install one side of Hinge to Shelf
Centered in line with drilled
pass-thru hole
4”
C
L
Transfer and
Drill Holes for
Hinge
Transfer and
Drill Hole for
Loop Clamp
2”
78
9 10
11 12
8”
4.75”
.25”
3/16”Thru Hole
Install Hinge to Book with
Hex Screws and washers behind
Hinge Plate with Cap Nuts in Book
Install Wire Loop
to Loop Clamp before
attaching Clamp
Feed Wire thru
Pass-Thru Hole and thru
both Eyescrews
Slide on Crimp and run Wire over Latch Bar
between the corner and the Tab
Crimp
Run Wire thru Crimp
Spring
Attachment
from Bar Tab
to Bracket
13 14
15 16
False Panel
Cleats
17
Tab
Corner
5/8”
Hole
5.5” Center
to Back
of Cabinet
29.43” Center
to Bottom
of Cabinet
5/8” Hole
Padlock
Bracket
Handle Bracket
Knob
Fully Engaged
in Lock Position
11/16”
Slot
Width
29.43” Center
to Bottom
of Cabinet
(Same Height as
5/8” Hole)
7.84”
Cane Latch Install
12
34
56
Hinge Side
Side of Cabinet
to locate for start
of installation
2.81”
Cane Latch
Orientation
Cane Latch
Making Contact
with Jamb Face Strike Plate
7/8” Drilled
Hole Before
Installing Plate
Book Pull Install
Install Eyescrews
3/16” Drilled
Hole
Install one side of Hinge to Shelf
Centered in line with drilled
pass-thru hole
4”
C
L
Transfer and
Drill Holes for
Hinge
Transfer and
Drill Hole for
Loop Clamp
2”
78
9 10
11 12
8”
4.75”
.25”
3/16”Thru Hole
Install Hinge to Book with
Hex Screws and washers behind
Hinge Plate with Cap Nuts in Book
Install Wire Loop
to Loop Clamp before
attaching Clamp
Feed Wire thru
Pass-Thru Hole and thru
both Eyescrews
Slide on Crimp and run Wire over Latch Bar
between the corner and the Tab
Crimp
Run Wire thru Crimp
Spring
Attachment
from Bar Tab
to Bracket
13 14
15 16
False Panel
Cleats
17
Tab
Corner
5/8”
Hole
5.5” Center
to Back
of Cabinet
29.43” Center
to Bottom
of Cabinet
5/8” Hole
Padlock
Bracket
Handle Bracket
Knob
Fully Engaged
in Lock Position
11/16”
Slot
Width
29.43” Center
to Bottom
of Cabinet
(Same Height as
5/8” Hole)
7.84”
Cane Latch Install
12
34
56
Hinge Side
Side of Cabinet
to locate for start
of installation
2.81”
Cane Latch
Orientation
Cane Latch
Making Contact
with Jamb Face Strike Plate
7/8” Drilled
Hole Before
Installing Plate
Book Pull Install
Install Eyescrews
3/16” Drilled
Hole
Install one side of Hinge to Shelf
Centered in line with drilled
pass-thru hole
4”
C
L
Transfer and
Drill Holes for
Hinge
Transfer and
Drill Hole for
Loop Clamp
2”
78
9 10
11 12
8”
4.75”
.25”
3/16”Thru Hole
Install Hinge to Book with
Hex Screws and washers behind
Hinge Plate with Cap Nuts in Book
Install Wire Loop
to Loop Clamp before
attaching Clamp
Feed Wire thru
Pass-Thru Hole and thru
both Eyescrews
Slide on Crimp and run Wire over Latch Bar
between the corner and the Tab
Crimp
Run Wire thru Crimp
Spring
Attachment
from Bar Tab
to Bracket
13 14
15 16
False Panel
Cleats
17
Tab
Corner
Figure 13 Figure 14
Figure 15

9
13. Test Latch action by opening and closing the door using the Book to disengage and
Engage the Latch. If the Cane Latch has any resistance, the Latch will not engage
properly. Inspect Wire movement for any unneeded tension or resistance. Apply Bar
Soap to any points of friction or unwanted noises.
14. If the Latch is desired to be completely hidden and unseen. Consider installing
a false bottom to the fixed shelf. Any ridged ¼” plywood cut to the size of the
underside of the fixed shelf will fit. Install ¾” wood cleats inset 1/4” from the bottom
shelf edge all the way around the underside of the Shelf. Install with Brad Nails or
putty over screws to complete the Hidden Latch look.
Closed Door Open Door
5/8”
Hole
5.5” Center
to Back
of Cabinet
29.43” Center
to Bottom
of Cabinet
5/8” Hole
Padlock
Bracket
Handle Bracket
Knob
Fully Engaged
in Lock Position
11/16”
Slot
Width
29.43” Center
to Bottom
of Cabinet
(Same Height as
5/8” Hole)
7.84”
Cane Latch Install
12
34
56
Hinge Side
Side of Cabinet
to locate for start
of installation
2.81”
Cane Latch
Orientation
Cane Latch
Making Contact
with Jamb Face Strike Plate
7/8” Drilled
Hole Before
Installing Plate
Book Pull Install
Install Eyescrews
3/16” Drilled
Hole
Install one side of Hinge to Shelf
Centered in line with drilled
pass-thru hole
4”
C
L
Transfer and
Drill Holes for
Hinge
Transfer and
Drill Hole for
Loop Clamp
2”
78
9 10
11 12
8”
4.75”
.25”
3/16”Thru Hole
Install Hinge to Book with
Hex Screws and washers behind
Hinge Plate with Cap Nuts in Book
Install Wire Loop
to Loop Clamp before
attaching Clamp
Feed Wire thru
Pass-Thru Hole and thru
both Eyescrews
Slide on Crimp and run Wire over Latch Bar
between the corner and the Tab
Crimp
Run Wire thru Crimp
Spring
Attachment
from Bar Tab
to Bracket
13 14
15 16
False Panel
Cleats
17
Tab
Corner
5/8”
Hole
5.5” Center
to Back
of Cabinet
29.43” Center
to Bottom
of Cabinet
5/8” Hole
Padlock
Bracket
Handle Bracket
Knob
Fully Engaged
in Lock Position
11/16”
Slot
Width
29.43” Center
to Bottom
of Cabinet
(Same Height as
5/8” Hole)
7.84”
Cane Latch Install
12
34
56
Hinge Side
Side of Cabinet
to locate for start
of installation
2.81”
Cane Latch
Orientation
Cane Latch
Making Contact
with Jamb Face Strike Plate
7/8” Drilled
Hole Before
Installing Plate
Book Pull Install
Install Eyescrews
3/16” Drilled
Hole
Install one side of Hinge to Shelf
Centered in line with drilled
pass-thru hole
4”
C
L
Transfer and
Drill Holes for
Hinge
Transfer and
Drill Hole for
Loop Clamp
2”
78
9 10
11 12
8”
4.75”
.25”
3/16”Thru Hole
Install Hinge to Book with
Hex Screws and washers behind
Hinge Plate with Cap Nuts in Book
Install Wire Loop
to Loop Clamp before
attaching Clamp
Feed Wire thru
Pass-Thru Hole and thru
both Eyescrews
Slide on Crimp and run Wire over Latch Bar
between the corner and the Tab
Crimp
Run Wire thru Crimp
Spring
Attachment
from Bar Tab
to Bracket
13 14
15 16
False Panel
Cleats
17
Tab
Corner
Cane Latch
Making Contact
with Jamb Face Strike Plate
7/8” Drilled
Hole Before
Installing Plate
Book Pull Install
Install Eyescrews
3/16” Drilled
Hole
Install one side of Hinge to Shelf
Centered in line with drilled
pass-thru hole
4”
C
L
Transfer and
Drill Holes for
Hinge
Transfer and
Drill Hole for
Loop Clamp
2”
78
9 10
11 12
8”
4.75”
.25”
3/16”Thru Hole
Install Hinge to Book with
Hex Screws and washers behind
Hinge Plate with Cap Nuts in Book
Install Wire Loop
to Loop Clamp before
attaching Clamp
Feed Wire thru
Pass-Thru Hole and thru
both Eyescrews
Slide on Crimp and run Wire over Latch Bar
between the corner and the Tab
Crimp
Run Wire thru Crimp
Spring
Attachment
from Bar Tab
to Bracket
13 14
15 16
False Panel
Cleats
17
Tab
Corner
Figure 16 Figure 17

10
Invisidoor Application Images

11
NOTES

Also available from CSH:
REV. 1.08.21
1170 Wauwatosa Rd.
Cedarburg, WI 53012
cshardware.com
(262) 365-7960
Mini Barn Door Hardware Rolling Barn Door Hardware
Rolling Ladders
This manual suits for next models
1
Table of contents
