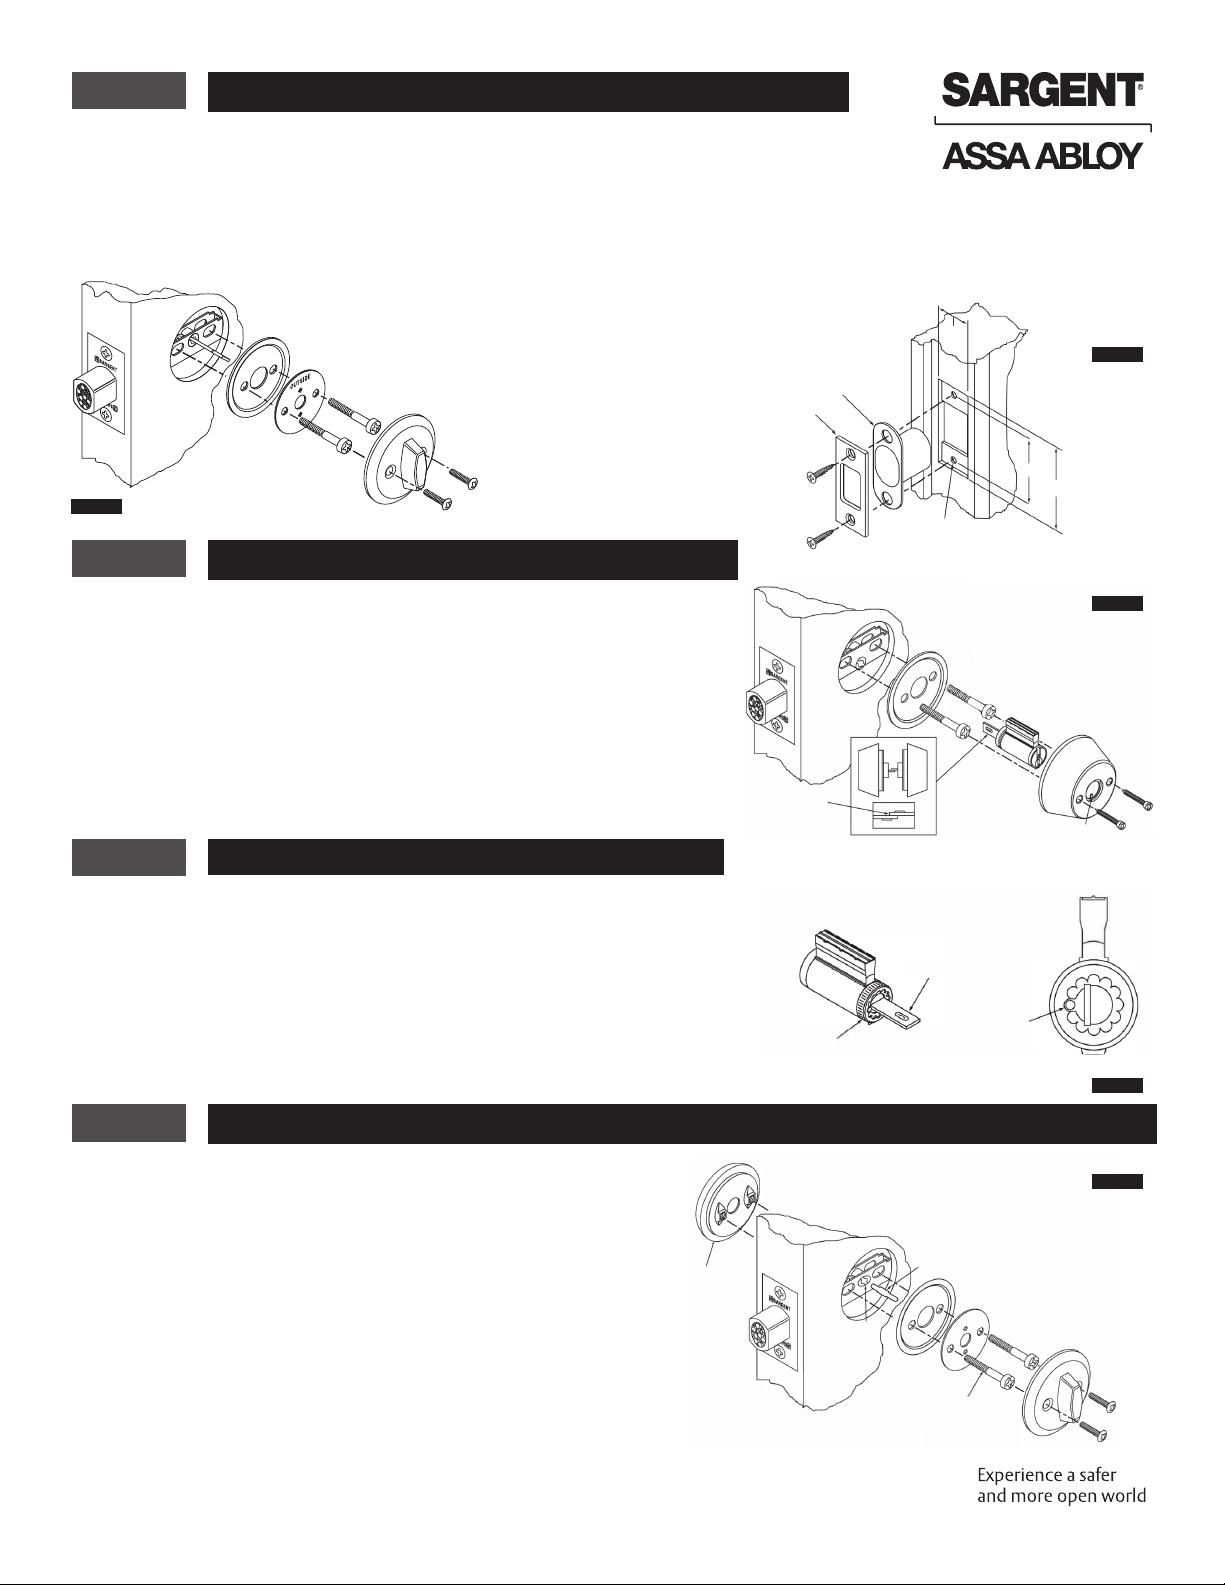
Assa Abloy SARGENT 480 Series User manual
Other Assa Abloy Door Lock manuals

Assa Abloy
Assa Abloy ESA500 User manual

Assa Abloy
Assa Abloy ZI IKON eCLIQ N109 User manual

Assa Abloy
Assa Abloy ESA500 Installation manual

Assa Abloy
Assa Abloy Corbin Russwin Access 600 CL33600 TCRNE1... User manual

Assa Abloy
Assa Abloy Sargent 11 Line User manual

Assa Abloy
Assa Abloy Yale real Living Assure Lock SL Technical specifications

Assa Abloy
Assa Abloy Securitron UnLatch Manual

Assa Abloy
Assa Abloy RIXSON W0700 Series User manual

Assa Abloy
Assa Abloy Valencia Bella User manual

Assa Abloy
Assa Abloy SARGENT KP8977 Guide

Assa Abloy
Assa Abloy KESO User manual

Assa Abloy
Assa Abloy RIXSON 93 User manual
Assa Abloy
Assa Abloy Arrow Revolution U4A-YRHCPZW0 Technical specifications

Assa Abloy
Assa Abloy EL460 User manual

Assa Abloy
Assa Abloy Lockwood Onyx 9A1A2/5PBLK User manual

Assa Abloy
Assa Abloy Corbin Russwin ED5200N Series User manual

Assa Abloy
Assa Abloy Corbin Russwin Access 600 CL33600 TCRNE1... User manual

Assa Abloy
Assa Abloy OneSystem N1940 User manual

Assa Abloy
Assa Abloy Sargent PE8500 Series User manual

Assa Abloy
Assa Abloy R10 User manual


Popular Door Lock manuals by other brands


SCOOP
SCOOP Pullbloc 4.1 FS Panik Assembly instruction

Yale
Yale MORTISE 8800 SERIES installation instructions

Siegenia
Siegenia KFV AS3500 Assembly instructions

Saflok
Saflok Quantum ädesē RFID installation instructions

ArrowVision
ArrowVision Shepherd 210 installation manual

Baldwin
Baldwin 009 Series quick start guide