manuals.online logo
Brands
  1. Home
  2. •
  3. Brands
  4. •
  5. CTA
  6. •
  7. Rack & Stand
  8. •
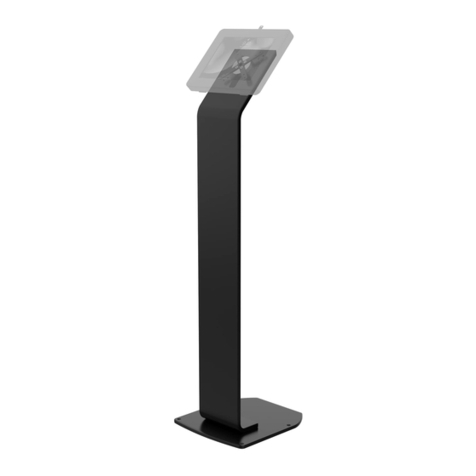
  9. CTA PAD-SHFS User manual

CTA PAD-SHFS User manual

Heavy Duty Security
Gooseneck Floor Stand
& Connecting Pole Add-on
INSTRUCTION MANUAL
PAD-SHFS & ADD-POLE
1.Going the Cable Through the Cable Routings on the Pole
1.Put the top pole to the lowest position,insert the cable into the cable routing on the bottom pole and push inward.
2.Draw out the top pole and continue to push inward the cable until the cable head is visible through the cable routing on the top pole .
3.Draw out the cable head from the cable routing on the top pole .
This product allows you to go through the cable from the cable routings on the pole.
Instructions:
Package Contents:
loosen completely and remove from top
PAD-SCGS
3. Base Assembly and Connecting the Metal Cover:
METAL CONNECTION
HEIGHT
ADJUSTMENT
KNOB
POLE
METAL
CROSS BASE X 2
CONNECTION SCREW BOLT,
WASHERS AND NUT
Pole Assembly and Pole Nut
Cross Base Sections (2)
Allen Key
2. Installing the Wheels
Wheel
Place a spring washer over the screw
bolt on the wheel.
Place the screw bolt from each wheel through the metal base, then place a nut cover
over the top of each. Screw down clockwise by hand, then use wrench to tighten
further.
Screw Nut Cover
Spring
Washer
Metal
Base
1) Place the metal base pieces with the higher
piece on top of the cross base. Align the holes
at the bottom of the pole with the holes on the
cross base.
2) Insert a screw bolt with a washer into each
of 4 holes. Place another washer on the
underside of each screw bolts.
3) Grip the nut on the underside with one hand,
and use the other to tighten each screw with
the Allen key. Repeat to tighten all four
screw bolts.
4. Rotate the grip counter clockwise to
of pole.
5. Place the square metal cover over
the top of the pole and slide down to
stand base.
6. Place grip back over stand pole
and tighten.
4. Connecting the Tablet gooseneck holder & Battery Case
3. Rotate plastic grip counter clock-
wise to loosen, then adjust pole to
desired height. Rotate plastic grip
clockwise to tighten.
1. Refer to Section 1 to install your
device and make sure you have held
it securly.
2. Tighten and loosen the gooseneck to
holder connection screw to adjust ease of
rotation.
5. Installing your Device and Adjusting the Floor Stand:
3. Turn the Y screw clockwise to
tighten the connection.
Gooseneck
Metal
Connection
Y Screw
Battery Case
1. Place battery case over top of
metal connection.
Note: if Y screw is already in,
unscrew before attaching gooseneck.
2. Screw the gooseneck onto the
metal connection of the pole by
turning clockwise. Be sure that the
battery case is on the opposite side
of the pole as the Y screw.
Allen Key
Instructions:
Use this table to determine the appropriate
foam pad to use with your tablet.
Note: sizes refer to total tablet size with or
without a case.
m
m
Foam Pad
Thickness
Tablet
Thickness:
1mm 0.67-1.06in
5mm 0.51-0.91in
10mm 0.31-0.71in
17-27m
13-23m
8-18mm
/
/
/
1.Attaching Foam Pad to Tablet Holder
Select the appropriate foam pad according
to the thickness of your tablet (or tablet in its
case), then press adhesive side into center
of the tablet holder.
1mm Foam Pad
5mm
Foam
Pad
10mm
Foam
Pad
LOCK
UNLOCK
LOCK
UNLOCK
LOCK
UNLOCK
LOCK
UNLOCK
LOCK
UNLOCK
Package Contents:
1.Insert key and unlock the
holder,TAKE OUT THE KEY
then slide the arm to open
to a width according to your
need.
2. Insert key and lock the
holder,TAKE OUT THE KEY
then install your device in
and slide the arm closed
to hold tightly.
Section 1
ADD-POLE
2.Stand Assembly:
1. Insert the pole into the center of the heavy duty base.
2. Place metal washer over tightening screw rod, then screw into the
bottom side of the stand base center, turning clockwise to tighten.
METAL CONNECTION
HEAVY DUTY BASE
HEIGHT
ADJUSTMENT
KNOB
POLE
METAL WASHER &
TIGHTENING SCREW ROD
Attaching wheels:
Connect wheels to stand base before attaching pole.
Screw wheels into floor base by hand,
then use wrench to tighten.
Instructions:
Use this table to determine the appropriate
foam pad to use with your tablet.
Note: sizes refer to total tablet size with or
without a case.
m
m
Foam Pad
Thickness
Tablet
Thickness:
1mm 0.67-1.06in
5mm 0.51-0.91in
10mm 0.31-0.71in
17-27m
13-23m
8-18mm
/
/
/
1.Attaching Foam Pad to Tablet Holder
Select the appropriate foam pad according
to the thickness of your tablet (or tablet in its
case), then press adhesive side into center
of the tablet holder.
1mm Foam Pad
5mm
Foam
Pad
10mm
Foam
Pad
LOCK
UNLOCK
LOCK
UNLOCK
LOCK
UNLOCK
LOCK
UNLOCK
LOCK
UNLOCK
1. Insert key and set position
to unlock. Remove key,
then slide holder open.
2. Load tablet corner first
into one end. Insert key
and set to lock, then slide
holder shut until secure.
Remove key.
Section 1
loosen completely and remove from top
PAD-SCGS
3. Base Assembly and Connecting the Metal Cover:
METAL CONNECTION
HEIGHT
ADJUSTMENT
KNOB
POLE
METAL
CROSS BASE X 2
CONNECTION SCREW BOLT,
WASHERS AND NUT
Pole Assembly and Pole Nut
Cross Base Sections (2)
Allen Key
2. Installing the Wheels
Wheel
Place a spring washer over the screw
bolt on the wheel.
Place the screw bolt from each wheel through the metal base, then place a nut cover
over the top of each. Screw down clockwise by hand, then use wrench to tighten
further.
Screw Nut Cover
Spring
Washer
Metal
Base
1) Place the metal base pieces with the higher
piece on top of the cross base. Align the holes
at the bottom of the pole with the holes on the
cross base.
2) Insert a screw bolt with a washer into each
of 4 holes. Place another washer on the
underside of each screw bolts.
3) Grip the nut on the underside with one hand,
and use the other to tighten each screw with
the Allen key. Repeat to tighten all four
screw bolts.
4. Rotate the grip counter clockwise to
of pole.
5. Place the square metal cover over
the top of the pole and slide down to
stand base.
6. Place grip back over stand pole
and tighten.
4. Connecting the Tablet gooseneck holder & Battery Case
3. Rotate plastic grip counter clock-
wise to loosen, then adjust pole to
desired height. Rotate plastic grip
clockwise to tighten.
1. Refer to Section 1 to install your
device and make sure you have held
it securly.
2. Tighten and loosen the gooseneck to
holder connection screw to adjust ease of
rotation.
5. Installing your Device and Adjusting the Floor Stand:
3. Turn the Y screw clockwise to
tighten the connection.
Gooseneck
Metal
Connection
Y Screw
Battery Case
1. Place battery case over top of
metal connection.
Note: if Y screw is already in,
unscrew before attaching gooseneck.
2. Screw the gooseneck onto the
metal connection of the pole by
turning clockwise. Be sure that the
battery case is on the opposite side
of the pole as the Y screw.
Allen Key
Instructions:
Use this table to determine the appropriate
foam pad to use with your tablet.
Note: sizes refer to total tablet size with or
without a case.
m
m
Foam Pad
Thickness
Tablet
Thickness:
1mm 0.67-1.06in
5mm 0.51-0.91in
10mm 0.31-0.71in
17-27m
13-23m
8-18mm
/
/
/
1.Attaching Foam Pad to Tablet Holder
Select the appropriate foam pad according
to the thickness of your tablet (or tablet in its
case), then press adhesive side into center
of the tablet holder.
1mm Foam Pad
5mm
Foam
Pad
10mm
Foam
Pad
LOCK
UNLOCK
LOCK
UNLOCK
LOCK
UNLOCK
LOCK
UNLOCK
LOCK
UNLOCK
Package Contents:
1.Insert key and unlock the
holder,TAKE OUT THE KEY
then slide the arm to open
to a width according to your
need.
2. Insert key and lock the
holder,TAKE OUT THE KEY
then install your device in
and slide the arm closed
to hold tightly.
Section 1
3. Rotate plastic grip counter clock-
wise to loosen, then adjust pole to
desired height. Rotate plastic grip
clockwise to tighten.
1. Refer to Section 1 to install your
device and make sure you have held
it securly.
2. Tighten and loosen the gooseneck to
holder connection screw to adjust ease of
rotation.
3. Installing your Device and Adjusting the Floor Stand:
Automatic Hand Sanitizer Dispenser
Universal Acrylic Soap Dispenser Holder

This manual suits for next models

1

Other CTA Rack & Stand manuals

CTA PAD-FTS9 User manual

CTA

CTA PAD-FTS9 User manual

CTA ADD-PARAFS User manual

CTA

CTA ADD-PARAFS User manual

CTA PAD-CHKWDC User manual

CTA

CTA PAD-CHKWDC User manual

CTA PAD-HSKSB User manual

CTA

CTA PAD-HSKSB User manual

CTA PAD-VPOS2BC User manual

CTA

CTA PAD-VPOS2BC User manual

CTA PAD-SWM User manual

CTA

CTA PAD-SWM User manual

CTA PAD-KMS User manual

CTA

CTA PAD-KMS User manual

CTA PAD-PARAF1 User manual

CTA

CTA PAD-PARAF1 User manual

CTA PAD-MSPC10 Series User manual

CTA

CTA PAD-MSPC10 Series User manual

CTA PAD-HGTSB User manual

CTA

CTA PAD-HGTSB User manual

CTA PAD-CHKB User manual

CTA

CTA PAD-CHKB User manual

CTA AUT-VDMC User manual

CTA

CTA AUT-VDMC User manual

CTA PAD-WDM User manual

CTA

CTA PAD-WDM User manual

CTA PAD-UAM User manual

CTA

CTA PAD-UAM User manual

CTA PAD-SSMANS User manual

CTA

CTA PAD-SSMANS User manual

CTA PAD-2VDMWA User manual

CTA

CTA PAD-2VDMWA User manual

CTA ADD-PARAFSV User manual

CTA

CTA ADD-PARAFSV User manual

CTA LT-LFSDM User manual

CTA

CTA LT-LFSDM User manual

CTA PAD-PARAPOSW User manual

CTA

CTA PAD-PARAPOSW User manual

CTA PAD-FTSU User manual

CTA

CTA PAD-FTSU User manual

CTA PAD-SSMA User manual

CTA

CTA PAD-SSMA User manual

CTA PAD-HSKSBAE User manual

CTA

CTA PAD-HSKSBAE User manual

CTA PAD-PF1ICC User manual

CTA

CTA PAD-PF1ICC User manual

CTA PAD-ASK13B User manual

CTA

CTA PAD-ASK13B User manual

Popular Rack & Stand manuals by other brands

homechoice Willow Shoe Rack Assembly instruction

homechoice

homechoice Willow Shoe Rack Assembly instruction

Innovation First 111-5383 installation instructions

Innovation First

Innovation First 111-5383 installation instructions

Jotto Desk 425-5652 quick start guide

Jotto Desk

Jotto Desk 425-5652 quick start guide

Grizzly T33692 instructions

Grizzly

Grizzly T33692 instructions

ACT AC8325 Quick install

ACT

ACT AC8325 Quick install

Square Getting Started Guide

Square

Square Getting Started Guide

KSL WM225T installation instructions

KSL

KSL WM225T installation instructions

Wali MF001-P installation manual

Wali

Wali MF001-P installation manual

Costway TL35274 user manual

Costway

Costway TL35274 user manual

Middle Atlantic Products TOR Series instruction sheet

Middle Atlantic Products

Middle Atlantic Products TOR Series instruction sheet

Avalon Instruments EVO-ZERO instruction manual

Avalon Instruments

Avalon Instruments EVO-ZERO instruction manual

Hakko Electronics 999-224B Assembly instructions

Hakko Electronics

Hakko Electronics 999-224B Assembly instructions

Crimson CV100S-24A instruction manual

Crimson

Crimson CV100S-24A instruction manual

Pulsar RS4268GD installation guide

Pulsar

Pulsar RS4268GD installation guide

Ubiquiti Quick-Mount quick start guide

Ubiquiti

Ubiquiti Quick-Mount quick start guide

KSL WMO-6241N Quick installation guide

KSL

KSL WMO-6241N Quick installation guide

Titan Fitness HEAVY DUTY POWER RACK owner's manual

Titan Fitness

Titan Fitness HEAVY DUTY POWER RACK owner's manual

Crimson F55A instruction manual

Crimson

Crimson F55A instruction manual

manuals.online logo
manuals.online logoBrands
  • About & Mission
  • Contact us
  • Privacy Policy
  • Terms and Conditions

Copyright 2025 Manuals.Online. All Rights Reserved.