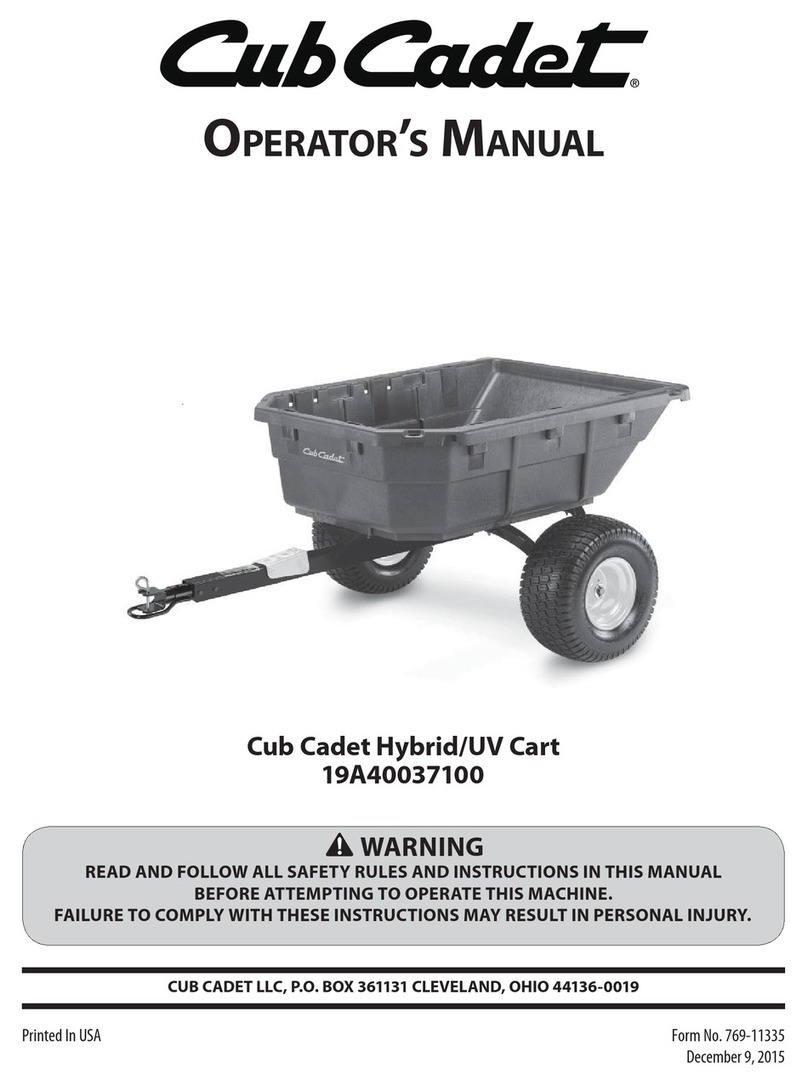
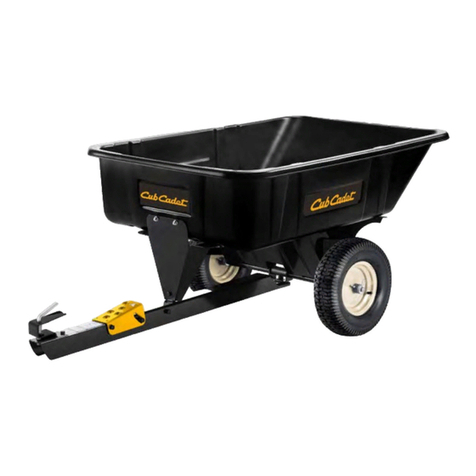
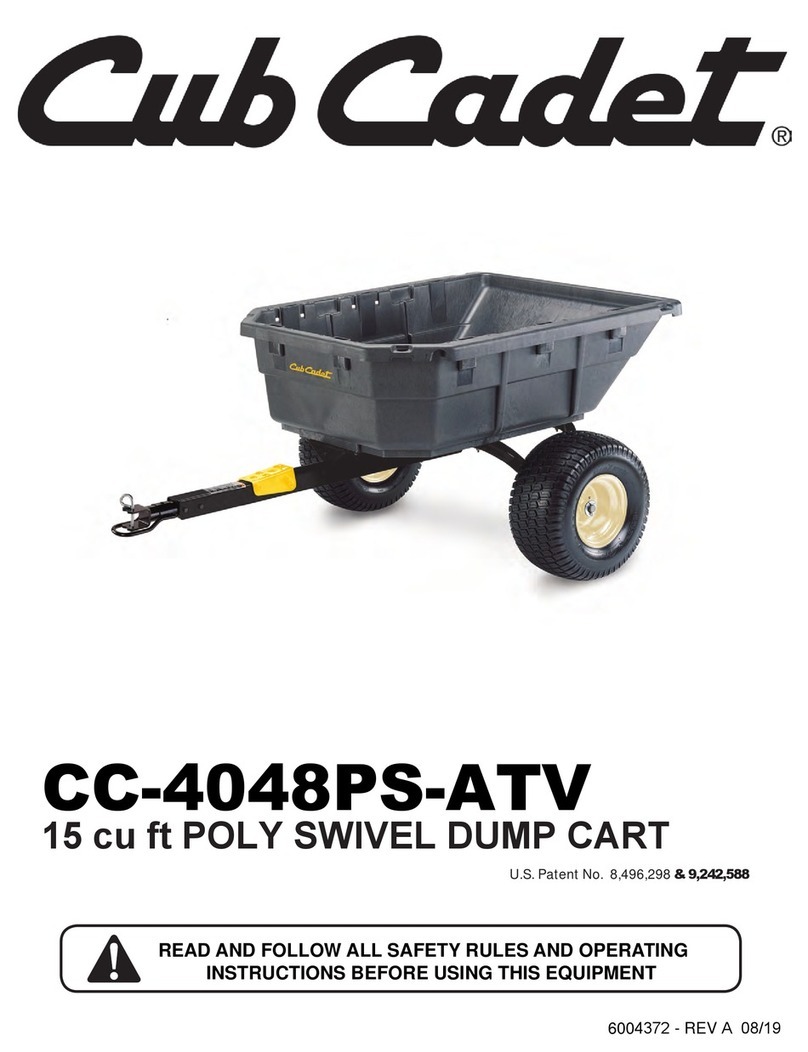
Cub Cadet 19A40026100 User manual

CUB CADET LLC, P.O. BOX 361131 CLEVELAND, OHIO 44136-0019
Printed In USA
OperatOr’sManual
Safe Operation Practices • Set-Up • Operation • Maintenance • Service • Troubleshooting • Warranty
WARNING
READ AND FOLLOW ALL SAFETY RULES AND INSTRUCTIONS IN THIS MANUAL
BEFORE ATTEMPTING TO OPERATE THIS EQUIPMENT.
FAILURE TO COMPLY WITH THESE INSTRUCTIONS MAY RESULT IN PERSONAL INJURY.
Cub Cadet Hauler
19A40026100
Form No. 769-10609A
(June 3, 2015)
• Español, P. 12
• Français, P. 22

Product Registration and Customer Support
Please register your product on our website, www.cubcadet.com.
If you have difficulty assembling this product or have any questions regarding the controls, operation, or maintenance of
this equipment, you can seek help from the experts. Choose from the options below:
◊Visit us on the web at www.cubcadet.com
◊Call a Customer Support Representative at (800) 965-4CUB
◊Locate your nearest Cub Cadet Dealer at (877) 282-8684
◊Write to Cub Cadet LLC • P.O. Box 361131 • Cleveland, OH • 44136-0019
Thank you for purchasing a Cub Cadet Hauler. It was carefully
engineered to provide excellent performance whenproperly
operated and maintained.
Please read this entire manual prior to operating the equipment.
It instructs you how to safely and easily set up, operate and
maintain your equipment. Please be sure that you, and any other
persons who will operate the equipment, carefully follow the
recommended safety practices at all times. Failure to do so could
result in personal injury or property damage.
All information in this manual is relative to the most recent
product information available at the time of printing. Review this
manual frequently to familiarize yourself with the equipment,
its features and operation. Please be aware that this Operator’s
Manual may cover a range of product specifications for various
models. Characteristics and features discussed and/or illustrated
in this manual may not be applicable to all models. Cub Cadet
LLC reserves the right to change product specifications, designs
and equipment without notice and without incurring obligation.
If you have any problems or questions concerning this
equipment, phone your local Cub Cadet dealer or contact us
directly. Cub Cadet’s Customer Support telephone numbers,
website address and mailing address can be found on this page.
We want to ensure your complete satisfaction at all times.
Throughout this manual, all references to LEFT, RIGHT, FRONT,
and REAR indicate that position on the hauler when facing
forward while seated in the tractor’s operator seat.
Thank You
Record Product Information
Before setting up and operating your new equipment, please
locate the model plate on the equipment and record the
information in the provided area to the right. You can locate the
model plate by looking at the bracket between the wheels. This
information will be necessary, should you seek technical support
via our web site, Customer Support Department, or with a local
authorized service dealer.
Model NuMber
Serial NuMber
To The Owner 1
2
Safe Operations....................................................... 3
Assembly & Set-Up .................................................. 6
Controls & Features................................................. 9
Operation................................................................10
Maintenance & Adjustment .................................11
Illustrated Parts List .............................................. 32
Attachments & Accessories .................................. 40
Warranty ................................................................ 42
Table of Contents

Important Safe Operation Practices 2
3
General Operation
1. Read, understand, and follow all instructions on the
equipment and in the manual(s) before attempting to
assemble and operate. Keep this manual in a safe place for
future and regular reference and for ordering replacement
parts.
2. Never carry passengers in or on the hauler.
3. Never allow children less than 14 years of age to operate
the towing vehicle or hauler. Children 14 and over should
read and understand the instructions and safe operation
practices in this manual, on the hauler, and the towing
vehicle manual and should be trained and supervised by
an adult.
4. Never allow adults to operate the towing vehicle or hauler
without proper instruction.
5. Check the towing vehicle brake action before use with the
hauler. Adjust or service the brakes per the manufacturer
instructions as necessary.
6. Keep bystanders, children and pets away from the towing
vehicle and the hauler while it is in operation.
7. Wear sturdy, rough-soled work shoes and close-fitting
slacks and shirts. Avoid loose fitting clothes and jewelry
which can be caught in movable parts of the hauler. Never
operate this hauler in bare feet or sandals.
8. Your hauler is not a toy. Use extreme caution at all times.
The hauler’s purpose is to haul material. Do not use it for
any other purpose.
9. Make sure you have control of the towing vehicle and
hauler at all times. Do not rush. Take your time. When
in doubt about the towing vehicle and hauler or your
surroundings, stop and take time to look things over. Make
sure you are able to proceed in a safe manner.
10. Watch for traffic when operating near or crossing
roadways.
11. Go slow. The hauler is not intended for use on any public
roadway or highway use.
12. Do not operate hauler while under the influence of alcohol
or drugs.
13. Operate only in daylight or good artificial light.
14. Always look down and behind before and while backing
the tow vehicle and hauler to avoid a back-over accident.
15. Slow down before turning. Operate the towing vehicle
smoothly. Avoid erratic operation and excessive speed
particularly when carrying a full or heavy load or on slopes.
16. Never leave a loaded cart unattended.
17. Use only accessories and attachments approved for you
Cub Cadet Hauler by the hauler manufacturer. Read,
understand and follow all instructions provided with the
approved accessory or attachment.
18. If situations occur which are not covered in this manual, use
care and good judgment. Contact your customer service
representative for assistance.
Towing, Loading and Unloading Safety
1. Do not exceed the 800 lb. load capacity of the hauler or the
limits of the towing vehicle.
2. Exceeding stated load capacity can lead to loss of traction
needed for slowing the vehicle down and stopping.
3. Reduce towed weight when operating on slopes.
4. Operate this hauler with towing vehicles designed with a
compatible tow hitch for this hauler.
5. Do not allow riders on or in this hauler.
6. Make sure dump latch is securely latched before loading or
operating the unit.
7. Spread load evenly in bed. Secure load to prevent
movement. Avoid top-heavy loads which could cause
hauler to tip.
8. Go slow. Avoid sudden starts and stops which could cause
load to shift and loss of control.
9. Use towing vehicle parking brake while loading and
unloading this hauler. When lowering dump bed, keep
hands and other body parts from between bed and frame.
Keep bystanders away.
10. Unload dump bed before disconnecting hauler from
towing vehicle. Keep body parts from under hauler tongue.
Slope Operation
Slopes are a major factor related to loss of control and tip-over
accidents which can result in severe injury or death. All slopes
require extra caution. If you cannot back up the slope or if you
feel uneasy on it, do not.
Do not tow heavy loads on slopes greater than 5 degrees. When
going downhill, the extra weight tends to push the tow vehicle
and may cause you to lose control (e.g. tow vehicle may speed
up, braking and steering ability are reduced, hauler may jack-
knife and cause tow vehicle to overturn.)
For your safety, use the slope gauge included as part of this
manual to measure slopes before operating hauler on a sloped
or hilly area. If the slope is greater than 5 degrees as shown on
the slope gauge, do not operate hauler with a heavy load on that
area or serious injury could result.
The Cub Cadet Hauler was designed for hauling activities typically associated with residential lawn and
garden maintenance activities in conjunction with a suitable towing vehicle with a compatible hitch.

4Section 2 — important Safe operation practiceS
Do:
1. Operate up and down slopes, not across. Exercise extreme
caution when changing direction on slopes.
2. Reduce speed, especially when going downhill, to avoid
loss of control.
3. Watch for holes, ruts, bumps, rocks, or other hidden objects
that could cause the hauler to tip over.
4. Go slow. Choose a low enough tow vehicle speed setting
so that you will not have to stop or shift while on the slope.
Tires may lose traction on slopes even though the brakes
are functioning properly. Always keep tow vehicle in gear
when going down slopes to take advantage of engine
braking action.
5. Follow the tow vehicle manufacturer’s recommendations
for towing operations. Do not exceed the hauler
recommendations regardless of tow vehicle capabilities.
6. Keep all movement on the slopes slow and gradual. Do
not make sudden changes in speed or direction. Rapid
acceleration or braking could cause the towing vehicle,
hauler, and load to become unstable which could cause
serious injury.
7. Avoid starting or stopping on a slope.
Do Not:
1. Do not turn on slopes unless necessary; then, turn slowly
and gradually downhill, if possible.
2. Do not drive near drop-offs, ditches or embankments. The
tow vehicle and hauler could suddenly turn over if a wheel
is over the edge of a cliff, ditch, or if an edge caves in.
3. Do not the towing vehicle and this hauler on steep slopes.
4. Do not operate towing vehicle and hauler on wet grass
or loose ground surfaces. Reduced traction could cause
sliding.
5. Do not shift to neutral and coast downhill. Over-speeding
may cause the operator to lose control of the towing
vehicle and hauler resulting in serious injury or death.
6. Do not tow loaded hauler on slopes greater than 5 degrees.
When going downhill, the extra weight tends to push the
towing vehicle and may cause you to lose control (e.g.
towing vehicle may speed up, braking and steering ability
are reduced, attachment may jack-knife and cause towing
vehicle to overturn).
7. Do not make sudden changes in speed or direction.
Children
1. Tragic accidents can occur if the operator is not alert to the
presence of children. Children are often attracted to the
towing vehicle and hauler. They do not understand the
dangers. Never assume that children will remain where you
last saw them.
a. Keep children out of the operating area and in
watchful care of a responsible adult other than the
operator.
b. Be alert and turn the towing vehicle off if a child
enters the area.
c. Before and while backing, look behind and down for
small children.
d. Never carry children on the towing vehicle or hauler.
They may fall off and be seriously injured or interfere
with safe hauler operation.
e. Use extreme care when approaching blind corners,
doorways, shrubs, trees or other objects that may
block your vision of a child who may run into the
path of the towing vehicle and hauler.
f. Keep children away from hot or running engines.
They can suffer burns from a hot muffler.
g. Remove key when a towing vehicle is unattended to
prevent unauthorized operation.
2. Never allow children less than 14 years of age to operate
the towing vehicle or hauler. Children 14 and over should
read and understand the instructions and safe operation
practices in this manual, on the hauler, and the towing
hauler manual and should be trained and supervised by an
adult.

5Section 2 — important Safe operation practiceS
Safety Symbols
This page depicts and describes safety symbols that may appear on this product. Read, understand, and follow all instructions on the
machine before attempting to assemble and operate.
Symbol Description
READ THE OPERATOR’S MANUAL(S)
Read, understand, and follow all instructions in the manual(s) before attempting to
assemble and operate
DANGER — Do not carry children or passengers.
This symbol points out important safety instructions which, if not followed, could endanger
the personal safety and/or property of yourself and others. Read and follow all instructions
in this manual before attempting to operate this machine. Failure to comply with these
instructions may result in personal injury. When you see this symbol. Heed its warning.
WARNING! Your Responsibility—Restrict the use of this equipment to persons who read, understand and follow
the warnings and instructions in this manual and on the equipment.
SAVE THESE INSTRUCTIONS!

Assembly & Set-Up 3
6
NOTE: All references to LEFT, RIGHT, FRONT, and REAR indicate
the hauler position when seated in the tractor’s operator seat
and facing forward.
Hardware Pack
1
2
3
4
GREASE
Figure 3-1
The contents of the hardware pack are listed below and
referenced in Figure 3-1.
1. Two (2) Flat Washers, .760 x 1.490 x .060 (736-0351)
2. Two (2) Flange Washers, .781 x 1.590 (736-04228A)
3. Two (2) Lynch Pins, .1875 (714-0220A)
4. One (1) Lithium Grease (737-04085)
Hauler Preparation
1. Carefully unpack the contents of the carton and unwrap
and cut any cable ties securing the contents in the carton.
2. Carefully stand the hauler up as shown in Figure 3-2.
Figure 3-2
3. Before installing the wheels, the axles and the inside of the
rims should be greased with the packet of grease shipped
with your hauler. Approximately half of the package should
be used on each side. Apply some grease to the exposed
portion of the axle and coat the axle completely. Squeeze a
small amount of grease into the rim.
Contents of Carton
• One Hauler Assembly • One Tongue Assembly • Two Wheel Assemblies
• One Hardware Pack • One Operator’s Manual

7Section 3 — ASSembly & Set-Up
4. Slide the inner flat washer from the hardware pack, the tire
and outer flanged washer from the hardware pack onto the
axle as shown in Figure 3-3. Make sure the valve stem on
the tire rim is facing outward.
Figure 3-3
5. Install the lynch pins from the hardware pack through the
holes in the axles. Flip the lynch pin down over the axle to
secure the tires in place. See Figure 3-4.
1
2
Figure 3-4
6. Carefully set the hauler down onto its wheels.
7. Locate the panel latch on the front of the hauler. Push the
panel latch inward and raise the sides of the hauler bed.
See Figure 3-5.
1
2
Figure 3-5
8. Repeat Step 7 on the other side of the bed.
9. With both sides now raised, lift the front panel up and
insert the front panel into the side panels pull outward on
the tabs until they click into place. See Figure 3-6.
1
1
2
Figure 3-6

8Section 3— ASSembly & Set-Up
10. Lift the tailgate latches and then lift the tailgate into place.
See Figure 3-7.
1
1
2
Figure 3-7
11. When the tailgate is in position, secure it in place by
snapping the tailgate latches onto the tailgate. See Figure
3-8.
Figure 3-8
12. Remove the clevis pin and the cotter pin from the tongue
bracket. See the inset in Figure 3-9
1
2
3
Figure 3-9
13. Slide the tongue assembly into the tongue bracket as
shown in Figure 3-9. Line up the rear-most hole with the
hole in the tongue bracket and insert the clevis pin through
the tongue assembly and the tongue bracket. Secure the
clevis pin with the cotter pin as shown in Figure 3-9.
14. Be sure that the clevis pin is installed on the interior of the
tongue assembly and the tongue bracket as shown in the
inset in Figure 3-9.
Checking Tire Pressure
WARNING! Equal tire pressure should be
maintained at all times. Refer to the tire sidewall for
proper pressure.
The tires on your hauler may be over-inflated for shipping purposes.
Adjusting the tire pressure before using the hauler may be required.
Check the sidewall of tire for maximum p.s.i.
NOTE: The recommended tire pressure is 14 p.s.i.

Controls & Features 4
9
Dump Pedal
Tailgate Latch
Tailgate Latch
Tailgate
Tongue Hitch
NOTE: References to LEFT, RIGHT, FRONT, and REAR indicate that
position on the hauler when facing forward while seated in the
tractor’s operator seat.
Tailgate
The tailgate is located on the back of the hauler and can be
opened for loading and locks into place with the use of the two
tailgate latches.
Tailgate Latches
The tailgate latches are located on the rear of the hauler and are
used to secure the tailgate.
Tongue Hitch
The tongue hitch is located on the front of the tongue and is
used to hook the hauler up to your tractor.
Dump Pedal
The dump pedal is located on the tongue and can be used to
dump the contents of the hauler.

Operation 5
10
Attaching the Hauler to Your Tractor
1. Remove the clevis pin and cotter pin from the tongue hitch.
See Figure 5-1.
Figure 5-1
2. Carefully slide the tongue hitch onto the hitch bracket
on the back of your tractor and secure in place with the
hardware removed in Step 1. See Figure 5-1.
Dumping the Hauler
3. The contents of the hauler can be dumped by pressing
down on the dump pedal on the tongue. See Figure 5-2.
1
2
Figure 5-2
4. Raise the back of the hauler bed and push down on the
front of the bed until the bed bracket clicks into place.
Lowering the Tailgate
Pull up on the tailgate latches to lower the tailgate. See Figure
5-3.
Figure 5-3
Raising the Tailgate
Raise the tailgate and secure it into the up position by snapping
the tailgate latches back into place. See Figure 5-4.
Figure 5-4

Maintenance & Adjustments 6
11
Adjustments
Storing the Hauler
The hauler can be folded up for storage purposes. To prepare the
hauler for storage, proceed as follows:
1. Pull up on the tailgate latches and fold the tailgate down
into the bed.
2. Push the levers on the front of the hauler, under the bed
floor and lower the front panel down into the bed.
3. Fold the side panels down onto the bed until they snap
into the panel latches.
4. Remove the clevis pin and cotter pin securing the tongue
assembly into the tongue bracket.
5. Slide the tongue assembly out of the tongue bracket.
6. Stand the hauler up on its front end. See Figure 6-1.
Figure 6-1
7. Slide the tongue assembly into the opening on the hauler
support bracket as shown in Figure 6-1.
8. Secure the tongue assembly in place with the clevis pin
and cotter pin as shown in the inset of Figure 6-1.
Making a Divider for the Hauler
Using a piece of ⁄” plywood, a divider can be constructed to
create two separate bins for the hauler.
The dimensions for this divider are 12” high x 32-⁄” long by ⁄“
thick. Carefully cut the plywood and install it into the hauler bed
as shown in Figure 6-2.
Figure 6-2
Maintenance
1. Lubricate all the pivot points annually or as needed.
2. Grease the wheels using the grease fitting on the wheels
annually or as needed. See Figure 6-3.
Figure 6-3

Registro de productos y atención al cliente
Por favor registre su producto en nuestro sitio web, www.cubcadet.com.
En caso de tener problemas para montar este producto o de tener dudas con respecto a los controles, el funcionamiento o
mantenimiento de este equipo, puede solicitar la ayuda de expertos. Seleccione una de las opciones siguientes:
◊Visite nuestro sitio web en www.cubcadet.com
◊Llame a un representante de Asistencia al Cliente al (800) 965-4CUB
◊Localice a su distribuidor Cub Cadet más cercano llamando al (877) 282-8684
◊Escriba a Cub Cadet LLC • P.O. Box 361131 • Cleveland, OH • 44136-0019
Gracias por comprar un remolque Cub Cadet. Se ha diseñado
cuidadosamente para brindar excelente rendimiento si se opera
y mantiene correctamente.
Por favor lea todo este manual antes de hacer funcionar el
equipo. El manual le indica cómo configurar, operar y mantener
el equipo de manera fácil y segura. Por favor asegúrese de que
usted, y cualquier otra persona que haga funcionar el equipo,
siga atentamente y en todo momento las medidas de seguridad
recomendadas. En caso de no hacerlo podrían producirse
lesiones personales o daños materiales.
Toda la información contenida en este manual hace referencia
a la más reciente información de producto disponible en el
momento de la impresión. Revise el manual frecuentemente
para familiarizarse con el equipo, sus características y
funcionamiento. Por favor tenga en cuenta que este Manual
del Operador puede cubrir una gama de especificaciones para
productos de varios modelos. Es posible que las características y
funciones incluidas y/o ilustradas en este manual no se apliquen
a todos los modelos. Cub Cadet LLC se reserva el derecho de
modificar las especificaciones de los productos, los diseños y
el equipo sin previo aviso y sin generar responsabilidad por
obligaciones de ningún tipo.
Si tiene algún problema o duda con respecto a este equipo, llame
a su distribuidor Cub Cadet local o comuníquese directamente
con nosotros. En esta página encontrará los números de
teléfono, la dirección del sitio web y la dirección postal de la
Atención al cliente de Cub Cadet. Queremos garantizar su entera
satisfacción en todo momento.
En todo este manual, las referencias a IZQUIERDA, DERECHA,
ADELANTE y ATRÁS indican esa posición del remolque desde el
asiento del operador en el tractor, mirando hacia adelante.
Gracias
Registro de información de producto
Antes de configurar y hacer funcionar su equipo nuevo, por favor
localice la placa de modelo en el equipo y registre la información
en el espacio de la derecha. Para encontrar la placa de modelo
mire en la ménsula entre las ruedas. Necesitará esta información
si tiene que solicitar soporte técnico a través de nuestro sitio
web, el Departamento de atención al cliente, o de un distribuidor
local de servicio autorizado.
NúMero de Modelo
NúMero de Serie
Al propietario 1
12
Utilización segura ..................................................13
Montaje y Conguración.......................................16
Controles y Características....................................19
Funcionamiento.................................................... 20
Mantenimiento y ajustes.......................................21
Lista de piezas ilustradas...................................... 32
Aditamentos y accesorios..................................... 40
Garantía................................................................. 43
Índice

Importantes medidas de seguridad 2
13
Funcionamiento general
1. Lea, entienda y cumpla todas las instrucciones incluidas en
el equipo y en el(los) manual(es) antes de intentar realizar el
montaje de la unidad y utilizarla. Guarde este manual en un
lugar seguro para consultas futuras y periódicas, así como para
solicitar repuestos.
2. Nunca traslade pasajeros en el remolque.
3. Nunca permita que niños menores de 14 años utilicen el
vehículo de remolque o el remolque. Los niños de 14 años
en adelante deben leer y entender las instrucciones de
funcionamiento y las normas de seguridad contenidas en
este manual, en el remolque y en el manual del vehículo de
remolque y deben ser entrenados y supervisados por un
adulto.
4. Nunca permita que los adultos utilicen el vehículo de
remolque sin recibir antes la instrucción apropiada.
5. Compruebe el funcionamiento de los frenos del vehículo de
remolque antes de usarlo con el remolque. Ajuste o repare los
frenos según las instrucciones del fabricante si es necesario.
6. Mantenga a los observadores, niños y mascotas alejados
del vehículo de remolque y del remolque cuando está en
funcionamiento.
7. Utilice zapatos de trabajo resistentes, de suela fuerte, así como
pantalones y camisas ajustados. Evite usar vestimenta floja y
joyas que podrían quedar atrapadas en las partes móviles del
remolque. Nunca haga funcionar este remolque descalzo o
con sandalias.
8. Su remolque no es un juguete. Tenga extrema precaución
en todo momento. El propósito del remolque es remolcar
material. No lo utilice para ningún otro fin.
9. Asegúrese de mantener el control del vehículo de remolque
y del remolque en todo momento. No se apure. Tómese su
tiempo. Cuando dude acerca del vehículo de remolque y
del remolque o de sus alrededores, deténgase y tómese el
tiempo necesario para inspeccionar. Asegúrese de que está en
condiciones de continuar de forma segura.
10. Tenga cuidado con el tráfico cuando opere cerca de rutas o al
cruzarlas.
11. Vaya despacio. El remolque no está diseñado para ser usado
en la vía pública o en autopista.
12. No utilice el remolque bajo la influencia de alcohol o drogas.
13. Úselo solamente con luz natural o con buena luz artificial.
14. Siempre mire hacia abajo y hacia atrás antes de desplazarse
hacia atrás y mientras retrocede con el vehículo de remolque y
el remolque para evitar un accidente.
15. Reduzca la velocidad antes de girar. Accione el vehículo de
remolque de forma pareja. Evite la operación errática y la
velocidad excesiva particularmente cuando lleva una carga
pesada o en pendientes.
16. Nunca deje el carro cargado sin vigilancia.
17. Utilice únicamente accesorios y acoples para su remolque Cub
Cadet que sean aprobados por el fabricante del remolque.
Lea, comprenda y siga todas las instrucciones incluidas con el
accesorio o complemento aprobado.
18. Si se presentan situaciones que no están previstas en este
manual, tenga cuidado y use el sentido común. Póngase en
contacto con su representante de servicio al cliente para
obtener ayuda.
Seguridad al remolcar, cargar y descargar
1. No supere la capacidad de carga de 800 libras del remolque ni
los límites del vehículo de remolque.
2. Si se supera la capacidad de carga establecida se puede perder
la tracción necesaria para reducir la velocidad y detenerse.
3. Reduzca el peso remolcado cuando opera en pendientes.
4. Utilice este remolque con vehículos de remolque diseñados
con gancho de remolque compatible para este equipo.
5. No permita el traslado de personas en este remolque.
6. Asegúrese de que el sujetador de descarga esté bien trabado
antes de cargar la unidad o de utilizarla.
7. Esparza la carga de forma pareja en la plataforma. Sujete la
carga para evitar el movimiento. Evite cargas descompensadas
que pudieran hacer que el remolque se tumbe.
8. Vaya despacio. Evite arrancar y detener el equipo de repente,
ya que eso podría hacer que la carga se desplace y usted
pierda el control.
9. Use el freno de mano del vehículo de remolque mientras
carga y descarga este remolque. Cuando baja la plataforma de
descarga, mantenga las manos y otras partes del cuerpo fuera
del área entre la plataforma y el bastidor. Mantenga alejados a
los observadores.
10. Descargue la plataforma de descarga antes de desconectar el
remolque del vehículo de remolque. Mantenga las partes del
cuerpo lejos del área debajo de la lengüeta de remolque.
Funcionamiento en pendiente
Las pendientes son un factor importante relacionado con
accidentes por pérdida de control y vuelcos que pueden producir
lesiones graves o la muerte. Todas las pendientes requieren mayor
precaución. Si no puede retroceder por la pendiente o si no se siente
seguro, no lo haga.
No remolque cargas pesadas en pendientes superiores a 5 grados.
Cuando se desplaza cuesta abajo, el peso adicional tiende a empujar
el vehículo de remolque y puede hacerle perder el control (por
ejemplo, el vehículo de remolque se puede acelerar, la capacidad de
conducir y frenar se reduce, el remolque puede acodillarse y hacer
que el vehículo de remolque vuelque).
Para su seguridad, use el indicador de pendientes que se adjunta a
este manual para medir la pendiente antes de operar el remolque en
una zona inclinada. Si la pendiente es de más de 5º, como se muestra
en el medidor, no haga funcionar el remolque con carga pesada en
ese sector o podría causar lesiones graves.
El remolque Cub Cadet se ha diseñado para actividades de remolque típicamente asociadas con el mantenimiento
de césped y jardines residenciales junto con un vehículo de remolque adecuado con gancho compatible.

14 Sección 2 — importanteS medidaS de Seguridad
Haga lo siguiente:
1. Opere en las pendientes hacia arriba y hacia abajo, no de
manera transversal. Tenga mucho cuidado al cambiar de
dirección en una pendiente.
2. Reduzca la velocidad, especialmente al desplazarse cuesta
abajo, para evitar la pérdida de control.
3. Esté atento a los hoyos, surcos, baches, rocas u otros
objetos ocultos que podrían hacer que el remolque
vuelque.
4. Vaya despacio. Elija una velocidad suficientemente baja
del vehículo de remolque de manera que no tenga que
detenerse ni realizar cambios mientras se desplaza en
la pendiente. Los neumáticos pueden perder tracción
en las pendientes aun cuando los frenos funcionen
correctamente. Siempre mantenga el vehículo de
remolque en cambio mientras desciende una pendiente
para poder frenar con el motor.
5. Siga las recomendaciones del fabricante del vehículo de
remolque para las operaciones de remolque. No supere las
recomendaciones del remolque independientemente de la
capacidad del vehículo de remolque.
6. Todos los movimientos en las pendientes deben ser lentos
y graduales. No haga cambios bruscos de velocidad o
dirección. La aceleración o el frenado rápido podrían
causar la inestabilidad del vehículo de remolque, del
remolque y de la carga, lo cual podría provocar lesiones
graves.
7. Evite arrancar y detenerse cuando está en una pendiente.
No haga lo siguiente:
1. No gire en pendiente a menos que sea necesario; si lo hace,
gire lenta y gradualmente cuesta abajo, si es posible.
2. No se desplace cerca de caídas, zanjas o terraplenes. El
vehículo de remolque y el remolque pueden volcarse
repentinamente si una de las ruedas pasa el borde de un
acantilado o zanja o si se desmorona un borde.
3. No utilice el vehículo de remolque y este remolque en
pendientes empinadas.
4. No utilice el vehículo de remolque y el remolque en pasto
mojado o superficies de tierra blanda. La falta de tracción
puede hacer que se deslice.
5. No cambie a punto muerto para bajar por inercia. El exceso
de velocidad puede hacer que el operador pierda el
control del vehículo de remolque y del remolque y que se
produzcan lesiones graves o la muerte.
6. No remolque un remolque cargado en pendientes
superiores a 5 grados. Cuando se desplaza cuesta abajo, el
peso adicional tiende a empujar el vehículo de remolque y
puede hacerle perder el control (por ejemplo, el vehículo
de remolque se puede acelerar, la capacidad de conducir y
frenar se reduce, el acople puede acodillarse y hacer que el
vehículo de remolque vuelque).
7. No haga cambios bruscos de velocidad o dirección.
Niños
1. Pueden ocurrir accidentes trágicos si el operador no está
atento a la presencia de niños. Los niños con frecuencia se
sienten atraídos por el vehículo de remolque y el remolque.
No entienden los riesgos ni los peligros. Nunca suponga
que los niños permanecerán en el lugar donde los vio por
última vez.
a. Mantenga a los niños fuera del área de operación
y bajo estricta vigilancia de un adulto responsable
además del operador.
b. Esté alerta y apague el vehículo de remolque si un
niño ingresa al área.
c. Antes de moverse hacia atrás y mientras lo hace,
mire hacia atrás y abajo para ver que no haya niños.
d. No traslade nunca niños en el vehículo de remolque
o el remolque. Podrían caerse y resultar gravemente
heridos o interferir con la operación segura del
remolque.
e. Tenga mucho cuidado al aproximarse a las esquinas
ciegas, puertas, arbustos, árboles u otros objetos
que puedan obstaculizarle la visión de un niño
que pudiese correr al encuentro del vehículo de
remolque o del remolque.
f. Mantenga a los niños alejados de los motores en
marcha o calientes. Pueden sufrir quemaduras con
un silenciador caliente.
g. Retire la llave cuando el vehículo de remolque
quede sin vigilancia para evitar el funcionamiento
no autorizado.
2. Nunca permita que niños menores de 14 años utilicen el
vehículo de remolque o el remolque. Los niños de 14 años
en adelante deben leer y entender las instrucciones de
funcionamiento y las normas de seguridad contenidas en
este manual, en el remolque y en el manual del vehículo de
remolque y deben ser entrenados y supervisados por un
adulto.

15Sección 2 — importanteS medidaS de Seguridad
Símbolos de seguridad
En esta página se presentan y describen los símbolos de seguridad que pueden aparecer en este producto. Lea, entienda y siga todas
las instrucciones incluidas en la máquina antes de intentar armarla y hacerla funcionar.
Símbolo Descripción
LEA LOS MANUALES DEL OPERADOR
Lea, entienda y siga todas las instrucciones incluidas en los manuales antes de intentar
armarla y hacerla funcionar.
PELIGRO - No traslade niños ni pasajeros.
La presencia de este símbolo indica que se trata de instrucciones de seguridad importantes
que debe respetar para evitar poner en riesgo su seguridad personal y/o material y la de los
demás. Lea y cumpla todas las instrucciones de este manual antes de intentar operar esta
máquina. Si no respeta estas instrucciones puede provocar lesiones personales. Cuando vea
este símbolo, Tenga en cuenta la advertencia.
¡ADVERTENCIA! Su responsabilidad—Limite el uso de este equipo motorizado a las personas que lean,
comprendan y respeten las advertencias e instrucciones que figuran en este manual y en el equipo.
¡GUARDE ESTAS INSTRUCCIONES!

Montaje y Configuración 3
16
NOTA: Todas las referencias a IZQUIERDA, DERECHA, ADELANTE y
ATRÁS indican la posición relativa del remolque desde el asiento
del operador en el tractor, mirando hacia adelante.
Paquete de elementos de ferretería
1
2
3
4
GRASA
Figura 3-1
El contenido del paquete de elementos de ferretería se enumera
abajo y se hace referencia al mismo en la Figura 3-1.
1. Dos (2) arandelas planas, .760 x 1.490 x .060 (736-0351)
2. Dos (2) arandelas con brida, .781 x 1.590 (736-04228A)
3. Dos (2) pasadores Lynch, .1875 (714-0220A)
4. Una unidad (1) grasa de litio (737-04085)
Preparación del remolque
1. Desembale con cuidado el contenido de la caja y desate y
corte cualquier precinto que sujete el contenido dentro de
la caja.
2. Con cuidado coloque el remolque en posición vertical tal
como se muestra en la Figura 3-2.
Figura 3-2
3. Antes de instalar las ruedas, los ejes y el interior de las
llantas se deben engrasar con el paquete de grasa enviado
junto con el remolque. Se debe utilizar aproximadamente
la mitad del paquete en cada lado. Aplique un poco
de grasa en la parte expuesta del eje y recubra el eje
completamente. Inyecte una pequeña cantidad de grasa
dentro de la llanta.
Contenido de la caja de cartón
•Un conjunto de remolque • Un conjunto de lengüeta • Dos conjuntos de ruedas
•Un paquete de elementos de ferretería •Un Manual del operador

17Sección 3 — Montaje yconfiguración
4. Deslice la arandela plana interior del paquete de elementos
de ferretería, el neumático y la arandela con brida exterior
del paquete de elementos de ferretería en el eje, tal como
se muestra en la Figura 3-3. Asegúrese de que el vástago
de la válvula de la llanta del neumático esté mirando hacia
afuera.
Figura 3-3
5. Instale los pasadores Lynch del paquete de elementos
de ferretería a través de los orificios de los ejes. Voltee el
pasador Lynch hacia abajo sobre el eje para ajustar los
neumáticos en su lugar. Consulte la Figura 3-4.
1
2
Figura 3-4
6. Con cuidado coloque el remolque sobre sus ruedas.
7. Ubique el sujetador del panel en la parte delantera del
remolque. Presione el sujetador del panel hacia adentro y
levante los lados de la plataforma del remolque. Consulte
la Figura 3-5.
1
2
Figura 3-5
8. Repita el paso 7 del otro lado de la plataforma.
9. Con los dos lados ahora levantados, eleve el panel
delantero e inserte el panel delantero en los paneles
laterales, tire hacia afuera en las lengüetas hasta que
encajen en su lugar. Consulte la Figura 3-6.
1
1
2
Figura 3-6
10. Levante los sujetadores de la puerta trasera y luego eleve la
puerta trasera en su lugar. Consulte la Figura 3-7.

18 Sección 3 — Montaje yconfiguración
1
1
2
Figura 3-7
11. Cuando la puerta trasera esté en su lugar, fíjela
presionando los sujetadores de la puerta trasera en la
misma. Consulte la Figura 3-8.
Figura 3-8
12. Retire el pasador de horquilla y el pasador de chaveta de la
ménsula de lengüeta. Vea el recuadro de la Figura 3-9.
1
2
3
Figura 3-9
13. Deslice el conjunto de lengüeta en la ménsula de lengüeta
tal como se muestra en la Figura 3-9. Alinee el orificio
que se encuentra más atrás con el orificio de la ménsula
de lengüeta e inserte el pasador de chaveta a través del
conjunto de lengüeta y la ménsula de lengüeta. Fije el
pasador de horquilla con el pasador de chaveta tal como se
muestra en la Figura 3-9.
14. Asegúrese de que el pasador de horquilla quede instalado
en el interior del conjunto de lengüeta y la ménsula de
lengüeta tal como se muestra en el recuadro de la Figura
3-9.
Control de la presión de los neumáticos
¡Advertencia! Se debe mantener una presión
uniforme para todos los neumáticos en todo
momento. Consulte cuál es la presión adecuada en
los laterales de los neumáticos.
Tal vez los neumáticos del remolque hayan sido inflados en exceso
para el envío del producto. Puede ser necesario ajustar la presión de
los neumáticos antes de usar el remolque. Consulte en los laterales
de los neumáticos la presión máxima en psi.
NOTA: La presión recomendada para los neumáticos es 14 p.s.i.

Controles y Características 4
19
Pedal de
descarga
Sujetador de
puerta trasera
Sujetador de
puerta trasera
Puerta
trasera
Enganche de
lengüeta
NOTA: Las referencias a IZQUIERDA, DERECHA, ADELANTE y
ATRÁS indican esa posición del remolque desde el asiento del
operador en el tractor, mirando hacia adelante.
Puerta trasera
La puerta trasera está ubicada en la parte trasera del remolque y
se puede abrir para la carga y se traba en su lugar con el uso de
dos sujetadores de puerta trasera.
Sujetadores de puerta trasera
Los sujetadores de puerta trasera están ubicados en la parte
trasera del remolque y se usan para asegurar la puerta trasera.
Enganche de lengüeta
El enganche de lengüeta está ubicado delante de la lengüeta y
se utiliza para enganchar el remolque al tractor.
Pedal de descarga
El pedal de descarga está ubicado en la lengüeta y se puede
utilizar para descargar el contenido del remolque.

Funcionamiento 5
20
Acople del remolque a su tractor
1. Retire el pasador de horquilla y el pasador de chaveta del
enganche de lengüeta. Consulte la Figura 5-1.
Figura 5-1
2. Con cuidado deslice el enganche de lengüeta en la
ménsula de enganche que está en la parte trasera de su
tractor y fíjelo en su lugar con el elemento de ferretería
retirado en el paso 1. Vea la Figura 5-1.
Descarga del remolque
3. El contenido del remolque se puede descargar
presionando hacia abajo sobre el pedal de descarga de la
lengüeta. Consulte la Figura 5-2.
1
2
Figura 5-2
4. Levante la parte trasera de la plataforma del remolque y
empuje hacia abajo en la parte delantera de la plataforma
hasta que la ménsula de la plataforma haga clic en su lugar.
Bajar la puerta trasera
Tire hacia arriba sobre los sujetadores de la puerta trasera para
bajar la puerta trasera. Consulte la Figura 5-3.
Figura 5-3
Levantar la puerta trasera
Levante la puerta trasera y fíjela en posición arriba presionando
los sujetadores de la puerta trasera otra vez en su lugar. Consulte
la Figura 5-4.
Figura 5-4
Table of contents
Other Cub Cadet Outdoor Cart manuals

Cub Cadet
Cub Cadet 19A40036100 User manual

Cub Cadet
Cub Cadet CC-4048PS-ATV User manual

Cub Cadet
Cub Cadet 19A40037100 User manual

Cub Cadet
Cub Cadet 19B40026100 User manual

Cub Cadet
Cub Cadet CC-1000PS User manual

Cub Cadet
Cub Cadet CC-1000PS User manual

Cub Cadet
Cub Cadet CC-3040PS User manual

Cub Cadet
Cub Cadet CCTC-10 User manual

Cub Cadet
Cub Cadet CC-3048HKD User manual