Cuisinart MG-50C Service manual

®
Meat Grinder Attachment
INSTRUCTION AND RECIPE BOOKLET
MG-50C
For your safety and continued enjoyment of this product,
always read the Instruction Book carefully before using.

23
IMPORTANT
SAFEGUARDS
When using electrical appliances,
basic safety precautions should
always be taken, including the
following:
1. READ ALL INSTRUCTIONS
BEFORE USING.
2. Switch off and unplug your
Cuisinart®Stand Mixer before
tting or removing the Meat
Grinder Attachment, after use
and before cleaning.
3. Close supervision is necessary
when any appliance is used by
or near children or individuals
with certain disabilities.
Cuisinart does not recommend
the use of this appliance by
children or individuals with
certain disabilities.
4. NEVER FEED FOOD BY
HAND; ALWAYS USE THE
PUSHER. Avoid contact
with moving parts and tted
attachments. To reduce the
chances of bodily injury and/
or damage to the stand mixer
or Meat Grinder Attachment,
keep hands, clothing, cooking
utensils, etc., away from the
moving parts during operation.
5. Do not use ngers to scrape
food away from grinding plate
while appliance is operating.
Injury may result.
6. The use of attachments not
recommended or sold by
Cuisinart may cause re,
electric shock or injury.
7. Do not use more than one
attachment at a time.
8. Do not use the stand mixer or
attachment if it is damaged
or if the cord is damaged. Have
it checked and serviced before
resuming use.
9. Do not use this attachment
for anything other than its
intended use.
10. Do not use outdoors.
11. Warning: The cutter is sharp;
handle with care both when
using and when cleaning.
12. To protect against the risk of
electric shock, do not put the
base power unit in water or
other liquids.
13. Do not let cord hang over
edge of table or counter.
14. Never leave your Meat Grinder
Attachment unattended while
the stand mixer is running.
15. The attachments are intended
for use with the basic
appliance SM-50C.
16. Do not operate your
appliance in an appliance
garage or under a wall
cabinet. When storing in an
appliance garage always
unplug the unit from the
electrical outlet. Not doing
so could create a risk of re,
especially if the appliance
touches the walls of the
garage or the door touches
the unit as it closes.
SAVE THESE
INSTRUCTIONS
FOR HOUSEHOLD
USE ONLY
Refer to stand mixer manual for
stand mixer operating instructions.
IMPORTANT: Always unplug the
Cuisinart
®
Stand Mixer from outlet
when assembling and
disassembling.
CONTENTS
Important Safeguards....................2
Unpacking Instructions..................3
Parts and Features ........................4
Assembling Meat Grinder
Attachment .................................... 5
Sausage Maker .............................5
Cleaning and Maintenance............ 7
Tips and Hints ...............................7
Recipes ......................................... 8
Warranty....................................... 11
UNPACKING
INSTRUCTIONS
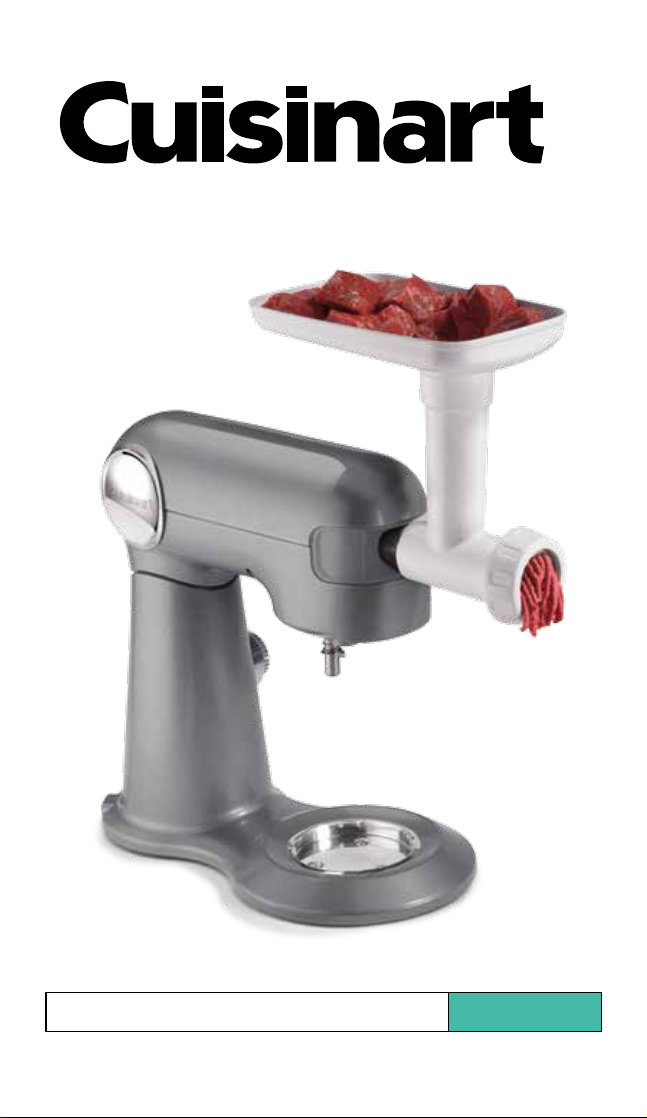
1. Place the gift box containing
your Cuisinart®Meat Grinder
Stand Mixer Attachment on
a at sturdy surface before
unpacking.
2. Remove the instruction booklet
and tray.
3. Remove the grinding plates,
sausage-making ring, cutter, ring
nut and both sausage nozzles.
Be careful when removing the
grinding plates.
4. Lift the corrugated insert that
contains the grinder body out
of the gift box and remove
the grinder body. Remove the
pusher/wrench.
5. Unscrew the ring nut and
remove the protective cardboard
insert from in front of the cutter.
Use caution; the blades are
sharp.
To assemble the meat grinder
attachment, follow Assembly
Instructions on page 5. Replace all
packaging materials inside box and
save the box for repackaging.
WARNING: RISK OF FIRE OR ELECTRIC SHOCK
The lightning flash with arrowhead symbol within an equilateral triangle
is intended to alert the user to the presence of uninsulated, dangerous
voltage within the product’s enclosure that may be of sufficient
magnitude to constitute a risk of fire or electric shock to persons.
The exclamation point within an equilateral triangle is intended to alert
the user to the presence of important operating and maintenance
(servicing) instructions in the literature accompanying the appliance.

45
PARTS AND FEATURES
1. Grinder Body
2. Feed Screw Pin
3. Cutter
4. Ring Nut
5. Wrench
6. Tray
7. Pusher with Storage
8. Pusher Lid
9. Sausage-Making Ring
10. Large Sausage Nozzle
for thicker sausages
11. Small Sausage Nozzle
for thinner sausages
12. Two Grinding Plates
a. Medium, use for
grinding raw meat,
cooked meats for
spreads and
breadcrumbs
b. Coarse, use for grinding
raw or cooked meats,
firm vegetables, dried
fruits and cheese
123
457
8
6
11
10
912b
12a
Assembling Meat
Grinder Attachment
Assemble the meat grinder
attachment prior to attaching
to the stand mixer.
1. Insert the feed screw pin
into the open end of the
attachment.
2. Place the cutter with the at
side facing out toward you
over the feed screw pin (this
is an important step or the
meat grinder will not work).
3. Place the grinding plate over
the cutter on the feed screw
pin.
4. Screw on the ring nut by
turning it clockwise and hand
tighten.
When you are nished meat
grinding, and if the ring nut is too
tight to remove, use the wrench
to loosen.
Attaching to stand
mixer
1. Make sure stand
mixer is OFF.
2. Gently pull port
cover off front
of mixer head to
remove.
3. Turn the
stand mixer
attachment
knob
counterclock-
wise until outlet
opening is
unobstructed.
4. Insert the square
metal end of the
assembled
attachment into
the opening. If
necessary, turn it to the right
slightly so the small round
knob on the attachment is
below the notch on right side
of opening, and turn it back
and forth slightly until the
knob slips into the notch and
attachment locks into place.
5. Turn the stand
mixer attach-
ment knob
clockwise to
secure grinder to
mixer.
6. Fit the tray onto
the top of the
meat grinder
and put a mixing
bowl under the
grinder to catch food.
MEAT GRINDER

67
Operation
1. Cut meat into 1-inch (2.5 cm)
cubes, or 1-inch (2.5 cm)
long strips.
2. Turn the stand mixer to
Speed 3, and drop meat into
the grinder, one strip or a
handful of cubes at a time.
3. Use the pusher to gently
move food down and into the
grinder. Do not push hard –
this could damage your meat
grinder.
Note: Very cold meat is good
for grinding. Frozen meat should
never be processed.
SAUSAGE MAKER
Assembling Sausage
Maker Attachment
Assemble the sausage maker
attachment prior to attaching to
the stand mixer.
1. Insert the feed screw pin into
the open end of the attach-
ment.
2. Place the sausage-making
ring with the notches tting
into the notch openings on
the feed meat grinder.
3. Place the sausage nozzle
onto the ring nut and screw it
onto the meat grinder nozzle
by turning it clockwise and
hand tighten.
When you are nished
making your sausages, and
if the ring nut is too tight to
remove, use the wrench to
loosen.
Attaching to Stand
Mixer
1. Follow steps
1 to 4 under
“Attaching to
stand mixer”
on page 5.
2. Turn the
stand mixer
attachment
knob clockwise
to secure
sausage maker
to mixer.
3. Fit the tray onto
the top of the
feed tube. If you
are not using
casing, place a bowl under
nozzle opening to catch
sausage.
Operation
Please see Tips and Hints on
page 7 for best results.
1. Slide open end of soaked
sausage casing over nozzle.
(See Tips and Hints for
instructions on soaking
sausage casings.)
2. Push as much casing as
you’ll need for the number of
sausages you want to make
onto the nozzle.
3. Tie a knot in the end of the
casing and cut off any
excess.
4. Poke a hole in the casing just
before the knot with a cake
tester to prevent air pocket
from forming.
5. Place sausage ingredients on
tray and turn stand mixer to
Speed 3.
6. Hold casing rmly on nozzle
as you use pusher to feed
ingredients into the sausage
maker.
7. Continue to hold casing on
nozzle, releasing it gradually
and pulling it off the nozzle
as it lls and forms a coil of
sausage in bowl below. Be
careful not to overll.
8. Turn mixer off when done,
leaving about 12 inches
(30 cm) of unlled casing.
To form Individual
Sausages*
1. Lay long sausage on at
tray and poke all over with a
sharp object, similar in size
to a needle or cake tester,
to prevent air pockets from
forming.
2. Twist into sausages – you
choose the size – by twisting
each “sausage” rst forward,
then backward, to prevent
them from untwisting.
3. Pierce any air pockets you
see.
4. For best results, dry
uncovered in refrigerator for
about 6 hours, then ip and
dry another 6 hours before
cooking.
* Please see Tips and Hints
on page 7 for best results.
CLEANING AND
MAINTENANCE
1. Remove the ring nut
manually or with the wrench
if it is fastened too tightly.
2. Disassemble and wash each
part in warm soapy water.
Dry all of the parts
thoroughly. Do not put any
of the metal parts in a
dishwasher. Tray, pusher
and wrench are top rack
dishwasher safe.
3. Reassemble.
4. Wipe the grinding plates with
vegetable oil and wrap each
plate with greaseproof paper.
This will prevent discoloring/
rusting.
5. Store the sausage
attachments and grinding
plates inside the pusher and
attach the lid.
6. Any other servicing should
be performed by an
authorized service
representative.

89
Tips and Hints
A wide variety of meat dishes,
homemade sausages, chunky
spreads, relishes, and purées are
all great ways to use the meat
grinder. With your own meat
grinder you know exactly what is
going into your food. You are able
to control the ingredients you use
such as cuts of meat, fat, salt and
spices.
For grinding:
• Meat should be very well chilled
before grinding. Should meat
warm up while grinding, pause
and chill meat before grinding
again. Keeping the meat below
45°F (7°C) is ideal for grinding
and sausage making.
• Cut meat into small 1- to 2-inch
(2.5 to 5 cm) cubes for grinding,
removing any skin, but keeping
all of the fat.
• Fatty, cheaper cuts of meat are
perfect for the grinder. Fat gives
flavour and juiciness to ground
meats and sausage.
• Coarse plate – use for coarse
ground textured items such as
coarsely ground beef for chili,
relishes, sauces and salsas.
• Medium plate – use for medium
ground textured items, such as
meat for sausage, meatballs or
meatloaf.
• Be sure to refrigerate any
ground meats immediately.
Cook or freeze within 1 or
2 days.
• If grinding bread for
breadcrumbs, make sure to
use dry or toasted bread.
• When grinding meats or filling
sausage: After the last piece
of meat has gone through the
chute, place a slice of bread
through the machine in order to
clear the last bit of ground meat
or to clear the sausage nozzle
of ground meat.
For making sausages:
• Soak natural casings in water
for at least 30 minutes to an
hour and then allow lukewarm
water to run through the entire
casing to remove any excess
salt.
• Be sure to fill the entire casing
and then prick all over to
release air before twisting
individual links.
• For casings, 2 feet (0.6 m)
of medium hog casings
accommodates
1 pound (454 g) of meat.
• Casings can be difficult to find.
The best places to try are either
your local butcher or websites
geared to sausage making.
• Taste your mixture first before
stuffing into casings by taking
a small amount of the mix and
cooking it in a small skillet until
cooked through.
Sweet Italian
Sausage
For Hot Italian Sausage
add 1 to 2 teaspoons
(5 to 10 ml) of crushed
red pepper to the mixture.
Makes about 3 pounds (1.36 kg)
of sausage or 15 to 16 sausage
links
3 pounds (1.36 kg) pork
butt, cubed into 1-inch
(2.5 cm) pieces
2 garlic cloves, finely
chopped
2 tablespoons (30 ml)
fennel seeds, toasted
3 tablespoons (45 ml)
fresh parsley, chopped
2¼ teaspoons (11 ml) ko-
sher salt
1 teaspoon (5 ml) paprika
1 teaspoon (5 ml) freshly
ground black pepper
2 tablespoons (30 ml) dry
white wine
1. Mix ingredients together well
in a large stainless bowl.
Cover with plastic wrap
and place in the refrigerator
overnight.
2. Once meat has rested,
assemble the meat grinder
fitted with the medium plate.
Attach meat grinder to the
mixer. Turn the stand mixer
to Speed 3 and grind all
ingredients into a mixing
bowl.
3. Form into patties, use
crumbled or make into
sausage links.
Nutritional information per
4 ounce. (113 g) serving:
Calories 217 (45% from fat)
• Carb. 1g • Pro. 28g • Fat 11g
• Sat. fat 4g • Chol. 97mg • Sod. 388mg
• Calc. 18mg • Fiber 0g
Chorizo
Who knew that tasty chorizo was
so easy to make at home?
Makes about 3 pounds (1.36 kg)
of sausage or 15 to 16 sausage
links
3 pounds (1.36 kg) pork
shoulder, cut into 1-inch
(2.5 cm) cubes
3 garlic cloves, finely
chopped
2 tablespoons (30 ml)
ancho chile powder
1 tablespoon (15 ml)
paprika
1 tablespoon (15 ml)
kosher salt
2 teaspoons (10 ml)
ground cumin
1 teaspoon (5 ml) dried
oregano
2 teaspoons (10 ml) apple
cider vinegar
½ teaspoon (2.5 ml) freshly
ground black pepper
¼ teaspoon (1 ml) cayenne
pepper
1. Mix ingredients together well
in a large stainless bowl.
Cover with plastic wrap
and place in the refrigerator
overnight.

10 11
2. Once meat has rested,
assemble the meat grinder
fitted with the medium plate.
Attach meat grinder to the
mixer. Turn the stand mixer
to Speed 3 and grind all
ingredients into a mixing
bowl.
3. Form into patties, use
crumbled or make into
sausage links.
Nutritional information per
4 ounce (113 g) serving:
Calories 201 (40% from fat)
• Carb. 2g • Pro. 27g • Fat 9g
• Sat. fat 3g • Chol. 88mg • Sod. 777mg
• Calc. 23mg • Fiber 1g
Lamb Sliders
The zip of the garlic and herbs
give these zesty lamb burgers
a Mediterranean twist.
Makes 13 sliders
3 pounds (1.36 kg) lamb
shoulder, cut into 1-inch
(2.5 cm) cubes
4 garlic cloves, finely
chopped
2 tablespoons (30
ml) fresh rosemary,
chopped
1 tablespoon (15 ml) fresh
thyme, chopped
3 tablespoons (45 ml)
fresh parsley, chopped
2 tablespoons (30 ml) dry
white wine
1 tablespoon (15 ml)
kosher salt
2 teaspoons (10 ml)
coarsely ground black
pepper
1. Mix ingredients together well
in a large stainless steel bowl.
Cover with plastic wrap and
place in refrigerator overnight.
2. Once the meat has rested,
assemble the grinder
attachment fitted with the
coarse plate. Attach meat
grinder to the mixer. Turn the
stand mixer to Speed 3 and
grind all ingredients into a
mixing bowl.
3. Form into patties.
Nutritional information per slider:
Calories 145 (35% from fat)
• Carb. 1g • Pro. 21g • Fat 6g
• Sat. fat 2g • Chol. 68mg • Sod. 561mg
• Calc. 15mg • Fiber 0g
Spicy Green Chile
Chicken Sausage
Makes about 3 pounds (1.36 kg)
of sausage or 15 to 16 sausage
links
3 pounds (1.36 kg)
chicken, dark meat,
cut into 1-inch (2.5 cm)
cubes
3 garlic cloves, chopped
½ cup (125 ml) loosely
packed cilantro,
chopped
2 large jalapeño peppers,
seeded and chopped
4 cans [4 ounces (113 g)
each] chopped green
chiles, well drained
1 tablespoon (15 ml)
kosher salt
1 tablespoon (15 ml)
tequila
1. Mix ingredients together well
in a large stainless bowl.
Cover with plastic wrap
and place in the refrigerator
overnight.
2. Once meat has rested,
assemble the meat grinder
fitted with the medium plate.
Attach meat grinder to the
mixer. Turn the stand mixer
to Speed 3 and grind all
ingredients into a mixing
bowl.
3 Form into patties, use
crumbled or make into
sausage links.
Nutritional information per
4 ounce (113 g) serving:
Calories 117 (28% from fat)
• Carb. 1g • Pro. 18g • Fat 4g
• Sat. fat 1g • Chol. 75mg • Sod. 616mg
• Calc. 31mg • Fiber 1g
Simply Rich Burgers
These simple burgers get their
“richness” and flavour from the
short ribs. Play with the ratio of
the two meats if you prefer a
leaner burger.
Makes about 10 burgers
2 pounds (907 g) sirloin
roast, cut into 1-inch
(2.5 cm) cubes
2 pounds (907 g) short
ribs, bone removed and
cut into 1-inch (2.5 cm)
cubes
1. Assemble the meat grinder
fitted with the coarse or
medium plate. Attach meat
grinder to the mixer. Turn the
stand mixer to Speed 3 and
grind the meat into a mixing
bowl.
2. Form into patties, being
careful not to overwork. Cook
burgers on the grill or a heavy
bottomed pan, about 4 to
5 minutes per side for
medium.
Nutritional information per burger:
Calories 400 (55% from fat)
• Carb. 0g • Pro. 45g • Fat 24g
• Sat. fat 11g • Chol. 163mg
• Sod. 115mg • Calc. 34mg • Fiber 0g

®
CuisinartTM offers an extensive assortment of top quality products
to make life in the kitchen easier than ever. Try some of our other
countertop appliances and cookware, and Savor the Good Life®.
www.cuisinart.ca
Coffeemakers Blenders Juicers Cookware Tools and
Gadgets
©2016 Cuisinart Canada
100 Conair Parkway,
Woodbridge, ON L4H 0L2
Printed in China
16CC023876
Trademarks or service marks of third
parties referred to herein are the
trademarks or service marks of their
respective owners.
12
WARRANTY
LIMITED ONE-YEAR
WARRANTY
We warrant that this Cuisinart product will be
free of defects in materials or workmanship
under normal home use for 1 year from the
date of original purchase. This warranty covers
manufacturer’s defects including mechanical
and electrical defects. It does not cover
damage from consumer abuse, unauthorized
repairs or modifications, theft, misuse, or
damage due to transportation or environmen-
tal conditions. Products with removed or
altered identification numbers will not be
covered.
This warranty is not available to retailers or
other commercial purchasers or owners. If
your Cuisinart product should prove to be
defective within the warranty period, we will
repair it or replace it if necessary. For warranty
purposes, please register your product online
at www.cuisinart.ca to facilitate verification of
the date of original purchase and keep your
original receipt for the duration of the limited
warranty. This warranty excludes damage
caused by accident, misuse or abuse,
including damage caused by overheating,
and it does not apply to scratches, stains,
discolouration or other damage to external
or internal surfaces that does not impair the
functional utility of the product. This warranty
also expressly excludes all incidental or
consequential damages.
Your Cuisinart product has been manufactured
to the strictest specifications and has been
designed for use only in 120 volt outlets and
only with authorized accessories and
replacement parts. This warranty expressly
excludes any defects or damages caused by
attempted use of this unit with a converter, as
well as use with accessories, replacement
parts or repair service other than those
authorized by Cuisinart.
If the appliance should become defective
within the warranty period, do not return the
appliance to the store. Please contact our
Customer Service Centre:
Toll-free phone number:
1-800-472-7606
Address:
Cuisinart Canada
100 Conair Parkway
Woodbridge, Ont. L4H 0L2
Email:
consumer_Canada@conair.com
Model:
MG-50C
To facilitate the speed and accuracy of your
return, please enclose:
• $10.00 for shipping and handling of the
product (cheque or money order)
• Return address and phone number
• Description of the product defect
• Product date code*/copy of original proof
of purchase
• Any other information pertinent to the
product’s return
* Product date code can be found on the
underside of the base of the product. The
product date code is a 4 or 5 digit number.
Example, 90630 would designate year,
month & day (2009, June 30th).
Note: We recommend you use a traceable,
insured delivery service for added protection.
Cuisinart will not be held responsible for
in-transit damage or for packages that are
not delivered to us.
To order replacement parts or accessories,
call our Customer Service Centre at
1-800-472-7606. For more information,
please visit our website at www.cuisinart.ca.
IB-14223-CAN
Table of contents
Other Cuisinart Meat Grinder manuals

Cuisinart
Cuisinart MG-50 User manual

Cuisinart
Cuisinart CMG-100C Service manual

Cuisinart
Cuisinart MG-100 User manual

Cuisinart
Cuisinart MG-100 Service manual

Cuisinart
Cuisinart CMG-105C Service manual

Cuisinart
Cuisinart MG-50 Service manual

Cuisinart
Cuisinart MG-50 User manual

Cuisinart
Cuisinart MG-100C Service manual

Cuisinart
Cuisinart MG-100 Service manual

Cuisinart
Cuisinart SM-MGC Operational manual