Custom Built eBikes VLCD-5 User manual

https://custombuilt-ebikes.co.uk
VLCD-5
User Guide

Summary .........................................................................................1
Specification...................................................................................1
Installation......................................................................................2
Functions........................................................................................3
Operation Procedure .....................................................................4
5.1 Button Definition .................................................................4
5.2 Operation and setting .........................................................4
5.3 Basic functions....................................................................5
5.4 Hidden functions and to be showed..................................6
5.5 Fault & Error code...............................................................9
5.6 Torque signal value shows …………………………...........11
5.7 Initial value for torque signal ……………………………... 12
Contents

Summary
The VLCD-5 display is an intelligent management system for electric bikes. It’s mainly used to control
the power assistance, show the battery level, measure the speed of electric bicycle and record the trip
distance.
Specification
Type
VLCD-5
Working voltage
DC 11V-60V
Max working current
70mA(11V) 32mA(50V)
Display type
(21*4 segment LCD)
Measuring the speed
1-12 pulses each round of wheel
Working temperature
-200C—+700C
Backlight
(White LED mode,brightness:200cd/m2)
Dimension
102.5mm×74.5mm×28mm
(102.5mm×75.5mm×28mm (exclude thickness of Pedestal)

Installation
Mount the set on the handlebar, connect the output line (4-core push-male) to the 4-pin plug-female.
1 Orange ( RX )
2 Brown ( TX )
3 White (Weak current )
4 Green ( Power )
5 Black ( Earth)
6 Purple ( Brake)
VLCD pinout
VLCD-5
Button control
(5-core push-male)
Mounting
base
Connect to the
motor
Connect to controller
VLCD-5
6-pinplug-female connector –links
unit to motor

Function Description
4.1 Speed display
Show current speed, unit: Km/h and MPH (switchable).
4.2 Power level indicator
Four horizontal blocks show energy of battery (each block represents 25% of charge). Strobe
warns you to charge the battery.
4.3 Trip distance (resets when power turned off)
Show trip distance.
4.4 Odometer
Show total miles / kms.
4.5 Elapsed time
Records how long you have cycled for
4.6 Average speed(AVG)
Shows average speed.
4.7 Power assistance level
Shows the power assistance level( 4 available, adjustable)
4.8 Backlight
Switch between 2 levels brightness, default is backlight off.
4.9 Wheel-diameter setting (reserved)
Select wheel-diameter among14-32 inch. default is 26-inch..
4.10 Speed Sensor Magnet Selection
Select the magnetic steel number of the speed sensor, default value is 1.
4.11 Speed unit option
Switch speed unit from Km/h or Mil/h, fault is Km/h.
4.12 6km/h function
Select function of 6km, default is OFF.
4.13 Max speed setting (reserved)
Select max speed 15-45km/h, Default is 25Km/h.
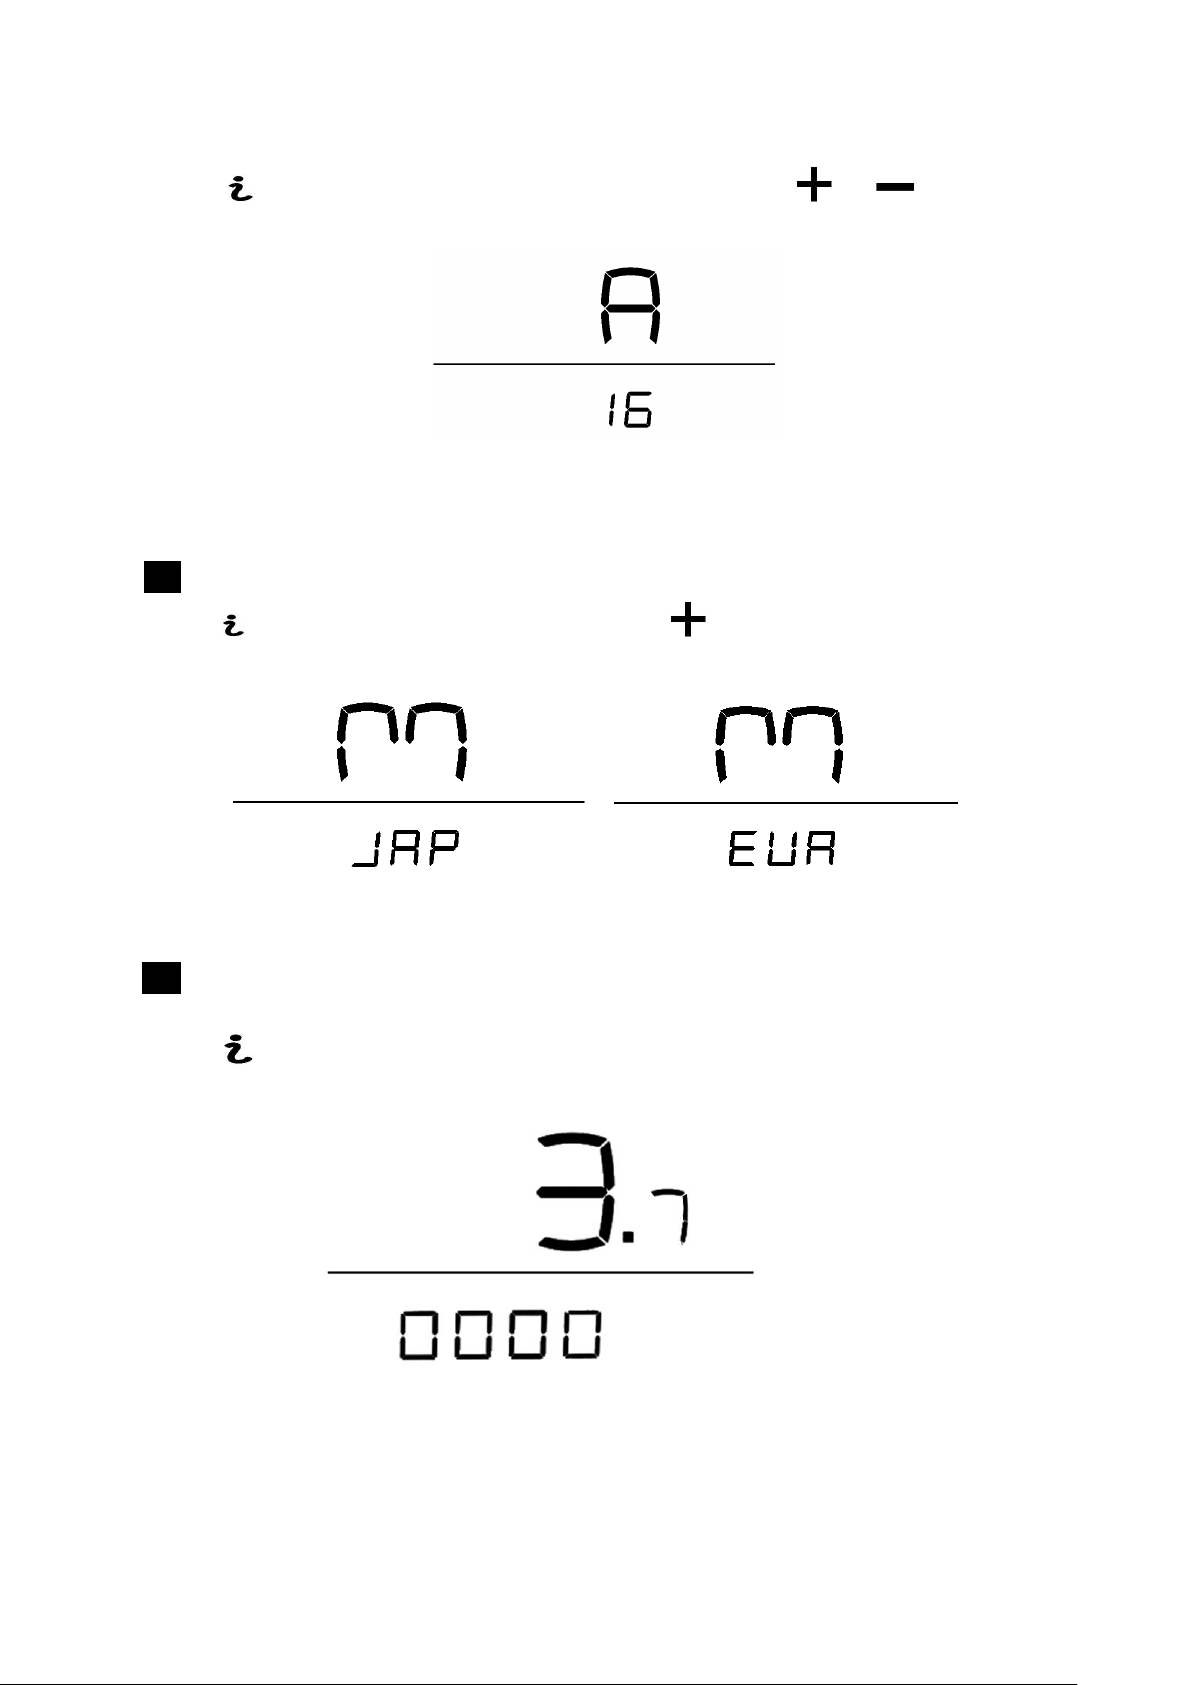
4.14 Assist ratio setting (reserved)
Select the ratio (default is 16).
4.15 Mode selection (reserved)
Default is Europe. Speed limit setting is on by default.
4.16 Software version
Showing the current software version
4.17 Diagnosis code
The diagnosis codes will be displayed according to the failure recorded. The fault detection
system runs whenever the equipment is turned on.
4.18 Torque signal value
Torque signal value displays.
4.19 Initial torque signal value
Initial torque signal value displays

Operating Procedure
5.1 Button Definition
5.2 Operation and setting
1)Press this button to power on the LCD display. Press for 2 seconds to turn off,
pressing the button for 2 seconds to power off. Automatically shut off after 5 minutes with no use.
These step through the assistance levels - “OFF”,“ECO”,“TOUR”,“SPEED”,
“TURBO”
There are 4 levels of power assist (none, low, medium, high) which are names Eco, Tour, Speed and
Turbo. Press the + / -button to adjust the power assist from low to high. Default is medium assistance
(speed)
(ECO)(TOUR) (SPEED) (TURBO)
None Minimum Medium Max
3) Allows you to change the display >> “ODO” > “TRIP” > “AVG” > “TIME”
There are 4 modes (odometer, trip distance, average speed, elapsed time. Press this button to adjust the
mode. Default is odometer.
Odometer(ODO)Trip distance(TRIP)
Elapsed time (TIME) Average speed(AVG)

5.3 Basic functions
Backlight
Use the button (briefly) to switch on background lighting
Odograph (ODO)
When using the odometer, press the three buttons simultaneously for 10s to reset ODO.
Odometer
Trip distance (TRIP)
In the trip distance state, press the button for 2s,Reset counter and time.
单次里程 Trip distance
Average speed(AVG)
Shows the average speed (average speed=trip distance / elapsed time). This is measured with a
resolution of 0.1km/h (mil/h). Maximum is 99 km/h or 99.9mil/h. If you average this speed then we suggest
you enter the next Olympics and represent the UK. Custom Built eBikes will sponsor you.
Average speed
Elapsed Time(TIME)
Shows how long you have been cycling for,

Mileage time
Show diagnostic code
Useful when the s**t hits the fan. It shows the diagnostic code which will show what’s gone wrong.
Contact Custom Built eBikes to fix the issue. Once the controller encounters an error, the relevant code will
appear where the speed is normally displayed.
Diagnostic code
5.4 Hidden functions
To show the hidden function, you should press these two buttons simultaneously for 3 seconds
on the startup screen. This will then reveal the hidden functions. Remember that with great power comes
great responsibility.
There are 11 items you can play with (odometer, trip distance, average speed, elapsed time, wheel
diameter selection, magnetic steel number selection, speed units selection, 6/Km/h function selection, top
speed selection, power adjustment selection, mode selection). The initial item is odometer.
Wheel diameter selection(d1)
Use the button to enter the speed units interface, press or button to adjust between
14-32 inch. Default is 26.
Wheel diameter selection
Use the button to enter the magnetic steel number selection, press or button to switch
amongst 1-12. Default is 1. This allows you to set the number of pulses received from one revolution of the
wheel.

1 2
Magnetic steel number selection
Imperial / metric selection(km/h / MPH)
Use the button to enter the speed units interface, press button to switch between km/h and
mil/h. Default is Km/h.
Speed units interface
6 6km/h –walking mode
Use the button to enter the 6/Km/h walking mode, press buttons to switch ON/OFF. Default is
OFF. Press button for 3s to start the motor running to assist your walking.
6/Km/h function selection
SD: Speed Limit
Use the button to enter the speed limit selection, press or buttons to adjust. The
default is 25KPH.

Speed limit selection
Use the button to enter the power adjustment submenu, press or buttons to switch
between 6 and 35 –with 25 being the default setting.
Power adjustment selection
M
Use the button to enter the mode submenu, press button to switch between Japanese and
European mode. Default is Europe.
mode selection
3.7
Use the button to show the current software version.

5.5 Error code
If the system detects a problem, the error code(s) will be displayed where the speed is normally shown.
The error detection systems works when ever the motor is in use.
5.6 Torque signal value display
Press buttons simultaneous for 10 seconds under ODO menu, then only press to
show “ODO”, “TRIP”, “AVG”, “TIME”, “TE”and “TE1”respectively.
Under submenu “TE”, press again, it shows initial torque value, which is for service inspection
use only.
Odometer(ODO)Trip distance(TRIP)Average speed(AVG)
(TE1)(TE)One way time(TIME)
Torque signal value display
5.7 Initial value for torque signal display
Under submenu “TE1”, press again, it shows initial torque value, which is for service inspection use
only. The torque value is normal and the range is between 56 and 102.
ERR-02
HALL
(Motor hall fault or motor short circuit)
ERR-03
Controller failure
ERR-04
Throttle fault)
ERR-08
Low voltage warning
ERR-06
Turn on the motor with cyclist’s feet on the pedal
for coaster brake version

(Initial value for torque signal display)
Table of contents
Other Custom Built eBikes Bicycle Accessories manuals